Author

Barbara L.

Browsing

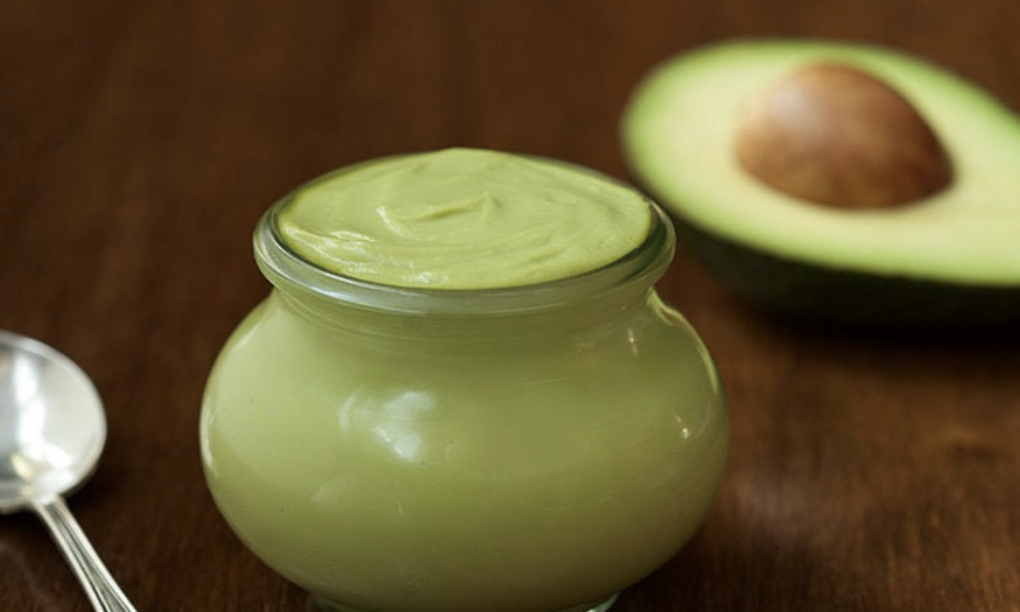
Discover how to create a delectable avocado mayonnaise, packed with flavor and health benefits, as a versatile substitute for traditional mayo.

The Health Benefits of Avocado

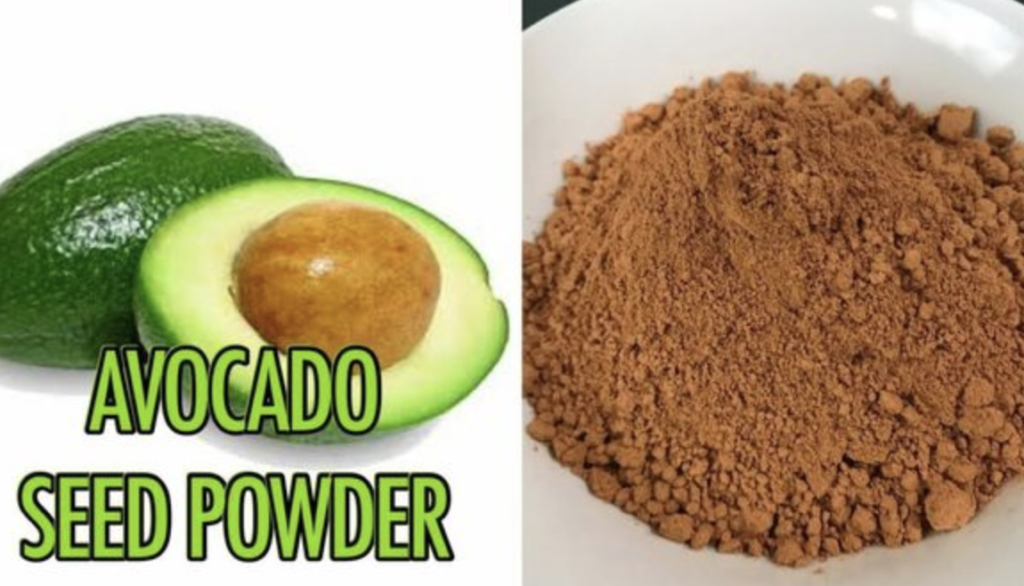
Avocado serves as a superfood, offering a creamy texture to mayo while reducing calorie intake. Rich in good fats, avocados promote satiety and are a plentiful source of fiber, Omega-3 fatty acids, and Vitamin E.

Ingredients for Avocado Mayonnaise:

  • Half a ripe avocado
  • One egg
  • 2 parts sunflower oil (using fingers as a measure)
  • 2 tablespoons of lemon juice
  • Black pepper
  • 2 sprigs of fresh cilantro (coriander)
  • A pinch of salt

Preparation Steps:

  1. Combine avocado, egg, lemon juice, sunflower oil, cilantro, black pepper, and salt in a blender or food processor.
  2. Blend until a creamy consistency is achieved. Taste and adjust seasoning as needed, adding more lemon juice or salt if desired.
  3. Transfer the avocado mayonnaise to a bowl or container.

Serving and Storage:

  • Enjoy immediately or refrigerate for later use.
  • Use as a salad dressing, vegetable dip, or sandwich spread.

Conclusion:

By making this avocado mayonnaise, not only do you indulge in a creamy delight, but you also embrace a healthier lifestyle. Try this recipe today and elevate your meals with its delicious and nutritious goodness.

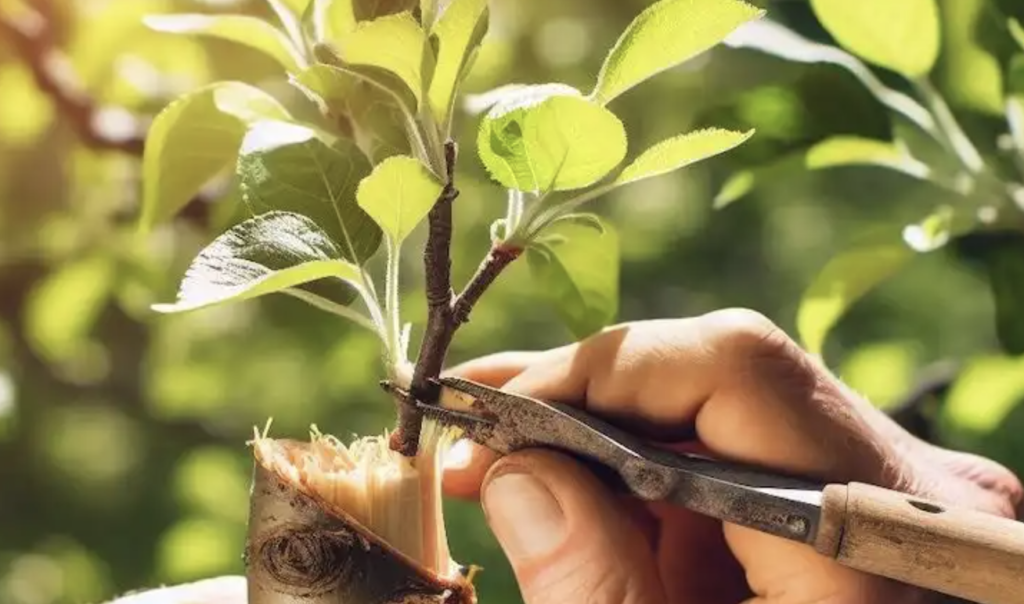
Grafting is a horticultural technique employed to merge parts from two plants, ensuring they grow as a single, enhanced entity. Primarily used in fruit tree propagation, grafting amalgamates the desirable traits of both the rootstock and the scion. Here’s an in-depth manual on how to graft trees effectively, focusing on the method of grafting under the bark.

1. Timing is Key:

  • Optimal time: Late winter or early spring before sap flow (bud break) initiates, facilitating healing and growth during the growing season.

2. Selecting Scion and Rootstock:

  • Scion: Choose a healthy, disease-free one-year-old scion with 2-3 buds.
  • Rootstock: Ensure compatibility, health, and establishment. The rootstock size may vary based on the grafting method.

3. Essential Grafting Techniques:

  • Whip Grafting: Suitable for similar-sized rootstocks and scions. Make matching diagonal cuts on both and join to align cambium layers.
  • Cleft Grafting: Ideal for larger rootstocks. Create a vertical cut in the rootstock and insert a wedge-shaped scion.
  • Bud Grafting (Budding): Insert a mature bud into a rootstock cut, commonly done in summer.

4. Grafting Under the Bark:

  • Ideal for large rootstocks and when bark separates easily from the wood (spring).
  • Process: Create a T-shaped cut in the rootstock bark, peel back flaps, and insert the scion with buds and a small wood piece. Secure the scion, ensuring contact with the rootstock cambium layer.

5. Post-Grafting Care:

  • Seal the graft with wax or tape to prevent drying.
  • Provide ample water, refrain from fertilizing until graft takes.
  • Monitor for growth or failure, adjusting care as needed.

6. Tips for Success:

  • Sanitize tools to prevent disease spread.
  • Make precise cuts for optimal cambium contact.
  • Label grafted plants for tracking.
  • Exercise patience; grafts may take time to establish.

Grafting is a gratifying process, enabling gardeners to create unique fruit tree combinations or repair damaged trees. Understanding each method’s advantages aids in selecting the most suitable technique. With diligence and practice, successful and fruitful growth is achievable in your garden or orchard.

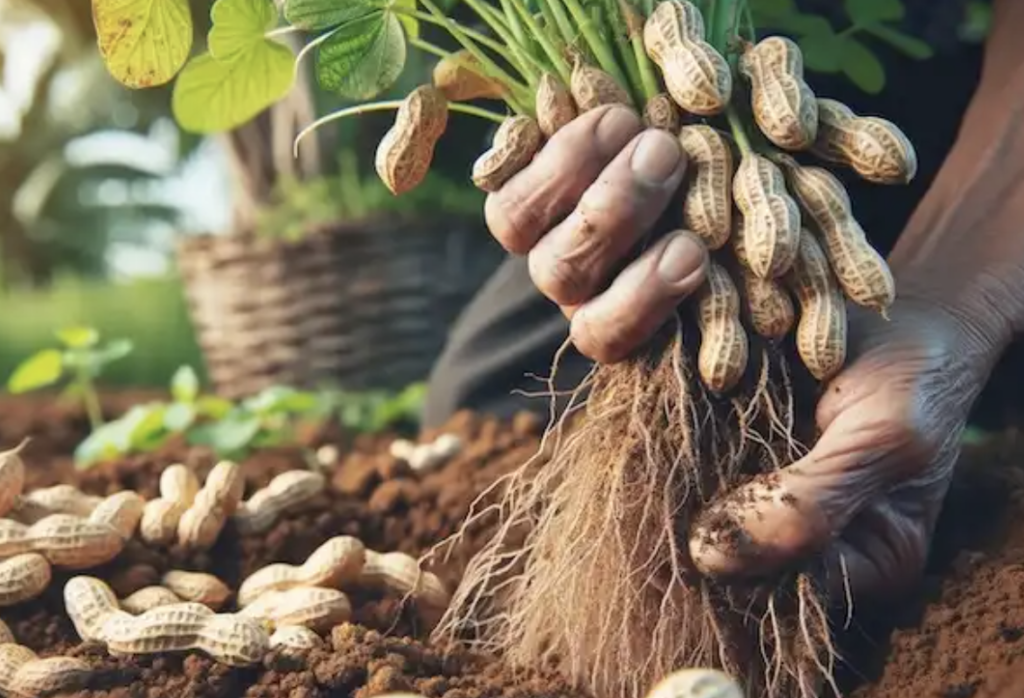
Growing peanuts from store-bought nuts is a rewarding gardening project that can yield delicious results. Follow these steps to get started:

Step 1: Choosing Peanuts

  • Opt for fresh, raw, uncooked peanuts in their shells.
  • Avoid roasted or salted peanuts as they won’t germinate.

Step 2: Preparation and Planting

  • Peanuts require a long growing season (100-130 frost-free days).
  • Start indoors 5-8 weeks before the last frost date for an early start, especially in Northern climates.
  • Plant in well-draining, loose soil, adding sand and aged compost if needed.
  • Sow seeds 1-2 inches deep and 24-36 inches apart in rows spaced at least 72 inches apart.

Step 3: Location and Soil

  • Choose a sunny site, as peanuts need full sun.
  • Use row covers to protect young plants from spring frosts.
  • Soil should be light, loamy, and slightly acidic (pH 5.5-7.0).

Step 4: Watering and Care

  • Water at least 1 inch per week, maintaining even moisture but not waterlogging the soil.
  • Add mulch once seedlings are half a foot tall to retain moisture and control weeds.

Step 5: Fertilization

  • Peanuts are nitrogen-fixers, so they require less nitrogen.
  • Focus on calcium, as it’s crucial for pod development.
  • Use a low-nitrogen or balanced fertilizer before planting.

Step 6: Pruning and Propagation

  • Pruning isn’t typically required but may be done for maintenance.
  • Propagate peanuts using seeds, selecting healthy, mature ones for saving and planting the following spring.

Step 7: Harvesting and Storing

  • Harvest time is about 100-150 days after planting.
  • Remove the entire plant from the soil for harvesting.
  • Store raw peanuts in a mesh bag in a dry place or roast them for consumption.

Growing peanuts can be a fun and fruitful endeavor, especially if you have a sunny spot and a bit of patience. With the right care, you can enjoy home-grown peanuts right from your backyard!

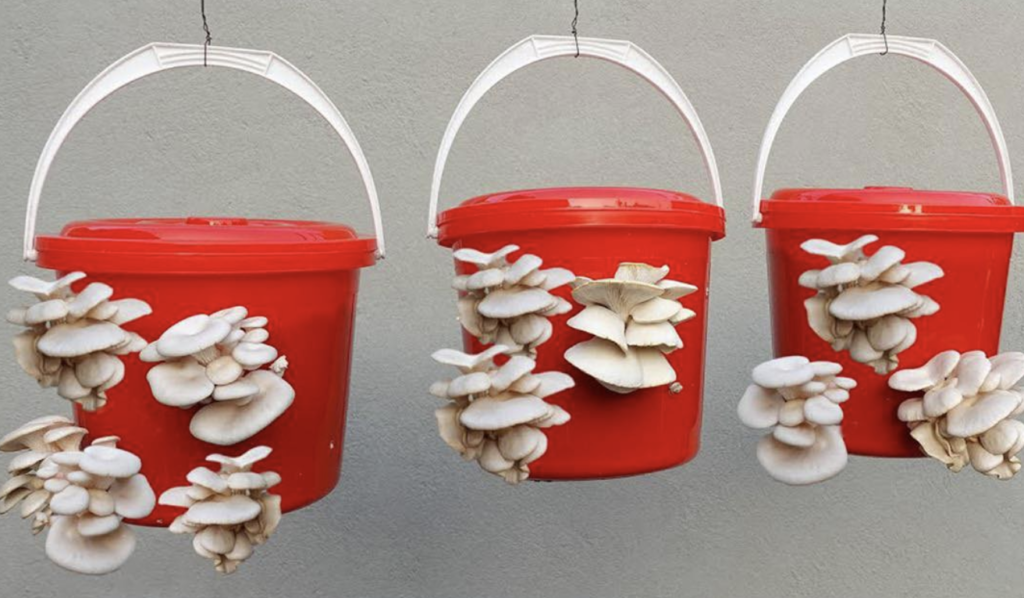
Embark on a delightful and sustainable hobby by growing mushrooms at home. Explore the simplicity and efficiency of using buckets with holes to enjoy multiple harvests of freshly harvested fungi. Follow this comprehensive guide to kickstart your mushroom-growing adventure right in the comfort of your own home.

Materials Needed:

Ensure you have all the necessary materials at hand before beginning your mushroom-growing journey.

  • Straw
  • Water
  • Large pot for boiling
  • Mushroom seeds (spawn)
  • Plastic buckets with holes
  • Clean cloth or lid for covering the buckets
  • Watering can or spray bottle
  • A cool, dark place for incubation

Step 1: Preparing the Straw

Gather suitable straw and chop it into pieces approximately 2-4 inches in length to prepare for the cultivation process.

Step 2: Boiling the Straw

Sterilize the chopped straw by boiling it in water. Let it simmer until sterilized, then allow it to cool down to room temperature.

Step 3: Acquiring Mushroom Seeds

Purchase mushroom seeds, also known as mushroom spawn, from a reliable supplier. Choose from various mushroom species like oyster, shiitake, or white button mushrooms based on your preferences.

Step 4: Layering Straw and Mushroom Seeds

Begin layering the plastic bucket with holes, alternating between cooled, boiled straw and mushroom seeds. Ensure even distribution for optimal mushroom growth.

Step 5: Incubation

Cover the bucket with a clean cloth or a lid with small holes and place it in a cool, dark area with temperatures ranging from 70°F to 75°F (21°C to 24°C). During this incubation period, the mycelium will colonize the straw.

Step 6: Daily Watering

Maintain consistent moisture levels by watering the mushrooms once or twice a day using a watering can or spray bottle. Avoid overwatering to prevent contamination.

Step 7: Harvesting

Around 21 days later, tiny mushroom pins will appear on the straw’s surface. Keep up with moisture levels, and as these pins mature, gently twist and pull them from the substrate when they reach the desired size.

Step 8: Continued Harvesting

Enjoy multiple harvests by picking mushrooms before they release spores, ensuring a consistent supply of fresh, homegrown mushrooms throughout the year.

Disclaimer:

Growing mushrooms at home requires attention to detail and proper sterilization to prevent contamination. Follow safety guidelines when handling potentially contaminated materials or consuming homegrown mushrooms. If in doubt, consult local experts or mycology professionals for guidance.

Unlock the joy of home mushroom cultivation using buckets with holes and savor the satisfaction of harvesting your own fresh mushrooms. Experiment with different species and techniques to elevate your culinary experiences and enjoy the delightful flavors of homegrown produce. Happy mushroom growing!

Discover the extraordinary health benefits of thyme beyond its culinary uses. Learn how this versatile herb can address various health concerns and enhance your well-being.

Antibacterial Wonder: Enhancing Oral Hygiene

Thyme oil, derived from Thymus vulgaris, exhibits potent antibacterial properties against a range of bacteria, including antibiotic-resistant strains. Incorporating thyme oil into oral hygiene routines can improve mouth health, acting as a natural mouthwash when diluted with warm water.

Anti-inflammatory Arsenal: Easing Discomfort

Thyme essential oil contains Cyclooxygenase-2 (COX-2) inhibitors, essential for reducing inflammation and relieving localized discomforts. Blending thyme oil with a carrier oil for topical application can effectively ease muscle pains, headaches, and inflammations.

Cognitive Boost: Supporting Mental Well-being

Studies suggest that thyme supplementation may enhance antioxidant levels and Omega 3 levels crucial for preserving cognitive function and mental well-being with age.

Acne Combatant: Natural Skin Care

Thyme tincture is a potent adversary against acne-causing bacteria. Crafting this remedy involves infusing wild thyme flowers with alcohol or brandy and allowing the concoction to steep in sunlight. Gentle skin cleansing with thyme’s potent antibiotic and healing properties can combat acne effectively.

Cancer Fighter: Promising Therapeutic Potential

Thyme extract exhibits promising efficacy in combating cancer cells, particularly in breast and colon cancer patients. Thyme essential oil displays remarkable cytotoxicity against breast cancer cells, offering potential as an adjunct therapy in cancer management.

Respiratory Relief: Soothing Respiratory Distress

Blending thyme extract with ivy leaf extract offers remarkable alleviation of acute bronchitis symptoms, notably reducing cough severity. Thyme tea and steam inhalation with thyme oil provide soothing relief for respiratory distress.

Blood Pressure Regulation: Supporting Cardiovascular Health

Varieties such as Wild Thyme and Himalayan Thyme showcase blood pressure-regulating properties, providing comfort to individuals grappling with hypertension.

In essence, thyme emerges as a holistic health ally, enriching lives through its multifaceted medicinal properties. Incorporating thyme into your wellness routine can yield significant rewards, promoting overall health and vitality.

Prepare to dazzle your guests with this creative twist on deviled eggs, transforming them into stunning white tulip flowers. Inspired by a presentation from РОССИЯ on YouTube, this recipe promises to be the centerpiece of your next gathering or Easter brunch.

Ingredients:

  • Eggs
  • Crab meat
  • Cream cheese
  • Green onions
  • Paprika
  • Salt

Directions:

  1. Boil the Eggs: Hard boil the eggs to perfection, then set them aside to cool.
  2. Prepare the Eggs: Carefully cut a cross at the top of each egg with a sharp knife, extending the incision slightly down the sides to create tulip petals. Gently remove the yolk and set aside.
  3. Mix the Filling: In a medium bowl, blend the egg yolks, crab meat, cream cheese, salt, and paprika until smooth. Transfer the mixture to a piping bag.
  4. Fill the Eggs: Pipe the yolk mixture back into the egg cavities generously to create the tulip centers.
  5. Create the Stems: Use a straw to puncture a hole in the bottom of each filled egg. Insert a green onion into the hole to act as the tulip stem, completing the floral illusion.

Presentation Tips:

  • Display Creatively: Arrange your tulip eggs on a platter covered with kale or lettuce leaves to mimic a garden, enhancing the bouquet effect.
  • Add Color: For a vibrant bouquet, consider adding natural food coloring to the yolk mixture to create a variety of tulip colors.
  • Serve with Style: Pair your deviled egg bouquet with other bite-sized appetizers or a selection of dips to round out your snack table.

Conclusion:

This White Tulip Deviled Egg recipe is not just a treat for the palate but also a feast for the eyes, proving that creativity in the kitchen knows no bounds. Whether for a special occasion, a festive brunch, or simply to impress your guests, these deviled eggs are sure to captivate and delight everyone who sees (and tastes) them. Enjoy crafting and serving your edible masterpiece!

Discover why incorporating just three dates into your daily diet can significantly boost your health and vitality, making them a powerhouse of nourishment and wellness.

What Makes Dates Special?

Dates stand out for their rich nutritional content, packed with essential minerals like potassium, magnesium, and iron, as well as vital vitamins such as vitamin K and various B vitamins. Their impressive profile makes them one of nature’s most nourishing fruits, offering an array of health benefits.

The Three Wonders of Daily Dates:

1. Natural Energy Booster: With natural sugars like glucose, fructose, and sucrose, dates provide a swift and sustained energy boost without the crash of processed snacks. Perfect for a morning pick-me-up or pre-workout fuel.

2. Digestive Health Support: Dates are rich in soluble fiber, promoting smooth bowel movements and preventing constipation. Adding dates to your diet supports digestive efficiency and overall wellness.

3. Heart Health Ally: Dates regulate blood pressure with their potassium content and reduce heart disease risk by preventing arterial plaque formation, thanks to their antioxidants.

How to Enjoy Dates Daily:

Incorporating three dates into your routine is easy and delicious. Chop them into salads, enjoy as a midday snack, or blend into oatmeal for a natural sweetener. Their versatility makes them a delightful addition to any meal.

A Note of Moderation:

While dates offer numerous health benefits, they are high in natural sugars. Moderation is key, especially for those monitoring blood sugar levels or caloric intake. Balanced consumption ensures you enjoy their flavor and nutritional value without overindulging.

Embrace the Goodness of Dates:

With just three dates a day, you can embark on a healthier, more joyful journey, savoring the natural sweetness and myriad health benefits these tiny treasures offer.

The article provides valuable insights into the health benefits and uses of two common mallow plants, Malva neglecta and Malva sylvestris. Here’s a summary of the key points covered:

  1. Malva Neglecta:
    • Known as cheeseweed, it is versatile in medicinal and culinary applications.
    • Health benefits include digestive aid, anti-inflammatory properties, and respiratory relief.
    • Every part of the plant is edible, making it valuable for both health and culinary purposes.
  2. Malva Sylvestris:
    • Common mallow is recognized for its attractive flowers and broader range of applications.
    • Health benefits include respiratory support, digestive regulation, skin care, sleep aid, and potential cancer prevention.
    • It is also used in culinary dishes, adding nutritional value and flavor.
  3. Culinary Uses:
    • Both Malva neglecta and Malva sylvestris can be incorporated into salads, soups, and other dishes, providing a nutritious boost.
  4. Safety and Precautions:
    • While generally safe, it’s important to consult with a healthcare provider before using these plants, especially for individuals on medications or with existing health conditions.
    • Pregnant or lactating women should exercise caution.

Overall, the article highlights the therapeutic potential and culinary versatility of Malva neglecta and Malva sylvestris, emphasizing their role as natural remedies and nutritious additions to one’s diet.

Growing grapes from seeds in containers is indeed an exciting and rewarding project for gardening enthusiasts. Here’s a detailed guide to help you navigate the process successfully:

1. Acquiring Grape Seeds:

  • Choose ripe grapes from healthy vines.
  • Gently extract seeds from the grapes and rinse them to remove any pulp or residue.

2. Seed Preparation:

  • Place the seeds in a damp paper towel, seal them in a plastic bag, and refrigerate for 2-3 months to stratify them.

3. Germination Process:

  • Fill small containers with well-draining potting mix and plant the stratified seeds.
  • Keep the soil consistently moist and place the containers in a warm, sunny location.

4. Tender Care and Maintenance:

  • Provide support for young vines as they grow.
  • Monitor soil moisture and water when needed.
  • Thin out seedlings once they reach a few inches in height, keeping the strongest ones.

5. Transplantation and Container Tips:

  • Transfer seedlings to larger containers as they outgrow their initial homes.
  • Choose containers with adequate drainage and use a quality potting mix rich in organic matter.

6. Special Tricks and Tips:

  • Prune the vines regularly to encourage strong growth and fruit development.
  • Apply balanced fertilizer during the growing season, but avoid over-fertilization.
  • Ensure grapevines receive 6-8 hours of direct sunlight daily for optimal growth.

7. Patience Rewarded:

  • Understand that growing grapes from seeds is a long-term endeavor, and it may take several years for the vines to mature and produce fruit.
  • Embrace the joy of nurturing your unique grape varieties from seeds to fruitful vines.

Embarking on the journey of growing grapes from seeds in containers requires patience and dedication, but the experience is incredibly fulfilling. With proper care and attention, you’ll witness the transformation of tiny seeds into flourishing grapevines, ready to reward you with delicious fruits.

Growing an almond tree from a seed at home can indeed be a fulfilling endeavor, yielding both aesthetic beauty and nutritious nuts over time. Here’s a comprehensive guide to help you through the process:

Step 1: Obtain Almond Seeds

  • Selecting Seeds: Choose raw, fresh, and untreated almonds. You can collect them from another almond tree or purchase them raw and untreated.
  • Stratification: Soak the almonds in water for 48 hours, then wrap them in a moist paper towel, place them in a plastic bag, and refrigerate for several weeks to stratify them and encourage germination.

Step 2: Planting the Seed

  • Timing: Spring is the optimal time for planting almond seeds.
  • Soil Preparation: Almond trees thrive in well-draining soil with a pH level between 6 and 7.5. Enrich the planting area with compost.
  • Planting Depth: Plant the seeds 2-3 inches deep in the soil and water thoroughly.
  • Location: Select a sunny location for your almond tree, as they require full sunlight to thrive.

Step 3: Caring for Your Almond Tree

  • Watering: Ensure regular watering, especially during the tree’s early years. Mature trees are drought-tolerant but benefit from consistent watering.
  • Pruning: Focus on developing a healthy framework for the tree in its early years, and prune for sunlight and air circulation in subsequent years to minimize disease risk.
  • Fertilizing: Use balanced fertilizer during the growing season to nourish the tree.

Step 4: Protecting the Tree

  • Pests and Diseases: Keep a lookout for common pests and diseases and take preventative measures as needed.
  • Winter Protection: Young almond trees may need protection from harsh winters using mulch and protective wraps.

Step 5: Harvesting Almonds

  • Waiting Period: Almond trees typically start producing nuts in the 3rd or 4th year and reach full production after 5-6 years.
  • Harvest Time: Almonds are ready for harvest in late summer to early fall when the hulls split, revealing the shell.
  • Drying: Allow harvested almonds to dry in a cool, dry place for about a week before storing or consuming them.

Step 6: Enjoying the Rewards

  • Roasting and Eating: Roast your almonds for a delicious snack or use them in cooking.
  • Admiring the Blossoms: Enjoy the beautiful blossoms that almond trees provide in the spring, adding aesthetic appeal to your garden.

Final Thoughts:

Growing an almond tree requires patience and care, but the rewards – including delicious nuts and beautiful blossoms – are well worth the effort. Ensure you tend to the tree’s needs throughout its life, and you’ll reap the bountiful rewards in the years to come.

Note: Always consider your local climate and consult with local experts to ensure almonds are suitable for your area before planting.