Category

Gardening

Category

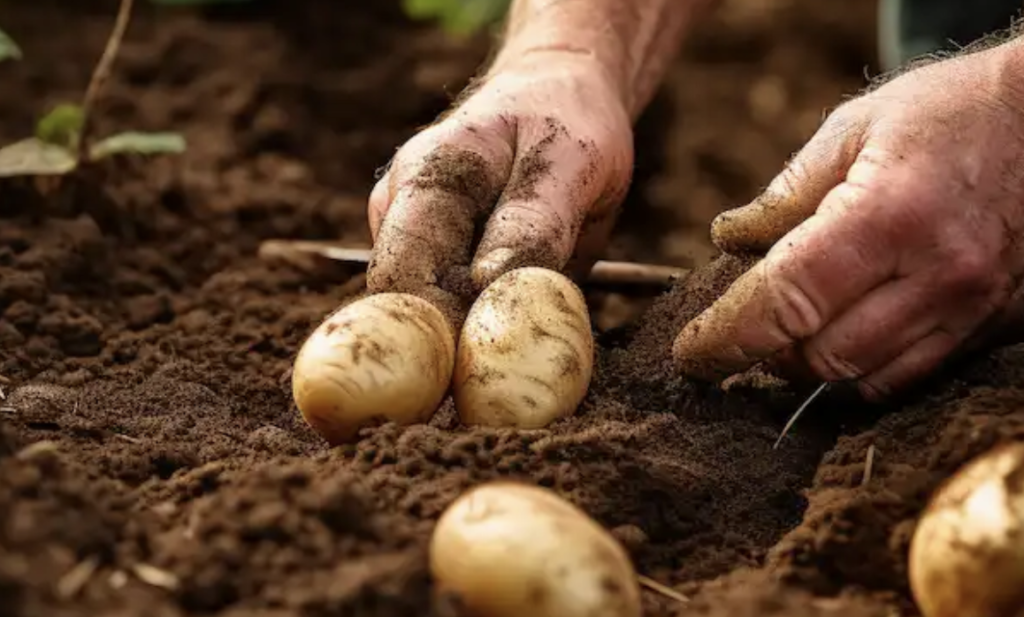
Growing potatoes in your backyard can be a rewarding endeavor with the right approach. One key step in this process is cutting the potatoes before planting, a practice known as “seed potato preparation.” This technique not only boosts the yield of your potato crop but also helps control diseases and manage potato size effectively.

Why Cut Potatoes Before Planting?

  • Maximizing Yield: Each cut piece of potato, or ‘seed,’ can sprout into a new plant, multiplying the number of plants from a single potato.
  • Disease Control: Allowing the cut surfaces to callous over before planting reduces the risk of soil-borne diseases.
  • Size Management: Cutting larger seed potatoes helps regulate the size and uniformity of the harvest.

Step-by-Step Guide to Cutting and Planting Potatoes

  1. Choosing the Right Potatoes
    • Select certified seed potatoes suited to your climate and soil type to avoid diseases.
  2. Cutting the Potatoes
    • Cut potatoes 1-2 days before planting with a clean, sharp knife, ensuring each piece has one or two eyes (buds).
  3. Curing the Cut Pieces
    • Lay the pieces in a cool, dry place away from direct sunlight to allow the cuts to dry and form a callous.
  4. Preparing the Soil
    • Choose a sunny location with well-draining soil enriched with compost or aged manure.
  5. Planting
    • Plant potato pieces eye-side-up, 2-3 inches deep, spaced 12 inches apart in rows.
  6. Caring for the Plants
    • Keep the soil moist but not waterlogged, and hill the soil around the plants as they grow to cover emerging tubers and prevent greening.
  7. Harvesting
    • Potatoes are ready to harvest when the foliage begins to die back; gently dig around plants to unearth the potatoes.

Conclusion

Cutting potatoes before planting is a simple yet powerful technique to optimize the yield and health of your potato crop. Remember to consider the specific requirements of your chosen potato variety and practice good garden hygiene for a successful harvest. With proper care and attention, you can enjoy a plentiful supply of this versatile and nutritious vegetable fresh from your garden.

Are you tired of constantly buying expensive blueberries? Why not try your hand at growing your own? Not only will you save money, but you’ll also have the joy of picking and enjoying fresh fruit from your very own garden. Here are some helpful tips to get you started on your blueberry planting journey:

  1. Choose the Right Variety: Before you begin planting, research which blueberry variety thrives best in your specific climate. Some types prefer humid weather, while others can withstand freezing temperatures.
  2. Prepare the Soil: Blueberries thrive in acidic soil, with a pH ranging from 4 to 5. If your soil isn’t suitable for berry cultivation, consider planting them in pots filled with acidic soil.
  3. Provide Sunlight and Nutrient-Rich Soil: Blueberries need plenty of sunlight and nutrient-rich soil. Select a sunny spot for planting them in the ground, spacing the bushes about 5 feet apart. For pot planting, use an 18-inch pot filled with suitable soil. Water them regularly, about 1 to 2 inches per week.
  4. Protect Your Plants: Shield your blueberry plants from bugs, birds, and other critters by surrounding them with bamboo sticks and covering them with a food-grade net.
  5. Regular Pruning: Blueberry bushes can produce fruit for up to 20 years! To ensure their longevity, prune them regularly. Keep in mind that pruned bushes will not bear fruit in the year they are pruned, so consider having multiple bushes and alternate pruning schedules.
  6. Watch for Ripening: Pay attention to the buds in early spring. By July, the blueberries should be ripe and ready for picking. Wait for them to turn a rich blue hue before gently plucking them from the bush.

By following these tips, you can enjoy a never-ending supply of delicious blueberries right at your fingertips. Growing blueberries is a fun and rewarding project, especially if you have limited space. Share these insider tips with your friends on Facebook and start your own blueberry journey today!

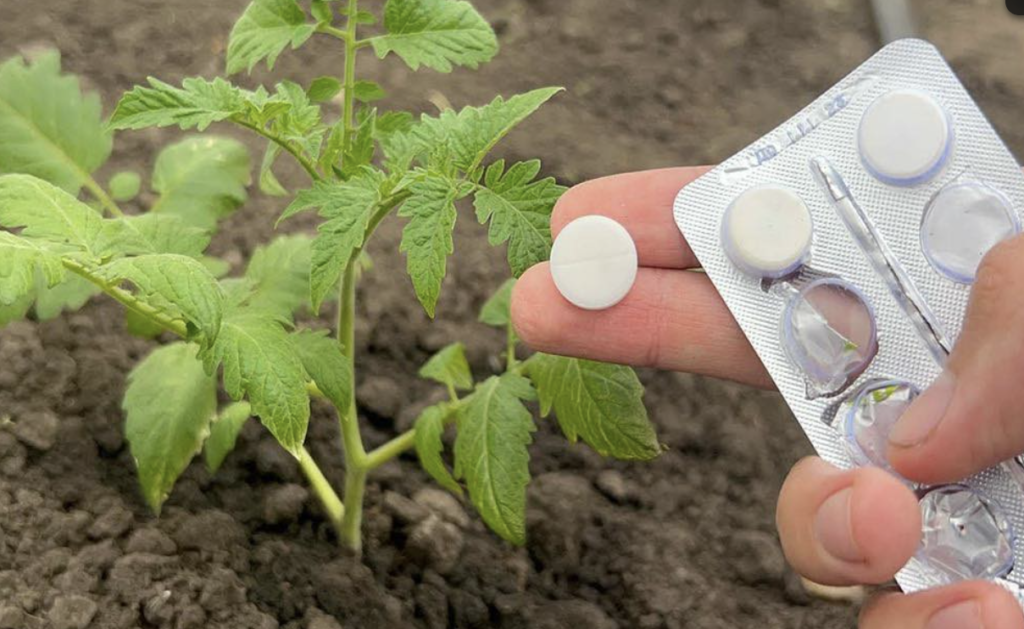
Aspirin, known scientifically as acetylsalicylic acid, has been found to offer remarkable benefits for vegetable plants beyond just keeping cut flowers fresh. Recent research conducted by the University of Rhode Island has highlighted its potential to enhance growth, strength, and resilience in vegetable crops. Here’s how you can utilize aspirin in your vegetable gardening practices:

Rooting Aid:

  • Soak vegetable cuttings in a solution of distilled water and dissolved aspirin for several hours before planting. This helps disinfect the cuttings and stimulates robust root development.

Growth Stimulant:

  • Dilute aspirin in water and spray the solution onto vegetable plants every few weeks. This promotes vigorous growth and strengthens plant immunity against diseases.

Seed Treatment:

  • Prior to sowing, soak vegetable seeds in a mixture of water and aspirin to improve germination rates and seedling vigor.

Soil Amendment:

  • Place aspirin tablets directly into the soil around vegetable plants, ensuring they receive regular watering to activate the aspirin’s beneficial properties.

Benefits:

  • Enhanced Growth: Aspirin-treated vegetables exhibit notable improvements in growth and strength.
  • Increased Resistance: Plants treated with aspirin show increased resistance to common pests and diseases, particularly solanaceous vegetables like tomatoes, peppers, and eggplants.
  • Cost-Effective: Aspirin treatment is a simple and cost-effective strategy for supporting healthier, more productive vegetable plants.

By incorporating aspirin treatment into your vegetable gardening routine, you can enjoy the transformative impact it has on the health and productivity of your plants. Give it a try and witness the benefits firsthand in your vegetable garden.

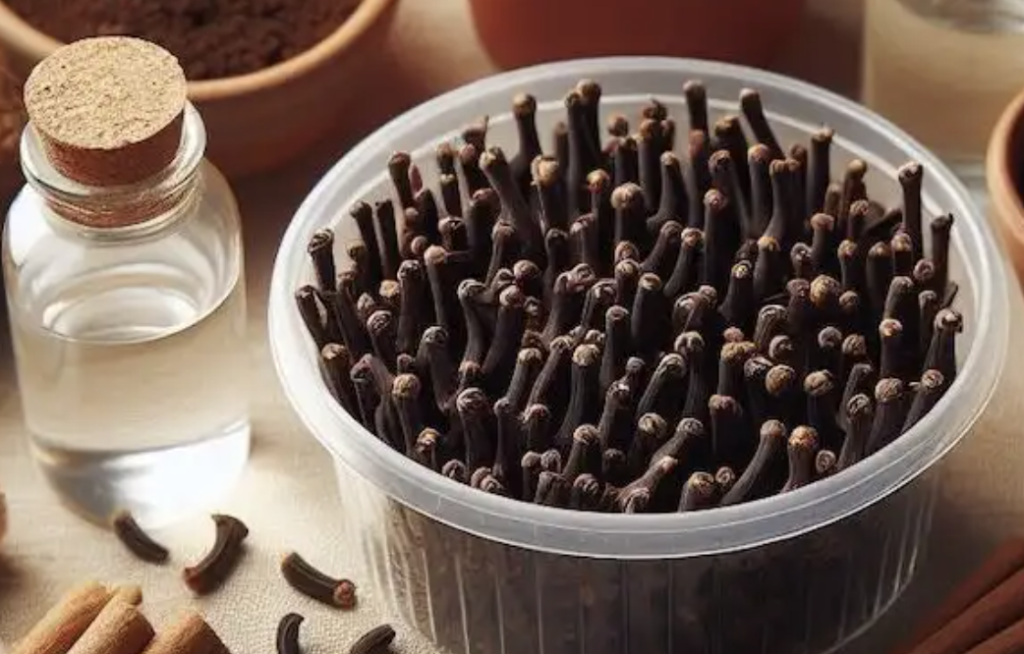
Growing clove plants from cloves is a rewarding endeavor that requires patience and attention to detail. Follow this comprehensive guide to germinate clove seeds, plant them, and provide the necessary care for healthy growth and eventual harvesting of cloves.

Germinating Clove Seeds:

Materials Needed:

  • Clove seeds (fresh and healthy ones)
  • Small pots or seed trays
  • Well-draining potting soil
  • Plastic wrap or a transparent cover
  • Warm water

Steps:

  1. Selecting Clove Seeds: Choose fresh, plump, and unbroken cloves for planting.
  2. Soaking the Seeds: Soak the clove seeds in warm water for 24 hours to soften the hard shell and aid germination.
  3. Preparation of Pots/Trays: Fill small pots or seed trays with well-draining potting soil, leaving space at the top for the seeds.
  4. Planting Clove Seeds: Plant the soaked clove seeds about 1 inch deep into the soil, spacing them evenly.
  5. Covering the Pots/Trays: Cover the pots or trays with plastic wrap or a transparent cover to create a greenhouse effect, retaining moisture and warmth.
  6. Maintaining Moisture and Warmth: Keep the soil consistently moist and place the pots or trays in a warm location with indirect sunlight.
  7. Germination Period: Clove seeds can take several weeks to sprout. Once sprouts emerge, remove the plastic covering and provide filtered sunlight.

Planting Clove Seedlings:

Materials Needed:

  • Larger pots with good drainage
  • Rich, well-draining potting mix
  • Fertilizer (balanced, slow-release, or organic)

Steps:

  1. Transplanting: When clove seedlings have developed a few sets of true leaves and are sturdy enough, transplant them into larger pots filled with well-draining potting mix.
  2. Soil and Fertilization: Ensure the soil remains consistently moist. Fertilize sparingly with a balanced, slow-release, or organic fertilizer to support growth.

Caring for Clove Plants:

  • Light and Temperature: Clove plants thrive in warm, humid conditions with partial shade. Aim for temperatures between 60°F to 90°F (15°C to 32°C).
  • Watering: Keep the soil consistently moist, watering when the top inch feels dry. Avoid waterlogging.
  • Humidity: Increase humidity by misting the plants regularly or using a humidifier.
  • Pruning: Prune occasionally to encourage bushy growth and remove dead or damaged parts.
  • Harvesting Cloves: Harvest cloves when they turn pink or reddish before fully opening. Dry them in a shaded, well-ventilated area.

By following these steps and providing proper care, you can successfully grow clove plants from cloves. Remember to be patient, as it may take several years for cloves to mature and produce viable harvests.

Growing robust and vibrant seedlings sets the stage for a successful gardening journey. Elevate your planting game by enriching your soil with simple yet powerful natural additives. Let’s unlock the potential of bay leaves, onion peels, and other elements to nurture your seedlings into flourishing plants.

Embracing Bay Leaves: A Nutrient-Rich Boost

Vitamins and Minerals: Bay leaves, renowned for their culinary allure, harbor a wealth of nutrients beneficial for plant growth. Rich in vitamins B and C, as well as essential minerals like phosphorus, magnesium, and calcium, they fortify soil health and promote robust plant development. Incorporate 1 teaspoon of ground bay leaves per liter of soil to infuse your growing medium with vital nutrients.

Harnessing the Potential of Onion Peels

Microelement Marvels: Don’t discard onion peels; they hold the key to enhancing soil fertility. Laden with microelements crucial for root and stem strength, onion peels offer a cost-effective and eco-friendly soil amendment. Integrate 1 tablespoon of crushed onion peels per liter of soil to provide essential nutrients for your seedlings’ growth.

Soil Preparation: A Crucial Step

Moistening Solution: Before planting, ensure your soil is adequately moistened for optimal seed germination. Prepare a solution of succinic acid by dissolving 1 tablet in a liter of water. This potent acid energizes soil organisms, boosts plant growth, and enhances immunity. Use this solution to moisten the soil, preparing it for planting.

Enhancing Growth: Additional Methods

Tangerine Peel Additive: Ground tangerine peels enrich the soil, improving its texture and nutrient retention. Incorporate 1-2 tablespoons per liter of soil to foster root development and overall plant health.

Rice Flour and Turmeric: A blend of rice flour and turmeric powder provides essential nutrients and protection for seedlings. Add 1 teaspoon of rice flour and a sprinkle of turmeric to the soil before planting to nurture healthy growth.

Liquid Fertilizer for Established Seedlings

Homemade Nourishment: Once seedlings have developed their first true leaves, administer a homemade liquid fertilizer. Mix rice flour and turmeric in hot water and allow it to infuse for several hours. Apply this nutrient-rich solution at the root to encourage further growth and resilience.

Cultivating Healthier Seedlings, Naturally

By incorporating these natural additives into your soil, you empower your seedlings to thrive and flourish. Sustainable and effective, these methods utilize common kitchen scraps and natural ingredients to promote plant health from the earliest stages. Remember, the care you invest in your seedlings lays the foundation for a bountiful harvest. Happy gardening!

Cucumbers, beloved for their versatility and ease of cultivation, can reach new heights when grown in a herringbone pattern. This innovative approach optimizes space, promotes plant health, and adds visual appeal to your garden. Here’s why and how you should consider adopting this method for your cucumber plants.

Embracing the Benefits of a Herringbone Pattern

  1. Maximizes Space: Planting cucumbers in a herringbone pattern allows for efficient use of limited garden space, maximizing yield.
  2. Improves Air Circulation: The structured arrangement enhances airflow between plants, reducing the risk of diseases caused by stagnant moisture.
  3. Enhances Sunlight Exposure: Each cucumber plant receives ample sunlight, crucial for robust growth and abundant fruiting.
  4. Facilitates Harvesting: The organized layout makes it easier to spot and pick cucumbers, simplifying the harvesting process.
  5. Aesthetic Appeal: The distinctive herringbone pattern adds an element of visual interest and organization to your garden landscape.

Step-by-Step Guide to Growing in a Herringbone Pattern

Step 1: Planning Your Space

  • Location: Choose a sunny spot with well-draining soil.
  • Soil Preparation: Enrich the soil with compost or manure.
  • Spacing: Allocate at least 18 inches of space around each cucumber plant.

Step 2: Creating the Herringbone Structure

  • Materials: Gather sturdy stakes (e.g., bamboo) and garden twine or netting.
  • Installation: Place parallel stakes 18 inches apart and intersect them at the top to form ‘X’ shapes. Connect the stakes with twine or netting for support.

Step 3: Planting and Training the Cucumbers

  • Sowing Seeds: Plant cucumber seeds at the base of each stake and keep the soil consistently moist until germination.
  • Training the Vines: Guide the cucumber vines up the stakes using soft ties or clips. Prune lateral branches for vertical growth and airflow.

Step 4: Ongoing Care

  • Watering: Keep the soil consistently moist without waterlogging.
  • Fertilizing: Apply a balanced fertilizer every 4-6 weeks during the growing season.
  • Pest and Disease Management: Monitor for pests and diseases, and use organic remedies as needed.

Step 5: Harvesting

  • Timing: Harvest cucumbers when firm and bright green.
  • Method: Cut the cucumbers from the vine with sharp scissors or a knife to avoid damaging the plant.

Conclusion

Growing cucumbers in a herringbone pattern is a practical, space-efficient, and visually appealing method that enhances both productivity and aesthetics in your garden. By following these steps and providing proper care, your herringbone cucumber garden will thrive, yielding abundant and delicious produce throughout the season. Happy gardening!

Have you ever gazed upon your garden and pondered if a hidden gem lies among the greenery? Well, if lavender thrives in your space, consider yourself in possession of a plant as valuable as a gold mine! This delightful herb, adorned with its soothing purple blooms and fragrant aroma, offers more than just visual and olfactory delights. Let’s delve into the treasure trove of benefits that just one leaf of lavender holds, revealing why this plant could be the most precious item in your home.

A Plant of Multifaceted Wonders

Lavender, with its delicate flowers and robust scent, is renowned for its ability to calm the mind and soothe the soul. Yet, its leaves, often overshadowed, possess their own unique magic:

1. Natural Relaxant: A single leaf of lavender holds the key to relaxation. Whether infused in a bath, crafted into a homemade pillow sachet, or simply rubbed between your fingers to release its calming scent, lavender leaves can help alleviate stress and cultivate a tranquil environment.

2. Aid for a Good Night’s Sleep: Lavender’s fragrance is a trusted ally in the pursuit of restful sleep. Placing a few leaves under your pillow or near your bed can create a peaceful atmosphere conducive to quality sleep, gently guiding you into dreamland.

3. Kitchen Marvel: Beyond its calming qualities, lavender can elevate culinary creations. When used sparingly, its leaves impart a unique floral note to dishes, enhancing the flavor profile of baked goods and refreshing beverages. Imagine a hint of lavender in your lemonade or cookies—it’s a simple touch that can make a world of difference.

4. Home Remedy Hero: Lavender leaves boast antiseptic and anti-inflammatory properties, making them a fantastic natural remedy for minor cuts, burns, and insect bites. A quick poultice of crushed leaves applied to the affected area can provide relief and aid in healing.

Conclusion: Embracing Lavender’s Bounty

In essence, the true value of lavender transcends its beauty, extending into the multitude of benefits it brings into our lives. This plant, particularly its versatile leaves, serves as a testament to nature’s generosity. Whether flourishing in your garden or adorning your home, cherish lavender as the treasure it is. You never know when you’ll need to tap into its gold mine of benefits, enriching your life in myriad ways.

Tomatoes are a beloved garden staple, but to maximize their health and productivity, proper pruning is essential. This guide will walk you through the importance of pruning tomatoes, when and how to prune them effectively, and provide insightful tips for a bountiful harvest.

Understanding the Importance of Tomato Pruning

Pruning tomatoes is crucial for several reasons:

  1. Improves Air Circulation: Pruning opens up the plant, reducing the risk of fungal diseases by allowing air to flow freely.
  2. Enhances Sunlight Exposure: Removing excess foliage ensures sunlight reaches the fruits, promoting healthy growth and ripening.
  3. Directs Energy to Fruit Production: By removing unnecessary shoots and leaves, the plant can focus its energy on producing larger, healthier fruits.

Preparing to Prune

Before you begin pruning, gather the necessary tools: clean, sharp pruning shears or scissors. Disinfect your tools before and after pruning to prevent disease spread.

Step-by-Step Pruning Process

Step 1: Identify the Type of Tomato Plant

  • Determinate Tomatoes: Minimal pruning; remove suckers below the first flower cluster.
  • Indeterminate Tomatoes: Regular pruning needed to manage size and energy.

Step 2: Pruning Basics

  • Remove Suckers: Eliminate small shoots in the axils, focusing on indeterminate varieties below the first fruit cluster.
  • Prune Lower Leaves: Prevent soil-borne diseases by removing leaves close to the ground, especially after fruit set.
  • Thin Out Leaves: Improve air circulation and sunlight penetration by thinning middle leaves.

Step 3: Advanced Pruning Techniques

  • Topping Off: Cut off the top growing point of indeterminate plants a month before frost to direct energy into ripening fruit.
  • Missouri Pruning: Pinch off sucker tips, leaving one or two leaves, to balance leafy growth and fruit production.

Step 4: Regular Maintenance

  • Monitor Your Plants: Check regularly and prune as needed, preferably in the morning when plants are dry.
  • Support Your Plants: Stake, cage, or trellis plants for support, especially as they grow and bear fruit.

Step 5: Post-Pruning Care

  • Watering: Ensure plants receive enough water, focusing on the base to avoid wetting leaves and causing fungal diseases.
  • Fertilizing: Feed plants with balanced fertilizer, especially after significant pruning, to support growth.

Conclusion

Pruning tomatoes may seem daunting, but with practice, it becomes a rewarding part of tomato cultivation. By following these steps and understanding your plants’ needs, you can ensure a healthy, productive garden filled with delicious, sun-ripened tomatoes. Happy gardening!

Sweet potatoes are a delightful and nutritious addition to any home garden. Growing them in soil bags offers a convenient and space-saving solution, perfect for gardeners of all levels. Follow this comprehensive guide to successfully nurture sweet potatoes in soil bags and enjoy a bountiful harvest.

Essential Materials:

  1. Sweet potato slips: Young, rooted plants.
  2. Soil bags: Or large grow bags.
  3. Potting soil or compost: High-quality and well-draining.
  4. Watering can or garden hose: With a gentle spray nozzle.
  5. Fertilizer: Suitable for root vegetables.
  6. Garden trowel or hand spade: For planting and maintenance.
  7. Stakes or trellises: Optional for support.
  8. Mulch: Such as straw or leaves.

Step-by-Step Guide:

  1. Choosing the Ideal Location: Select a sunny spot with good drainage, ensuring at least 6-8 hours of sunlight daily.
  2. Preparing the Soil Bags: Fill soil bags with potting mix or a blend of compost and garden soil, leaving space at the top. Ensure the soil is loose and well-draining.
  3. Planting Sweet Potato Slips: Plant slips 4-6 inches deep in the soil bags, spaced 12-18 inches apart. Position them vertically with roots facing downward.
  4. Proper Watering: Water regularly to maintain uniform soil moisture, avoiding over-saturation. Water early in the morning to allow leaves to dry during the day.
  5. Fertilization: Apply a balanced, slow-release fertilizer according to package instructions, avoiding over-fertilization.
  6. Optional Support and Trellising: Consider using stakes or trellises for support, gently securing vines as they grow.
  7. Mulching: Apply mulch around plants to conserve moisture and suppress weeds, ensuring it doesn’t touch the stems.
  8. Harvesting: Sweet potatoes are ready for harvest 100-120 days after planting. Gently excavate around the base of the plant and lift tubers from the soil.
  9. Curing and Storage: Cure harvested sweet potatoes in a warm, humid location for 10-14 days before storing in a cool, dark place with proper ventilation.

Conclusion:

Cultivating sweet potatoes in soil bags is a rewarding and space-efficient way to enjoy this nutritious root vegetable at home. With proper materials and care, you can successfully grow sweet potatoes even in limited garden space or poor soil conditions. Follow this guide, and soon you’ll be harvesting your own delicious homegrown sweet potatoes. Happy gardening!

Growing peanuts at home in recycled plastic containers offers a rewarding and eco-friendly way to enjoy freshly harvested peanuts right from your garden. Follow this beginner’s guide for a satisfying gardening experience and a bountiful harvest.

Materials Needed:

  1. Recycled plastic containers: Ensure they are large enough to accommodate peanut plants and have drainage holes.
  2. Peanut seeds: Also known as peanut kernels.
  3. High-quality potting mix: Opt for a mix that provides good drainage and nutrient retention.
  4. Organic compost: Enhances soil fertility.
  5. Perlite or vermiculite: Improves drainage.
  6. Watering can or hose: For regular watering.
  7. Fertilizer: Balanced NPK fertilizer for plant nutrition.
  8. Mulch: Helps retain moisture and suppress weeds.
  9. Full sunlight area: Peanuts require at least 6-8 hours of direct sunlight.

Step-by-Step Guide:

  1. Selecting the Right Containers: Choose containers at least 12 inches deep with drainage holes to prevent waterlogging.
  2. Preparing the Potting Mix: Mix potting mix, compost, and perlite/vermiculite in equal parts for optimal soil structure.
  3. Planting Peanut Seeds: Plant seeds 1-2 inches deep and 4-6 inches apart in containers filled with prepared potting mix.
  4. Watering: Keep soil consistently moist, especially during flowering and pod development.
  5. Providing Sunlight: Place containers in a location with full sunlight exposure.
  6. Fertilization: Apply balanced NPK fertilizer every 3-4 weeks during the growing season, avoiding excessive nitrogen.
  7. Managing Growth: Support peanut plant growth by mounding soil around pegs as they elongate and enter the soil.
  8. Mulching: Apply mulch around plants to retain soil moisture and suppress weeds.
  9. Harvesting: Harvest peanuts when plants turn yellow and leaves begin to dry. Dry harvested peanuts in a warm, well-ventilated area for two weeks before removing from shells.
  10. Storing and Enjoying: Store dried peanuts in a cool, dry place. Roast or boil peanuts before consuming for optimal flavor.

Conclusion:

Cultivating peanuts in recycled plastic containers is a rewarding and accessible way to experience the joy of gardening and enjoy homegrown peanuts. With the right materials, proper care, and patience, you can successfully grow your own peanuts and savor the satisfaction of harvesting your own crop. Get ready to embark on this exciting journey and enjoy the fruits of your labor!