Category

Health & Wellness

Category

Papaya seeds are often discarded, but they’re packed with health benefits. Rich in nutrients, antioxidants, and enzymes, they support digestion, detoxify the body, and offer antibacterial and anti-inflammatory properties. Here’s how you can eat them and make the most of their health benefits.


Health Benefits of Papaya Seeds

  1. Improves Digestion
    • Papaya seeds contain digestive enzymes like papain that help break down proteins and improve gut health.
  2. Supports Liver Detox
    • Papaya seeds aid in cleansing the liver by removing toxins and improving liver function.
  3. Kills Parasites
    • They contain compounds like carpaine that help eliminate intestinal parasites.
  4. Anti-Inflammatory Properties
    • Their anti-inflammatory effects may help reduce joint pain and other inflammatory conditions.
  5. Antibacterial Effects
    • Papaya seeds can fight harmful bacteria like E. coli, Staphylococcus, and Salmonella.

How to Prepare and Eat Papaya Seeds

  1. Fresh from the Papaya
    • Scoop out the seeds from a fresh papaya.
    • Rinse them thoroughly to remove the jelly-like coating.
    • You can eat them fresh, but they have a strong, peppery taste.
  2. Dried Papaya Seeds
    • Spread the seeds on a tray and air dry them or use a dehydrator.
    • Once dried, grind them into a powder and store in an airtight container.
  3. Crushed or Ground
    • Use crushed or ground papaya seeds as a seasoning in salads, soups, or smoothies. They have a flavor similar to black pepper.
  4. With Honey
    • Mix a small amount of fresh or dried seeds with honey to mask their strong flavor.
  5. In Smoothies
    • Blend ½–1 teaspoon of papaya seeds into your morning smoothie for an easy, nutritious boost.

How Much to Eat

  • Start with ½ teaspoon per day to allow your body to adjust.
  • Gradually increase to 1–2 teaspoons per day, depending on your tolerance and health goals.
  • Avoid consuming large quantities, as papaya seeds are potent and may cause digestive discomfort if overused.

Precautions

  • Pregnant Women: Avoid papaya seeds as they may cause uterine contractions.
  • Children: Use only under a doctor’s supervision due to their potency.
  • Medical Conditions: Consult your doctor if you’re on medication or have any health concerns.

Storage Tips

  • Fresh Seeds: Store in an airtight container in the refrigerator for up to 5–7 days.
  • Dried Seeds: Keep in a cool, dry place in an airtight container for up to several months.

Incorporate Papaya Seeds into Your Routine

Papaya seeds are a natural powerhouse of nutrients and health benefits. With their strong flavor, they might take some getting used to, but their positive effects on digestion, detox, and overall health make them worth it. Start small and enjoy the benefits of this incredible superfood! ?✨

If you’re looking for a refreshing and energizing drink, combining watermelon with ginger creates a vibrant beverage that not only tastes great but also boosts your energy levels naturally. Here’s why this combination works so well and how you can make your own watermelon ginger juice at home.

Health Benefits of Watermelon and Ginger

Watermelon: This juicy fruit is loaded with water and essential nutrients, including vitamins A, B6, and C, as well as potassium and magnesium. Watermelon is also rich in lycopene, an antioxidant that helps fight oxidative stress and inflammation.

Ginger: Known for its potent anti-inflammatory properties and digestive benefits, ginger can also help increase circulation and boost energy levels. Its sharp, spicy flavor complements the sweetness of watermelon beautifully.

How to Make Watermelon Ginger Juice

Ingredients:

  • 4 cups of fresh watermelon cubes (seeds removed)
  • 1 inch of fresh ginger root, peeled
  • Juice of 1 lime (optional, for added zest)
  • Ice cubes (optional, for serving)
  • Fresh mint leaves (optional, for garnish)

Instructions:

  1. Prepare Ingredients: Cut the watermelon into cubes, and peel the ginger. If you prefer a bit of tang, have a lime ready to squeeze.
  2. Juice the Ingredients: In a blender, combine the watermelon cubes and ginger. Blend until smooth. For an extra kick of freshness and a bit of tang, add the juice of one lime.
  3. Strain the Juice (Optional): For a smoother texture, strain the juice using a fine mesh sieve or cheesecloth to remove the pulp and bits of ginger.
  4. Serve: Pour the juice over ice cubes in glasses. Garnish with fresh mint leaves for an additional refreshing touch.
  5. Enjoy: Refresh yourself with this energizing and hydrating drink!

Tips for the Best Watermelon Ginger Juice

  • Chill Your Ingredients: For a cooler drink, refrigerate the watermelon and ginger before juicing. This way, you might not even need ice.
  • Adjust to Taste: If the ginger’s spice is too strong, use less. If you like your drink a bit sweeter, you can add a little honey or agave syrup.
  • Hydration: This drink is excellent for hydration, making it perfect for hot days or after workouts.

Conclusion

Watermelon juice with ginger is not just a thirst quencher—it’s a health booster packed with vitamins, antioxidants, and minerals. It’s a natural energy drink that can help keep you refreshed and revitalized. Try making it at home and adjust the ingredients according to your taste preferences for a perfect blend of health and flavor!

Sleeping positions can significantly impact your overall health and sleep quality. While there are various positions people prefer, sleeping on your left side is often recommended by healthcare professionals for several key health benefits. Here’s a detailed look at why adopting this sleeping posture might be a good idea:

1. Enhances Digestion

Sleeping on your left side can improve your digestive system’s efficiency. The stomach and pancreas hang naturally when lying on the left, which optimizes digestion. This position allows gravity to facilitate the movement of food waste through the ascending colon, which can help reduce the risk of constipation and may lead to a more restful sleep due to less digestive discomfort.

2. Benefits to Circulation and Heart Health

For the heart, sleeping on the left side can be especially beneficial. This position may enhance circulation and cardiovascular health because of the body’s anatomy. The heart is better positioned to pump downhill and the aorta curves from the heart and descends into the abdomen on the left side. This alignment can ease the heart’s workload as it pumps blood downward to the rest of the body.

3. Relieves Back Pain

Individuals suffering from chronic back pain may find relief when sleeping on their left side, particularly with a supportive pillow between their knees. This position can help align the spine better and distribute weight more evenly, reducing pressure points and potentially easing pain.

4. Helps Reduce Heartburn

For those suffering from acid reflux or gastroesophageal reflux disease (GERD), sleeping on the left side can make a significant difference. This position prevents stomach contents from flowing back into the esophagus, thus minimizing the risk and discomfort of heartburn during the night.

5. Ideal for Pregnant Women

Sleeping on the left side is often advised for pregnant women. This position prevents the uterus from pressing against the liver, which is on the right side, and promotes better blood flow to the fetus, uterus, and kidneys. Enhancing maternal blood circulation can also increase the amount of nutrients that reach the placenta and the baby.

Conclusion

Switching to sleeping on your left side could offer numerous health benefits, from improved digestion and back pain relief to better heart health and reduced heartburn. It’s particularly beneficial for pregnant women, aiding in the safety and efficiency of nutrient flow to the baby. As with any new habit, it may take some time to adjust, but the potential health benefits make it worth trying. If you’re considering changing your sleeping position, it may also be helpful to consult with a healthcare provider, especially if you have existing health concerns.

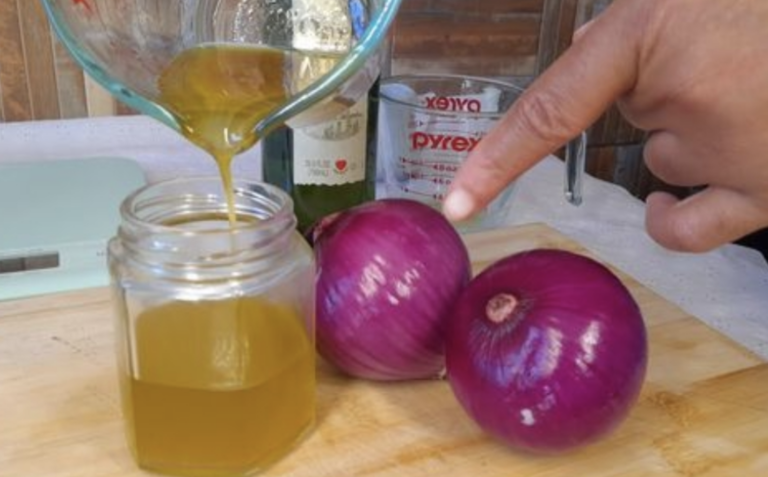
Combining honey with onions might sound unusual, but this mixture has been used as a traditional remedy for various ailments for centuries. Both ingredients are powerhouses of nutritional benefits and when combined, they can offer a unique set of health advantages. Here’s what happens to your body when you consume honey mixed with onions:

1. Enhanced Respiratory Health

One of the most well-known benefits of honey and onion is their ability to alleviate respiratory conditions. Onions contain quercetin, an antioxidant that helps reduce inflammation and acts as an antihistamine. This can be particularly beneficial for those suffering from allergies, asthma, or colds. Honey acts as a natural cough suppressant and can soothe sore throats. Together, they help in reducing congestion and calming respiratory ailments.

2. Boosted Immune System

Both honey and onions have strong antibacterial properties. Honey is known for its effectiveness against various strains of bacteria, and onions are rich in vitamin C, which is vital for the immune system. Consuming honey and onions can help fortify your body’s natural defenses against infections.

3. Improved Digestive Health

Onions are rich in prebiotics, which feed beneficial gut bacteria and improve overall gut health. Honey, being a natural prebiotic, also supports the growth of good bacteria in the digestive tract. This combination can help regulate digestion and prevent gastrointestinal disorders.

4. Anti-inflammatory Effects

Both honey and onions have anti-inflammatory properties. Chronic inflammation is associated with many diseases, including heart disease, diabetes, arthritis, and Alzheimer’s disease. Regular consumption of honey and onions can reduce inflammation markers in the body, thereby potentially reducing the risk of these conditions.

5. Antioxidant Properties

Honey and onions are both excellent sources of antioxidants. These substances help combat oxidative stress in the body, which is linked to aging and many chronic diseases. By neutralizing free radicals, the antioxidants in honey and onions can help protect your body’s cells and enhance overall health.

How to Use Honey and Onion Together

  • Honey and Onion Syrup for Cough: Chop an onion and cover it with honey in a bowl. Let it sit overnight. The onion will release its juices, mixing with the honey to form a syrup. Take a spoonful of this syrup to relieve coughs or sore throats.
  • Daily Health Tonic: Finely chop an onion and mix it with a tablespoon of honey. Consume this mixture once a day as a preventive measure to boost immune function and promote respiratory health.

Conclusion

Eating honey mixed with onions offers multiple health benefits, from boosting the immune system and improving respiratory health to providing anti-inflammatory and antioxidant effects. While it may not be the most common or appetizing combination, its potential health benefits make it worth considering as a supplement to a healthy diet. As always, it’s wise to consult with a healthcare provider before starting any new health regimen, especially if you have underlying health conditions or allergies.

Are you searching for a simple and natural way to maintain youthful and glowing skin? Look no further! Bay leaf and cornstarch, two common kitchen staples, have surprising skincare benefits that can leave your skin feeling soft, smooth, and refreshed. Let’s explore how this powerful duo can revolutionize your skincare routine, regardless of your age.

Why Bay Leaf and Cornstarch?

Bay Leaf: Known for its natural antioxidants and soothing properties, bay leaf can help reduce redness and improve skin tone. It also possesses mild antibacterial benefits, supporting clear and healthy skin.

Cornstarch: A gentle and natural ingredient, cornstarch absorbs excess oil, leaving your skin with a silky-smooth finish. It’s hailed for its calming properties, making it an excellent choice for soothing sensitive or irritated skin.

How to Make the Bay Leaf and Cornstarch Mask

Ingredients:

  • 3–4 bay leaves
  • 1 tablespoon of cornstarch
  • 1 cup of water

Instructions:

Prepare the Bay Leaf Water

  1. Boil the cup of water and add the bay leaves. Allow them to simmer for approximately 10 minutes to extract their valuable nutrients.
  2. Remove the bay leaves and let the infused water cool down to a warm (not hot) temperature.

Mix the Mask

  1. In a bowl, combine the cooled bay leaf water with the cornstarch. Stir until achieving a smooth, paste-like consistency.

Apply to Your Face

  1. Wash your face with a gentle cleanser and pat it dry.
  2. Using clean fingers or a brush, apply the mask evenly to your face, while avoiding the delicate eye area.

Relax and Let It Work

  1. Leave the mask on for 15–20 minutes. You’ll feel it tightening as it dries, which is a promising sign!

Rinse Off

  1. Gently rinse off the mask with lukewarm water and pat your skin dry.

You’ll Notice the Benefits

With regular use, this mask can improve the texture of your skin, brighten its appearance, and provide a more youthful glow. Its natural ingredients are gentle yet effective, ensuring you a refreshed and radiant complexion.

Pro Tips

  • For optimal results, use this mask once a week.
  • Always utilize fresh bay leaves to maximize their beneficial properties.
  • If you have very sensitive skin, perform a patch test before applying the mask to your face.

Go ahead and give this natural remedy a try—experience the sensation of turning back the clock on your skin’s aging process!

Are cockroaches causing a ruckus in your home? Don’t fret! With these natural remedies, you can easily say goodbye to these pesky pests. Here are a couple of options you can try:

1. Dettol Solution

Dettol, known for its strong antiseptic properties, can also be lethal for cockroaches. Although it’s not specifically labeled for pest control, it can still be highly effective.

Preparation: Mix 1 part Dettol with 3 parts water in a spray bottle.

Application: Spray the solution directly on cockroaches or in areas where they frequently appear.

2. Boric Acid

Boric acid is another powerful tool in eliminating cockroaches from your home.

Preparation: Mix 50 ml of Dettol Liquid with boric acid.

Application: Apply the mixture in areas where cockroaches are commonly found, such as behind kitchen counters, in cupboards, or along baseboards.

It’s important to take extra precautions when using these remedies. Keep children and pets away from the treated areas until the solution dries up completely.

By following these natural pest control remedies, you can bid farewell to cockroach invasions and enjoy a pest-free environment in your home. Stay tuned for more helpful tips!

Are you looking for a delicious and soothing drink that also has amazing health benefits? Look no further than ginger tea! This wonderful drink, made by boiling ginger root, can improve your well-being in many ways. If you’re between the ages of 45 and 65, this article will guide you on how to make ginger tea at home and explain why it’s worth trying!

The Power of Ginger

Ginger is an extraordinary herb that is widely used around the world to treat various ailments. It has potent anti-inflammatory and antioxidant properties, making it highly effective for improving health. Ginger is especially beneficial for digestive health, providing relief from nausea and supporting the immune system.

How to Make Ginger Tea

Ingredients:

  • Fresh ginger root (approximately a 1-inch piece)
  • 1 liter of water
  • Optional: Honey or lemon to taste

Instructions:

  1. Prepare the Ginger:
    • Peel the ginger root and thinly slice it. This increases the surface area, allowing more of its beneficial components to be released into the water.
  2. Boil the Ginger:
    • In a small pot, add the sliced ginger to 1 liter of water.
    • Bring the water to a boil, then reduce the heat and let it simmer for 15-20 minutes. The longer you simmer the ginger, the stronger and more potent your tea will be.
  3. Strain and Serve:
    • Remove the pot from the heat after simmering.
    • Strain the tea to remove the ginger slices.
    • If desired, add honey or lemon to enhance the flavor and provide additional health benefits. Honey soothes the throat and adds natural sweetness, while lemon provides a refreshing taste and a boost of vitamin C.

The Health Benefits of Ginger Tea

Drinking boiled ginger tea offers several incredible health benefits:

1. Digestive Health: Ginger stimulates the production of saliva, bile, and gastric enzymes, aiding digestion and relieving indigestion and constipation.

2. Nausea Relief: Ginger is effective in reducing nausea caused by motion sickness, pregnancy, and chemotherapy.

3. Inflammation Reduction: The powerful anti-inflammatory properties of ginger can help alleviate pain and swelling, particularly in conditions like arthritis.

4. Immune Boosting: Ginger possesses antiviral and antibacterial properties, making it an excellent natural remedy to strengthen the immune system, especially during cold and flu seasons.

Moderation is Key

While ginger tea is beneficial, it’s important to consume it in moderation. Excessive intake may lead to gastrointestinal discomfort such as heartburn or diarrhea. If you have gallstones or issues with blood clotting, it’s best to consult with a healthcare provider before increasing your ginger intake, as it may have an impact on these conditions.

Conclusion

Making ginger tea by boiling ginger root is a simple yet effective way to unlock the many health benefits of this powerful root. Whether you’re experiencing an upset stomach, battling a cold, or simply seeking a warm and healthful drink, ginger tea can be a wonderful addition to your daily routine. Give it a try and experience the natural boost it offers!

Apple cider vinegar (ACV) has been praised as a versatile remedy for various health issues. While it can be beneficial at any time of the day, consuming it before bedtime can provide specific advantages, especially for people between 45-65 years old. Let’s explore how a nightly dose of apple cider vinegar can potentially transform your health and improve your quality of life.

1. Improved Digestive Health

ACV helps with digestion by increasing stomach acid production, which aids in breaking down food more efficiently. Drinking it before bed can alleviate digestive issues like indigestion or bloating that often occur overnight.

2. Stable Blood Sugar Levels

One of the significant benefits of apple cider vinegar is its ability to stabilize blood sugar levels. Consuming it before bedtime can reduce blood sugar spikes during the night, which is especially beneficial for individuals with type 2 diabetes or those managing their blood sugar levels.

3. Enhanced Weight Loss

ACV can aid weight loss by promoting feelings of fullness and reducing appetite when consumed before meals. While research on its effects before bed is limited, maintaining stable blood sugar levels overnight can potentially support weight management.

4. Healthier Skin

Apple cider vinegar’s antibacterial properties can improve skin health by reducing acne-causing bacteria and other skin irritants. Drinking a diluted mixture before bedtime might contribute to clearer skin.

5. Improved Heart Health

Preliminary studies suggest that apple cider vinegar may help improve heart health by lowering blood pressure and cholesterol levels. While more research is needed, making ACV a part of your nighttime routine could potentially benefit your cardiovascular health over time.

How to Consume Apple Cider Vinegar Before Bedtime

Dilute It: Always dilute ACV before drinking to protect your teeth and stomach lining. Mix one to two tablespoons of ACV with a glass of water.
Drink Before Brushing: Consume the diluted ACV before brushing your teeth to avoid potential enamel erosion caused by acidity.
Add Honey: If the taste is too strong, add a teaspoon of honey to the mixture. It can also soothe your throat and improve sleep quality.

Precautions

Although apple cider vinegar offers numerous health benefits, it may not be suitable for everyone. Drinking acidic beverages like ACV, especially in undiluted form, can lead to tooth enamel erosion or digestive discomfort. It’s important to start with a small amount and observe your body’s reaction. People with gastroparesis, sensitive stomachs, or those taking certain medications should consult a healthcare provider before starting an ACV regimen.

Drinking apple cider vinegar before bedtime can potentially improve your overall health, from digestion and blood sugar control to weight management and heart health. Remember to use it in moderation and pay attention to your body’s response. As with any natural remedy, it’s always beneficial to consult with healthcare professionals when needed. Cheers to a healthier you!

Are you dreaming of long, thick, and healthy hair? Look no further – the answer is rosemary black oil! This natural remedy has been used for ages to stimulate hair growth, strengthen strands, and reduce hair fall. Let’s dive into the incredible benefits of this magical oil and learn how you can use it.

Why Rosemary Oil Works for Hair Growth

Stimulates Hair Follicles: Rosemary oil improves blood circulation to the scalp, providing essential nutrients and oxygen to hair follicles, which in turn promotes growth.

Prevents Hair Loss: By combatting DHT (dihydrotestosterone), an hormone linked to hair thinning and loss, rosemary oil becomes a natural remedy for conditions like androgenic alopecia.

Strengthens Hair Strands: Packed with antioxidants, rosemary oil protects your hair from damage and reduces split ends.

Promotes Scalp Health: Its antifungal and antibacterial properties keep your scalp clean, reducing dandruff and irritation.

How to Make Black Oil with Rosemary

Making your own rosemary black oil is simple. Here’s what you’ll need:

  • ½ cup of black seed oil (nigella sativa oil)
  • 2–3 tablespoons of rosemary essential oil
  • 1 tablespoon of castor oil (optional, for added thickness and growth)

Instructions:

  1. In a small glass jar or bottle, mix the black seed oil and rosemary essential oil.
  2. Add castor oil if desired for extra hair-strengthening properties.
  3. Shake well to combine all ingredients.

How to Use Rosemary Black Oil for Hair Growth

Now that you have your rosemary black oil ready, it’s time to start using it to achieve remarkable results. Here’s how:

Scalp Massage: Take a small amount of the oil and warm it slightly (do not overheat). Gently massage it into your scalp using circular motions for 5–10 minutes. This boosts circulation and ensures the oil penetrates deeply.

Leave It On: Let the oil sit for at least 1–2 hours or, for best results, overnight. Use a shower cap to prevent any mess.

Wash It Out: Rinse your hair with a mild shampoo and lukewarm water. Condition as usual.

Frequency: Use this treatment 2–3 times a week for noticeable results.

Benefits You’ll Notice

By regularly using rosemary black oil, get ready to experience these fantastic benefits:

Thicker, Fuller Hair: Within weeks, your hair will feel denser and look healthier.

Faster Growth: Many users report visible hair growth in as little as one month.

Reduced Hair Fall: Regular use helps minimize shedding and strengthens the roots.

Improved Scalp Condition: Say goodbye to dandruff, itching, and dryness.

Bonus Tips for Best Results

To maximize the effectiveness of rosemary black oil, here are some additional tips:

Pair with a Healthy Diet: Include foods rich in biotin, omega-3 fatty acids, and zinc to support hair growth from within.

Avoid Heat Styling: Excessive heat can damage your hair and slow down growth.

Be Consistent: Regular application of rosemary black oil is key to seeing the best results.

Are you ready to experience crazy hair growth naturally? Join the many who have fallen in love with rosemary black oil and start your journey to healthier, faster-growing hair today! ?✨

Are you tired of stained teeth? Do you want a natural solution that is gentle yet effective? Look no further than carrot tops! These often overlooked and discarded parts of the carrot can actually work wonders for your teeth. With their high chlorophyll content and gentle abrasive properties, they can help remove stains and freshen your breath, giving you a bright, shiny smile in just 2 minutes! Let’s dive into how you can use carrot tops for pearly white teeth.

Why Carrot Tops Work for Teeth Whitening

Carrot tops are a natural stain remover due to their fibrous texture. This means that they act as a mild abrasive, gently scrubbing away surface stains caused by coffee, tea, and food. But that’s not all – they also contain chlorophyll, which not only detoxifies the mouth but also helps neutralize bad odors. Additionally, carrot tops are rich in calcium and other minerals that strengthen enamel while enhancing the natural whiteness of teeth. It’s like getting a triple benefit in one!

How to Use Carrot Tops for Teeth Whitening

Using carrot tops for teeth whitening is easy. Here’s what you’ll need:

  • A handful of fresh carrot tops
  • 1 teaspoon of baking soda (optional, for extra whitening power)

And here are the steps to follow:

  1. Wash the carrot tops thoroughly and chop them into smaller pieces.
  2. Crush the carrot tops into a paste using a mortar and pestle or blend them with a tiny amount of water.
  3. Mix the paste with baking soda (optional).
  4. Apply the mixture to your toothbrush and gently brush your teeth for 2 minutes.
  5. Rinse your mouth with water and voila, you’re ready to show off your beautiful smile!

Benefits After 2 Minutes

Using carrot tops for teeth whitening can deliver some amazing benefits in just 2 minutes:

  • Noticeably whiter teeth: The surface stains are reduced, revealing a whiter smile.
  • Fresher breath: Chlorophyll in carrot tops eliminates bad odors instantly, leaving your breath fresh and clean.
  • Stronger teeth: The natural minerals found in carrot tops promote enamel strength, making your teeth stronger and healthier.

For best results, repeat this process 2-3 times a week. You’ll be amazed at the long-lasting results!

Say goodbye to harsh chemical whiteners and hello to this natural and safe remedy. By using carrot tops regularly, you can maintain a sparkling white smile that’s not only beautiful but also healthy. So why wait? Grab some carrot tops and get ready to shine! ?✨