Category

Gardening

Category

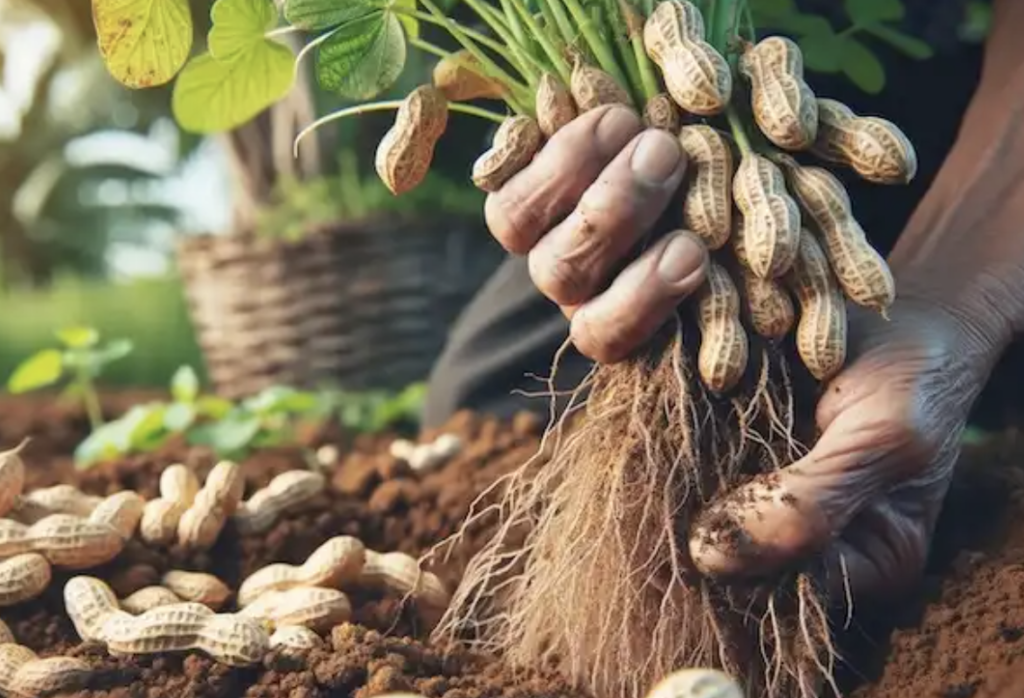
Growing peanuts from store-bought nuts is a rewarding gardening project that can yield delicious results. Follow these steps to get started:

Step 1: Choosing Peanuts

  • Opt for fresh, raw, uncooked peanuts in their shells.
  • Avoid roasted or salted peanuts as they won’t germinate.

Step 2: Preparation and Planting

  • Peanuts require a long growing season (100-130 frost-free days).
  • Start indoors 5-8 weeks before the last frost date for an early start, especially in Northern climates.
  • Plant in well-draining, loose soil, adding sand and aged compost if needed.
  • Sow seeds 1-2 inches deep and 24-36 inches apart in rows spaced at least 72 inches apart.

Step 3: Location and Soil

  • Choose a sunny site, as peanuts need full sun.
  • Use row covers to protect young plants from spring frosts.
  • Soil should be light, loamy, and slightly acidic (pH 5.5-7.0).

Step 4: Watering and Care

  • Water at least 1 inch per week, maintaining even moisture but not waterlogging the soil.
  • Add mulch once seedlings are half a foot tall to retain moisture and control weeds.

Step 5: Fertilization

  • Peanuts are nitrogen-fixers, so they require less nitrogen.
  • Focus on calcium, as it’s crucial for pod development.
  • Use a low-nitrogen or balanced fertilizer before planting.

Step 6: Pruning and Propagation

  • Pruning isn’t typically required but may be done for maintenance.
  • Propagate peanuts using seeds, selecting healthy, mature ones for saving and planting the following spring.

Step 7: Harvesting and Storing

  • Harvest time is about 100-150 days after planting.
  • Remove the entire plant from the soil for harvesting.
  • Store raw peanuts in a mesh bag in a dry place or roast them for consumption.

Growing peanuts can be a fun and fruitful endeavor, especially if you have a sunny spot and a bit of patience. With the right care, you can enjoy home-grown peanuts right from your backyard!
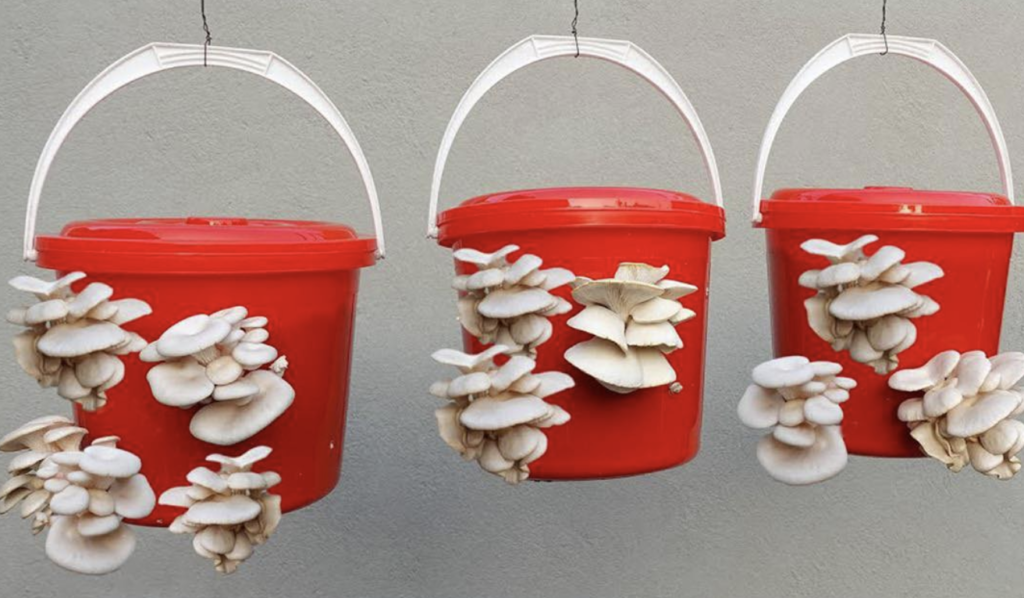
Embark on a delightful and sustainable hobby by growing mushrooms at home. Explore the simplicity and efficiency of using buckets with holes to enjoy multiple harvests of freshly harvested fungi. Follow this comprehensive guide to kickstart your mushroom-growing adventure right in the comfort of your own home.

Materials Needed:

Ensure you have all the necessary materials at hand before beginning your mushroom-growing journey.

  • Straw
  • Water
  • Large pot for boiling
  • Mushroom seeds (spawn)
  • Plastic buckets with holes
  • Clean cloth or lid for covering the buckets
  • Watering can or spray bottle
  • A cool, dark place for incubation

Step 1: Preparing the Straw

Gather suitable straw and chop it into pieces approximately 2-4 inches in length to prepare for the cultivation process.

Step 2: Boiling the Straw

Sterilize the chopped straw by boiling it in water. Let it simmer until sterilized, then allow it to cool down to room temperature.

Step 3: Acquiring Mushroom Seeds

Purchase mushroom seeds, also known as mushroom spawn, from a reliable supplier. Choose from various mushroom species like oyster, shiitake, or white button mushrooms based on your preferences.

Step 4: Layering Straw and Mushroom Seeds

Begin layering the plastic bucket with holes, alternating between cooled, boiled straw and mushroom seeds. Ensure even distribution for optimal mushroom growth.

Step 5: Incubation

Cover the bucket with a clean cloth or a lid with small holes and place it in a cool, dark area with temperatures ranging from 70°F to 75°F (21°C to 24°C). During this incubation period, the mycelium will colonize the straw.

Step 6: Daily Watering

Maintain consistent moisture levels by watering the mushrooms once or twice a day using a watering can or spray bottle. Avoid overwatering to prevent contamination.

Step 7: Harvesting

Around 21 days later, tiny mushroom pins will appear on the straw’s surface. Keep up with moisture levels, and as these pins mature, gently twist and pull them from the substrate when they reach the desired size.

Step 8: Continued Harvesting

Enjoy multiple harvests by picking mushrooms before they release spores, ensuring a consistent supply of fresh, homegrown mushrooms throughout the year.

Disclaimer:

Growing mushrooms at home requires attention to detail and proper sterilization to prevent contamination. Follow safety guidelines when handling potentially contaminated materials or consuming homegrown mushrooms. If in doubt, consult local experts or mycology professionals for guidance.

Unlock the joy of home mushroom cultivation using buckets with holes and savor the satisfaction of harvesting your own fresh mushrooms. Experiment with different species and techniques to elevate your culinary experiences and enjoy the delightful flavors of homegrown produce. Happy mushroom growing!

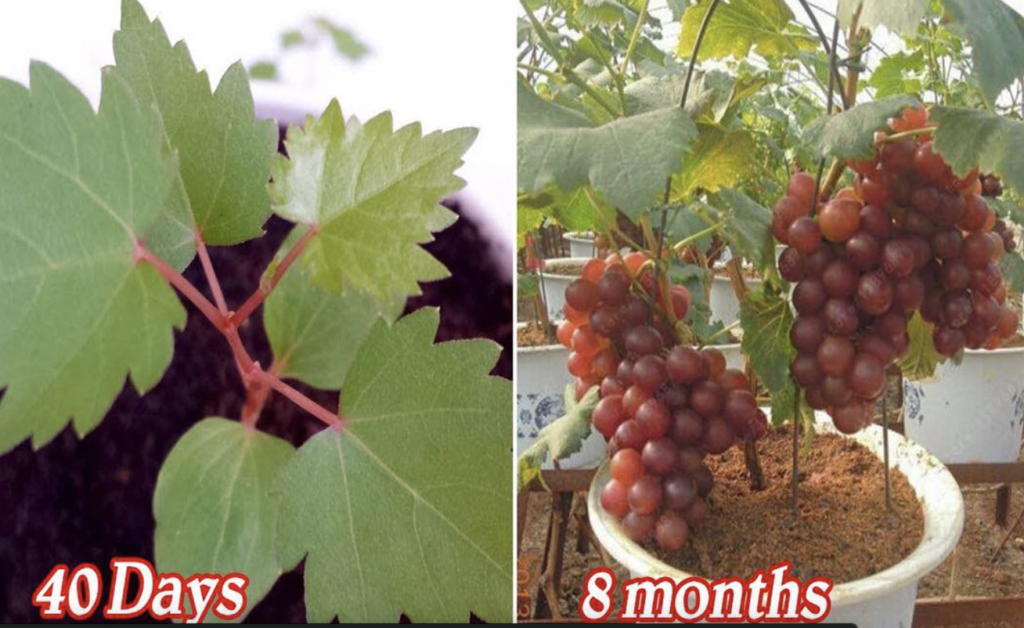
Growing grapes from seeds in containers is indeed an exciting and rewarding project for gardening enthusiasts. Here’s a detailed guide to help you navigate the process successfully:

1. Acquiring Grape Seeds:

  • Choose ripe grapes from healthy vines.
  • Gently extract seeds from the grapes and rinse them to remove any pulp or residue.

2. Seed Preparation:

  • Place the seeds in a damp paper towel, seal them in a plastic bag, and refrigerate for 2-3 months to stratify them.

3. Germination Process:

  • Fill small containers with well-draining potting mix and plant the stratified seeds.
  • Keep the soil consistently moist and place the containers in a warm, sunny location.

4. Tender Care and Maintenance:

  • Provide support for young vines as they grow.
  • Monitor soil moisture and water when needed.
  • Thin out seedlings once they reach a few inches in height, keeping the strongest ones.

5. Transplantation and Container Tips:

  • Transfer seedlings to larger containers as they outgrow their initial homes.
  • Choose containers with adequate drainage and use a quality potting mix rich in organic matter.

6. Special Tricks and Tips:

  • Prune the vines regularly to encourage strong growth and fruit development.
  • Apply balanced fertilizer during the growing season, but avoid over-fertilization.
  • Ensure grapevines receive 6-8 hours of direct sunlight daily for optimal growth.

7. Patience Rewarded:

  • Understand that growing grapes from seeds is a long-term endeavor, and it may take several years for the vines to mature and produce fruit.
  • Embrace the joy of nurturing your unique grape varieties from seeds to fruitful vines.

Embarking on the journey of growing grapes from seeds in containers requires patience and dedication, but the experience is incredibly fulfilling. With proper care and attention, you’ll witness the transformation of tiny seeds into flourishing grapevines, ready to reward you with delicious fruits.

Growing an almond tree from a seed at home can indeed be a fulfilling endeavor, yielding both aesthetic beauty and nutritious nuts over time. Here’s a comprehensive guide to help you through the process:

Step 1: Obtain Almond Seeds

  • Selecting Seeds: Choose raw, fresh, and untreated almonds. You can collect them from another almond tree or purchase them raw and untreated.
  • Stratification: Soak the almonds in water for 48 hours, then wrap them in a moist paper towel, place them in a plastic bag, and refrigerate for several weeks to stratify them and encourage germination.

Step 2: Planting the Seed

  • Timing: Spring is the optimal time for planting almond seeds.
  • Soil Preparation: Almond trees thrive in well-draining soil with a pH level between 6 and 7.5. Enrich the planting area with compost.
  • Planting Depth: Plant the seeds 2-3 inches deep in the soil and water thoroughly.
  • Location: Select a sunny location for your almond tree, as they require full sunlight to thrive.

Step 3: Caring for Your Almond Tree

  • Watering: Ensure regular watering, especially during the tree’s early years. Mature trees are drought-tolerant but benefit from consistent watering.
  • Pruning: Focus on developing a healthy framework for the tree in its early years, and prune for sunlight and air circulation in subsequent years to minimize disease risk.
  • Fertilizing: Use balanced fertilizer during the growing season to nourish the tree.

Step 4: Protecting the Tree

  • Pests and Diseases: Keep a lookout for common pests and diseases and take preventative measures as needed.
  • Winter Protection: Young almond trees may need protection from harsh winters using mulch and protective wraps.

Step 5: Harvesting Almonds

  • Waiting Period: Almond trees typically start producing nuts in the 3rd or 4th year and reach full production after 5-6 years.
  • Harvest Time: Almonds are ready for harvest in late summer to early fall when the hulls split, revealing the shell.
  • Drying: Allow harvested almonds to dry in a cool, dry place for about a week before storing or consuming them.

Step 6: Enjoying the Rewards

  • Roasting and Eating: Roast your almonds for a delicious snack or use them in cooking.
  • Admiring the Blossoms: Enjoy the beautiful blossoms that almond trees provide in the spring, adding aesthetic appeal to your garden.

Final Thoughts:

Growing an almond tree requires patience and care, but the rewards – including delicious nuts and beautiful blossoms – are well worth the effort. Ensure you tend to the tree’s needs throughout its life, and you’ll reap the bountiful rewards in the years to come.

Note: Always consider your local climate and consult with local experts to ensure almonds are suitable for your area before planting.

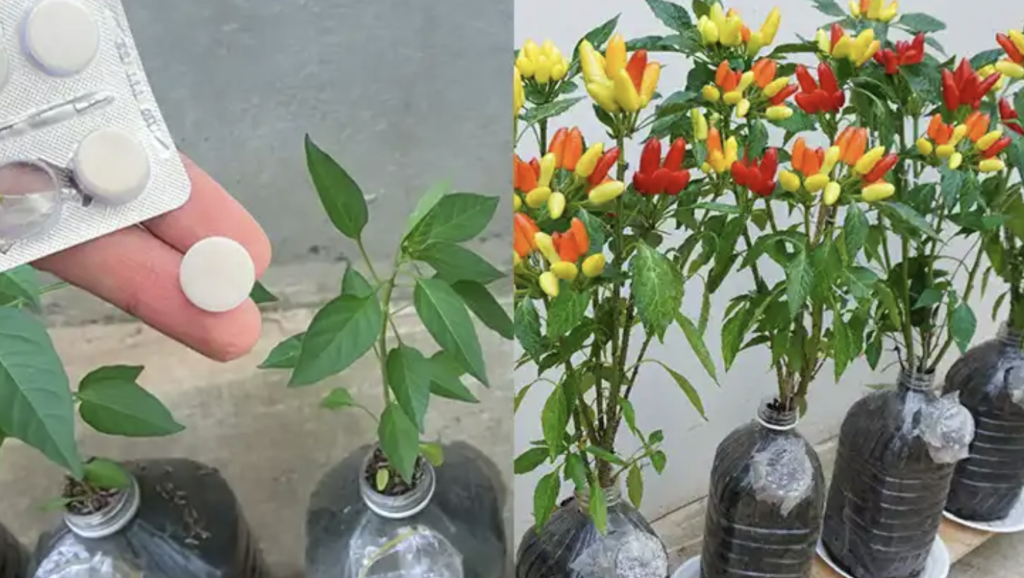
Growing chili peppers at home adds a spicy twist to your gardening adventure. In this comprehensive guide, we’ll navigate through the essential steps and tips for successfully nurturing chili peppers in containers, along with an unconventional approach involving vitamin B complex for enhanced plant vitality.

Container Selection:

Choose containers with ample depth and drainage holes to accommodate chili pepper roots. Opt for containers with a capacity of at least 5 gallons to support robust growth and development.

Soil Preparation:

Prepare a well-draining potting mix enriched with organic matter. Chili peppers thrive in slightly acidic to neutral soil conditions. Incorporate compost to boost fertility and create a nutrient-rich environment for your plants.

Planting Chili Pepper Seeds:

Plant chili pepper seeds in the container, adhering to the spacing recommendations on the seed packet. Ensure the containers are positioned in a sunny location, as chili peppers flourish in full sunlight.

Watering:

Maintain consistent soil moisture, especially during flowering and fruiting stages. Avoid overwatering, as chili peppers are prone to root rot. Water deeply when the top inch of soil feels dry to the touch.

Fertilizing:

Apply a balanced, water-soluble fertilizer or a fertilizer formulated specifically for peppers. Adhere to recommended application rates to supply essential nutrients for healthy plant growth and fruit production.

Unconventional Approach – Vitamin B Complex:

Experiment with an unconventional method to enhance chili pepper growth:

Vitamin B Complex Boost:

  • Dissolve a vitamin B complex tablet in water as per package instructions.
  • Apply the solution to the soil or use it as a foliar spray.
  • Vitamin B complex is believed to promote overall plant health and may contribute to increased fruit production.

Caution:

While exploring unconventional methods, exercise caution. Conduct small-scale tests before applying such methods to your entire garden. Be mindful of potential risks associated with unconventional supplements.

Conclusion:

Cultivating chili peppers at home is a delightful addition to your gardening pursuits. By following these guidelines, you can establish a thriving container garden and cautiously experiment with unconventional methods, like vitamin B complex supplementation, to enhance the vigor and yield of your chili pepper plants. Happy gardening and enjoy the flavorful harvest of chili peppers!

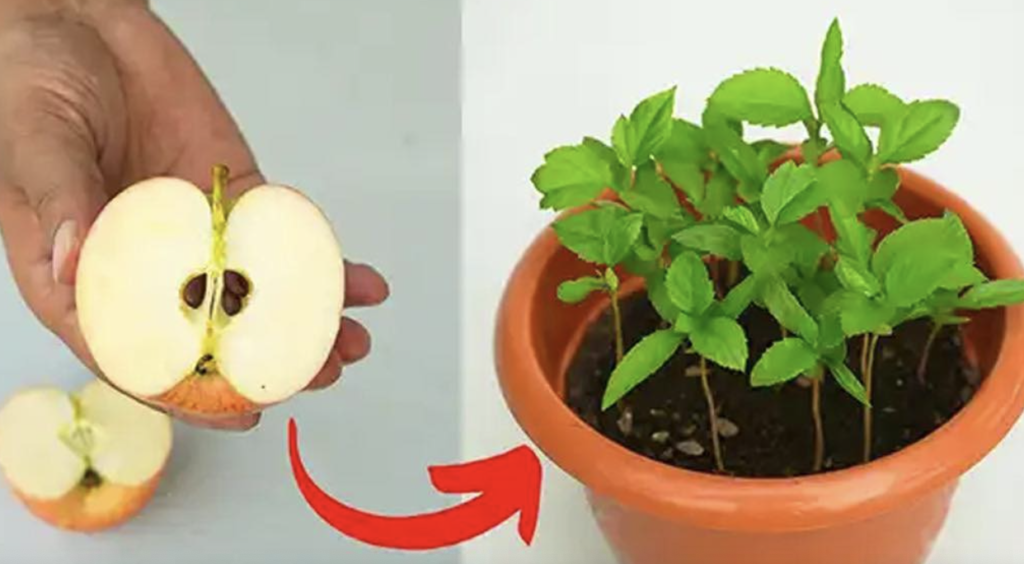
Apples, often celebrated as the epitome of health, hold a hidden potential beyond their nutritional benefits – the ability to give birth to new life in the form of saplings. Transforming discarded apple scraps into thriving apple saplings is a rewarding endeavor that requires minimal effort and zero cost. Let’s delve into the simple yet fulfilling process of nurturing apple saplings from seeds.

The Journey Begins: Extracting Seeds from Apples

The journey to nurturing your own apple tree commences with selecting a mature apple. Carefully extract the seeds from the core of the apple, ensuring they remain intact. This delicate process sets the stage for the germination of seeds and the birth of saplings.

Seed Germination: Awaiting Nature’s Miracle

Place the collected seeds inside a plastic or glass container lined with a damp white cloth napkin. Seal the container and allow the seeds to germinate in indirect sunlight for about 10 days. Vigilance is essential during this period to prevent mold formation and ensure successful germination.

Planting and Nurturing Your Sapling

After germination, delicately plant the germinated seeds in a pot filled with peat or high-quality, well-draining soil. Ensure the root faces downwards and the seed upwards, covering it with soil and misting with water. Position the pot in a well-lit area, avoiding direct sunlight exposure.

Witnessing Growth and Progress

As days pass, observe the sprout emerging from the soil, gradually growing taller with flourishing leaves. Within a month, the sapling will exhibit significant growth, indicating its readiness for further development. With proper care and nurturing, your apple sapling will thrive and mature into a magnificent tree, ready for grafting when it reaches optimal height and trunk diameter.

Embark on this journey of transformation, turning discarded apple scraps into flourishing saplings, and witness the wonders of nature unfold before your eyes. Happy gardening!

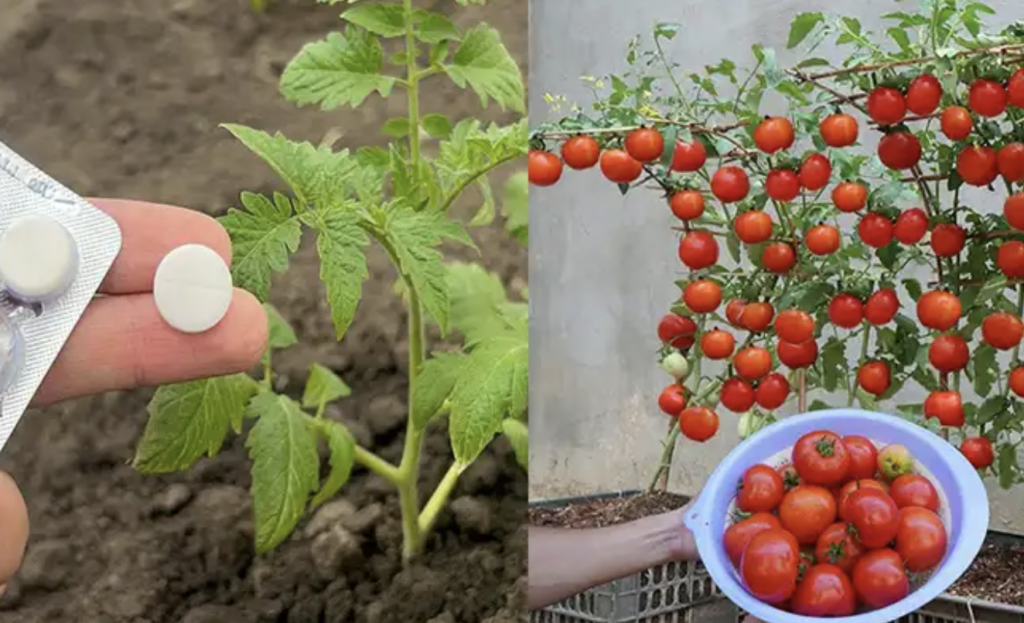
Tomatoes are a favorite among home gardeners, but achieving a bountiful harvest requires more than just planting and watering. In this comprehensive guide, we’ll walk you through the steps to grow tomatoes quickly and ensure they produce big, juicy fruits. Additionally, we’ll explore a unique top dressing method involving salicylic acid, a natural plant growth regulator found in aspirin.

Step 1: Choose the Right Tomato Varieties

Select tomato varieties that suit your climate and space. Determinate varieties are ideal for compact spaces, while indeterminate varieties keep producing throughout the season.

Step 2: Start with Quality Seeds or Seedlings

Ensure your seeds or seedlings come from a reputable source. Healthy plants from the beginning set the stage for a successful harvest.

Step 3: Provide Adequate Sunlight

Tomatoes thrive in sunlight. Plant them in a location that receives at least 6-8 hours of sunlight per day.

Step 4: Use Well-Draining Soil

Ensure your soil has good drainage to prevent waterlogged roots. Add organic matter like compost to improve soil fertility.

Step 5: Watering Wisely

Consistent watering is crucial, especially during dry spells. Water at the base of the plants to avoid wetting the foliage, which can lead to diseases.

Step 6: Fertilize Regularly

Feed your tomatoes with a balanced fertilizer to provide essential nutrients. Consider incorporating organic fertilizers for a more sustainable approach.

Step 7: Pruning and Staking

Prune the lower branches to improve air circulation and stake the plants to support heavy fruit loads. This prevents diseases and ensures healthier plants.

Step 8: Salicylic Acid Top Dressing

Now, let’s explore the unique top dressing method using salicylic acid from aspirin. Follow these steps:

Ingredients:

  • 6 aspirin tablets (0.5g each)
  • 0.5 liters of water
  • 10 liters of water (for dilution)
  • 1 tablespoon of 10% ammonia

Procedure:

  1. Grind the six aspirin tablets (0.5g each) and dissolve them in 0.5 liters of water.
  2. Boil the solution for 10 minutes with a covered lid.
  3. After boiling, dilute the solution in 10 liters of water.
  4. Add 1 tablespoon of 10% ammonia and mix well.

Application:

  • Spray the solution on plant leaves in the evening or early morning, 5-7 days after planting or germination.
  • Repeat every two to three weeks for optimal results.

This top dressing, rich in salicylic acid, acts as a natural growth regulator, enhancing plant immunity and resistance to diseases. The addition of ammonia further boosts its efficiency.

Step 9: Regular Maintenance

Monitor your plants regularly for pests and diseases. Early detection allows for prompt intervention and healthier plants.

Step 10: Harvesting

Harvest your tomatoes when they reach full color and size. Regular harvesting encourages continuous fruit production.

By following these steps and incorporating the salicylic acid top dressing, you’re on your way to growing tomatoes quickly and enjoying a plentiful harvest. Don’t forget to like and subscribe for more gardening tips and tricks. Happy gardening!

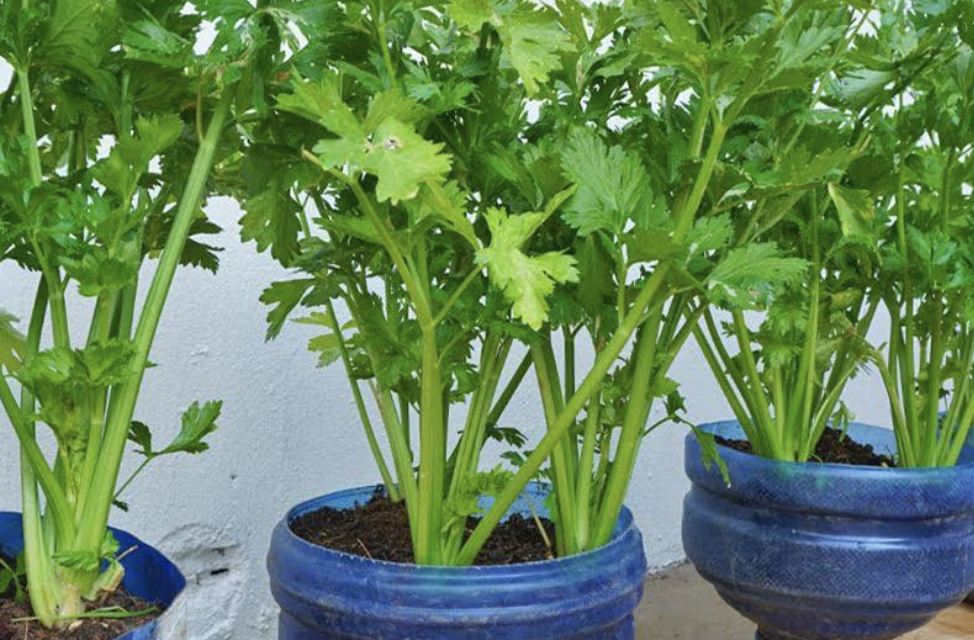
Celery isn’t just a tasty addition to your meals; it’s also a vegetable that can be easily regrown from scraps right in the comfort of your own home. Whether you’re an experienced gardener or a novice, regrowing celery is a simple and rewarding process that requires minimal effort and resources. In this comprehensive guide, we’ll walk you through the step-by-step process of regrowing celery first in water and then transplanting it into soil, all within containers.

Materials Needed:

  1. Fresh Celery: Choose a bunch of celery with healthy, crisp stalks.
  2. Containers: Opt for containers with drainage holes for both water and soil stages.
  3. Water: Use clean, room temperature water for the initial regrowth stage.
  4. Potting Mix: Select a well-draining potting mix for the soil stage.
  5. Sunlight: Find a sunny spot in your home where the celery can receive adequate sunlight.

Step 1: Harvesting and Preparing Celery Scraps

  1. Cut the Celery: Trim the celery stalks, leaving about 2 inches from the base where regrowth will occur.
  2. Remove Outer Layers: Peel away any outer layers that may hinder the regrowth process.

Step 2: Water Regrowth

  1. Place in Water: Submerge the celery base in a container with enough water to cover the cut end.
  2. Change Water Regularly: Refresh the water every few days to maintain cleanliness and provide essential nutrients.
  3. Wait for Growth: Within a week or two, new leaves should begin emerging from the center of the celery base.

Step 3: Transplanting to Soil

  1. Prepare Container: Fill a container with well-draining potting mix, leaving space for the celery base.
  2. Plant the Celery: Gently transfer the celery base from water to soil, burying it just enough to cover the roots.
  3. Water and Sunlight: Water the soil and place the container in a sunny location, ensuring at least 6 hours of sunlight daily.
  4. Maintain Moisture: Keep the soil consistently moist but not waterlogged, as celery prefers slightly damp conditions.

Step 4: Care and Harvest

  1. Fertilize (Optional): Consider using a balanced fertilizer to promote healthy growth, following package instructions.
  2. Monitor Growth: Watch as your celery plant grows and develops. Harvest outer stalks once they reach a suitable size.
  3. Continuous Harvesting: Celery is a cut-and-come-again plant, so harvest outer stalks as needed while allowing inner ones to continue growing.

By following these straightforward steps, you can experience the joy of regrowing celery at home, regardless of your gardening experience. It’s a sustainable and cost-effective way to have fresh celery readily available whenever you need it. Happy regrowing!

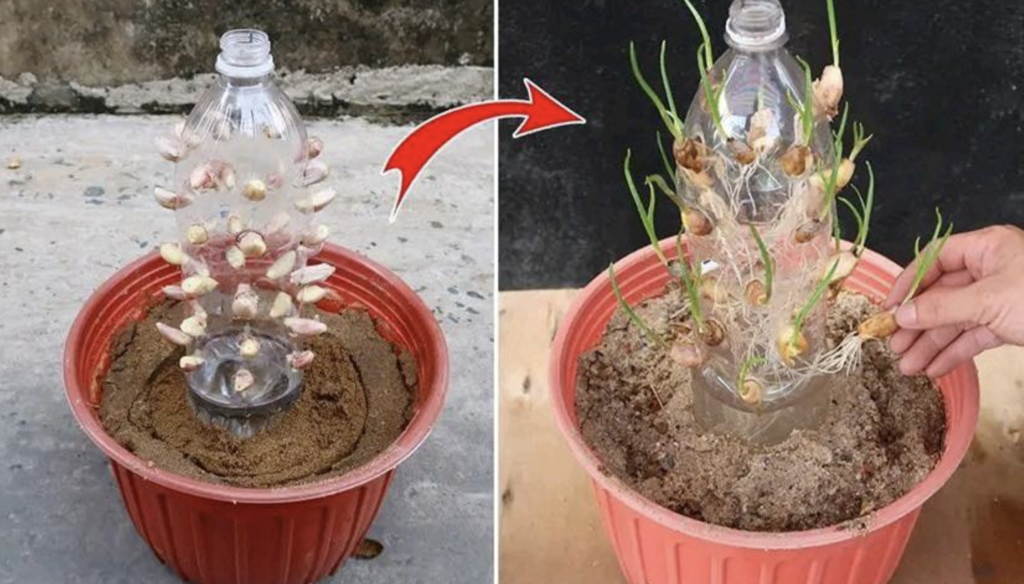
Growing garlic sprouts can be an interesting gardening experiment, especially if you’re looking for an eco-friendly approach that reuses plastic bottles. Here’s a simple method to cultivate garlic sprouts using two different sized plastic bottles.

Materials:

  • One 2-liter plastic bottle
  • One 5-liter plastic bottle
  • Garlic cloves
  • Water
  • Potting soil

Instructions:

Preparation of the 2-Liter Bottle:

  1. Take a 2-liter plastic bottle and make multiple holes around its body.
  2. Insert garlic cloves into these holes.
  3. Leave an untouched section at the bottom of the bottle, approximately 10 cm in height.
  4. Fill this bottom section with water.

Placement in Pot:

  1. Place the bottle in a pot filled with potting soil, ensuring that only the 10 cm section with water is buried in the soil.
  2. The section with the garlic cloves should remain above the soil.
  3. Make sure the bottle cap is removed.

Using the 5-Liter Bottle:

  1. Take the 5-liter bottle and cut off its base.
  2. Place it over the 2-liter bottle in the pot, acting as a greenhouse. Ensure the 5-liter bottle’s cap is closed to create a humid environment.

Watering and Waiting:

  1. Water the soil around the 2-liter bottle.
  2. Wait for approximately 7-10 days. Over this period, the garlic cloves will start to sprout.

Transplanting:

  1. Once the garlic has sprouted sufficiently, you can transplant them into the soil for further growth.

By using this method, you’re not only recycling plastic bottles but also creating a mini greenhouse environment conducive for the garlic sprouts. It’s an easy and sustainable approach to gardening!

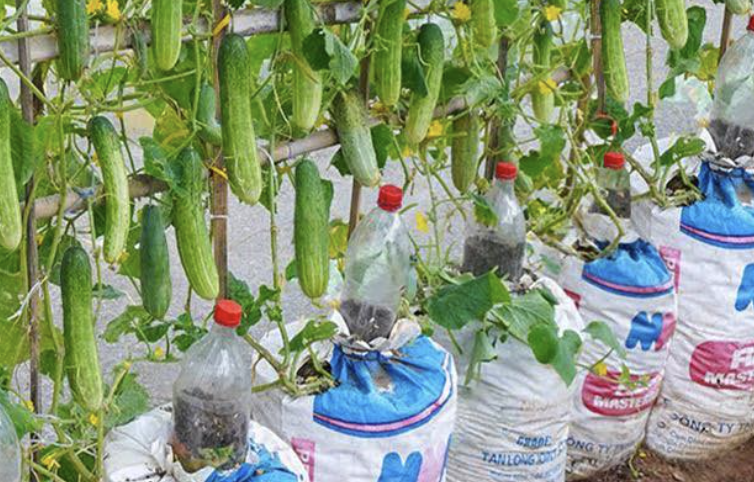
Growing cucumbers in soil bags with minimal care is indeed a creative and efficient method for cultivating this popular vegetable. Here’s a summary of the process and its benefits:

Materials and Tools:

  • Soil bags
  • Plastic bottles
  • Cucumber seedlings
  • Kitchen waste (compostable)
  • Vitamin B1 pills
  • Dishwashing foam
  • Wood grid (for support)
  • Scissors
  • Cup

Method:

  1. Prepare Soil Bags: Fill soil bags with potting mix, ensuring they are tightly closed at the bottom.
  2. Insert Plastic Bottles: Cut plastic bottles to create funnel shapes and place them in each soil bag for water reservoirs and fertilizer.
  3. Position the Bottles: Secure the bottles in the soil bags with twine or zip ties, leaving the necks exposed.
  4. Create Planting Holes: Cut holes in the bags to plant cucumber seedlings around the plastic bottles.
  5. Plant Cucumber Seedlings: Plant cucumber seedlings in the prepared holes, ensuring they are well-anchored.
  6. Provide Adequate Drainage: Make drainage holes at the bottom of each soil bag to prevent waterlogging.
  7. Support System: Install a wood grid behind the bags to support the growing cucumber vines.
  8. Regular Maintenance: Water the plants regularly, provide sunlight, and add kitchen waste and vitamin B1 after two months.
  9. Dishwashing Foam: Occasionally apply a mixture of dishwashing foam and water to deter pests.
  10. Harvest Cucumbers: Harvest ripe cucumbers regularly to encourage continuous production.

Benefits:

    • Low Maintenance: Suitable for busy individuals due to minimal care requirements.
    • Space-Efficient: Optimizes garden space by using soil bags placed in rows.
    • Recycling: Utilizes recycled plastic bottles for water reservoirs and fertilizer.
    • Continuous Harvest: Provides a steady supply of cucumbers throughout the growing season.

Conclusion: Growing cucumbers in soil bags with minimal maintenance is a resourceful gardening technique that can yield impressive results. By following the outlined steps and incorporating recycled materials like plastic bottles and kitchen waste, you can enjoy a bountiful cucumber harvest with little effort. Give this method a try and experience the convenience and productivity it offers in home gardening.