When it comes to health, paying attention to the small changes in our bodies is crucial. Sometimes, what seems like a minor issue can actually be an early warning sign of something far more serious — even cancer. Since cancer can appear in many different ways depending on its type and location, some symptoms are often mistaken for less concerning conditions.
Below, we explore 20 commonly ignored warning signs of cancer, along with practical steps you can take for prevention and early detection.
20 Often Ignored Cancer Symptoms
-
Unexplained Weight Loss – Losing weight without diet or exercise may sound good, but it can signal cancers like pancreatic, stomach, or lung.
-
Constant Fatigue – Feeling drained even after adequate rest may point to leukemia or colon cancer.
-
Persistent Fever – Fevers without infection, especially with night sweats, may be linked to leukemia or lymphoma.
-
Chronic Pain – Ongoing pain (such as headaches or backaches) that doesn’t improve with treatment could signal cancer.
-
Skin Changes – Watch for new moles, unusual darkening, yellowing of the skin/eyes, itching, or abnormal hair growth.
-
Bowel Habit Changes – Frequent constipation, diarrhea, or altered stool texture may point to colorectal cancer.
-
Difficulty Swallowing – Trouble swallowing or feeling like food is stuck can signal throat or esophageal cancer.
-
Lingering Cough or Hoarseness – A cough that won’t go away or a hoarse voice can indicate lung, throat, or thyroid cancer.
-
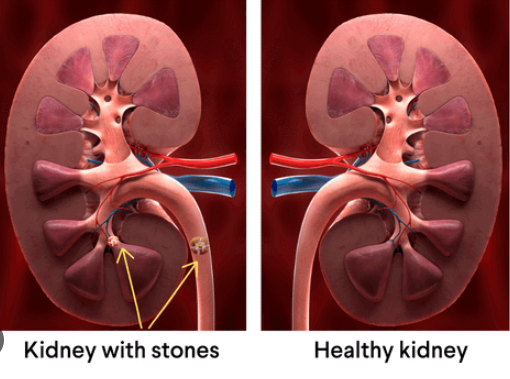
Unusual Bleeding – Blood in urine, stool, or abnormal vaginal bleeding may point to kidney, bladder, or uterine cancers.
-
Swollen Lymph Nodes – Enlarged, painless lymph nodes that don’t return to normal may indicate lymphoma.
-
Sudden Vision Changes – Unexplained vision issues could be a symptom of brain tumors.
-
Unexplained Lumps or Thickening – Any new or growing lump should be examined right away.
-
Indigestion or Heartburn – Persistent digestive discomfort may suggest stomach, esophageal, or throat cancers.
-
Shortness of Breath – Difficulty breathing can be linked to lung cancer.
-
Urinary Changes – Frequent urination, pain, or blood in urine could signal prostate or bladder cancer.
-
Non-Healing Sores – Sores in the mouth, skin, or genital area that don’t heal may be cancerous.
-
White Patches in the Mouth – Leukoplakia can develop into oral cancer if ignored.
-
Recurrent Heartburn/Indigestion – Chronic digestive discomfort, especially if unexplained, may indicate cancer.
-
Unusual Discharge or Bleeding – Spitting blood, bloody stool, or abnormal vaginal discharge can be serious red flags.
-
Feeling Full Quickly – If you feel full after eating little, it may be a sign of ovarian or other abdominal cancers.
Why These Symptoms Matter
While many of these issues may have harmless explanations, ignoring them can be dangerous. If symptoms persist, consult a healthcare professional. Early detection saves lives, making it crucial to listen to your body and act quickly when something feels off.
Preventing Cancer: Lifestyle Changes That Help
-
Eat a Nutritious Diet – Fill your plate with vegetables, fruits, whole grains, and lean protein. Antioxidants and fiber lower cancer risks.
-
Exercise Regularly – Staying active helps maintain a healthy weight and lowers the risk of colon, breast, lung, and kidney cancers.
-
Avoid Tobacco and Limit Alcohol – Both are among the top preventable causes of cancer.
-
Protect Your Skin – Use sunscreen, wear protective clothing, and avoid peak sun hours to reduce skin cancer risk.
-
Get Vaccinated – HPV vaccines reduce cervical and other genital cancers, while hepatitis B vaccination lowers liver cancer risk.
Detecting and Managing Symptoms
-
Routine Screenings – Follow your doctor’s advice for mammograms, colonoscopies, skin exams, and other checks.
-
Know Your Body – Pay attention to subtle changes — they may be early warnings.
-
Reduce Stress – Chronic stress weakens the immune system. Try meditation, yoga, or simple breathing exercises.
-
Seek Support – Talk to healthcare providers about symptoms and find emotional support through counseling or groups.
Final Thoughts
Cancer often whispers before it shouts. By learning to recognize the early signs, making smart lifestyle choices, and staying proactive with screenings, you greatly improve the chance of successful treatment. Your health is your most valuable asset — protect it by listening to your body.
Would you like me to make this version more conversational (like a health blog post for general readers), or keep it professional and structured like an informative medical guide?