Category

Health & Wellness

Category

Cooking rice with just water is a common practice, but if you’ve ever savored rice at a high-end restaurant or a luxurious hotel, you might have noticed that theirs often tastes exceptionally better. The secret? It’s not just water that they use; hotels often incorporate broths and additional ingredients to enhance the flavor, texture, and aroma of their rice. Here’s how you can replicate that restaurant-quality rice in your own kitchen.

Ingredients:

  • 1 cup of rice (your choice of white, brown, or jasmine)
  • 2 cups of chicken, vegetable, or beef broth (depending on your preference)
  • 1 tablespoon of unsalted butter or olive oil
  • Salt, to taste
  • Optional: herbs or spices (such as garlic powder, a bay leaf, or a cinnamon stick)

Instructions:

  1. Rinse Your Rice: Begin by thoroughly rinsing your rice under cold water until the water runs clear. This removes excess starch and prevents the rice from becoming gummy.
  2. Use Broth Instead of Water: Instead of water, use a broth of your choice. Chicken broth adds a mild, savory flavor, while vegetable broth keeps it light and is perfect for vegan dishes. Beef broth gives it a rich, intense taste suitable for heartier meals.
  3. Add Flavor Enhancers: Before turning on the heat, add a tablespoon of butter or olive oil. This not only adds a hint of richness but also helps to keep the rice grains separate and fluffy. If you’re feeling adventurous, add herbs or spices that complement your dish.
  4. Cook the Rice: Bring the broth to a boil in a saucepan. Add the rinsed rice and any optional spices or herbs, then stir once to distribute everything evenly. Reduce the heat to a low simmer and cover the pot. Let it cook until the rice absorbs all the liquid (about 15-18 minutes for white rice or 30-35 minutes for brown rice).
  5. Rest and Fluff: Once the rice is cooked, turn off the heat and let it sit, covered, for about 10 minutes. This allows the rice to steam and develop its flavors fully. After resting, fluff the rice with a fork to separate the grains.

Conclusion:

By simply switching water with broth and incorporating a few simple additions, you can dramatically improve the taste and texture of your rice. This method not only infuses the rice with deep, rich flavors but also elevates an everyday side dish to something special. Next time you prepare rice, try this hotel secret and watch your ordinary rice transform into an extraordinary complement to any meal.


If you’re battling foot pain that disrupts your daily activities, finding relief can feel like regaining a part of your life. Garlic and cloves, two potent natural remedies known for their medicinal properties, might just be the help you need. These ingredients are not only common in the kitchen but also have a history of use in traditional medicine for their anti-inflammatory and pain-relieving properties. Here’s how you can use garlic and cloves to help achieve pain-free feet.

The Healing Properties of Garlic and Cloves

Garlic is renowned for its anti-inflammatory effects, thanks to its high allicin content. This compound helps reduce inflammation and pain, making garlic a great choice for natural pain management. Cloves, similarly, are rich in eugenol, a natural pain reliever that also has anti-inflammatory properties. When used together, these spices can provide a powerful remedy for soothing foot pain.

How to Use Garlic and Cloves for Foot Pain

1. Garlic and Clove Oil Massage

  • Ingredients:
    • 2 cloves of garlic, finely minced
    • 10 whole cloves
    • ½ cup of olive oil or coconut oil
  • Preparation:
    • Gently heat the olive oil or coconut oil in a small saucepan.
    • Add the minced garlic and whole cloves.
    • Simmer on low heat for about 10 minutes, then allow it to cool.
    • Strain the oil to remove solids.
  • Usage:
    • Massage the oil into the affected areas of your feet once it is comfortably warm. Perform the massage before bedtime to allow the oil to work overnight.

2. Garlic and Clove Tea Soak

  • Ingredients:
    • 3 cloves of garlic, crushed
    • 1 tablespoon of ground cloves
    • 1 liter of hot water
  • Preparation:
    • Add the crushed garlic and ground cloves to the hot water in a large basin that can fit your feet.
    • Let the mixture steep until it reaches a comfortable temperature.
  • Usage:
    • Soak your feet in the basin for 20-30 minutes.
    • Do this daily for a week to help reduce inflammation and alleviate pain.

Additional Tips for Managing Foot Pain

  • Proper Footwear: Wearing shoes that fit well and offer good support can prevent further foot pain.
  • Foot Exercises: Engage in stretches and strengthening exercises specifically designed for foot health.
  • Cold and Heat Therapy: Apply ice packs to reduce acute inflammation and use heat therapy for relaxing stiff muscles and reducing chronic pain.
  • Elevate Your Feet: Whenever possible, elevate your feet to reduce swelling.

Conclusion: Natural Solutions for Foot Health

Turning to natural remedies like garlic and cloves can be an effective way to manage foot pain without relying on pharmaceuticals. These remedies are easy to prepare, affordable, and can be a comforting ritual in your daily routine. If symptoms persist despite these measures, it is crucial to consult a healthcare professional to explore other underlying causes of your pain. Rediscover your stride and enjoy a more active, pain-free life with the help of garlic and cloves.

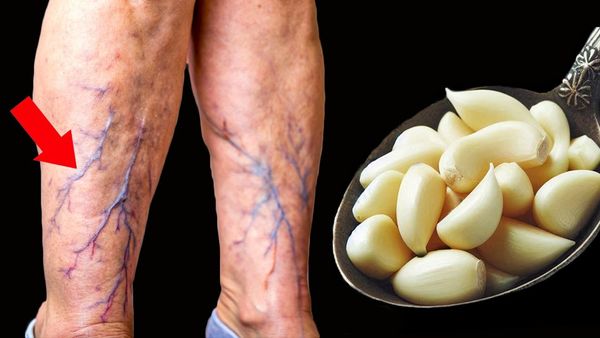
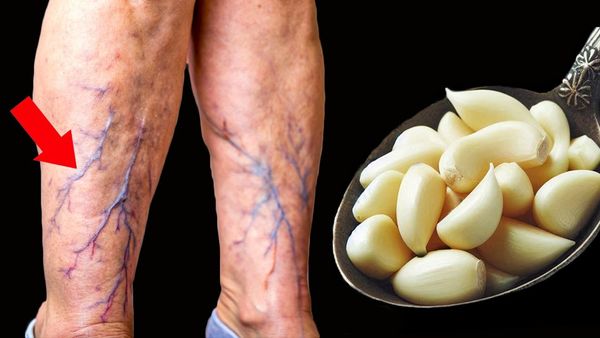
Garlic isn’t just an ordinary ingredient found in your kitchen; it’s a powerful natural remedy with incredible medicinal properties. Not only is garlic known for its anti-inflammatory properties, but it also helps improve circulation, making it an effective solution for reducing the appearance of varicose veins and relieving associated inflammation. Let’s explore how garlic performs its magic and how you can use it effectively.

Why Garlic Works for Varicose Veins

Improves Blood Circulation

Garlic contains sulfur compounds like allicin that enhance blood flow and prevent blood clots, ultimately reducing pressure in the veins.

Reduces Inflammation

Thanks to its natural anti-inflammatory properties, garlic can ease the swelling and discomfort caused by varicose veins.

Strengthens Vein Walls

Garlic is packed with antioxidants that protect and strengthen blood vessel walls, reducing the likelihood of further vein damage.

Detoxifies the Blood

By helping remove toxins from the blood, garlic plays a crucial role in promoting vein health.

How to Use Garlic for Varicose Veins

1. Garlic Oil Massage

Ingredients:

  • 5–6 fresh garlic cloves
  • 2 tablespoons olive oil
  • Juice of 1 lemon

Instructions:

  1. Prepare the Oil:
    • Crush the garlic cloves into a paste and mix them with olive oil and lemon juice.
    • Let the mixture sit for 12–24 hours to infuse.
  2. Apply to Affected Areas:
    • Massage the infused oil onto the varicose veins in a circular, upward motion.
    • Cover the area with a warm cloth for 15–20 minutes to enhance absorption.
  3. Repeat:
    • Use this remedy daily for at least 2 weeks to observe noticeable results.

2. Garlic Infusion for Internal Use

Ingredients:

  • 2–3 garlic cloves
  • 1 cup warm water
  • Optional: honey or lemon for flavor

Instructions:

  1. Activate the Allicin:
    • Crush the garlic cloves and let them sit for 10 minutes to activate allicin.
  2. Prepare the Infusion:
    • Add the crushed garlic to warm water and let it steep for 5 minutes.
    • Strain the infusion and drink it.
  3. Consume:
    • Consume the infusion once daily to improve circulation and reduce inflammation from within.

Additional Tips for Success

To optimize vein health and the effectiveness of garlic, here are some additional tips to consider:

  • Follow a balanced diet rich in fruits, vegetables, and whole grains.
  • Engage in regular physical activity, such as walking or stretching, to improve circulation.
  • Elevate your legs for 15–20 minutes daily to alleviate pressure on the veins.

Precautions

While garlic is generally safe, it’s essential to take precautions:

  • Before extensively using garlic topically, perform a patch test to check for any mild irritation.
  • If you’re taking blood-thinning medications, consult your doctor before increasing your garlic consumption.

What to Expect

Here’s what you can expect when using garlic for varicose veins:

Week 1–2: Reduced swelling and improved comfort around varicose veins.
Week 3–4: Gradual fading of visible veins and smoother skin appearance.

Final Thoughts

Garlic is a natural, affordable, and effective solution for varicose veins and inflammation. With consistent use, you’ll experience significant improvement in both the appearance and discomfort of varicose veins. Give this incredible remedy a try and witness the magic of garlic at work! ✨
Wouldn’t it be great if we had a natural remedy that could help cleanse our blood vessels, improve circulation, and support heart health? Well, the good news is that such a remedy actually exists! By combining a few powerful ingredients, you can create a drink packed with antioxidants and anti-inflammatory compounds that is not only easy to prepare but also highly beneficial for your overall cardiovascular health.

Ingredients

  • 1 medium-sized Onion
  • 6-8 cloves of Garlic
  • 3 cm piece of Ginger
  • 2 Lemons
  • 2 tablespoons of Turmeric (powdered or freshly grated)
  • 1/8 teaspoon of Black Pepper
  • 2 tablespoons of raw and organic Honey (if possible)
  • 1 liter of Water

Instructions

Prepare the Ingredients

  • Peel and finely chop the onion, garlic, and ginger.
  • Wash the lemons thoroughly and slice them into thin rounds, keeping the peel.

Boil the Mixture

  • In a pot, bring 1 liter of water to a boil.
  • Add the chopped onion, garlic, and ginger to the boiling water.
  • Reduce the heat and let it simmer for 10 minutes.

Add Lemon and Turmeric

  • Add the lemon slices and turmeric to the pot.
  • Continue to simmer for another 5 minutes.

Cool and Strain

  • Remove the pot from heat and let the mixture cool slightly.
  • Strain the liquid into a glass jar or bottle, discarding the solids.

Add Honey and Black Pepper

  • Once the mixture has cooled to a warm temperature (not hot), stir in the honey and black pepper.
  • Mix well until fully combined.

How to Use

  • Take 1 tablespoon of this remedy daily, preferably in the morning on an empty stomach.
  • Store the mixture in the refrigerator for up to a week. Shake well before use.

Health Benefits of the Ingredients

  • Onion: Lowers cholesterol and reduces inflammation.
  • Garlic: Improves blood flow, lowers blood pressure, and helps prevent plaque buildup in arteries.
  • Ginger: Boosts circulation and reduces oxidative stress.
  • Lemon: Rich in vitamin C, it promotes heart health and fights free radicals.
  • Turmeric: Contains curcumin, which reduces inflammation and prevents blood clots.
  • Black Pepper: Enhances the absorption of curcumin for maximum benefits.
  • Honey: A natural antioxidant that supports cardiovascular health and adds a pleasant taste.

Precautions

  • Consult your doctor before using this remedy if you’re on medication, pregnant, or have a medical condition.
  • Avoid excessive consumption, as it may lead to stomach upset or other side effects.

Conclusion

Taking care of our cardiovascular health is crucial, especially as we age. With just one tablespoon of this natural remedy a day, you can start cleansing your blood vessels and supporting your heart health. It’s a simple and effective solution that harnesses the power of these amazing ingredients. Give it a try and enjoy the benefits! ✨

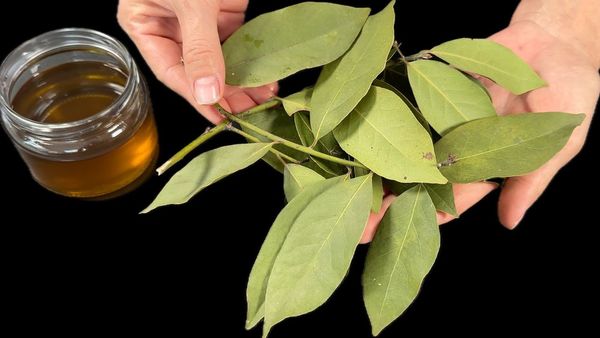
Bay leaves have been cherished for their culinary and medicinal benefits for a long time. But did you know that they can also provide natural relief for joint discomfort? Packed with anti-inflammatory and analgesic compounds, bay leaves can help reduce swelling, soothe pain, and improve mobility. With this simple remedy, you may start feeling the spring in your step, just like in your younger days, in just one week!

Why Bay Leaves Work

  • Anti-Inflammatory Properties: Bay leaves contain eugenol, a compound known for reducing inflammation in joints and muscles.
  • Pain Relief: The natural oils present in bay leaves have a soothing effect on sore areas.
  • Improved Circulation: Using bay leaves promotes blood flow, which aids in healing and improves mobility.

How to Use Bay Leaves for Joint Pain

1. Bay Leaf Compress

Ingredients:

  • 5–6 dried bay leaves
  • 2 cups of water
  • A clean cloth or gauze

Instructions:

  1. Boil the bay leaves in water for 10 minutes to extract their healing properties.
  2. Let the mixture cool slightly and then soak a clean cloth or gauze in the liquid.
  3. Apply the damp cloth to the affected joint and wrap it securely.
  4. Leave it on for 20–30 minutes, then remove and pat the area dry.
  5. Repeat this process twice daily for the best results.

2. Bay Leaf Oil Massage

Ingredients:

  • 10 dried bay leaves
  • 1/2 cup of olive oil
  • A glass jar

Instructions:

  1. Crush the bay leaves and place them in a clean, dry glass jar.
  2. Pour olive oil over the leaves until they are completely submerged.
  3. Seal the jar and let it sit in a cool, dark place for 5–7 days.
  4. Strain the oil and use it to gently massage your joints daily.

3. Bay Leaf Paste

Ingredients:

  • 5 dried bay leaves (ground into a powder)
  • A few tablespoons of warm water

Instructions:

  1. Mix the bay leaf powder with warm water to form a paste.
  2. Apply the paste directly to the affected joint.
  3. Cover with a bandage and leave it on for 30 minutes.
  4. Rinse off with warm water and repeat daily.

What to Expect

With consistent use of bay leaves, you can expect the following benefits:

  • Reduced joint pain and stiffness
  • Improved flexibility and range of motion
  • Alleviated swelling and inflammation

Pro Tips

  • Combine this natural remedy with gentle stretching or yoga to enhance results.
  • Stay hydrated to support your joints and overall health.
  • Consult your doctor before use if you have allergies or chronic conditions.

Give this natural bay leaf remedy a try and discover the joy of walking pain-free once again! ✨

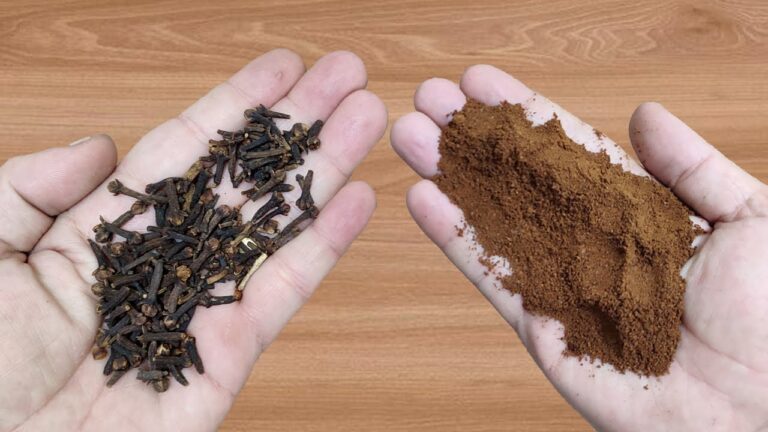
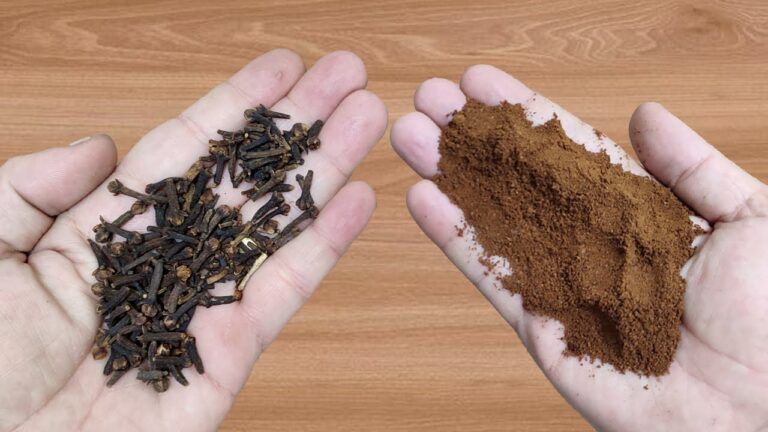
Did you know that you can create the flavor of cloves right in your own kitchen, without ever having to rush to the market? It’s as simple as pairing ground coffee with a little creativity. Let’s dive into this handy tip and see how it works!

Why Cloves?

Cloves are cherished for their warm, spicy aroma and distinct taste. They’re often used to enhance sweet and savory dishes or to add depth to beverages. But if you don’t have cloves on hand, coffee might just save the day.

The Coffee-Clove Connection

Ground coffee, especially darker roasts, has naturally rich, earthy, and slightly spicy undertones that can mimic the complexity of cloves when paired correctly. Here’s how you can achieve that flavor:

  1. Choose a Bold Coffee
    Opt for a robust blend or a dark roast. These types of coffee have stronger notes that pair well with the essence of cloves.
  2. Add Warm Spices
    Mix a small pinch of cinnamon, nutmeg, or even allspice into your coffee grounds before brewing. These spices complement coffee’s natural warmth and bring out clove-like flavors.
  3. Brew and Taste
    Brew your coffee as usual, and enjoy the subtle, spicy undertones that emerge. It’s not exactly like having whole cloves, but it’s close enough to work in a pinch!

Where Can You Use This?

This coffee-and-spice trick is excellent for:

  • Baking: Use it in recipes like spiced cookies, cakes, or muffins.
  • Beverages: Make spiced lattes or teas with a hint of “clove.”
  • Savory Dishes: Add a spoonful of this mix to marinades or sauces that call for cloves.

A Kitchen Hack Worth Trying

This simple hack not only saves you a trip to the store but also lets you experiment with flavors in new and exciting ways. Who knew that a little coffee could step in for cloves? So, the next time you’re out of cloves, brew up some coffee magic instead!

If you’re looking for a simple, natural way to boost your health, adding just three dates to your daily routine can make a world of difference. These sweet, chewy fruits are more than just a treat—they’re packed with nutrients that can transform your well-being. Let’s dive into the incredible ways dates can positively impact your body.


1. Boosts Energy Naturally

Dates are rich in natural sugars like glucose, fructose, and sucrose, providing a quick and sustained energy boost. They’re perfect for keeping you active throughout the day.

2. Supports Digestive Health

Packed with dietary fiber, dates help maintain regular digestion, ease bloating, and support a healthy gut.

3. Improves Heart Health

Dates contain potassium and magnesium, which help regulate blood pressure and reduce the risk of heart-related issues.

4. Strengthens Bones

Loaded with calcium, phosphorus, and vitamin K, dates are excellent for maintaining strong bones and reducing the risk of bone-related problems.

5. Boosts Brain Function

The antioxidants in dates, like flavonoids, help reduce inflammation and support brain health, improving focus and memory.

6. Aids in Weight Management

Despite their sweetness, dates are low in fat and provide fiber, keeping you full and helping to curb unhealthy cravings.

7. Promotes Healthy Skin

Dates are rich in vitamins C and D, which promote elasticity and fight signs of aging, giving you a natural glow.

8. Reduces Inflammation

The anti-inflammatory properties of dates can help with joint pain and reduce the risk of chronic illnesses.

9. Boosts Immunity

Dates are rich in antioxidants, which help strengthen the immune system and protect the body from free radicals.


How to Incorporate Dates into Your Day

  • Snack on them raw: Keep a few in your bag for a quick energy boost.
  • Add to smoothies: Blend dates into your favorite smoothie for natural sweetness.
  • Use in desserts: Substitute processed sugar with dates in baking for a healthier option.

By enjoying just three dates a day, you’re treating your body to a nutritional powerhouse that supports energy, health, and vitality. It’s a small habit that can lead to big, positive changes!

If you’ve been searching for a natural way to stimulate hair growth, onion peels might just be the surprising solution you need. Packed with nutrients that benefit hair health, this budget-friendly home remedy is gaining popularity for its effectiveness. After just two weeks of consistent use, many people have reported noticeable hair growth—even on bald spots! Here’s how it works and how you can try it yourself.


Why Onion Peels Work for Hair Growth

Onion peels, often discarded as kitchen waste, are rich in sulfur, antioxidants, and essential minerals. These nutrients promote hair growth by improving blood circulation to the scalp and strengthening hair follicles. Here’s why they’re so effective:

  1. Boosts Collagen Production: Sulfur stimulates collagen, which is essential for healthy hair growth.
  2. Strengthens Hair Roots: Nutrients in onion peels nourish the scalp, preventing hair breakage and thinning.
  3. Improves Blood Flow: Applying an onion peel rinse enhances circulation, ensuring follicles receive the nutrients they need.
  4. Reduces Scalp Issues: The antimicrobial properties of onion peels help combat dandruff and keep the scalp clean.

How to Use Onion Peels for Hair Growth

What You Need:

  • A handful of onion peels (from 2-3 onions)
  • 2 cups of water

Steps:

  1. Boil the Peels: Add the onion peels to water and let it boil for 10-15 minutes.
  2. Cool and Strain: Allow the mixture to cool, then strain out the peels.
  3. Apply to Scalp: After washing your hair, use the onion peel water as a rinse, focusing on the scalp.
  4. Massage: Gently massage your scalp for 5-10 minutes to enhance absorption.

How Often: Repeat this 2-3 times a week for best results.


What to Expect

With regular use, you might notice:

  • Reduced hair fall
  • Thicker, stronger hair
  • New hair growth on thinning or bald areas

Tips for Success

  • Combine this rinse with a balanced diet rich in protein and vitamins to support hair health.
  • Be consistent—results may vary, but most people see improvement within 14 days to a month.

Who knew something as simple as onion peels could be the secret to luscious locks? Try this remedy and give your hair the natural boost it deserves!

If you’re looking for a simple, sustainable way to lose weight while still enjoying your meals, rice and eggs might be the answer. These everyday ingredients, when combined thoughtfully, can fuel your body, keep you satisfied, and help you achieve noticeable weight loss. Here’s how this combination works and tips to make it effective.


Why Rice and Eggs Work for Weight Loss

  1. High in Protein: Eggs are an excellent source of protein, which helps boost metabolism, curb hunger, and promote muscle growth.
  2. Low in Calories: When eaten in moderation, rice provides a satisfying base that is low in fat and calories.
  3. Balanced Energy: The carbs in rice provide energy, while the eggs stabilize blood sugar levels, preventing cravings.
  4. Easy to Digest: Both rice and eggs are gentle on the stomach, making them great for digestion and reducing bloating.

How to Lose Weight with Rice and Eggs

1. Focus on Portion Control

  • Keep rice portions to about ½ cup per meal (preferably brown rice for added fiber).
  • Pair with 2 boiled or poached eggs for protein.

2. Stick to Balanced Meals

  • Add vegetables like spinach, broccoli, or carrots to increase nutrients and fiber.
  • Avoid frying the eggs or adding heavy sauces to rice.

3. Eat Regularly, Not Excessively

  • Have 3 main meals and 1-2 small snacks daily to keep your metabolism active.
  • Snack on fruits, nuts, or a boiled egg for extra energy.

4. Hydrate Well

  • Drink plenty of water to stay hydrated and help your body metabolize fats.

A Sample Day’s Meal Plan

  • Breakfast: 2 boiled eggs, ½ cup of cooked rice, and a handful of steamed spinach.
  • Snack: An apple or a handful of almonds.
  • Lunch: ½ cup of brown rice, 2 scrambled eggs (no oil), and stir-fried vegetables.
  • Snack: A boiled egg or a small piece of dark chocolate.
  • Dinner: ½ cup of rice with a vegetable omelet and a side salad.

Why It Works

By keeping meals simple and nutrient-dense, you provide your body with the essentials it needs without overloading on calories. The protein in eggs promotes fat burning, while rice provides sustained energy, helping you lose belly fat naturally.


Results

With consistency, portion control, and an active lifestyle, this approach can help you lose up to 15 kg in a month while feeling full and satisfied. Start today and watch the belly fat melt away!

Coughing and lung discomfort can be relieved with natural remedies that soothe and clear the respiratory system. These easy-to-make recipes–hot bay leaf tea and honey-lemon syrup infused with bay leaves–provide comfort and relief. Let’s dive into these gentle and nourishing remedies that you can prepare at the comfort of your home.

Bay Leaf Tea

This warming tea harnesses the natural benefits of bay leaves, known for their anti-inflammatory and antimicrobial properties.

Ingredients:

  • 3 fresh or dried bay leaves
  • 2 cups of water
  • 1 teaspoon of honey (optional)
  • A slice of lemon (optional)

Instructions:

  1. Boil 2 cups of water in a small pot.
  2. Add the bay leaves to the boiling water.
  3. Reduce the heat and let the leaves simmer for 5–7 minutes.
  4. Remove from heat and strain the tea into a cup.
  5. Sweeten with honey and add a slice of lemon, if desired.

Sip this tea slowly, allowing the steam to open your airways while the tea soothes your throat.

Honey-Lemon Syrup with Bay Leaves

This natural syrup combines the soothing qualities of honey, the vitamin C boost of lemon, and the lung-cleansing properties of bay leaves.

Ingredients:

  • 1 cup of raw honey
  • 1 lemon, thinly sliced
  • 3 fresh or dried bay leaves

Instructions:

  1. In a small saucepan, combine honey, lemon slices, and bay leaves.
  2. Warm the mixture over low heat, stirring gently to ensure the honey doesn’t boil.
  3. Allow the ingredients to infuse for 15-20 minutes.
  4. Remove from heat and let it cool. Strain into a clean jar.

Take 1 teaspoon of this syrup 2-3 times a day for relief from coughing and lung discomfort.

Why These Remedies Work

Bay leaves have natural compounds that support respiratory health by reducing inflammation and promoting clearer airways. Additionally, honey acts as a natural cough suppressant and soothes the throat, while lemon provides immune-boosting vitamin C. Together, these ingredients create a harmonious blend to support lung health and overall well-being.

Give these recipes a try for a natural, comforting approach to clearer lungs and easier breathing.