Category

Health & Wellness

Category

Banana peels, often discarded as waste, can be repurposed into a potent natural fertilizer for your garden. Rich in essential nutrients like potassium, phosphorus, and calcium, these humble peels offer numerous benefits to your plants. In this article, we’ll explore a straightforward method for creating homemade banana peel fertilizer that will nourish your garden and promote healthy growth.

Materials Needed: Before you begin, gather the following materials:

Banana Peels: Collect several ripe banana peels. The quantity will depend on how much fertilizer you intend to make. Jar or Container: You’ll need a jar or container with a lid to hold the banana peels and water. Water: Water is essential for soaking the banana peels and initiating the fermentation process. Time and Patience: Making banana peel fertilizer requires patience as the peels need time to ferment and release nutrients.

Steps to Make Homemade Banana Peel Fertilizer:

Step 1: Collect Banana Peels Gather ripe banana peels over a few days until you have enough to make your fertilizer.

Step 2: Cut the Peels Cut the banana peels into smaller pieces. This will accelerate the decomposition process.

Step 3: Place in a Jar Place the cut banana peels into your jar or container, filling it about halfway.

Step 4: Add Water Pour water into the jar, ensuring that the banana peels are fully submerged. Seal the jar with the lid.

Step 5: Fermentation Allow the jar to sit in a cool, dark place for approximately a week. During this time, the banana peels will ferment, releasing valuable nutrients into the water.

Step 6: Strain the Liquid After a week, strain the liquid from the jar into another container. This liquid is your homemade banana peel fertilizer.

Step 7: Dilute and Use To use the banana peel fertilizer, dilute it with water. A common ratio is one part banana peel liquid to five parts water. Adjust the concentration based on your plants’ needs.

Step 8: Water Your Plants Apply the diluted banana peel fertilizer directly to the soil around the base of your plants. Avoid getting the fertilizer on the leaves to prevent staining.

Benefits of Banana Peel Fertilizer:

Rich in Nutrients: Banana peels provide essential nutrients like potassium, phosphorus, and calcium, promoting flower and fruit development, as well as root growth. Cost-Effective: Homemade banana peel fertilizer offers a budget-friendly alternative to store-bought fertilizers. Reduced Waste: Repurposing banana peels reduces kitchen waste and contributes to a more sustainable lifestyle. Environmentally Friendly: This natural fertilizer is free from harmful chemicals, making it safe for both your plants and the environment. By following these simple steps, you can transform discarded banana peels into a valuable resource for your garden. Homemade banana peel fertilizer is an eco-friendly, cost-effective solution that will help your plants thrive and flourish. Give it a try and witness the benefits of harnessing the power of nature in your garden.

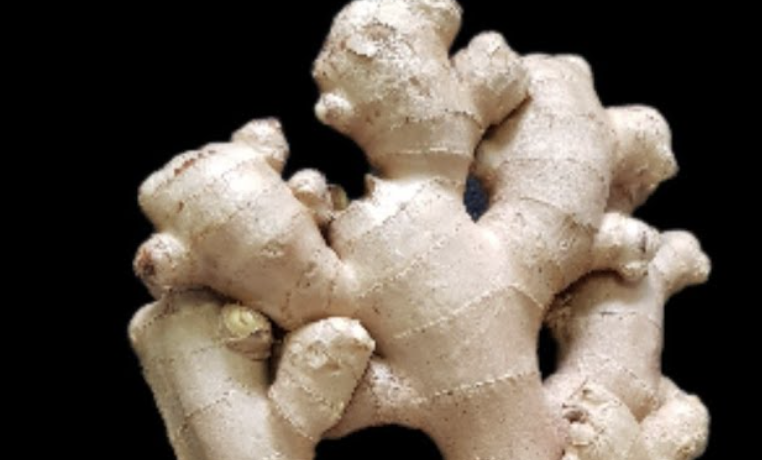
In the pursuit of radiant, youthful skin, nature often offers the most potent solutions. Among these, the combination of ginger and cornstarch stands out as a remarkable duo, providing a natural boost to your skincare routine. This blend, celebrated for its simplicity and effectiveness, promises to nurture your skin, leaving it glowing and smooth, without the worry of harsh chemicals.

Ginger: The Root of Radiance: Ginger is a true superhero in natural skincare, boasting high levels of antioxidants. These antioxidants combat free radicals, reducing inflammation and promoting even-toned, smooth skin. Additionally, ginger’s ability to enhance blood circulation contributes to its skin-rejuvenating properties, delivering essential nutrients to skin cells and imparting a vibrant, healthy glow.

Cornstarch: A Gentle Power: Despite its humble reputation, cornstarch is a gentle giant in the realm of natural beauty. Known for its soothing properties, cornstarch calms irritated skin while providing a silky-smooth texture. Its oil-absorbing qualities make it an excellent natural remedy for maintaining a matte, fresh appearance throughout the day.

A Winning Combination: When ginger and cornstarch are combined, they create a potent, natural alternative to commercial anti-aging products. This blend works to tighten and firm the skin, visibly reducing the appearance of fine lines and wrinkles. By stimulating collagen production, the foundation of youthful skin, this natural duo helps maintain elasticity and firmness, revealing a complexion that’s not only beautiful on the surface but also healthy and resilient from within.

How to Use This Magic Blend: Crafting a ginger-cornstarch mask is simple and cost-effective. Begin by grating fresh ginger and mixing it with cornstarch and a small amount of water to create a paste. Apply this mixture to your face, allowing it to dry gently as you relax. Rinse off with warm water to unveil soft, radiant skin.

In conclusion, the combination of ginger and cornstarch epitomizes the power of natural ingredients in achieving beautiful, youthful skin. This easy-to-make, affordable skincare solution offers a delightful way to pamper your skin, demonstrating that nature’s bounty is endlessly generous. Embrace the natural path to radiant, wrinkle-free skin today, and your complexion will thank you!

Imagine stepping into a sun-drenched Italian kitchen, the soul of the household, where the timeless art of cheese-making is passed down through the generations. Today, we’re bringing that cherished tradition into your kitchen with a recipe that’s both simple and steeped in history. With just vinegar and milk, and a mere 10 minutes of your time, you can craft a homemade cheese that would make any Italian nonna proud.

The Easiest Cheese You’ll Ever Make

You might believe cheese-making to be a lengthy process requiring specialized cultures and a lot of patience. But this recipe dispels those notions. It’s as effortless as it is delicious – a testament to the magic of simplicity in cooking.

From Milk to Cheese in a Flash

Here’s what you’ll need to create this delightful homemade cheese:

  • Milk: Opt for fresh milk, straight from the dairy aisle of your favorite store or, if available, sourced directly from a local farm.
  • White Vinegar: This magical ingredient transforms milk into curds and whey, like a culinary alchemist.

Step-by-Step to Cheesy Bliss

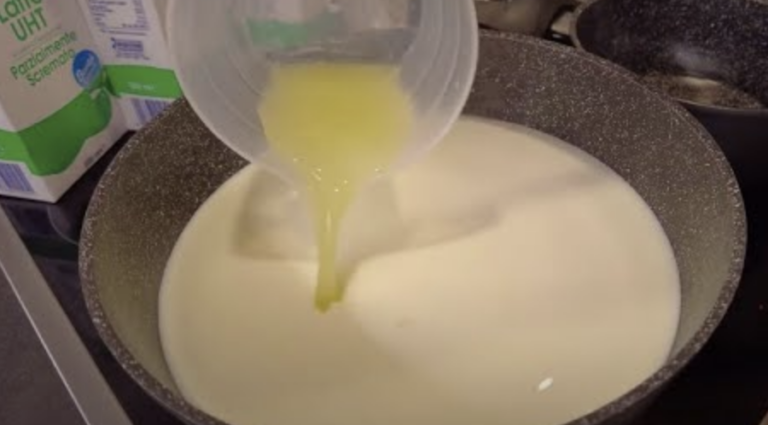
  1. Warm the Milk: Pour your milk into a pot and gently warm it over medium heat until it’s steaming with tiny bubbles around the edges, just before it reaches a boil.
  2. Add the Vinegar: Stir in a few tablespoons of white vinegar once the milk is warm. Almost immediately, the milk will curdle, signaling the formation of cheese.
  3. Let it Sit: Remove the pot from the heat and allow it to sit for a couple of minutes. This allows the curds to gather and intensifies the flavor.
  4. Strain and Press: Line a colander with cheesecloth and pour the mixture through it to separate the curds from the whey. Gently press the curds to remove excess liquid.
  5. Flavor it Up: Add a pinch of salt, fresh herbs, or any other desired flavorings to customize your cheese.

Ready to Enjoy

In no time, you’ll have a batch of soft, fresh cheese ready to elevate your culinary creations. Spread it on crusty bread, sprinkle it over salads, or savor it straight from the spoon.

A Tradition Continued

Each time you make this cheese, you’re not just following a recipe – you’re upholding a piece of culinary heritage in your own kitchen. It’s a celebration of tradition, simplicity, and the extraordinary flavors that emerge from basic ingredients. So here’s to tradition, to simplicity, and to homemade cheese that’s ready in a flash – just like Nonna used to make!

Purslane (Portulaca oleracea) is often overlooked as a common weed, but it’s actually a nutritional powerhouse, packed with omega-3 fatty acids, vitamins (especially A and C), minerals, and antioxidants. Thriving in various climates and conditions, purslane is both versatile and resilient, making it a valuable addition to your diet. Here’s how to identify purslane and incorporate it into your meals with a simple, nutritious recipe.

Identifying Purslane

Characteristics:

  • Leaves: Small, oval-shaped, and fleshy, resembling a jade plant’s leaves.
  • Stems: Thick, reddish, and succulent.
  • Flowers: Tiny yellow flowers that only open on sunny mornings.
  • Growth Habit: Grows close to the ground and forms dense mats in gardens, fields, and cracks in sidewalks.

Foraging for Purslane

Purslane can be found in gardens, fields, and along roadsides. Choose plants in areas free from chemical pesticides and away from roads to avoid contamination. Harvest early in the morning when the leaves are most succulent.

Culinary Uses

Purslane can be eaten raw or cooked, offering a slightly lemony and salty flavor. It’s great in salads, sandwiches, and soups. Here’s a simple recipe to try:

Recipe: Purslane and Tomato Salad

Ingredients:

  • 2 cups fresh purslane, leaves and tender stems
  • 1 cup cherry tomatoes, halved
  • 1/4 cup red onion, thinly sliced
  • 2 tablespoons olive oil
  • 1 tablespoon apple cider vinegar
  • Salt and pepper to taste
  • Optional: Feta cheese or olives for garnish

Instructions:

  1. Prepare the Purslane: Rinse thoroughly under cold water and pat dry.
  2. Combine the Salad Ingredients: In a large bowl, mix purslane, cherry tomatoes, and red onion.
  3. Make the Vinaigrette: Whisk together olive oil, apple cider vinegar, salt, and pepper in a small bowl.
  4. Dress the Salad: Pour the vinaigrette over the salad and toss gently to coat.
  5. Serve: Garnish with feta cheese or olives if desired. Serve immediately.

Nutritional Benefits

Purslane is rich in omega-3 fatty acids, Vitamin A, Vitamin C, magnesium, and potassium, promoting heart health, brain function, and reducing inflammation.

Purslane is a versatile and nutritious addition to your diet, whether foraged in the wild or cultivated in your garden. Embrace this resilient plant and enjoy its flavor and health benefits in your culinary creations!

Swelling and joint pain in the legs can be a real hindrance to daily activities, but relief may be closer than you think. Dive into the world of natural remedies with a simple yet powerful solution: a soothing soak of rice and baking soda. Let’s explore how these pantry staples can work wonders for your comfort and well-being.

The Dynamic Duo: Rice and Baking Soda

Rice: Renowned for its versatility in cuisine, rice doubles as a gentle exfoliant when used in a soak. It stimulates circulation and reduces inflammation, providing relief from swelling and joint pain.

Baking Soda: With its alkaline properties, baking soda neutralizes acidity in the body, a common trigger for inflammation. Incorporating baking soda into the soak helps alleviate discomfort and promotes overall well-being.

Crafting Your Soothing Soak

Ingredients:

  • 1/2 cup of uncooked rice
  • 2 tablespoons of baking soda
  • Warm water

Preparation:

  1. Fill a basin or bucket with warm water, ensuring it covers your feet and ankles comfortably.
  2. Add the uncooked rice and baking soda to the water, stirring until the baking soda dissolves.
  3. Soak your feet for 15 to 20 minutes, gently massaging the affected areas for added relief.

Benefits Beyond Relief

Relaxation: Beyond reducing swelling and joint pain, this soak offers a relaxing ritual to soothe tired feet and calm the mind.

Skin Softening: The gentle exfoliation from the rice leaves your skin feeling soft and rejuvenated.

Tranquility: Take advantage of this moment of self-care by adding a few drops of essential oil, such as lavender or chamomile, for added relaxation and aromatherapy benefits.

Conclusion: Embrace Comfort in Simplicity

Experience relief and relaxation with the humble combination of rice and baking soda. This natural remedy offers not only relief from swelling and joint pain but also a tranquil escape right in the comfort of your home. Discover the power of simplicity and find comfort in every step of your day. Cheers to a happier, more comfortable you!

In our pursuit of holistic health, the significance of digestive well-being often takes center stage. Recognizing the pivotal role our digestive system plays, ancient wisdom and modern science converge to spotlight two remarkable allies: ginger and dates. Harnessing their potent properties, we embark on a journey toward optimal health and vitality.

The Healing Harmony of Ginger

Anti-Inflammatory Wonder: Ginger, revered for centuries in traditional medicine, boasts formidable anti-inflammatory properties. It serves as a natural remedy for a spectrum of digestive woes, from nausea to bloating and gas.

Dates: Nature’s Nutrient Powerhouse

Fiber-Rich Marvel: Dates, nature’s gift abundant in fiber, vitamins, and minerals, nurture a healthy digestive tract. Their gentle cleansing action supports intestinal health, contributing to overall well-being.

Crafting the Digestive Elixir

Ingredients:

  • 1-2 inches of fresh ginger root
  • 4-5 pitted dates
  • 1 liter of water

Preparation:

  1. Prepare the Ingredients: Thinly slice the ginger and chop the pitted dates to enhance flavor infusion.
  2. Simmer: In a large pot, bring water, ginger, and dates to a gentle boil, then simmer for 20 minutes to infuse the elixir with their nutritive essence.
  3. Strain and Serve: After simmering, strain the mixture to yield a soothing elixir, to be enjoyed warm or chilled based on preference.

Nurturing Wellness, One Sip at a Time

Embrace this ginger and date elixir as more than a remedy; it’s a proactive stride toward digestive harmony. By calming the stomach, bolstering liver function, and fostering intestinal cleanliness, this natural tonic becomes a cornerstone of your wellness journey.

Embrace the Wisdom of Nature

Incorporating these gentle yet powerful solutions into our daily rituals can wield profound effects on our health. So, when seeking relief from digestive discomfort or aiming to fortify gut health, heed the call of nature’s bounty—ginger and dates. Here’s to your health and the joy of a thriving digestive system!

Lemon seeds, often overlooked and discarded, hold untapped potential that can add value to your culinary endeavors and home environment. Here’s how you can make the most of these tiny treasures:

1. Cultivate Your Own Lemon Tree

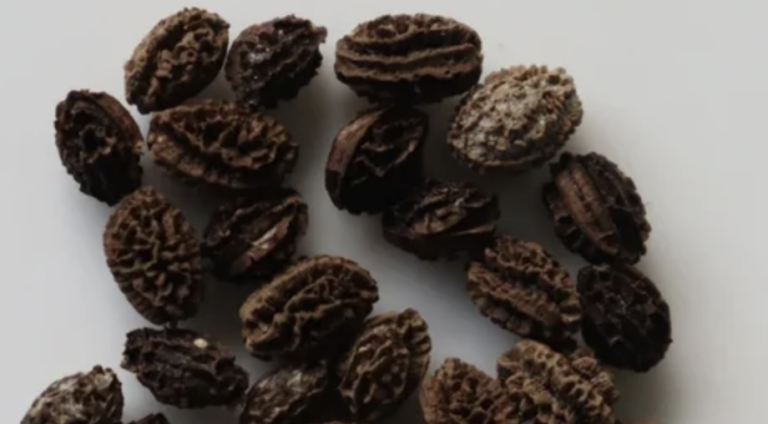
  • Save and Dry Lemon Seeds: After juicing a lemon, rinse the seeds under room temperature water and spread them on a paper towel to dry. Peel off the outer layer of the seeds with tweezers.
  • Initiate Germination: Place the dried seeds between layers of damp cotton in a shallow dish. Keep the cotton moist and the area humid to encourage germination.
  • Transfer to Pot: Once the sapling develops roots, transfer it to a small pot filled with soil and perlite for proper drainage. Provide regular care, warmth, and consistent moisture for optimal growth.

2. Create Natural Fresheners

  • Harness Citrus Aroma: Rinse lemon seeds without removing the skin, as they retain their citrus scent even after washing.
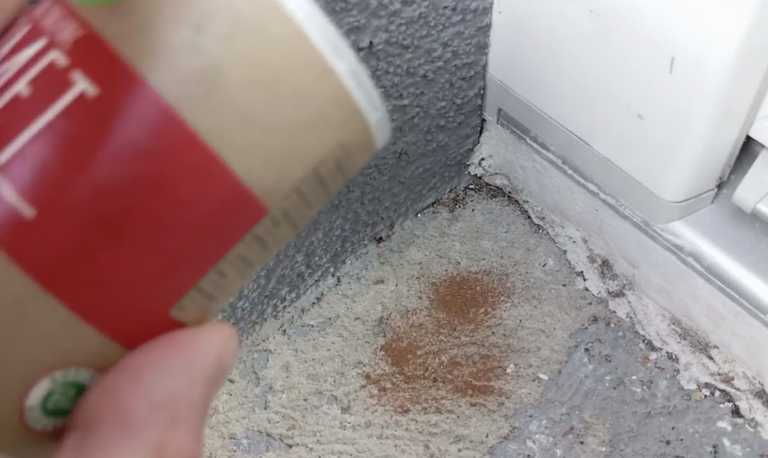
  • Use in Small Bags: Place the seeds in a small canvas bag and position them in drawers, closets, or bathrooms to freshen up the space. They can also be attached to radiators in winter to emit a delightful lemon fragrance, enhancing your home’s ambiance.

Discovering the versatility of lemon seeds adds a touch of nature’s magic to your daily life, whether through cultivating your own lemon tree or using them as natural fresheners. Don’t let these seeds go to waste; instead, unlock their potential and enjoy the benefits they offer.

Crash diets and rapid weight loss might yield temporary results, but they often lead to unhealthy cycles of weight gain. Instead, our approach focuses on healthy lifestyle changes that are satisfying and sustainable.

Why Crash Diets Don’t Work

Short-term diets often result in rebound weight gain, leading to a cycle of frustration and disappointment. Sustainable weight loss involves making lasting changes to your eating habits and lifestyle.

The 28 Day Weight Loss Challenge Approach

Our 28 Day Weight Loss Challenge emphasizes healthy eating, regular exercise, and realistic weight loss goals of around 4-6 kilos per month. Here are 10 tips to enhance your weight loss journey:

  1. Cut Out Added Sugar: Reducing added sugar intake can blast belly fat, boost energy levels, and improve skin health. Check labels for hidden sugars and explore healthier alternatives for your sweet cravings.
  2. Boost Protein and Fiber Intake: Lean protein and fiber-rich foods keep you feeling full longer, curb hunger pangs, and promote muscle building and digestive health. Incorporate nuts, eggs, lentils, and tofu into your meals.
  3. Eliminate Processed Foods: Cut back on processed and fast foods laden with extra calories. Opt for whole grains and wholemeal versions instead of refined carbs.
  4. Meal Planning: Plan your meals and snacks to stay on track with your calorie goals. Our 28 Day Weight Loss Challenge offers customizable meal plans to suit various dietary preferences and needs.
  5. Seek Support: Connect with friends or join online communities for support and motivation. Sharing experiences and tips can keep you accountable and inspired on your weight loss journey.
  6. Incorporate Strength Training: Squats and lower body exercises strengthen muscles, improve posture, and boost calorie burning. Combine with upper body exercises like push-ups for a full-body workout.
  7. Get Sweaty with HIIT: High-Intensity Interval Training (HIIT) is effective for blasting belly fat and boosting metabolism. Even short sessions can yield significant results when combined with a healthy eating plan.
  8. Stay Hydrated: Drinking water regularly suppresses appetite, boosts metabolism, and cleanses your body. Aim for adequate hydration to support weight loss and overall health.
  9. Portion Control: Balance your meals with appropriate portions of fruits, vegetables, whole grains, protein, and healthy fats. Our meal plans offer guidance on portion sizes for optimal nutrition.
  10. Incorporate Weight Training: Weight training builds lean muscle mass, which burns calories even at rest. It shapes and tones your body while improving strength and posture.

Embrace Sustainable Change

By following these tips alongside The 28 Day Weight Loss Challenge, you’ll foster healthy habits for long-term success. Remember, sustainable weight loss is about making realistic lifestyle changes that support your well-being and fitness goals.

Toenail fungus can be an uncomfortable and embarrassing issue, but fret not! A quick and inexpensive solution awaits, utilizing three common kitchen ingredients: egg, baking soda, and apple cider vinegar.

The Power Trio of Ingredients

Each component brings its unique benefits to combat toenail fungus effectively:

  • Egg: Serves as a binding agent, ensuring the mixture adheres well to the nail.
  • Baking Soda: With potent antifungal properties, it fights fungus while neutralizing foot odor.
  • Apple Cider Vinegar: Its acetic acid content eliminates fungi and restores skin’s natural acidity disrupted by infections.

Crafting Your Toenail Fungus Remedy

Ingredients:

  • 1 egg
  • 1 teaspoon baking soda
  • 1 teaspoon apple cider vinegar

Instructions:

  1. Crack the Egg: Separate the eggshell from its contents, reserving the shell for the remedy.
  2. Mix the Ingredients: Combine baking soda and apple cider vinegar in a bowl to form a paste. Adjust the consistency with more vinegar if needed.
  3. Application: Use the clean eggshell as a makeshift bowl for your mixture. Apply the paste directly onto the affected toenail using the shell.
  4. Let It Work: Allow the mixture to sit for a few minutes before rinsing off with warm water. Gently pat dry with a towel.

Embracing Simplicity for Healthier Nails

This remedy’s simplicity underscores the efficacy of everyday ingredients. While severe cases warrant professional consultation, this home solution is an excellent initial approach. Consistency and patience are crucial, but with this simple remedy, clearer and healthier nails are within reach without breaking the bank. Take proactive steps towards better well-being, starting with this easy DIY remedy!

Garlic, revered in culinary traditions worldwide, is not only celebrated for its flavor-enhancing qualities but also prized for its myriad health benefits. From regulating blood pressure to bolstering the immune system, its nutritional prowess knows no bounds. However, preserving garlic’s freshness over time poses a challenge. Here, we unveil a chef’s clandestine method for keeping garlic fresh and usable for up to a year.

The Versatile Benefits of Garlic

Beyond its culinary charm, garlic boasts an impressive array of health properties:

  • Natural antibacterial and antiparasitic qualities.
  • Immune system strengthening attributes.
  • Anti-inflammatory prowess.
  • Regulation of the circulatory system, aiding in cardiovascular health.
  • Effectiveness against seasonal flu.

Preserving Garlic: Step-by-Step Guide

Garlic, susceptible to potency loss and spoilage, can be safeguarded using this chef-approved method:

  1. Soak the Garlic: Submerge half a kilogram of garlic cloves in warm water for an hour to soften the skin for easy peeling.
  2. Peeling and Preparing: Dry the cloves and peel off the softened skin effortlessly.
  3. Sterilize a Glass Jar: Ensure the jar is clean and sterilized to prevent bacterial growth.
  4. Adding Ingredients: Place the peeled cloves in the jar and add roughly two tablespoons of coarse salt for preservation. Include a few tablespoons of apple cider or wine vinegar to maintain integrity.
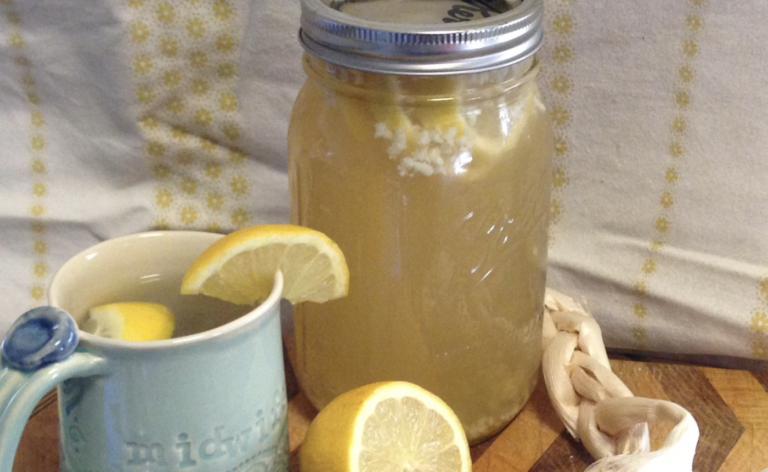
  5. Final Touches: Pour cooled boiled water into the jar, and place a lemon slice atop the garlic for added preservation. Seal the jar tightly, shake to mix ingredients, and voila!

Results and Usage

With this method, garlic cloves remain fresh for over a year, devoid of rot, and always at your fingertips. This practical approach not only saves time but also ensures you reap garlic’s full health benefits whenever needed.

This chef’s secret to preserving garlic enhances its shelf life and guarantees year-round access to its health-boosting properties. Whether you’re a culinary enthusiast or health-conscious individual, this method is both practical and effective, ensuring your kitchen remains stocked with the freshest garlic.