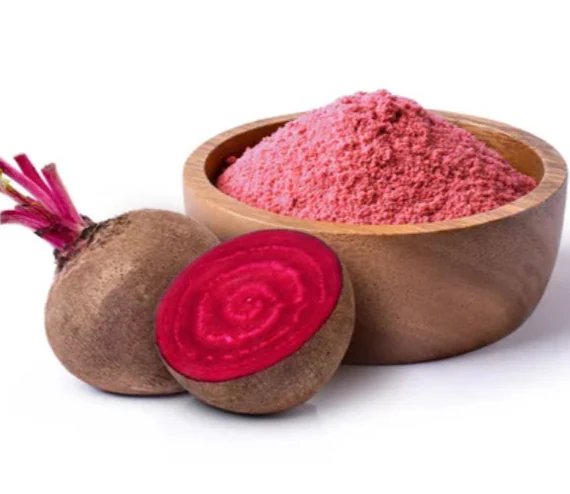
Category

Health & Wellness

Category


If you’re looking for a simple and natural way to boost your health and manage your weight, look no further than your kitchen pantry. Apple cider vinegar (ACV) has been praised for its numerous health benefits, and just one tablespoon a day can make a big difference. Let’s explore how this tangy tonic can enhance your wellness and support weight loss.

Aiding Weight Loss

One of the most talked-about benefits of apple cider vinegar is its ability to help with weight loss. ACV can increase feelings of fullness, helping you eat fewer calories and avoid overeating. This is because the acetic acid in vinegar can slow down the digestion of starches, leading to a more gradual release of glucose into the bloodstream. This steady energy release can help reduce cravings and keep you satisfied longer.

Improving Digestion

Apple cider vinegar can also be a great aid for your digestive system. It helps increase stomach acid production, which can improve digestion and nutrient absorption. If you struggle with bloating or indigestion, a tablespoon of ACV diluted in water before meals can help ease these symptoms and promote a healthier gut.

Balancing Blood Sugar Levels

For those concerned about blood sugar levels, apple cider vinegar can be particularly beneficial. Studies have shown that ACV can improve insulin sensitivity and lower blood sugar responses after meals. This can be especially helpful for people managing diabetes or those looking to maintain stable energy levels throughout the day.

Enhancing Heart Health

ACV can contribute to heart health by helping to lower cholesterol and triglyceride levels. The acetic acid in vinegar has been shown to reduce bad cholesterol (LDL) while increasing good cholesterol (HDL). This can improve overall cardiovascular health and reduce the risk of heart disease.

Boosting Immune System

Rich in antioxidants, apple cider vinegar can support a strong immune system. Its antimicrobial properties can help fend off harmful bacteria and boost your body’s natural defenses. Adding a tablespoon of ACV to your daily routine can help keep you healthy and resilient, especially during cold and flu season.

How to Incorporate ACV into Your Daily Routine

Incorporating apple cider vinegar into your daily life is simple. Start with one tablespoon of ACV in a glass of water. You can add a bit of honey if you prefer a sweeter taste. Drink this mixture in the morning or before meals to reap the benefits. Remember to rinse your mouth with water afterward to protect your tooth enamel from the acidity.

A Simple Step to Better Health

A daily tablespoon of apple cider vinegar is an easy and natural way to enhance your wellness and support weight loss. With its multitude of benefits, this simple tonic can make a big difference in how you feel. So why not give it a try and see the positive changes for yourself?


Imagine a simple, soothing cup of tea that can transform your energy levels and boost your vitality. Meet moringa tea—a natural and delicious beverage that’s packed with nutrients and health benefits. Adding moringa tea to your daily routine could be the secret weapon you need for a more energetic and vibrant life.

What is Moringa?

Moringa, often referred to as the “miracle tree,” is a plant known for its incredible nutritional profile and medicinal properties. The leaves of the moringa tree are especially rich in vitamins, minerals, and antioxidants. When brewed into a tea, these leaves create a powerful, health-boosting drink.

Boosts Energy Levels

One of the standout benefits of moringa tea is its ability to enhance your energy levels naturally. Unlike caffeinated drinks that can lead to crashes, moringa tea provides a steady, sustained energy boost. The vitamins and minerals in moringa support overall vitality, helping you feel more awake and alert throughout the day.

Rich in Nutrients

Moringa leaves are packed with essential nutrients, including vitamin C, vitamin A, calcium, potassium, and protein. Drinking moringa tea is like giving your body a nutrient-rich gift. These nutrients support various bodily functions, from maintaining healthy skin to promoting strong bones.

Supports Immune Health

Your immune system is your body’s defense against illness, and moringa tea can help keep it strong. The high levels of antioxidants and vitamin C in moringa leaves help protect your cells from damage and support your body’s natural defenses. A daily cup of moringa tea can help you stay healthy and resilient.

Promotes Healthy Digestion

Moringa tea also benefits your digestive system. It has anti-inflammatory properties that can help soothe the digestive tract, reducing symptoms of bloating and discomfort. Additionally, moringa’s fiber content supports healthy digestion and regularity.

Helps Manage Stress

In today’s fast-paced world, finding ways to manage stress is crucial. Moringa tea has adaptogenic properties, meaning it helps your body adapt to stress and maintain balance. Drinking moringa tea can have a calming effect, helping you feel more relaxed and centered.

How to Enjoy Moringa Tea

Making moringa tea is easy and enjoyable. Simply steep dried moringa leaves or moringa tea bags in hot water for about 5-10 minutes. You can drink it plain or add a bit of honey or lemon for extra flavor. Enjoy a cup in the morning to kickstart your day or in the evening to unwind.

A Natural Path to Energy and Vitality

Incorporating moringa tea into your daily routine is a simple and natural way to boost your energy and vitality. With its impressive range of health benefits, moringa tea is truly a miracle in a cup. So why not brew a cup today and discover the difference it can make in your life?


If you’re looking for a delicious and refreshing way to help shed those extra pounds, look no further than this simple cucumber and corn salad. Packed with nutrients and low in calories, this salad is a fantastic addition to your weight loss journey. My mom swears by it, and she managed to lose an impressive 25 kg in just a month!

Why Cucumber and Corn?

Cucumbers are a fantastic weight loss food. They’re low in calories but high in water content, which helps keep you hydrated and full. Cucumbers also contain fiber, which aids in digestion and helps reduce bloating. On the other hand, corn is a great source of fiber and essential vitamins. It adds a satisfying crunch and natural sweetness to the salad without adding too many calories.

The Magic Ingredients

To make this belly-fat-burning salad, you’ll need a few simple ingredients:

  • 2 large cucumbers, thinly sliced
  • 1 cup of cooked corn kernels
  • 1 small red onion, finely chopped
  • 1 handful of fresh parsley, chopped
  • 2 tablespoons of lemon juice
  • 1 tablespoon of olive oil
  • Salt and pepper to taste

Simple Steps to a Delicious Salad

  1. Prepare the Cucumbers: Start by slicing the cucumbers thinly. You can use a mandoline slicer if you have one to get even slices.
  2. Mix in the Corn: Add the cooked corn kernels to the bowl of sliced cucumbers. If you’re using canned corn, make sure to drain and rinse it well.
  3. Add Some Zing: Finely chop a small red onion and a handful of fresh parsley. Toss them into the bowl with the cucumbers and corn.
  4. Dress It Up: In a small bowl, mix together the lemon juice and olive oil. Pour this dressing over the salad and toss everything together until well coated.
  5. Season to Taste: Finally, add salt and pepper to taste. Give the salad one last toss, and it’s ready to serve!

Why This Salad Works

This cucumber and corn salad is not only delicious but also helps with weight loss in several ways. The high water content in cucumbers helps keep you hydrated and full, reducing the likelihood of overeating. The fiber in both cucumbers and corn aids digestion and helps maintain a healthy gut. Plus, the fresh lemon juice boosts metabolism, which can help burn belly fat.

A Refreshing Addition to Your Diet

Incorporating this cucumber and corn salad into your daily meals is an easy and tasty way to support your weight loss goals. It’s light, refreshing, and perfect for hot summer days. Plus, it’s versatile enough to be a side dish or a main meal. So why not give it a try and see the difference it can make in your journey to better health?


There’s nothing quite like the taste of homemade cheese, and with just three simple ingredients, you can create a healthy, delicious treat right in your own kitchen. This recipe is a family treasure passed down from my grandmother, and it’s perfect for anyone looking to enjoy fresh, wholesome cheese without any fuss.

The Magic Trio

To make this delightful homemade cheese, you’ll need only three ingredients:

  • 1 liter of whole milk
  • 2 tablespoons of white vinegar or lemon juice
  • A pinch of salt

Step-by-Step Instructions

  1. Heat the Milk: Pour the whole milk into a large pot and place it over medium heat. Heat the milk until it’s just about to boil, but don’t let it come to a full boil. You’ll know it’s ready when small bubbles start to form around the edges.
  2. Add the Acid: Once the milk is hot, remove it from the heat. Stir in the vinegar or lemon juice slowly, one tablespoon at a time. You’ll see the milk start to curdle immediately, forming curds and whey. Let the mixture sit for about 5-10 minutes to allow the curds to fully form.
  3. Strain the Curds: Place a cheesecloth or a clean kitchen towel over a colander and set it over a large bowl to catch the whey. Carefully pour the curdled milk into the colander, letting the whey drain away. Gather the edges of the cheesecloth and gently squeeze out any excess whey from the curds.
  4. Season and Shape: Transfer the curds to a bowl and add a pinch of salt. Mix well to evenly distribute the salt. At this point, you can shape the cheese into a ball or press it into a mold for a more defined shape. Let the cheese sit in the cheesecloth for an additional 30 minutes to firm up.

Enjoying Your Homemade Cheese

And there you have it—fresh, homemade cheese with just three ingredients! This cheese is wonderfully versatile. You can enjoy it on its own, spread it on crackers, or add it to your favorite salads and dishes. It has a mild, creamy flavor that pairs well with both sweet and savory toppings.

Why Homemade Cheese?

Making cheese at home is not only satisfying but also allows you to control what goes into your food. This homemade cheese is free from preservatives and additives, making it a healthier choice compared to many store-bought varieties. Plus, it’s a great way to impress friends and family with your culinary skills!

A Family Tradition

This simple recipe is a cherished tradition in our family, and I’m thrilled to share it with you. Making cheese at home brings a touch of nostalgia and a lot of joy. So why not give it a try and experience the magic of homemade cheese? It’s easy, fun, and oh-so-delicious!

Did you know you can make delicious, homemade cheese with just a few simple ingredients from your kitchen? Forget about buying cheese at the market. With this easy and fun recipe, you can create your own fresh cheese right at home by simply adding an egg to boiling milk. Let’s get started!

Ingredients:

  • 1 liter of whole milk
  • 1 egg
  • 1 tablespoon of white vinegar or lemon juice
  • A pinch of salt

Instructions:

  1. Heat the Milk:
    • Pour the whole milk into a large pot and place it on the stove over medium heat.
    • Stir occasionally to prevent the milk from scorching. Heat until the milk starts to boil.
  2. Prepare the Egg Mixture:
    • While the milk is heating, crack the egg into a small bowl and beat it well.
    • Add the white vinegar or lemon juice to the beaten egg and mix thoroughly. This combination helps to curdle the milk, which is essential for making cheese.
  3. Add the Egg Mixture to the Boiling Milk:
    • Once the milk reaches a rolling boil, carefully pour the egg mixture into the pot.
    • Stir continuously as you add the mixture to ensure it is evenly distributed.
  4. Curdle the Milk:
    • Keep the milk on the heat and continue to stir gently. You will soon notice the milk starting to separate into curds (solid) and whey (liquid).
    • This process should take just a few minutes. Once you see clear separation, remove the pot from the heat.
  5. Strain the Curds:
    • Place a cheesecloth or a clean kitchen towel over a colander and set it over a large bowl to catch the whey.
    • Carefully pour the curds and whey into the colander, allowing the liquid to drain away. Be cautious, as the mixture will be hot.
    • Gather the edges of the cheesecloth and gently squeeze out any excess whey.
  6. Season and Shape the Cheese:
    • Transfer the curds to a bowl and add a pinch of salt for flavor. Mix well.
    • If you prefer, you can shape the cheese by pressing it into a mold or simply forming it into a ball with your hands.
  7. Chill and Enjoy:
    • Place your homemade cheese in the refrigerator to cool and firm up. After a few hours, it’s ready to enjoy!

Benefits of Homemade Cheese:

  • Fresh and Natural: You control the ingredients, ensuring your cheese is free from preservatives and additives.
  • Customizable: Adjust the salt and flavorings to suit your taste.
  • Economical: Making cheese at home can be more cost-effective than buying specialty cheeses.

Tips:

  • Experiment with herbs and spices for different flavors.
  • Use the leftover whey in smoothies, soups, or baking for added nutrition.

In conclusion, making your own cheese at home is not only simple but also rewarding. This delightful recipe transforms everyday ingredients into a fresh and tasty treat. So next time you’re in the mood for some cheese, skip the store and enjoy the homemade goodness!


Looking for a refreshing and easy dessert that’s perfect for hot days? How about trying a no-bake watermelon dessert that’s light, delicious, and sugar-free! This unique recipe combines the creamy sweetness of condensed milk with the refreshing taste of watermelon, making it a delightful treat that’s both healthy and simple to prepare. Let’s get started on this cool, crowd-pleasing dessert.

Ingredients:

  • 2 cups watermelon, cubed and seeds removed
  • 1/2 cup sweetened condensed milk (use a sugar-free version for a healthier option)
  • 1 teaspoon vanilla extract
  • Fresh mint leaves for garnish (optional)

Instructions:

  1. Prepare the Watermelon:
    • Start by cutting the watermelon into small, bite-sized cubes. Make sure to remove any seeds. Fresh, juicy watermelon is the star of this dessert, providing natural sweetness and hydration.
  2. Blend the Ingredients:
    • In a blender, combine the watermelon cubes and the sugar-free condensed milk.
    • Add the vanilla extract for a hint of extra flavor.
    • Blend until the mixture is smooth and well combined. This creates a creamy, watermelon-infused mixture that is perfect for a chilled dessert.
  3. Chill the Mixture:
    • Pour the blended mixture into a large bowl or individual serving dishes.
    • Cover with plastic wrap and refrigerate for at least 2 hours, or until the dessert is well chilled and slightly firm.
  4. Serve and Garnish:
    • Before serving, give the mixture a quick stir to ensure a smooth consistency.
    • Garnish with fresh mint leaves if desired, adding a touch of color and a hint of fresh flavor.

Health Benefits:

  • Watermelon: Rich in vitamins A and C, watermelon is hydrating and low in calories. It’s also a great source of antioxidants.
  • Sugar-Free Condensed Milk: Provides a creamy texture and natural sweetness without the added sugar, making it a healthier choice.
  • Vanilla Extract: Adds a natural, subtle sweetness and aroma without any added sugar.

Why This Dessert Works:

This no-bake watermelon dessert is not only delicious but also incredibly easy to make. With just a few simple ingredients, you can whip up a treat that’s perfect for hot summer days. It’s light and refreshing, making it an ideal choice for those who want a sweet treat without the extra sugar and calories.

Tips for Enjoyment:

  • For an extra touch, sprinkle some finely chopped nuts or coconut flakes on top before serving.
  • Pair this dessert with a glass of iced herbal tea for a truly refreshing experience.

In Conclusion:

This no-bake watermelon dessert is a fantastic way to enjoy the natural sweetness of watermelon in a creamy, chilled form. It’s easy to prepare, healthy, and perfect for cooling down on a warm day. Give this simple, delicious recipe a try and delight in the refreshing flavors of watermelon and creamy condensed milk. Enjoy!

Are you experiencing uncomfortable and sometimes painful swelling in your hands and feet? Excess water retention might be the culprit. But don’t worry, there are natural remedies that can help, like parsley and lemon. These two ingredients are known for their diuretic properties, which means they can help flush out excess water from your body and promote fluid balance. Let’s learn more about why parsley and lemon are so effective and how you can use them to reduce swelling.

Parsley:

  • Did you know that parsley is more than just a garnish? It’s actually a powerful diuretic that can increase urine production and help remove excess fluid from your body. This can lead to a reduction in water retention.
  • Parsley is also packed with antioxidants, vitamins, and minerals, including vitamin C, A, and K. These nutrients support kidney function and overall health.

Lemon:

  • Lemon is well-known for its detoxifying effects and its ability to improve digestion and liver function. These benefits can contribute to better fluid regulation in your body.
  • Lemons are also rich in vitamin C, which can strengthen your body’s natural defenses and enhance the absorption of nutrients. This may help manage inflammation and reduce swelling.

Parsley and Lemon Tea:

Ingredients:

  • 1 bunch of fresh parsley
  • 1 lemon
  • 1 liter of water

Instructions:

  1. Bring the water to a boil.
  2. Finely chop the parsley and add it to the boiling water.
  3. Lower the heat and let the mixture simmer for about 10 minutes.
  4. Turn off the heat and add the juice of one lemon to the tea.
  5. Strain the tea and drink it warm or cool.

Daily Consumption:

Drink 1-2 cups of parsley and lemon tea every day. Starting your day with a cup can kickstart your digestive system and enhance the diuretic effects.

  • Stay Hydrated: It may seem counterintuitive, but drinking enough water actually helps reduce water retention. When your body is dehydrated, it holds onto fluid as a defense mechanism.
  • Exercise Regularly: Regular physical activity helps circulate blood and fluids throughout your body, which supports the lymphatic system in reducing swelling.
  • Reduce Salt Intake: Too much salt in your diet can lead to water retention. Limiting your salt intake can prevent fluid accumulation.
  • Elevate Your Feet: If swelling in your legs, ankles, or feet is an issue, try elevating your feet to improve circulation.
  • While parsley and lemon are generally safe for most people, excessive consumption can lead to side effects, such as gastrointestinal upset or worsened kidney issues for those with pre-existing conditions.
  • If you’re pregnant, it’s important to consult a healthcare provider before consuming high amounts of parsley, as it can influence hormonal balance and uterine contractions.
  • Always consider consulting with a healthcare professional before trying any new treatments for your health, including natural remedies.

Using parsley and lemon can be a safe and natural way to manage water retention and reduce swelling. These remedies not only help with fluid balance but also offer additional health benefits. Just remember to incorporate them into your routine wisely and observe improvements in how your body manages fluid retention. Say goodbye to uncomfortable swelling and hello to improved well-being!

Baking soda is not just for baking or removing odors – it can also do wonders for your skin! If you’re dealing with age spots, acne, or bothersome blackheads, baking soda might be the game-changer you’ve been looking for. Not only does it gently exfoliate, but it also has antibacterial and anti-inflammatory benefits. Let’s explore how you can effectively incorporate this versatile ingredient into your skincare routine.

1. Why Choose Baking Soda?

Baking soda, also known as sodium bicarbonate, is a multi-purpose gem that effortlessly removes dead skin cells, unclogs pores, and brightens your complexion. Its antibacterial and anti-inflammatory properties are excellent for combating acne and blackheads. Additionally, baking soda balances your skin’s pH level, a crucial factor in maintaining healthy skin.

2. Banishing Age Spots with Baking Soda

Age spots, also known as sun spots or liver spots, occur due to prolonged sun exposure and aging. The good news is that baking soda can help you gradually lighten these spots.

How to Use:

  • Mix 1 tablespoon of baking soda with a few drops of water or lemon juice to form a thick paste.
  • Gently massage the paste onto the age spots using circular motions.
  • Leave it on for 5-10 minutes, then rinse off with warm water.
  • Repeat 2-3 times a week for noticeable results over time.

3. Fighting Acne with Baking Soda

Thanks to its remarkable antibacterial properties, baking soda is highly effective in treating acne. It helps dry out existing pimples and reduces the likelihood of new ones forming.

How to Use:

  • Create a paste by adding a few drops of water to 1 tablespoon of baking soda.
  • Apply the paste to areas of your skin that are prone to acne or pimples.
  • Rinse thoroughly with warm water after 5-10 minutes.
  • Use this treatment once or twice a week to keep acne under control.

4. Say Goodbye to Blackheads with Baking Soda

Blackheads form when pores become clogged with oil, dead skin cells, and other impurities. The exfoliating properties of baking soda work wonders in clearing out these stubborn imperfections.

How to Use:

  • Mix 1 tablespoon of baking soda with 1 teaspoon of water to create a gritty paste.
  • Gently massage the paste onto areas with blackheads, like the nose or chin.
  • Let it sit for a few minutes before rinsing with warm water.
  • Incorporate this treatment into your skincare routine once a week to prevent blackheads from reappearing.

5. Essential Tips for Using Baking Soda on Your Skin

Ensure a safe and pleasant experience by following these important tips:

Patch Test First: Before applying baking soda to your face, conduct a patch test on a small area of your skin to check for any adverse reactions.

Don’t Overdo It: Baking soda is effective but quite alkaline. Overuse can disrupt your skin’s natural pH balance. Limit usage to 2-3 times a week.

Moisturize: After using baking soda on your skin, it’s essential to moisturize thoroughly. Baking soda can be drying, so follow up with a good moisturizer to keep your skin hydrated.

6. A Simple and Effective Solution

Baking soda is a simple and natural remedy that addresses age spots, acne, and blackheads when used correctly. With consistent usage, you may notice significant improvements in your skin’s texture and tone, revealing a clearer and more radiant complexion. Give these baking soda treatments a try, and you’ll see why this common household ingredient could become your new skincare staple!

Are you looking for a way to make your morning routine even better? With a few simple additions, you can transform your everyday cup of joe into a health-boosting, fat-burning beverage that can help you maintain a healthy weight. Combined with a balanced diet and regular exercise, these ingredients can enhance your metabolic rate and provide you with additional energy throughout the day. Let’s explore three popular additions that can turn your coffee into a powerful health elixir.

1. Cinnamon – Adding Spice to Your Coffee

Cinnamon not only adds a sweet and spicy flavor to your coffee without the need for added sugar, it also comes with some impressive health benefits. It is known for its ability to stabilize blood sugar levels and improve insulin sensitivity, making it a great tool for managing or losing weight.

How to Add Cinnamon to Your Coffee: Simply stir in a quarter to a half teaspoon of ground cinnamon to your brewed coffee. Alternatively, you can add a cinnamon stick to your coffee grounds before brewing for a subtly infused flavor.

2. Coconut Oil – Fueling Your Day

Did you know that coconut oil can be a powerful ally in your weight loss journey? It contains medium-chain triglycerides (MCTs) that can increase energy expenditure and help your body burn fat more effectively. Additionally, coconut oil can help suppress your appetite, making it a valuable addition to your daily routine.

How to Add Coconut Oil to Your Coffee: Add a tablespoon of coconut oil to your hot coffee and stir well until the oil is fully dissolved. For a smoother texture, you can use a hand blender or a countertop blender to create a frothy, latte-like consistency.

3. Cayenne Pepper – Adding a Kick to Your Metabolism

A little bit of cayenne pepper can do wonders for your morning coffee. Capsaicin, the compound responsible for cayenne’s heat, has been shown to boost your metabolic rate and increase fat burning. Get ready to fire up your metabolism with this flavorful addition!

How to Add Cayenne Pepper to Your Coffee: Start with a small pinch of cayenne pepper, as too much can overpower your coffee. Mix it into your brew to heat things up and kickstart your metabolism in the morning.

Here are a few tips to keep in mind as you enhance your morning routine with these healthy coffee upgrades:

Moderation is Key: While these ingredients offer great health benefits, it’s important to use them in moderation. Too much coconut oil can add excessive calories, and too much cayenne can irritate your stomach.

Balanced Diet: For the best results, enjoy your fat-burning coffee as part of a balanced diet that includes plenty of fruits, vegetables, lean proteins, and whole grains.

Stay Hydrated: Remember that caffeine is a diuretic, so it’s essential to balance your coffee consumption with plenty of water throughout the day.

By incorporating these simple ingredients into your morning coffee, you can not only enjoy a unique taste experience but also potentially benefit from increased metabolism and energy levels. These factors can contribute to your overall weight loss efforts. Always consider any dietary restrictions or health conditions you may have, and if you’re unsure about introducing new ingredients into your diet, consult with a healthcare provider. Start your day with a cup of health-boosting coffee and embrace the positive changes it can bring to your life. Cheers to a healthier you!

Sometimes, the simplest combinations can lead to the most surprising and effective results. If you’ve ever struggled with unpleasant odors, stubborn stains, or pesky insects around the house, there’s a powerful yet natural solution that you might not have considered: cloves and white vinegar. When these two everyday ingredients are combined, they create a versatile and potent mixture that can be used in various ways around your home. The final result is nothing short of incredible!

Both cloves and white vinegar are well-known for their individual benefits. Cloves are packed with eugenol, a compound with strong antimicrobial and aromatic properties, making them effective for cleaning, deodorizing, and repelling insects. White vinegar, on the other hand, is a natural acid that cuts through grease, dissolves mineral deposits, and neutralizes odors. When combined, these two ingredients enhance each other’s properties, creating a powerful natural cleaner and deodorizer.

This simple solution requires just two ingredients and a bit of time to steep, but the results are well worth the wait.

Ingredients:

  • 1 cup of white vinegar
  • 10-15 whole cloves
  • A glass jar with a lid

Instructions:

  1. Combine the Ingredients: Place the whole cloves in the glass jar and pour the white vinegar over them. Make sure the cloves are fully submerged in the vinegar.
  2. Steep the Mixture: Seal the jar with the lid and let the mixture sit for about one week. This allows the cloves to infuse the vinegar with their aromatic oils and beneficial compounds.
  3. Strain and Use: After a week, strain the mixture to remove the cloves, and pour the infused vinegar into a spray bottle or use it directly for cleaning and deodorizing around the house.

Once your clove-infused vinegar is ready, you can use it in various ways around your home:

1. Natural All-Purpose Cleaner
The combination of vinegar’s acidity and clove’s antimicrobial properties makes this solution an excellent natural cleaner. Use it to wipe down countertops, clean bathroom surfaces, and even sanitize cutting boards.

2. Odor Neutralizer
Spritz the solution in areas with lingering odors, such as trash cans, pet areas, or musty closets. The vinegar neutralizes the odors, while the cloves leave behind a pleasant, spicy aroma.

3. Insect Repellent
Spray the clove vinegar solution around windowsills, door frames, and other entry points to repel insects like ants, flies, and mosquitoes. The scent of cloves is particularly effective at keeping pests at bay.

4. Fabric Freshener
Add a splash of clove-infused vinegar to your laundry rinse cycle to freshen up fabrics, remove odors, and leave your clothes with a subtle, pleasant scent.

5. Glass and Mirror Cleaner
This solution is perfect for cleaning glass surfaces. Spray it on mirrors or windows and wipe it down with a microfiber cloth for a streak-free shine.

1. Natural and Non-Toxic
Unlike commercial cleaners, this clove and vinegar solution is completely natural, making it safe to use around children and pets.

2. Effective and Versatile
This solution works wonders on a variety of surfaces and issues, from cleaning and deodorizing to repelling insects.

3. Pleasant Scent
The warm, spicy aroma of cloves leaves your home smelling fresh and inviting, without the harsh chemical scent of many store-bought cleaners.

Combining cloves and white vinegar creates a powerful, natural solution that can transform your cleaning routine and keep your home smelling wonderful. Whether you’re using it to clean, deodorize, or repel insects, the results are truly incredible. Give this simple yet effective remedy a try, and you’ll wonder how you ever managed without it!