Author

Barbara L.

Browsing

Imagine your home filled with a refreshing scent that lasts for days. With a simple trio of ingredients from your kitchen—clove, salt, and lemon—you can create a natural, long-lasting air freshener. This easy DIY project not only keeps your living space smelling great but also adds a touch of homely charm. Here’s how you can make your own natural scent booster that keeps your home fragrant for three days and nights.

Why Choose Natural Ingredients?

Opting for natural ingredients like clove, salt, and lemon not only minimizes the exposure to chemicals found in commercial air fresheners but also provides a more subtle, pleasing aroma that can enhance the ambiance of your home without overwhelming it.

Ingredients Needed

  • 2 lemons
  • 1/2 cup of salt (any kind will do, but coarse salt works best)
  • 25 whole cloves

Instructions

  1. Prepare the Lemons: Cut the lemons into slices or wedges, depending on your preference. The more surface area exposed, the stronger the scent.
  2. Add Cloves and Salt: Push the cloves into the lemon pieces, ensuring they are evenly distributed. The cloves not only add a rich, spicy aroma but also help to preserve the lemons slightly. Sprinkle salt over the lemons, which helps to draw out moisture and intensify the fragrance.
  3. Arrange Your Scented Mixture: Place the lemon slices in a bowl or on a small decorative plate. You can arrange them in your living room, bathroom, or kitchen—any area that benefits from a freshness boost.
  4. Maintenance: Every day, give the lemon slices a gentle stir or shake to activate the scents. If the lemons start to lose their potency, simply add a few fresh slices to the mix.

Benefits

  • Refreshing Scent: Lemons provide a crisp, clean smell, cloves add depth with their warm, spicy notes, and salt amplifies the overall aroma.
  • Humidity Absorption: Salt naturally absorbs excess humidity, which can help reduce mustiness in your home.
  • Antibacterial Properties: Both lemon and cloves have antibacterial qualities, making this mixture a great choice for maintaining a fresher, cleaner air quality.

Conclusion

This simple DIY concoction is not just about keeping your home smelling fresh; it’s also about creating a healthier living environment. Try this natural alternative and enjoy a fragrant, inviting home that welcomes you and your guests with its delightful aroma.

Did you know that something as simple as the peel of an orange can be incredibly powerful when used creatively? By placing orange peel in a plastic bottle, you can unlock a variety of benefits and uses that may surprise you. This easy, eco-friendly trick is a fantastic way to make the most out of your orange peels before tossing them into the compost bin. Let’s explore how this can be done and why it’s beneficial.

Why Orange Peel?

Orange peels are packed with essential oils that have numerous health and home care benefits. These oils are known for their natural antibacterial and antiseptic properties, making orange peel a great natural cleaner and air freshener.

How to Use Orange Peel in a Plastic Bottle

Materials Needed:

  • Fresh orange peels
  • An empty, clean plastic bottle
  • White vinegar (optional)
  • Water

Instructions:

  1. Prepare the Peels: Begin by enjoying a delicious orange, but instead of discarding the peel, save it for this eco-friendly project.
  2. Place in a Bottle: Take your fresh orange peels and stuff them into a clean plastic bottle. You can cut them into smaller pieces if necessary to fit more inside.
  3. Add Vinegar for Cleaning: For a natural cleaning solution, cover the peels with white vinegar. The vinegar acts as a solvent that extracts the oils and compounds from the peels, enhancing the cleaning power.
  4. Or Just Use Water: If you’re looking for a simple air freshener, just add water to the bottle instead. The essential oils in the orange peel will infuse the water.
  5. Let It Infuse: Seal the bottle and let it sit for a couple of weeks. The longer it sits, the more potent the mixture will become.
  6. Use It: For a cleaning spray, strain the liquid into another container and use it as a natural cleaner around your home. If it’s an air freshener, simply poke holes in the bottle cap and place it in areas that need freshening.

Benefits of Using Orange Peel This Way

  • Eco-Friendly: This method is a great way to reduce waste by reusing both plastic bottles and orange peels.
  • Cost-Effective: Utilize what you already have at home without needing to buy commercial products.
  • Pleasant Fragrance: Orange peel gives off a refreshing scent, making it ideal for keeping your home smelling clean.
  • Natural Cleaning Properties: The oils in orange peel help to cut through grease and leave surfaces shiny without the use of harsh chemicals.

Conclusion

This simple yet ingenious use of orange peel in a plastic bottle offers an array of advantages, from cleaning your home naturally to refreshing the air with a citrusy aroma. Give it a try and you might find yourself looking forward to your next orange as much for the peel as for the fruit inside!

Eggshells are often discarded without a second thought, but these humble kitchen scraps are incredibly versatile and useful. Here are four amazing tricks to use eggshells at home, helping you to reduce waste and make the most out of your everyday resources.

1. Natural Fertilizer for Your Garden

Eggshells are rich in calcium, which is essential for healthy plant growth. To use eggshells as a natural fertilizer:

  • Crush the Shells: Rinse your eggshells and let them dry. Once dry, crush them into small pieces.
  • Add to Soil: Sprinkle the crushed shells directly onto the soil or mix them into the compost. They help improve soil structure and provide a slow-release calcium boost to your plants.
  • Tomato Plants: Tomato plants, in particular, benefit from eggshells as they can prevent blossom-end rot caused by calcium deficiency.

2. Pest Repellent

Eggshells can act as a natural pest deterrent in your garden:

  • Barrier Method: Crushed eggshells sprinkled around the base of plants can deter soft-bodied pests like slugs and snails. The sharp edges of the shells are uncomfortable for these pests to crawl over, keeping them away from your plants.

3. Homemade Cleaning Scrub

Eggshells can be used as a gentle abrasive for cleaning:

  • Make a Scrub: Crush the shells into a fine powder. Mix the powder with a little water and some dish soap to create a paste.
  • Scrub Away: Use this paste to scrub tough stains on pots, pans, and even in sinks. The gritty texture helps remove stuck-on food and grime without scratching surfaces.

4. Natural Drain Cleaner

Keep your drains clear with this simple trick:

  • Grind the Shells: Grind eggshells into small pieces using a food processor.
  • Use Regularly: Periodically toss a small handful of ground eggshells into your kitchen sink drain and run hot water. The eggshells help scrape away food particles and debris stuck in the pipes, preventing clogs.

Conclusion

Don’t throw away those eggshells! With these simple and effective tricks, you can repurpose them to benefit your garden, home, and cleaning routine. It’s an easy way to embrace a more sustainable lifestyle while getting the most out of your resources. Give these tips a try and see how versatile eggshells can be!

If you’re looking for a quick, healthy, and incredibly delicious treat, boiled bananas are the answer. This simple recipe brings out the natural sweetness and richness of bananas without any added sugar. Perfect for a nutritious snack or a comforting dessert, this dish is sure to become a favorite in your home.

Why Boiled Bananas?

Boiling bananas is a fantastic way to enjoy their natural flavors while reaping their numerous health benefits. Bananas are rich in vitamins, minerals, and fiber, making them an excellent choice for a healthy diet. Boiling them enhances their softness and sweetness, creating a comforting and satisfying dish.

Ingredients:

  • 2 ripe bananas
  • 2 cups of water
  • A pinch of cinnamon (optional, for added flavor)
  • A dash of vanilla extract (optional)

Instructions:

  1. Prepare the Bananas: Start by peeling the bananas. You can leave them whole or cut them into halves or thirds, depending on your preference.
  2. Boil the Water: In a medium-sized saucepan, bring the water to a boil over medium heat.
  3. Add the Bananas: Carefully place the bananas into the boiling water. Reduce the heat to low and let the bananas simmer for about 10-15 minutes, or until they are tender and easily pierced with a fork.
  4. Enhance the Flavor: If you like, add a pinch of cinnamon and a dash of vanilla extract to the water while the bananas are simmering. These additions will infuse the bananas with a warm, aromatic flavor.
  5. Serve Warm: Once the bananas are tender, remove them from the water using a slotted spoon. Place them on a plate and let them cool slightly before serving. Enjoy them as they are, or sprinkle a bit more cinnamon on top for extra flavor.

Why You’ll Love This Recipe

  • Quick and Easy: This recipe requires minimal preparation and cooking time, making it perfect for a quick snack or dessert.
  • Nutritious: Bananas are packed with essential nutrients like potassium, vitamin C, and dietary fiber, making this dish a healthy choice.
  • Naturally Sweet: Boiling bananas brings out their natural sweetness, eliminating the need for added sugar.
  • Versatile: Enjoy boiled bananas on their own, or pair them with yogurt, oatmeal, or a scoop of nut butter for a more filling treat.

Conclusion

Boiled bananas are a simple and delicious way to enjoy a healthy snack or dessert. With just a few ingredients and minimal effort, you can create a comforting dish that highlights the natural sweetness and nutritional benefits of bananas. Give this easy recipe a try, and you’ll see why boiled bananas might just become your new favorite treat!

Have you noticed vertical ridges on your nails lately? Don’t worry, they are usually harmless and a common part of the aging process. However, in some cases, these ridges can be a sign of underlying health issues or nutritional deficiencies. So, let’s take a closer look at what causes these ridges and when you should consider consulting a healthcare professional.

As we age, it’s natural for vertical ridges to appear on our nails. These ridges typically run from the cuticle to the tip of the nail. While they may become more prominent as we get older, they are generally harmless.

Believe it or not, the appearance of vertical ridges can be influenced by our diet. Nutrients like protein, vitamin B12, and iron are crucial for maintaining healthy nails. A deficiency in any of these nutrients can lead to changes in nail health, including the emergence of ridges.

  • Protein: Our nails are primarily made of a protein called keratin. If we don’t consume enough protein, it can be challenging for our bodies to build strong and healthy nails.
  • Vitamin B12: Insufficient levels of B12 can cause changes in nail color and texture.
  • Iron: Low iron levels can result in vertical ridges and, in some cases, even cause nails to become spoon-shaped.

Staying hydrated is essential for our overall well-being, and this also applies to our nails. When we are dehydrated, our nails can become brittle and ridged. So make sure to drink enough water throughout the day to keep your nails and skin healthy.

If you’ve experienced any kind of trauma to your nails, like a crush injury or chronic picking, it can lead to the development of vertical ridges. These injuries can damage the nail bed and disrupt the normal growth of your nails.

Certain skin conditions, especially those that affect the cuticles or the skin around the nails, such as psoriasis or eczema, can cause nail abnormalities and ridges. So if you have any of these conditions, pay attention to your nail health too.

Poor circulation can have an impact on the growth and appearance of your nails. Conditions like peripheral arterial disease or other heart problems can manifest symptoms in the nails, including vertical ridges.

In conclusion, vertical ridges on your nails are usually nothing to worry about and a normal part of aging. However, if you notice additional changes like discoloration or thickness changes, or if the ridges are accompanied by other symptoms, it is advisable to consult a healthcare provider. Remember, your nails can provide insight into your overall health, so taking care of them through a balanced diet, hydration, and protection from injury is always a good idea.

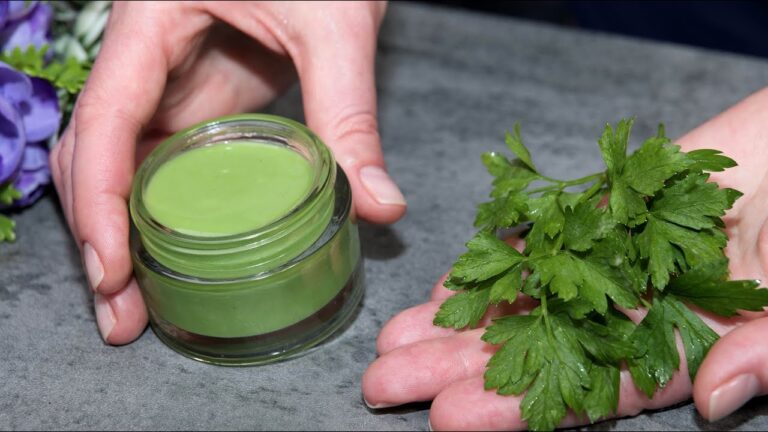
In the quest for a youthful and radiant complexion, natural remedies often yield some of the most effective and gentle solutions. One such delightful discovery involves using everyday kitchen ingredients — cornstarch, tomato, and parsley. This unique combination can work wonders on your skin, giving it a fresher, younger look without the harsh chemicals found in many commercial products. Let’s explore how you can create this natural face mask and enjoy the benefits it offers.

Benefits of Cornstarch, Tomato, and Parsley for Skin

Cornstarch: Known for its soothing properties, cornstarch is great for calming irritated skin and can help control oil production, making it a wonderful component for those with oily or combination skin types.

Tomato: Rich in antioxidants, particularly lycopene, tomatoes help protect the skin from environmental damage. They are also mildly acidic, which can help balance the skin’s pH and reduce the appearance of blemishes.

Parsley: This common herb is loaded with vitamins A and C, which are crucial for skin repair and rejuvenation. Parsley also helps lighten complexion and reduce the appearance of scars and spots.

How to Make the Cornstarch, Tomato, and Parsley Face Mask

Ingredients:

  • 1 ripe tomato
  • 1 tablespoon of cornstarch
  • A handful of fresh parsley leaves

Instructions:

  1. Prepare the Tomato: Cut the tomato in half and scoop out the seeds. You only need the pulp for this mask.
  2. Blend the Ingredients: In a blender, combine the tomato pulp, cornstarch, and parsley leaves. Blend until you achieve a smooth paste.
  3. Apply the Mask: Before applying the mask, make sure your face is clean and dry. Using your fingers or a soft brush, apply the mask evenly over your face, avoiding the eye area.
  4. Let It Sit: Allow the mask to sit on your skin for about 15-20 minutes. During this time, the ingredients will work together to rejuvenate and refresh your skin.
  5. Rinse Off: After the time is up, rinse the mask off with warm water. Pat your face dry with a clean towel.
  6. Moisturize: Follow up with your regular moisturizer to keep your skin hydrated.

Conclusion

This simple yet effective homemade mask can be a fantastic addition to your skincare routine, providing a natural way to enhance your skin’s health and appearance. Regular use can help make your skin appear brighter and more youthful, tapping into the natural powers of cornstarch, tomato, and parsley. Give it a try and watch your skin thank you with a vibrant, refreshed glow!

Are you looking for simple, natural ways to enhance your health and home? The combination of lemon and baking soda might just be the miraculous duo you need. These two common kitchen ingredients, when used together, offer a range of benefits from health remedies to cleaning solutions. Let’s explore how this powerful pair can be incorporated into your daily routine for remarkable results.

Health Benefits

1. Digestive Aid: Mixing lemon with baking soda can create an antacid effect. The lemon not only provides vitamin C but also increases the alkalinity of baking soda, helping to reduce acidity in the stomach. This can alleviate symptoms like heartburn and indigestion.

2. Detoxification: Drinking a mixture of lemon juice and baking soda may help detoxify the liver, providing a boost in digestion and purification of the body. This simple drink can be made by adding the juice of half a lemon and a teaspoon of baking soda to a glass of water.

3. Oral Health: The antibacterial properties of lemon combined with the mild abrasive effect of baking soda make it a fantastic homemade toothpaste. This mixture can help whiten your teeth naturally and maintain fresh breath.

4. Enhanced Immunity: Regular consumption of lemon and baking soda can boost the immune system. The high vitamin C content in lemons helps fight off infections, while baking soda balances the body’s pH, contributing to better health.

Household Uses

5. Natural Cleaning Solution: A paste made from lemon juice and baking soda can be used as a non-toxic cleaning agent that effectively cleans kitchen counters, sinks, and even bathroom surfaces. It cuts through grease and disinfects without the harsh chemicals found in commercial cleaners.

6. Odor Elimination: This combination also works wonders in neutralizing odors. Place a mixture of baking soda and lemon juice in your refrigerator or sprinkle it into the garbage can to eliminate unpleasant smells.

7. Stain Remover: Their natural bleaching properties make lemon and baking soda excellent for removing stains. Apply a paste to stained clothing or surfaces, let sit for a moment, and then wash as usual.

Conclusion

Lemon and baking soda together create a versatile, effective, and natural combination that can improve your health and clean your home. Whether you’re using it as a part of your wellness routine or as an eco-friendly cleaning solution, this duo proves that sometimes, the simplest ingredients can be the most miraculous.

Tamarind leaves are an often overlooked part of the tamarind tree, known more commonly for its fruit. However, the leaves themselves hold a substantial nutritional and medicinal value, making them a beneficial addition to various dishes. Here’s an exploration of the nutritional power of tamarind leaves:

Nutritional Benefits of Tamarind Leaves

  1. Rich in Vitamins and Minerals:
    • Tamarind leaves are a good source of essential vitamins such as Vitamin C, which boosts the immune system, and Vitamin A, which is vital for vision and skin health. They also contain significant amounts of B vitamins, which are important for energy production and brain function.
    • The leaves are rich in minerals like iron, which is crucial for blood production, and calcium, which is important for bone health.
  2. Antioxidant Properties:
    • They contain antioxidants that help combat free radicals in the body, potentially reducing the risk of chronic diseases such as heart disease and cancer.
  3. Anti-inflammatory Effects:
    • Tamarind leaves have anti-inflammatory properties, which can help in reducing inflammation in the body, aiding conditions like arthritis.
  4. Digestive Health:
    • The leaves are known to aid digestion and are used in traditional medicine to treat stomach ailments such as constipation and indigestion.
  5. Antimicrobial Properties:
    • They have been shown to possess antimicrobial properties that can help fight various pathogens and prevent infections.
  6. Antidiabetic Effects:
    • Some studies suggest that tamarind leaves may help manage blood sugar levels, making them beneficial for people with diabetes.

Culinary Uses of Tamarind Leaves

Tamarind leaves can be used in a variety of culinary applications, often imparting a tart flavor similar to tamarind fruit but with a milder profile:

  1. Soups and Stews:
    • In many Southeast Asian cuisines, tamarind leaves are added to soups and stews for a touch of tartness.
  2. Herbal Teas:
    • Dried tamarind leaves can be steeped in hot water to make a herbal tea that is both refreshing and beneficial for health.
  3. Seasoning:
    • Young, tender tamarind leaves can be used fresh in salads or as a seasoning in various dishes, similar to how one would use bay leaves.
  4. Medicinal Preparations:
    • The leaves can be used in traditional medicinal preparations to treat a range of ailments from malaria to ulcers and even as a poultice to heal wounds.

Precautions

While tamarind leaves are beneficial, they should be consumed in moderation, especially by those who are pregnant or have specific health conditions that may be affected by their consumption. It’s always a good idea to consult with a healthcare provider if unsure about introducing new elements to your diet, particularly for therapeutic purposes.

Tamarind leaves, with their unique flavor and health benefits, offer an excellent way to diversify one’s diet and explore new culinary landscapes. They not only enhance the flavor of dishes but also contribute beneficial nutrients, making them a valuable ingredient in the kitchen.

Baking soda shampoo is a popular DIY alternative to traditional shampoos, touted for its simplicity and effectiveness in cleansing hair and promoting scalp health, which can indirectly support hair growth. Here’s how to make and use baking soda shampoo:

How to Make Baking Soda Shampoo

Ingredients:

  • 1 part baking soda
  • 3 parts water

Instructions:

  1. Mix the Ingredients:
    • In a small squeeze bottle or jar, mix 1 part baking soda with 3 parts water. For example, you can use 1 tablespoon of baking soda with 3 tablespoons of water. Adjust the quantity depending on the length and thickness of your hair.
  2. Apply:
    • Wet your hair thoroughly. Apply the baking soda shampoo to your hair from roots to ends. Make sure to cover the scalp area well, as the main cleansing action should occur at the roots.
  3. Massage and Rinse:
    • Gently massage the mixture into your hair and scalp for a couple of minutes. The massaging helps stimulate the scalp and also ensures that the baking soda is distributed evenly.
    • Rinse thoroughly with warm water to ensure all baking soda is washed out of your hair.

Follow with an Apple Cider Vinegar Rinse

Since baking soda has a high pH, it’s important to neutralize it with something acidic like apple cider vinegar, which will help restore your scalp’s natural pH balance.

Ingredients:

  • 1 part apple cider vinegar
  • 4 parts water

Instructions:

  1. Prepare the Rinse:
    • Mix the apple cider vinegar with water in a squeeze bottle or jar.
  2. Apply:
    • After rinsing out the baking soda, apply the apple cider vinegar rinse to your hair, especially focusing on the ends.
  3. Final Rinse:
    • Let the vinegar mixture sit in your hair for a minute or two, then rinse it out thoroughly with cool water.

Benefits and Considerations

Benefits:

  • Cleanses Thoroughly: Baking soda effectively removes build-up from hair products, oils, and dirt, leaving hair squeaky clean.
  • Cost-Effective and Simple: This shampoo is inexpensive and can be easily made at home.
  • May Reduce Product Dependency: Some users find that using baking soda reduces their need for other hair products.

Considerations:

  • Can Be Harsh: Baking soda is abrasive and can be harsh on the hair and scalp. It’s recommended to use it sparingly, not more than once or twice a month.
  • Moisture Loss: Baking soda can strip natural oils from the hair, leading to dryness. It’s important to condition your hair regularly when using this treatment.
  • Not for All Hair Types: People with dry, curly, or brittle hair might find that baking soda is too drying. It’s generally more suited for oily hair types.

While baking soda shampoo can be a great way to cleanse the scalp deeply and support hair health, it’s crucial to monitor your hair’s response and adjust usage accordingly to prevent potential damage.

Apple cider vinegar (ACV) and honey are two natural ingredients that have been used for their health benefits for centuries. When combined, they create a mixture rich in essential nutrients and possess a variety of therapeutic properties. Here’s a closer look at the benefits of apple cider vinegar and honey:

Benefits of Apple Cider Vinegar and Honey

  1. Improves Digestion:
    • Apple cider vinegar can help stimulate digestive juices and increase stomach acid production, which aids in the breakdown of food. Honey, being a natural antibiotic, can soothe the stomach and reduce symptoms of common digestive disorders.
  2. Boosts Immune System:
    • Honey has strong antibacterial and antiviral properties, which help fight infections. ACV also has antibacterial effects and can support the immune system, making this combination excellent for warding off colds and flu.
  3. Reduces Inflammation:
    • Both honey and apple cider vinegar have anti-inflammatory properties, making them beneficial for reducing inflammation throughout the body, which can help alleviate conditions like arthritis or skin inflammation.
  4. Supports Heart Health:
    • Apple cider vinegar can help improve cardiovascular health by helping to lower bad cholesterol levels and triglycerides. Honey also has antioxidant properties that protect the heart by reducing oxidative stress.
  5. Aids in Weight Loss:
    • ACV has been shown to help increase feelings of fullness, which can lead to a decrease in calorie intake and contribute to weight loss. Honey, when consumed in moderation, can provide a healthy source of calories and natural sugar that the body can use for energy.
  6. Soothes Sore Throats:
    • The mixture is a popular home remedy for sore throats. Honey coats the throat and relieves irritation, while ACV’s antibacterial properties can help clear infections.
  7. Improves Skin Health:
    • Both ingredients are beneficial for the skin. ACV can help balance the skin’s pH, enhancing its protective barrier. Honey is a natural humectant, which means it helps keep the skin moist but not oily.

How to Use Apple Cider Vinegar and Honey

Simple ACV and Honey Drink:

  • Mix 1 tablespoon of apple cider vinegar and 1 tablespoon of honey in a glass of warm water.
  • Drink this mixture once or twice a day, preferably before meals, to harness the health benefits.

Precautions

  • ACV is acidic: It can wear away tooth enamel when consumed regularly. Always dilute it in water and consider drinking it with a straw.
  • Honey is high in sugars: Although it’s natural, it’s high in calories and sugars and should be consumed in moderation, especially if you have diabetes or are watching your calorie intake.
  • Allergic Reactions: Both honey and ACV can cause allergic reactions in some people. If you notice any adverse effects, discontinue use immediately.

Apple cider vinegar and honey together offer a potent combination of health benefits that can support overall wellness when included as part of a balanced diet.