Author

Barbara L.

Browsing

During a captivating journey through Turkey’s vibrant culinary landscape, I unearthed a hidden gem that breathed new life into two often-overlooked vegetables: broccoli and cauliflower. Renowned for their health benefits but sometimes dismissed for their mild flavor, Turkish chefs have ingeniously transformed these cruciferous delights into dishes so delectable they steal the spotlight at any meal. Let’s delve into how you can recreate this Turkish delight in your own kitchen, infusing broccoli and cauliflower with a burst of flavor that will captivate your taste buds.

The Turkish Culinary Artistry

In Turkey, cooking transcends mere sustenance; it’s an artistic expression, a symphony of flavors, colors, and textures. Broccoli and cauliflower, with their adaptable nature, serve as blank canvases for the vibrant palette of Turkish spices and cooking methods. The secret to unlocking their deliciousness lies in the harmonious blend of roasting and aromatic spices.

Recipe for Success: Roasted Broccoli and Cauliflower with Turkish Spice Blend

Ingredients:

  • 1 head of broccoli, cut into florets
  • 1 head of cauliflower, cut into florets
  • 3 tablespoons of olive oil
  • 2 teaspoons of paprika
  • 1 teaspoon of ground cumin
  • ½ teaspoon of turmeric
  • A pinch of cayenne pepper (optional, for heat enthusiasts)
  • Salt and freshly ground black pepper, to taste
  • A squeeze of lemon juice (for serving)
  • Fresh parsley, chopped (for garnish)

Instructions:

  1. Preheat the Oven: Preheat your oven to 400°F (200°C), setting the stage for a perfect roast.
  2. Season: In a large bowl, toss the broccoli and cauliflower florets with olive oil until evenly coated. Sprinkle with paprika, cumin, turmeric, cayenne pepper (if using), salt, and black pepper. Toss again to distribute the spices evenly.
  3. Roast to Perfection: Spread the seasoned florets on a baking sheet in a single layer, ensuring ample space for proper roasting. Roast in the preheated oven for 20-25 minutes, or until tender and the edges begin to crisp and brown.
  4. Serve with a Twist: Once roasted, drizzle lemon juice over the vegetables and garnish with fresh parsley. This adds a refreshing zest and enhances the flavors, elevating the dish to new heights.

The Culinary Transformation

What sets this Turkish-inspired approach apart is its ability to elevate ordinary ingredients into extraordinary culinary delights. Through the marriage of warm spices and the transformative power of roasting, broccoli and cauliflower become not only nutritious but also irresistibly flavorful and satisfying.

By incorporating these Turkish techniques and flavors into your cooking, you embark on a culinary voyage that celebrates the art of eating well. Here’s to making broccoli and cauliflower the shining stars of your table, transporting your taste buds to the bustling streets and warm hospitality of Turkey. Cheers to savoring every moment of this culinary journey!

Gardening enthusiasts are continually seeking innovative and sustainable ways to care for their plants while conserving resources and reducing costs. In this article, we introduce two simple yet highly effective do-it-yourself (DIY) methods for watering plants using everyday household items. These methods are not only cost-effective but also environmentally friendly, ensuring your plants receive the right amount of water with minimal waste.

Method 1: Slow-Release Watering Using a Buried Plastic Bottle

Materials Needed:

  • A large plastic bottle (2-liter size works well)
  • Marker
  • Sharp tool (awl or heated iron rod)
  • Water

Step-by-Step Guide:

  1. Prepare the Bottle: Clean the bottle and remove labels. Mark two lines on it – one approximately 15 centimeters from the bottom and another 10 centimeters from the neck.
  2. Create Water Outlet: Make a small hole about 7 centimeters from the bottle’s bottom.
  3. Fill the Bottle: Fill it with water up to the lower line and tighten the cap.
  4. Place the Bottle: Dig a hole near the plant and bury the bottle up to the marked line, with the hole facing the plant.
  5. Final Step: Fill the bottle completely, close the cap, and cover it with soil, leaving the neck exposed.

Advantages:

  • Efficient water use through targeted delivery to the root zone.
  • Reduces the need for frequent watering, saving time and resources.
  • Ideal for vegetable gardens and outdoor plants.

Method 2: Wicking System with a Plastic Bottle and Fabric/String

Materials Needed:

  • Plastic bottle
  • Cotton fabric or thick cotton string
  • Water
  • Sharp tool for making a hole

Step-by-Step Guide:

  1. Prepare the Bottle: Clean the bottle and make a hole in the cap.
  2. Thread the Fabric/String: Cut a piece of fabric or string, thread it through the cap, ensuring it’s long enough to reach the soil.
  3. Fill and Seal: Fill the bottle with water, replace the cap with the fabric/string, ensuring it’s saturated.
  4. Position the Bottle: Place the bottle cap side down in the soil near the plant, with the fabric/string extending into the soil.

Advantages:

  • Direct water delivery to roots, ensuring consistent moisture.
  • Suitable for indoor and outdoor potted plants.
  • Low maintenance and easy to monitor.

These two methods offer gardeners sustainable, cost-effective solutions for plant watering, particularly useful during dry spells or when away from home. By utilizing simple materials like plastic bottles and fabric, these methods align with eco-friendly gardening practices, prioritizing water conservation and efficiency.

Whether you have a vegetable garden, potted plants, or a mix of both, these DIY solutions can help maintain healthy, hydrated plants with minimal effort and cost. Embracing such sustainable practices not only benefits your garden but also contributes positively to environmental conservation.

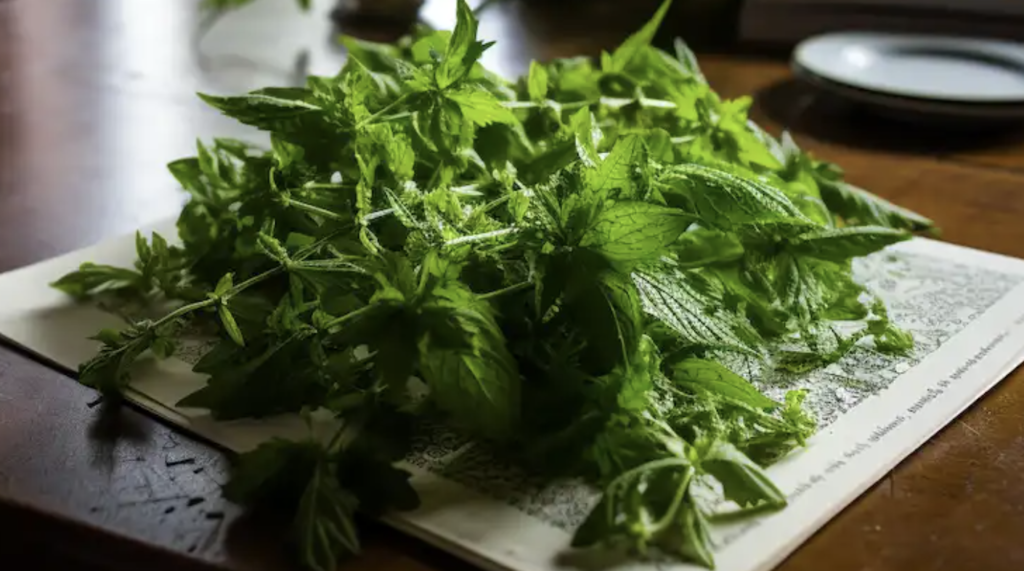
Lamb’s Quarters, also known as Chenopodium album or wild spinach, is a humble herbaceous plant with a rich history of culinary and medicinal uses. Despite being dismissed as a weed, it boasts numerous health-enhancing properties, making it a valuable addition to both diets and herbal wellness routines.

Health Benefits

Nutritional Powerhouse

Lamb’s Quarters is packed with essential vitamins and minerals like A, C, and K, along with calcium, iron, magnesium, and potassium, making it a nutrient-dense superfood.

Antioxidant Richness

Rich in antioxidants such as beta-carotene and quercetin, it helps protect cells from oxidative damage and may reduce the risk of chronic diseases like cancer and heart disease.

Anti-Inflammatory Properties

Its anti-inflammatory properties make it a potential remedy for conditions like arthritis and inflammatory bowel diseases, offering relief from inflammation and discomfort.

Digestive Support

Historically used to promote digestive health, its fiber content helps regulate bowel function and maintain gut health, preventing constipation.

Weight Management Aid

High in fiber, Lamb’s Quarters promotes satiety and may reduce calorie intake, supporting weight management efforts.

Blood Sugar Regulation

Preliminary studies suggest it may help regulate blood glucose levels, making it promising for diabetics or those at risk of diabetes.

Culinary Uses

Salad Ingredient

Young leaves add a refreshing, slightly tangy flavor to salads, whether raw or blanched.

Cooking Green Substitute

It can replace spinach or collard greens in various culinary preparations, adding flavor and nutrition when sautéed or steamed.

Smoothie Booster

Adding Lamb’s Quarters to smoothies enhances their nutritional value, complementing the sweetness of fruits.

Soup and Stew Enhancer

Its versatility extends to soups and stews, enriching both flavor and nutrition.

Medicinal Applications

Herbal Infusion

An infusion of its leaves soothes digestion and reduces oxidative stress in the body.

Topical Poultice

A poultice made from its leaves provides relief for skin irritations, bites, rashes, and minor burns.

Concentrated Tincture

Tinctures offer a more potent medicinal application, but caution and professional consultation are advised, especially when used with medications or existing health conditions.

Precautions and Considerations

Accurate Identification

Correct identification is crucial to avoid harmful mimic species.

Allergy Alert

Gradual introduction is recommended to monitor potential allergic reactions.

Purity in Harvesting

Harvest from uncontaminated, chemical-free areas.

Professional Consultation

Consult healthcare providers or certified herbalists before using medicinally, especially for those with health concerns or taking medications.

Conclusion

Once overlooked, Lamb’s Quarters is now recognized for its extensive health benefits and culinary adaptability. Whether enhancing nutrition, managing health conditions, or exploring new culinary experiences, it’s a multifaceted herb worth exploring with proper consideration and consultation for medicinal use.

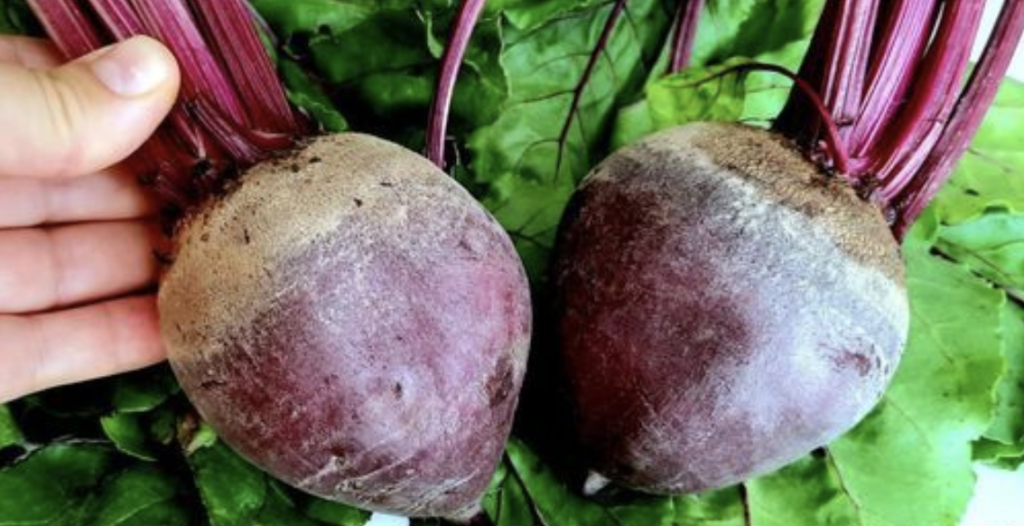
Red beets, with their remarkable health benefits and vibrant color, are more than just salad ingredients. Bursting with vitamins, minerals, and antioxidants, they support heart health, reduce blood pressure, and boost endurance. Join us as we explore a hidden gem involving red beets – a simple yet potent recipe that remains unknown to many.

Introducing the Red Beet Elixir – Nurturing Health and Vitality

The Red Beet Elixir is a delightful concoction that caters to your taste buds while nourishing your body. Here’s how to make it:

Ingredients:

  • 2 medium-sized red beets
  • 1 liter of water
  • Honey (optional, for sweetness)
  • Lemon juice (optional, for a tangy twist)

Instructions:

  1. Prepare the Beets: Wash the red beets thoroughly and chop them into small chunks.
  2. Cook the Beets: Place the chopped beets in a pot with 1 liter of water. Bring to a boil, then simmer for 20 minutes.
  3. Cool and Enhance: Allow the elixir to cool, then strain to remove beet chunks. Add honey for sweetness and lemon juice for a tangy flavor.
  4. Serve: Enjoy the elixir warm or chilled as a daily ritual to experience its health benefits.

Embracing the Beet Elixir – A Journey to Health and Vitality

Incorporate the Red Beet Elixir into your daily routine to harness the natural magic of red beets in a delightful and nutritious manner. Whether you seek to boost heart health, increase stamina, or enjoy a refreshing beverage, this secret recipe is your ticket to health and vitality.

Conclusion

With its simplicity and multitude of health benefits, the Red Beet Elixir serves as a testament to the effortless integration of nutritious and natural remedies into our lives. So, next time you have red beets at home, remember this miracle recipe and treat yourself to a glass of health and vitality.

Growing persimmons from seed is a fulfilling endeavor that promises the joy of nurturing your own fruit-bearing trees. This comprehensive guide will lead you through each step, ensuring a successful venture into cultivating these delightful fruits.

Choosing the Right Persimmon Variety

For pot cultivation, opt for dwarf or semi-dwarf varieties like Fuyu or Jiro. These varieties adapt well to container environments and are self-pollinating, making them ideal for small spaces.

Preparing the Ideal Pot

Select a spacious pot, preferably 22-24 inches in depth and width, to accommodate the persimmon tree’s taproots. Ensure good drainage using materials like ceramic, plastic, or wood to prevent root rot.

Soil Composition

Create a well-draining soil mix using potting soil, organic compost, and perlite or sand. This blend provides an optimal environment for root growth and overall plant health.

Seed Germination Process

Seed Selection and Preparation: Begin with fully ripe persimmons. Extract and thoroughly clean the seeds. Moist Paper Towel Method: Soak the seeds in warm water for 24 hours, then place them on a moist paper towel and seal in a container for germination. Stratification: Mimic the natural wintering process by refrigerating the container with seeds for about 3 months. Planting: After stratification, plant the seeds in a tall container with sterile potting soil, keeping them 2 inches deep in a bright, warm location.

Ongoing Care

Water deeply, allowing the soil to slightly dry between waterings. Fertilize during the growing season, prune to maintain shape and health, and ensure the tree receives 6-8 hours of direct sunlight daily.

Special Tips for Success

Repotting: Refresh the soil and provide more room for root growth by repotting every 2-3 years. Cross-Pollination: Enhance fruit production by planting multiple varieties for cross-pollination. Winter Care: In colder climates, move pots to an unheated indoor space during winter to protect the trees.

Conclusion

By following these guidelines and providing consistent care, you’ll cultivate healthy persimmon trees from seed and eventually enjoy their delicious fruits. Remember, patience and attention are essential, as persimmons may take a few years to bear fruit, but the rewards will be well worth the wait.

In a serene and picturesque setting, resides an individual whose vitality and zest for life spark curiosity and wonder. At the heart of her daily ritual lies a humble glass of kiwi juice. This unassuming fruit, with its vibrant green interior and rich nutritional profile, holds the promise of sustained youthfulness and robust health.

The Nutritional Powerhouse of Kiwi

Kiwi stands out among fruits for its exceptional nutritional benefits, boasting a wealth of vitamins C and E, antioxidants, fiber, and potassium, each contributing to overall well-being:

Vitamin C and E: Crucial for immune system support, these vitamins fortify the body against illnesses. Antioxidants: Kiwi’s antioxidants combat free radicals, potentially slowing the aging process and promoting skin health. Fiber: High fiber content aids digestion and supports heart health by regulating blood pressure. Potassium: Essential for cardiovascular health, potassium helps maintain optimal blood pressure levels.

A Ritual of Youth: The Kiwi Juice Connection

Our protagonist attributes her dynamism and radiant complexion to her daily indulgence in kiwi juice. Beyond a mere dietary habit, this ritual embodies her connection with the natural goodness of kiwi, delighting in its luscious flavors while nourishing her body.

Incorporating Kiwi into Your Lifestyle

Integrating kiwi into your daily routine is effortless and offers a plethora of health benefits:

Morning Boost: Kickstart your day with a revitalizing kiwi smoothie for a nutritious breakfast option. Salad Enhancement: Elevate your salads with the addition of kiwi for a burst of flavor and a nutrient-packed punch. Snacking: Enjoy kiwi as a tangy and nutritious snack, providing an instant rejuvenation and vital nutrient boost.

Conclusion: Embrace the Gift of Nature

The tale of our protagonist discovering the fountain of youth in the unassuming kiwi serves as a poignant reminder of nature’s profound offerings. Beyond tantalizing taste buds, kiwi presents a pathway to vibrant health and timeless vitality. Embrace this delightful fruit as your ally on the journey to a more joyful and enduring existence.

Discover the hidden treasure within avocado seeds and unlock their nutritional potential by transforming them into a versatile powder. Follow this simple DIY project to create avocado seed powder at home and elevate your wellness routine with its myriad benefits.

Avocado Seeds: Nature’s Powerhouse

Avocado seeds are packed with antioxidants, fiber, and essential nutrients, making them a valuable addition to your diet. Converting these seeds into powder provides a convenient way to boost the nutritional content of your meals, from smoothies to oatmeal and beyond.

Ingredients and Tools

Ingredients:

  • Avocado seeds

Tools:

  • Sharp knife
  • Baking sheet
  • Oven
  • High-powered blender or coffee grinder
  • Airtight container for storage

Instructions

  1. Prepare the Seed: After enjoying your avocado, thoroughly wash the seed to remove any remaining flesh. Allow it to dry completely.
  2. Slice the Seed: Carefully cut the avocado seed into quarters using a sharp knife to expedite the drying process and facilitate grinding.
  3. Oven Dry: Preheat your oven to its lowest setting and place the seed quarters on a baking sheet. Dry them in the oven for 1.5 to 2 hours, ensuring dehydration without roasting.
  4. Grind to a Powder: Once the seed pieces are fully dried and cooled, use a high-powered blender or coffee grinder to pulverize them into a fine powder.
  5. Storage: Transfer the avocado seed powder into an airtight container and store it in a cool, dry place to maintain freshness.

Usage Tips

Experiment with incorporating avocado seed powder into your daily meals, starting with small amounts due to its strong flavor. Gradually adjust according to your taste preferences and tolerance.

Embrace Sustainability and Wellness

This DIY project not only enhances your health but also aligns with a sustainable lifestyle by minimizing waste. Respect nature’s bounty and unleash your creativity in the kitchen while reaping the benefits of avocado seed powder.

Conclusion

May this simple yet fulfilling project bring creativity and wellness into your kitchen, allowing you to make the most of every part of your beloved avocados. Here’s to good health and embracing the holistic benefits of nature’s gifts!

Blackberries, renowned for their delectable flavor and vigorous growth, thrive remarkably well when cultivated in containers. Whether you’re constrained by space or aiming for controlled growth, growing blackberries in pots offers a fulfilling endeavor. Let’s explore the essential aspects of nurturing these delicious berries successfully.

Understanding Blackberry Growth

Similar to raspberries, blackberries feature rhizomes that spread underground, giving rise to canes. These canes progress through stages: primocanes, young and green, and floricanes, mature and woody, capable of fruit production.

Selecting the Right Variety

When selecting blackberry varieties, consider their growth habits. Some bear fruit on primocanes (young canes), while others produce on floricanes (second-year canes). Understanding this distinction aids in managing pruning and harvesting.

Soil Mix Preparation

Prepare a well-balanced potting mix to support blackberry growth. Opt for a standard potting mix rich in organic matter, supplemented by an acid-loving mix to slightly lower the pH. Blackberries thrive in slightly acidic soil, making this mix conducive to their growth.

Potting and Planting

Ensure the container provides ample space for blackberry growth. Plant the blackberry shrub, ensuring the soil level matches that of the pot. Gently tease the roots to encourage outward growth rather than circling.

Optimal Care for Container-Grown Blackberries

  • Sunlight: Provide full sun exposure, though blackberries tolerate partial shade.
  • Airflow: Ensure adequate airflow to prevent issues from excessive humidity.
  • Moisture: Maintain consistent soil moisture, especially during the fruiting season.
  • Fertilization: Apply organic fertilizers formulated for berries regularly.
  • Pruning: Minimal pruning may be necessary for container-grown blackberries, depending on the variety.

Challenges and Pest Management

Watch for signs of overwatering to prevent root rot. Protect berries from common pests like birds and fruit flies using netting to ensure a successful harvest.

Harvesting and Enjoyment

Harvest ripe blackberries promptly to prevent pest damage. Enjoy them fresh or incorporate them into various culinary creations, relishing their antioxidants and exquisite flavor.

Container gardening facilitates the cultivation of blackberries even in small spaces, offering a continuous supply of these delightful fruits. By prioritizing proper care, soil management, and addressing potential challenges, you can experience the satisfaction of growing blackberries at home.

In the realm of natural remedies and traditional wisdom, everyday ingredients harbor remarkable benefits, and cloves emerge as a standout example. Beyond their culinary allure, cloves serve as a versatile household treasure, offering a surprising yet effective solution: scattering them behind your doors. This age-old practice holds a myriad of benefits that redefine the role of this familiar spice in your home.

Why Scatter Cloves Behind Your Door?

1. Natural Air Freshener: The robust, spicy fragrance of cloves acts as a natural deodorizer, rejuvenating your home with an inviting aroma.

2. Pest Deterrent: Cloves’ potent scent serves as a deterrent against pests like ants and mosquitoes, fostering a serene and pest-free environment.

3. Mood Enhancer: The soothing aroma of cloves is linked to reduced stress and anxiety, creating a tranquil atmosphere that promotes relaxation and mental well-being.

Integrating Cloves Into Your Home:

1. Direct Sprinkle Method: Sprinkle whole cloves behind frequently opened doors to disperse their scent effectively throughout your space.

2. Cloth Pouch Technique: Encase whole cloves in fabric pouches and position them strategically behind doors or within closets for a subtle infusion of fragrance.

3. Homemade Potpourri: Combine cloves with cinnamon sticks and dried orange peels to create a personalized potpourri, enhancing your home with a layered, inviting aroma.

By embracing these innovative uses of cloves, you can significantly enhance the ambiance of your home, showcasing the simplicity and effectiveness of natural solutions. Beyond their culinary role, cloves hold the key to addressing everyday household challenges, embodying the essence of nature’s gifts. The next time you reach for cloves in your kitchen, envision their broader potential—not just as a spice but as a gateway to a more pleasant, pest-free, and serene living environment.

Crafting your own insect repellent spray offers a natural and gentle solution to ward off unwanted pests such as fleas, ants, and cockroaches. Follow these simple steps to create and utilize this homemade remedy:

Ingredients:

  • 1 cup of liquid detergent (any dishwashing liquid)
  • 2 cups of alcohol or apple cider vinegar
  • 2 tablespoons of cloves
  • 1/4 cup of water

Instructions:

  1. Prepare Clove Infusion: Boil 1/4 cup of water in a saucepan. Add 2 tablespoons of cloves to the boiling water and let them simmer for 10 minutes.
  2. Prepare Detergent and Alcohol (or Vinegar) Mixture: While the clove infusion is simmering, mix 1 cup of liquid detergent with 2 cups of alcohol or apple cider vinegar in a separate container.
  3. Combine Ingredients: After 10 minutes, remove the clove infusion from heat and allow it to cool. Once cooled, combine the clove infusion with the detergent and alcohol (or vinegar) mixture. Gently mix to avoid excessive foaming.
  4. Transfer to Spray Bottle: Pour the resulting solution into a spray bottle equipped with a diffuser nozzle.

How to Use:

  • Apply Liberally: Spray the homemade repellent in areas frequented by insects, focusing on entry points where pests may enter your home.
  • Maintain Cleanliness: Keep surfaces clean to remove food residues that attract insects and to eliminate insect eggs and larvae.

By following these steps, you can effectively repel insects from your home using a natural and eco-friendly solution.