As we age, bladder health and prostate function become important for overall well-being. Frequent urination, discomfort, or prostate swelling can disrupt daily life. Thankfully, this old-fashioned natural remedy has been used for generations to support a healthy bladder and prostate—and it’s easy to make!
Why This Recipe Works
✅ Supports Prostate Health – Reduces inflammation and improves urinary flow.
✅ Cleanses the Bladder – Helps flush out toxins and bacteria naturally.
✅ Reduces Frequent Urination – Especially helpful for nighttime bathroom trips.
✅ Improves Kidney Function – Aids in filtering out waste and preventing infections.
Grandfather’s Natural Bladder & Prostate Recipe
Ingredients:
✔ 1 tablespoon pumpkin seeds (raw, unsalted)
✔ 1 teaspoon flaxseeds (ground)
✔ 1 teaspoon nettle leaves (dried or fresh)
✔ 2 cups warm water
✔ 1 teaspoon honey (optional, for taste)
Instructions:
1️⃣ Boil the water and add nettle leaves. Let it steep for 10 minutes.
2️⃣ Grind the pumpkin and flaxseeds into a fine powder.
3️⃣ Strain the nettle tea and mix in the powdered seeds.
4️⃣ Add honey if desired and drink warm, once a day (best in the evening).
Why These Ingredients?
Pumpkin Seeds – Contain zinc and phytosterols that help shrink the prostate and improve urinary function.
Flaxseeds – High in omega-3s and fiber, they help reduce inflammation and support the prostate.
Nettle Leaves – A natural diuretic that cleanses the bladder, reducing frequent urination.
Warm Water – Helps flush out bacteria and toxins for a healthier urinary tract.
Extra Tips for Bladder & Prostate Health
✔ Limit caffeine & alcohol – These irritate the bladder.
✔ Drink plenty of water – Keeps the urinary system clean.
✔ Eat more tomatoes – Rich in lycopene, which supports prostate health.
✔ Avoid processed foods – They contribute to inflammation.
Try This Remedy & Feel the Difference!
This simple, natural recipe has been trusted for generations to keep the bladder and prostate healthy. Drink it regularly, and experience better urinary flow, reduced inflammation, and overall improved well-being!
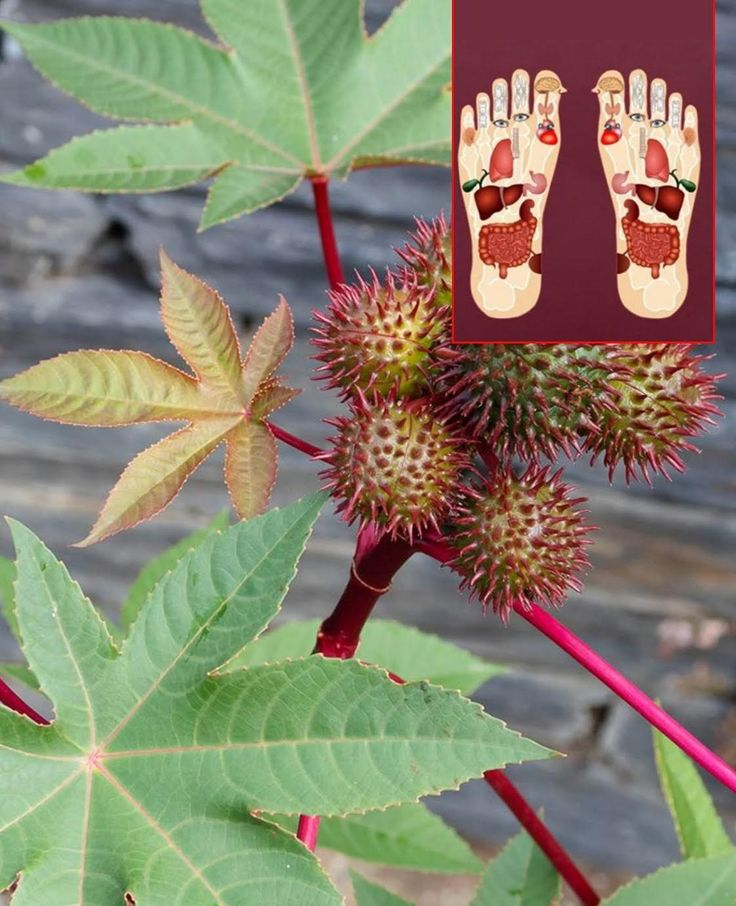
The castor plant (Ricinus communis), often recognized for its seeds and oil, also offers another hidden gem its leaves. Castor leaves have been celebrated in traditional medicine for centuries thanks to their powerful therapeutic properties. Known for their anti-inflammatory, detoxifying, and healing capabilities, these leaves have become a natural remedy for various health concerns.
#1. Anti-Inflammatory Properties
Inflammation is the body’s natural response to injury or infection, but chronic inflammation can lead to various health problems, including arthritis and joint pain. Castor leaves are renowned for their potent anti-inflammatory effects. Compounds found in these leaves, such as ricinoleic acid, help reduce inflammation and swelling.
When applied as a poultice, castor leaves can provide relief for arthritis, muscle pain, and even minor injuries. A study published in the International Journal of Pharmaceutical Sciences and Research highlighted castor leaves’ effectiveness in reducing joint inflammation, making them a natural alternative to synthetic anti-inflammatory drugs.
#2. Supports Digestive Health
Castor leaves are a traditional remedy for digestive issues. They stimulate the production of digestive enzymes, improving nutrient absorption and promoting overall gut health. Castor leaf tea, in particular, is known for its mild laxative properties, effectively relieving constipation and improving bowel regularity. The leaves also support the liver, an essential organ for digestion and detoxification. Regular use of castor leaf tea or poultices can aid in cleansing the digestive system, ensuring better digestion and reduced bloating.
#3. Detoxification and Liver Support
The liver plays a critical role in removing toxins from the body, and castor leaves can assist in this process. The detoxifying properties of castor leaves help rejuvenate liver function by flushing out harmful toxins. When applied as a poultice over the liver area, these leaves stimulate detoxification and support metabolic health. Research in The Journal of Ethnopharmacology has shown that the bioactive compounds in castor leaves contribute to improved liver enzyme activity.
#4. Enhances Skin Health
Castor leaves are a natural solution for various skin conditions, thanks to their anti-inflammatory and antimicrobial properties. When crushed and applied as a poultice, these leaves can soothe acne, rashes, and insect bites. Their healing compounds reduce swelling, alleviate itching, and promote faster recovery.
Additionally, castor leaves can help treat minor wounds and prevent infections. Studies published in Dermatology Research and Practice suggest that natural remedies like castor leaves can be effective for managing skin irritation and inflammation without the side effects of chemical-based products.
#5. Pain Relief
Pain management is one of the most significant benefits of castor leaves. Their analgesic properties provide natural relief from headaches, muscle soreness, and menstrual cramps. A castor leaf poultice, when applied to the affected area, enhances blood circulation and reduces pain intensity.
Warm castor oil massages infused with castor leaves can further relieve deep muscle pain and tension. Therefore, this holistic approach to pain management makes castor leaves a valuable remedy for those seeking alternatives to over-the-counter pain relievers.
How to Use Castor Leaves
Castor leaf poultice: Start with fresh castor leaves, a clean cloth, and warm water. Crush the leaves to release their juices, apply the paste to the affected area, and cover with a cloth. Let it sit for 20–30 minutes to relieve inflammation, pain, or irritation.
Castor leaf tea: Take 1–2 fresh or dried castor leaves and steep them in a cup of hot water for 5–10 minutes. Strain the tea and drink it once a day to support digestion and detoxification.
Castor leaf oil: Crush the leaves and infuse them in warm coconut or olive oil for 1–2 hours. Strain the oil and store it in a clean bottle. This oil can be massaged onto the skin for pain relief, scalp health, or wound healing.
Cautions and Precautions
While castor leaves are generally safe, the seeds of the castor plant are highly toxic. Avoid using seeds or unverified extracts. Perform a patch test before topical use to ensure you don’t experience skin irritation or allergic reactions. Pregnant and breastfeeding women should consult a healthcare provider before using castor leaves in any form.
Disclaimer
This article is for informational purposes only and should not replace professional medical advice. Consult a healthcare provider before using castor leaves, especially if you have underlying health conditions or are on medication.
Mimosa pudica, commonly known as the sensitive plant, touch-me-not, or “dormideira” in Portuguese, is much more than a fascinating plant that closes its leaves when touched. Native to Central and South America, this small, humble plant has been used for centuries in traditional medicine for its potent healing properties.
While its movement in response to touch has made it a favorite among children and nature enthusiasts, the real magic lies in its wide array of health benefits. In this article, we’ll explore ten incredible health benefits of Mimosa pudica and provide practical ways to incorporate this plant into your wellness routine.
10 Health Benefits of Mimosa Pudica
1. Anti-inflammatory Properties Mimosa pudica has powerful anti-inflammatory effects that can help reduce inflammation in the body. Whether applied topically to reduce swelling or taken internally, this plant can help soothe conditions such as arthritis, muscle pain, and other inflammatory disorders.
2.Liver Health This plant is known for its hepatoprotective properties, meaning it helps protect and detoxify the liver. It can be used to support liver function, helping to cleanse the body of toxins and promote overall liver health.
3. Digestive Aid Mimosa pudica can assist with various digestive issues, including constipation and diarrh ea. Its mild laxative properties can help regulate bowel movements, while its ability to reduce inflammation makes it effective for soothing the digestive tract.
4. Antimicrobial and Antiviral Effects Studies have shown that Mimosa pudica possesses antimicrobial and antiviral properties, making it effective in fighting off infections. It can be used to treat minor wounds, prevent infections, and even assist in managing viral conditions.
5. Sedative and Relaxant If you struggle with anxiety, insomnia, or stress, Mimosa pudica might be a natural solution. The plant has mild sedative effects that can help calm the nervous system, promoting better sleep and relaxation.
6. Oral Health The antibacterial properties of Mimosa pudica make it an excellent natural remedy for oral health issues. It can be used as a gargle to reduce inflammation and infection in the mouth, throat, and gums.
7.Wound Healing The anti-inflammatory and antimicrobial properties of Mimosa pudica also make it effective for wound healing. When applied as a poultice, it can help speed up the healing process of cuts, sores, and skin infections.
8.Menstrual Relief Women suffering from menstrual cramps or premenstrual syndrome (PMS) may find relief in Mimosa pudica. The plant can help alleviate pain, reduce irritability, and regulate menstrual cycles.
9. Support for Hemorrhoids Mimosa pudica’s soothing properties can provide relief for hemorrhoids, reducing pain and inflammation when applied topically or taken internally.
10.Antioxidant Effects The plant is rich in antioxidants, which help combat oxidative stress in the body. This not only supports overall health but also helps in preventing chronic diseases linked to oxidative damage.
How to Use Mimosa Pudica: 5 Practical Applications
1. Herbal Tea One of the simplest ways to use Mimosa pudica is to make an herbal tea. How to Prepare: Boil one teaspoon of dried Mimosa pudica leaves in a cup of water for about 10 minutes. Strain and drink the tea once it cools down. This tea can help with digestive issues, anxiety, and insomnia.
2. Topical Poultice For treating wounds, sores, or skin irritations, a Mimosa pudica poultice can be very effective. How to Prepare: Crush fresh leaves and stems of the plant to form a paste. Apply the paste directly to the affected area and cover it with a clean cloth. Leave it on for a few hours before rinsing it off. Repeat as needed.
3. Gargle for Oral Health To use Mimosa pudica for oral health, you can prepare a simple gargle. How to Prepare: Boil a handful of leaves in water, let it cool, and then use the liquid as a mouthwash. This helps reduce inflammation and combat infections in the mouth and throat.
4. Bath Soak For overall relaxation and skin health, you can add Mimosa pudica to your bath. How to Prepare: Add a handful of dried leaves or a few drops of Mimosa pudica extract to warm bathwater. Soak in the bath for 20-30 minutes to benefit from its soothing and anti-inflammatory properties.
5. Capsules or Powders Mimosa pudica is also available in capsule or powdered form for internal use. How to Use: Follow the dosage instructions on the packaging, as concentrations can vary. This form is convenient for supporting digestive health, liver function, and reducing inflammation.
Disclaimer
While Mimosa pudica has many health benefits, it’s important to use it with caution. The plant should be avoided by pregnant or breastfeeding women, and those with certain medical conditions should consult a healthcare provider before use. Additionally, excessive consumption can lead to adverse effects, so it’s essential to adhere to recommended dosages.
Conclusion
Mimosa pudica is more than just a plant that reacts to touch—it’s a powerful natural remedy with a variety of health benefits. From reducing inflammation to supporting liver health, this plant offers a range of uses that can enhance your wellness. By incorporating Mimosa pudica into your health regimen, whether through teas, poultices, or other methods, you can tap into its ancient healing properties. However, as with any medicinal plant, it’s crucial to use Mimosa pudica responsibly and consult a healthcare professional when necessary.
Are you looking for a safe, effective, and budget-friendly way to whiten your teeth? This simple two-ingredient remedy is all you need!
Using a ripe tomato and baking soda, you can remove yellow stains and tartar buildup, revealing brighter, whiter teeth in just two minutes. Here’s how this natural solution can transform your smile effortlessly.
Why Tomatoes Are Perfect for Teeth Whitening
Tomatoes aren’t just great for your diet—they’re an excellent natural remedy for teeth whitening. Here’s why:
Lycopene Power: Tomatoes are rich in lycopene, a powerful antioxidant that helps break down stains and reduce tartar buildup.
Natural Acids: Their gentle acidity works to lift surface discoloration without damaging your enamel.
Thank you for reading the article.
Perfect Combo with Baking Soda: When combined with baking soda, tomatoes create a powerful paste that removes yellow stains caused by food, drinks, and plaque.
Thank you for reading the article.
The Whitening Recipe
Ingredients:
1 ripe tomato
1 teaspoon baking soda
A small pinch of salt (optional)
Thank you for reading the article.
Step-by-Step Instructions:
1. Prepare the Tomato
Cut the ripe tomato in half and scoop out the pulp.
Mash the pulp into a smooth consistency using a fork or blender.
Thank you for reading the article.
2. Mix in Baking Soda
Add one teaspoon of baking soda to the mashed tomato pulp.
Baking soda acts as a gentle abrasive, scrubbing away surface stains.
Thank you for reading the article.
3. Optional: Add Salt
Include a small pinch of salt for an extra cleaning boost. The mild abrasiveness of salt helps tackle tougher stains.
4. Apply to Your Teeth
Use your finger or a soft toothbrush to apply the mixture evenly to your teeth, focusing on areas with visible discoloration.
Thank you for reading the article.
5. Let It Sit
Allow the paste to sit on your teeth for 1–2 minutes to let the ingredients work.
6. Rinse Thoroughly
Rinse your mouth well with warm water.
For a cleaner finish, brush your teeth with regular toothpaste.
Thank you for reading the article.
How It Works
Tomatoes: The lycopene and natural acids break down tartar and remove stains.
Baking Soda: Gently scrubs the teeth and neutralizes harmful acids in the mouth.
Salt (Optional): Enhances the cleaning power by acting as a mild abrasive for stubborn stains.
Thank you for reading the article.
Tips for Maintaining a White Smile
To keep your teeth bright and healthy, follow these oral care habits:
Brush Twice Daily: Use a fluoride toothpaste to remove plaque and prevent tartar buildup.
Floss Regularly: Clean between your teeth to remove food particles and plaque.
Rinse After Staining Foods: After consuming coffee, tea, or red wine, rinse with water to minimize staining.
Use Mouthwash: An antibacterial mouthwash freshens your breath and keeps your teeth cleaner.
Stay Hydrated: Drinking water washes away food particles and neutralizes acids in your mouth.
Limit Natural Remedies: Use this tomato and baking soda paste a few times a week to avoid overuse, which can harm enamel.
Thank you for reading the article.
Conclusion: A Simple, Natural Solution
This tomato and baking soda remedy is a game-changer for achieving a naturally brighter smile. It’s safe, affordable, and easy to prepare at home. With consistent use and good oral hygiene practices, you’ll enjoy a noticeably whiter, healthier smile—free of harsh chemicals.
Try it today and see the results for yourself! Combine this remedy with daily oral care for the confidence of a radiant, sparkling smile. ✨
In today’s world, where saving money is a priority, finding creative ways to repurpose everyday items can make a big difference. Rising living costs make it essential to cut unnecessary expenses, and one surprising yet effective way to do so is by using orange peels combined with salt to create a powerful cleaning solution.
The Hidden Value of Orange Peels
Orange peels are often discarded as waste, but they hold incredible cleaning potential. Packed with natural oils and a refreshing citrus scent, they can be turned into an effective, chemical-free detergent that saves money while keeping your home spotless.
Why Add Salt to Orange Peels?
Salt is a natural abrasive that enhances the cleaning power of orange peels. It helps break down grease, lift stains, and eliminate odors, making it a cost-effective addition to homemade cleaning products.
A Budget-Friendly Alternative to Expensive Cleaners
Commercial cleaning products can be expensive, and lower-cost alternatives often lack efficiency. Using DIY solutions like this one not only reduces costs but also ensures you are using natural, non-toxic ingredients in your home.
How to Make an Orange Peel and Salt Cleaner
Ingredients:
Orange peels from 2-3 oranges
1 tablespoon of table salt
1 teaspoon of baking soda
2 cups of water
1/2 cup of alcohol vinegar
1 teaspoon of dish detergent (optional)
Thank you for reading the article.
Instructions:
Simmer the Peels: Place the orange peels in a pot with water and bring to a gentle boil.
Add Salt & Baking Soda: Stir in the salt and baking soda, allowing the mixture to infuse for 15-20 minutes.
Strain the Liquid: Once the water turns an orange hue, strain the mixture into a container.
Mix with Vinegar & Detergent: Add alcohol vinegar and a dash of dish detergent, then mix well.
Store & Use: Pour the solution into a spray bottle for easy application.
Thank you for reading the article.
Powerful Benefits of This DIY Cleaner
Cuts Through Grease: The combination of orange oils, salt, and vinegar effectively removes stubborn stains and grease.
Freshens and Deodorizes: Leaves a refreshing citrus scent, eliminating unpleasant odors in the kitchen and bathroom.
Thank you for reading the article.
Eco-Friendly & Safe: Contains no harsh chemicals, making it safe for children and pets.
Cost-Effective: Reduces spending on expensive cleaning products while utilizing kitchen scraps.
Thank you for reading the article.
Smart Ways to Use Your Orange Peel Cleaner
Kitchen Surfaces: Spray on countertops, sinks, and stovetops to remove grease and grime.
Bathroom Cleaning: Works well on tiles, sinks, and bathtubs for a fresh, clean look.
Glass & Windows: A streak-free solution for shining glass surfaces.
Garbage Bins & Fridges: Helps neutralize odors and keep storage areas smelling fresh.
Thank you for reading the article.
Additional Tips for Best Results
Store in a Sealed Bottle: Keeps the solution fresh and ready to use.
Shake Before Use: Ensures the ingredients remain well-mixed.
Use Within a Month: For optimal effectiveness, make fresh batches as needed.
Final Thoughts
Instead of throwing away orange peels, repurpose them into a powerful and budget-friendly household cleaner. This simple yet effective solution not only saves money but also reduces waste and promotes a more sustainable lifestyle. Start today and experience the benefits of a cleaner home without the added expense! ✨
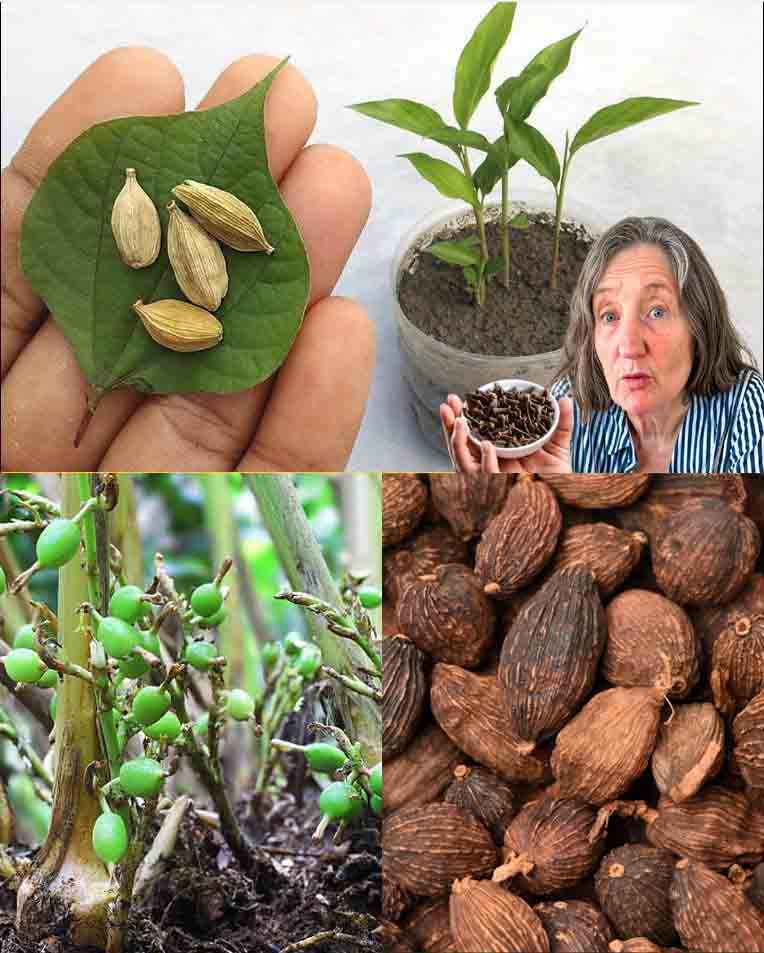
Cardamom, often called the “Queen of Spices,” is a prized ingredient in culinary traditions worldwide, known for its warm, aromatic, and slightly sweet flavor. While most people buy dried cardamom pods, you can actually grow your own cardamom plant at home—even in a small space!
If you’ve ever wanted to cultivate your own fresh cardamom, this step-by-step guide will teach you how to grow cardamom from seeds in a pot, ensuring you have a continuous supply of this exotic spice.
Why Grow Cardamom at Home?
✔ Fresh & Organic – Homegrown cardamom ensures chemical-free, high-quality spice.
✔ Cost-Effective – Store-bought cardamom is expensive, but growing it at home saves money.
✔ Aromatic & Beautiful – A fragrant, lush green plant that enhances indoor and outdoor spaces.
✔ Satisfying & Rewarding – Experience the joy of harvesting your own spices.
What You’ll Need to Grow Cardamom in a Pot
Before you start, gather these essential supplies:
✔ Cardamom Seeds – Purchase from a reputable supplier or extract seeds from fresh store-bought cardamom pods.
✔ A Large Pot – At least 12 inches in diameter with good drainage holes.
✔ Potting Mix – Use a well-draining, nutrient-rich mix with a neutral pH.
✔ Warm & Humid Environment – Cardamom thrives in warm, tropical conditions (70-80°F or 21-27°C).
✔ Indirect Sunlight – The plant prefers bright, filtered light rather than direct sun.
✔ Plastic Wrap or Mini Greenhouse Cover – Helps maintain humidity during germination.
✔ Watering Can & Humidifier (Optional) – To keep soil moist but not soggy.
Step 1: Germinating Cardamom Seeds
1. Prepare the Seeds
If using cardamom pods, crack them open to remove the seeds.
Soak the seeds in warm water for 24 hours to soften the outer shell and speed up germination.
2. Prepare the Pot & Soil
Fill your pot with a well-draining potting mix, leaving about an inch of space at the top.
Ensure the pot has drainage holes to prevent waterlogging.
3. Plant the Seeds
Plant the soaked seeds½ inch deep, spacing them 2-3 inches apart.
Gently press soil over the seeds but don’t compact it too tightly.
4. Water & Cover
Water the pot thoroughly, ensuring the soil is moist but not waterlogged.
Cover the pot with plastic wrap or a plastic lid to create a mini greenhouse effect, helping to maintain humidity.
5. Maintain Warmth
Place the pot in a warm, humid location (70-80°F or 21-27°C).
If necessary, use a heating mat to maintain consistent warmth.
6. Be Patient
Cardamom seeds take several weeks to germinate (sometimes up to 40 days).
Keep the soil consistently moist, but avoid overwatering, which can cause rot.
Step 2: Caring for Your Cardamom Plant
Once your seedlings emerge, follow these essential care tips:
1. Provide Indirect Sunlight
Move the pot to a bright area with filtered sunlight (a north- or east-facing window works well).
If growing outdoors, place the plant in a shaded or semi-shaded spot.
2. Maintain Humidity & Moisture
Keep the humidity levels above 50% by:
✔ Using a humidifier.
✔ Placing a tray of water near the plant.
✔ Misting the leaves occasionally.
Water regularly, keeping the soil moist but not soggy.
3. Fertilize Sparingly
Feed the plant with a diluted liquid fertilizer every 2-3 months during the growing season (spring & summer).
Avoid over-fertilizing, as cardamom prefers moderate feeding.
4. Repot as Needed
As the plant grows, repot it into a larger container to accommodate its expanding roots.
Choose a deep pot for healthy root development.
Step 3: Pruning & Harvesting Cardamom Pods
1. Pruning for Bushy Growth
Trim damaged or dead leaves to encourage new growth.
Pinch off excess shoots to enhance plant health.
2. When to Harvest Cardamom Pods
Cardamom plants take 2-3 years to produce pods, so patience is key.
Once mature, the plant bears flowers, followed by green seed pods.
Harvest the pods when they turn slightly yellow, but before they fully dry out.
Dry the pods in a cool, dark place, then store them in an airtight container.
Common Problems & Solutions
✔ Problem: Seeds not germinating.
✔ Solution: Ensure warm temperatures (70-80°F or 21-27°C) and consistent moisture.
✔ Problem: Slow growth.
✔ Solution: Increase humidity, provide indirect sunlight, and fertilize occasionally.
✔ Problem: Root rot.
✔ Solution: Use well-draining soil and ensure the pot has drainage holes.
Final Thoughts: Is Growing Cardamom Worth It?
Growing your own cardamom plant is a rewarding experience, even though it requires patience and the right conditions. Whether you love spices, gardening, or tropical plants, cardamom is an excellent addition to your home garden.
Why You Should Grow Cardamom at Home:
✔ Organic & Fresh: No chemicals, just pure cardamom goodness.
✔ Cost-Effective: Save money by growing your own spice.
✔ Aromatic & Beautiful: Adds a tropical touch to your home or garden.
✔ Great for Culinary Uses: Use fresh pods in teas, curries, and desserts.
If you have the space, time, and patience, growing cardamom from seeds can be a fun and fulfilling project. So why not start your own cardamom plant today and enjoy the flavorful rewards of homegrown spices?
Would you try growing cardamom at home? Let us know in the comments! ✨
Growing blueberry at home in pots is a rewarding venture that allows even those with limited space to enjoy the delicious fruits of their labor. Here’s a detailed guide on how to successfully cultivate blackberries in containers.
Materials Needed:
Blueberry Plants:
Choose a suitable blackberry variety for container growing. Thornless varieties are often preferred for ease of handling.
Large Pots:
Select pots with a minimum of 5 gallons capacity to provide ample space for root development.
High-Quality Potting Mix:
Use a well-draining potting mix with a balanced blend of organic matter.
Choose a blackberry variety that is well-suited for container growing. Thornless varieties are often recommended for ease of maintenance.
Choosing the Right Pot:
Opt for pots with a minimum capacity of 5 gallons. Ensure the containers have drainage holes to prevent waterlogging.
Preparing the Potting Mix:
Use a high-quality potting mix that is well-draining. Mix in some compost for added nutrients.
Planting Blueberry :
Plant blackberries in the center of the pot at the same depth as they were in their nursery containers.
Installing Support Structures:
Blackberries need support as they grow. Install trellises or stakes to support the plants and guide their growth.
Watering:
Maintain consistent moisture levels, especially during the growing season. Water when the top inch of soil feels dry.
Fertilizing:
Apply a balanced, slow-release fertilizer during the growing season. Follow the manufacturer’s recommendations for application.
Mulching:
Apply a layer of organic mulch around the base of the plants to conserve moisture and suppress weeds.
Pruning:
Regular pruning is essential to manage the size of the plants and encourage fruiting. Prune in late winter or early spring before new growth begins.
Harvesting:
Harvest blueberry when they are fully ripe, typically when they turn shiny black and easily come off the plant.
+1 secret that helps blueberries a lot: Soil acidity:
Blueberries prefer acidic soil, with a pH between 4.5 and 5.5. maintain or adjust the acidity of the soil in your blueberry garden, so you can take the following steps:
Soil pH Testing: Use a soil pH test kit to determine the level of acidity. If the pH is too high (ie), you can add sulfur to the soil to lower the pH level.
Adding acidic mulch: Apply a layer of acidic mulch, such as peat moss, pine compost, or pine bark, around the blueberry roots. This not only maintains soil moisture and prevents weed growth, but also helps maintain soil acidity.
Fertilize the cause: Use specific fertilizers for acid soils or for acidophilic plants, which contain essential nutrients for blueberries and help maintain optimal acidity levels.
Blueberries can be grown in temperate and cooler climates, thriving particularly well in regions like North America, Europe, and parts of Asia and Australia.
Sunlight: Full sun, requiring at least 6-8 hours of direct sunlight per day, though they can tolerate partial shade.
Soil: Acidic, well-drained soil with a pH of 4.5 to 5.5.
Blueberries are commonly grown in places with cold winters and moderate summer temperatures, such as the northern United States, Canada, and northern Europe.
Benefits of Growing Blueberry in Pots:
Space Efficiency:
Ideal for those with limited garden space or balconies.
Easy Maintenance:
Container gardening allows for better control over soil quality and reduces the risk of invasive growth.
Accessibility:
Pots can be moved to optimal sunlight locations and protect plants from harsh weather.
By following these steps, even novice gardeners can enjoy the satisfaction of growing delicious blueberry at home in containers. With proper care and attention, your potted blackberry plants can yield bountiful harvests.
Mimosa pudica, known as the sensitive plant, touch-me-not, or dormideira in Portuguese, is more than a captivating plant that folds its leaves when touched. Originating from Central and South America, this humble plant has been a part of traditional medicine for centuries due to its potent healing properties. While its responsive movement fascinates many, the real magic lies in its extensive health benefits. This article explores ten of these benefits and practical methods to incorporate Mimosa pudica into your wellness routine.
10 Health Benefits of Mimosa Pudica
Anti-inflammatory Properties Mimosa pudica has remarkable anti-inflammatory effects, helping reduce bodily inflammation. When applied as a poultice to swollen areas or taken as a tea, it can help soothe conditions such as arthritis, muscle pain, and other inflammatory disorders.
Liver Health Support This plant is known for its hepatoprotective properties, meaning it aids in detoxifying and protecting the liver. By supporting liver function, Mimosa pudica assists the body in cleansing toxins, promoting overall liver health and function.
Digestive Aid Mimosa pudica is beneficial for digestive health, particularly in managing constipation and diarrhea. Its mild laxative properties help regulate bowel movements, while its anti-inflammatory effects make it ideal for soothing the digestive tract.
Antimicrobial and Antiviral Effects Studies have shown that Mimosa pudica has antimicrobial and antiviral properties, making it useful for combating infections. It can be applied to minor wounds, prevent infections, and aid in managing certain viral conditions.
Sedative and Relaxant For those struggling with anxiety, insomnia, or stress, Mimosa pudica’s mild sedative properties can help calm the nervous system, promoting relaxation and better sleep quality.
Oral Health With antibacterial qualities, Mimosa pudica is an effective natural remedy for oral health. Used as a mouth rinse, it reduces inflammation and combats infections in the mouth, throat, and gums.
Wound Healing Mimosa pudica’s combination of anti-inflammatory and antimicrobial properties makes it excellent for wound healing. Applied as a poultice, it can speed up the healing process for cuts, sores, and skin infections.
Menstrual Relief Women experiencing menstrual cramps or PMS symptoms may benefit from Mimosa pudica. The plant helps to alleviate pain, lessen irritability, and even support menstrual cycle regulation.
Support for Hemorrhoids Known for its soothing properties, Mimosa pudica can provide relief for hemorrhoids, easing pain and inflammation when used topically or taken as a supplement.
Antioxidant Properties Rich in antioxidants, Mimosa pudica helps combat oxidative stress, which supports overall health and reduces the risk of chronic diseases associated with oxidative damage.
How to Use Mimosa Pudica: 4 Practical Applications
Herbal Tea
How to Prepare: Boil one teaspoon of dried Mimosa pudica leaves in a cup of water for about 10 minutes. This tea can be enjoyed for its soothing effects on digestion, liver health, and general detox support.
Topical Poultice
How to Prepare: Crush fresh Mimosa pudica leaves and stems into a paste. Apply this directly to wounds, sores, or skin irritations and cover with a clean cloth. Leave the poultice on for a few hours, then rinse. Repeat as needed for inflammation or minor skin issues.
Gargle for Oral Health
How to Prepare: Boil a handful of Mimosa pudica leaves in water, let the liquid cool, and use it as a mouthwash. This helps reduce inflammation and fight infections in the mouth, throat, and gums.
Bath Soak
How to Prepare: Add a handful of dried leaves or a few drops of Mimosa pudica extract to warm bathwater. Soak for 20–30 minutes to enjoy the plant’s anti-inflammatory and relaxing properties.
Disclaimer
While Mimosa pudica is a powerful natural remedy, it’s essential to use it responsibly. Always consult a healthcare professional before adding it to your health regimen, especially if you have preexisting health conditions or are taking other medications. Avoid excessive consumption, as higher doses can lead to unwanted side effects. Use in moderation for the best results.
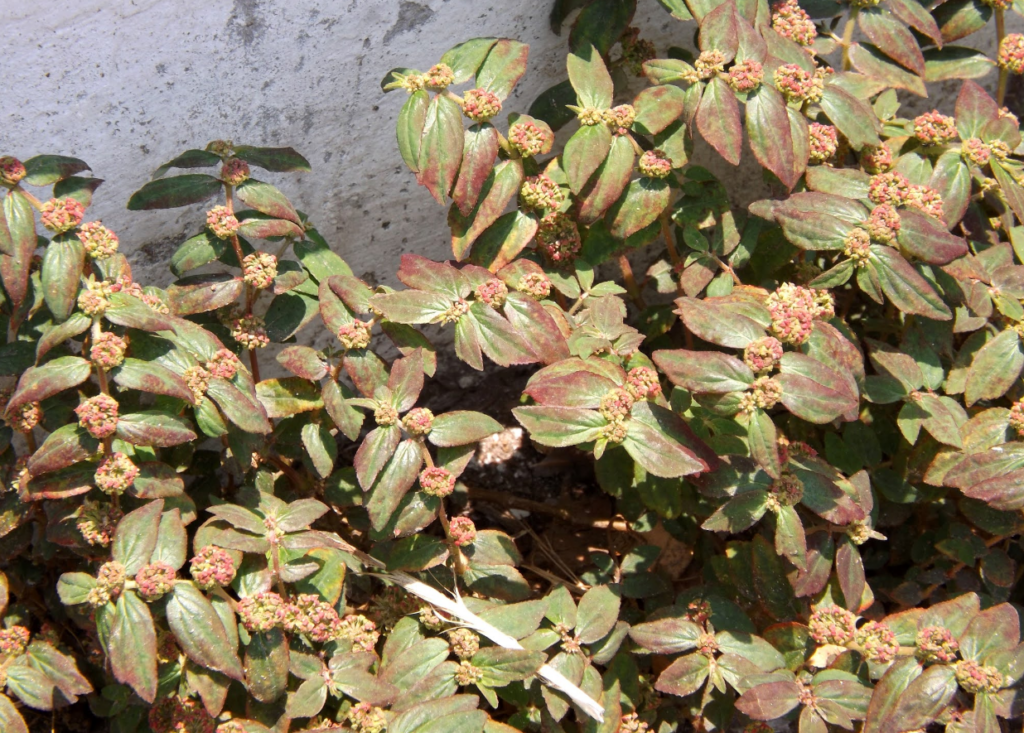
Euphorbia hirta, commonly known as the asthma plant, has been revered across various traditional medicine systems for its healing potential. Known for addressing respiratory issues, gastrointestinal concerns, and skin ailments, this humble herb is a versatile natural remedy. In this article, we explore the many applications of Euphorbia hirta, the science behind its traditional uses, and how it can be safely incorporated into a wellness routine.
Respiratory Health Benefits
Euphorbia hirta is most famous for its role in treating respiratory conditions such as asthma, bronchitis, and persistent coughs. In traditional remedies, the plant’s leaves are often brewed into a tea or decoction, believed to act as a bronchodilator, relaxing bronchial muscles and aiding easier breathing for those with asthma.
Gastrointestinal Relief
In traditional medicine, Euphorbia hirta is well-regarded for its antidiarrheal and anti-inflammatory properties, making it effective for treating digestive ailments. A decoction from the leaves is commonly used to alleviate symptoms of diarrhea, dysentery, and gastrointestinal spasms, offering potential relief for conditions like irritable bowel syndrome (IBS).
Dermatological Uses
Topical applications of Euphorbia hirta include treatments for warts, boils, rashes, and minor wounds. The plant’s antimicrobial and anti-inflammatory qualities make it useful in soothing skin irritations and promoting wound healing, with the leaves often ground into a paste or infused in water for direct application.
Antimicrobial Properties
Euphorbia hirta exhibits broad-spectrum antimicrobial effects, making it valuable for treating bacterial, fungal, and viral infections. This versatility allows it to be used both internally and externally, though more scientific studies are needed to confirm its full effectiveness.
Pain Relief and Anti-inflammatory Benefits
Euphorbia hirta is also known for its analgesic and anti-inflammatory effects, making it suitable for relieving pain from arthritis, muscle strains, and headaches. Traditionally, the plant’s leaves are brewed into a tea or applied topically as a poultice for targeted relief.
Antipyretic (Fever-Reducing) Properties
As a natural antipyretic, Euphorbia hirta has been used to manage fevers. Consuming a tea made from its leaves is believed to help lower body temperature, providing comfort during feverish conditions. While this traditional use is widespread, further scientific research is necessary to fully validate its efficacy.
Urinary Tract Health
Euphorbia hirta is traditionally used to treat urinary tract disorders, including infections and bladder inflammation. Its diuretic properties promote urine production, potentially helping to flush out infections. A tea or decoction made from the plant’s leaves is typically used for this purpose, though it is essential to consult a healthcare professional before relying on it for urinary health.
Antioxidant Properties
With the growing focus on antioxidants for health, Euphorbia hirta has attracted attention for its potential in combating oxidative stress, which plays a role in chronic disease prevention. The plant’s antioxidant content may provide support for general health and wellness.
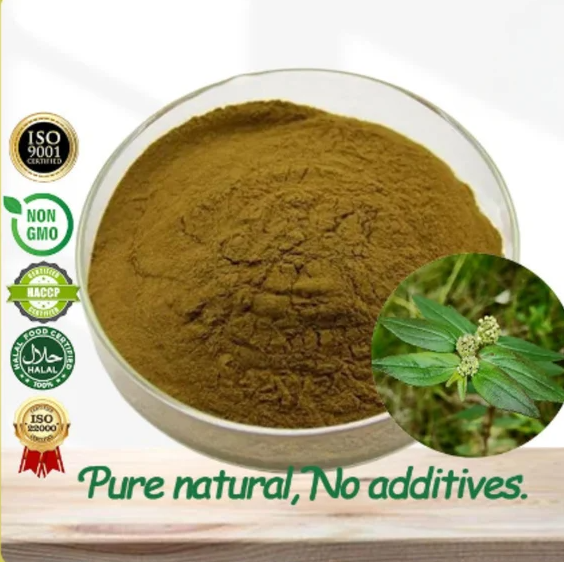
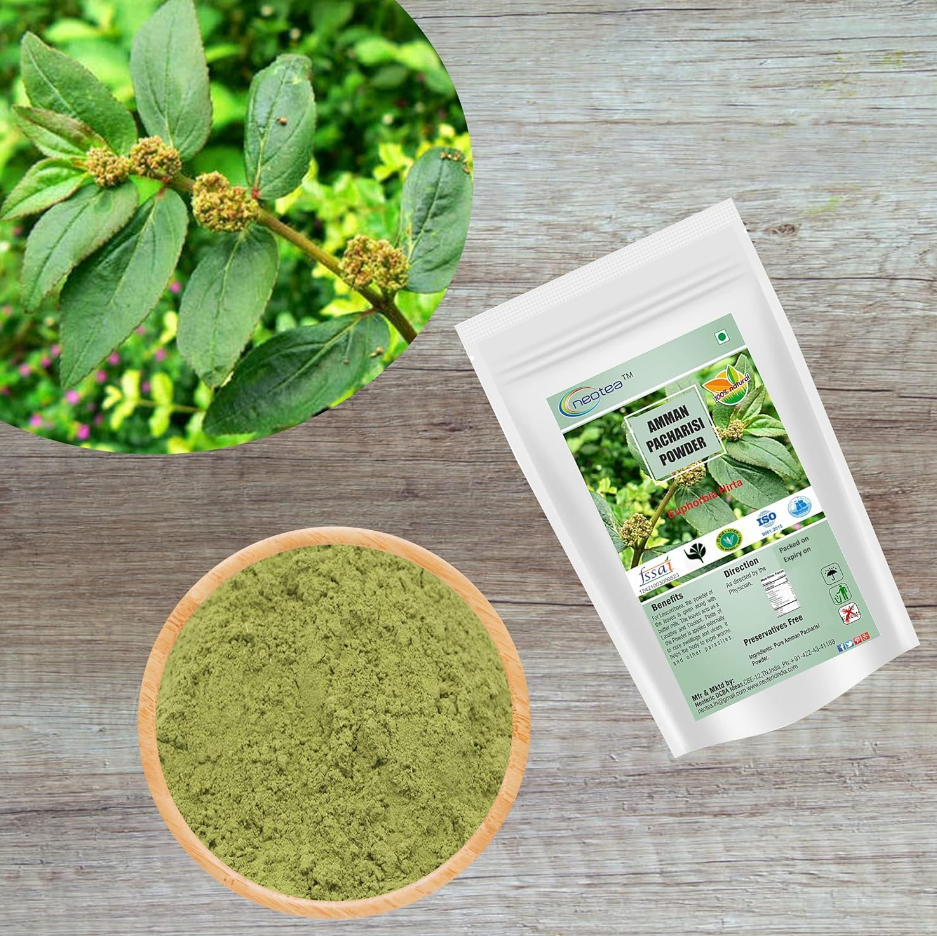
How to Use Euphorbia Hirta
Tea or Decoction
The most common method of using Euphorbia hirta is by making a tea or decoction. Simply boil fresh or dried leaves in water, strain, and consume the liquid. This preparation is particularly effective for respiratory and digestive health.
Topical Applications
For skin issues, the leaves can be ground into a paste and applied directly to affected areas. This is beneficial for treating minor wounds, skin irritations, and certain dermatological conditions.
Safety and Precautions
While Euphorbia hirta has a rich history in traditional medicine, caution is essential. High doses may be toxic, and it may cause side effects or interact with medications. Pregnant or breastfeeding individuals, as well as those with existing health conditions, should consult a healthcare provider before using Euphorbia hirta.
Euphorbia hirta, with its extensive range of traditional uses, showcases the power of nature in addressing health concerns from respiratory and gastrointestinal issues to skin care and beyond. Although its benefits are well-supported by traditional use, further research is needed to confirm its safety and efficacy. Always use herbal remedies responsibly and seek professional guidance to ensure safe use.
Feel inspired? Share this article with others who may benefit from learning about the healing potential of Euphorbia hirta!
Looking to elevate your coffee routine with a unique, flavorful twist? This ginger-cinnamon coffee mix combines the warming spice of ginger with the sweet aroma of cinnamon, creating a delicious and health-boosting beverage. Whether you prefer it hot or iced, this simple recipe is sure to refresh and energize your senses.
Why This Coffee Mix is Special
Ginger & Cinnamon: A Dynamic Duo for Health & Flavor
✔ Ginger – Adds a zesty warmth, aids digestion, and helps reduce inflammation.
✔ Cinnamon – Offers a sweet, aromatic touch while delivering antioxidant benefits and supporting blood sugar regulation.
Honey or Sweetener: A Natural Boost
✔ Honey balances the boldness of coffee while providing natural antibacterial properties.
✔ Alternative Sweeteners – Swap honey with agave, maple syrup, or stevia for a personalized touch.
Ingredients You’ll Need
✔ 1 cup of freshly brewed coffee (hot or cold, depending on preference)
✔ ½ teaspoon of fresh grated ginger (or ¼ teaspoon of ground ginger)
✔ ¼ teaspoon of ground cinnamon (the secret twist!)
✔ 1–2 teaspoons of honey or sweetener (optional)
✔ A splash of milk or cream (optional, for creaminess)
☕ Step-by-Step Instructions
1. Brew a Fresh Cup of Coffee
Prepare 1 cup of your favorite coffee using your preferred method (French press, espresso, drip, or pour-over). A rich, robust brew serves as the perfect base.
2. Infuse with Ginger
✔ Add grated or ground ginger while the coffee is hot.
✔ Stir well to release the bold, spicy flavor of ginger into the coffee.
3. Sprinkle in the Cinnamon
✔ Add ¼ teaspoon of cinnamon for a warm, aromatic depth.
✔ Mix thoroughly to ensure a well-balanced spice blend.
4. Sweeten the Deal (Optional)
✔ If you enjoy a slightly sweet taste, add honey or your preferred sweetener.
✔ Stir until completely dissolved.
5. Add a Creamy Touch (Optional)
✔ For a smoother texture, pour in a splash of milk or cream.
✔ Dairy-free alternatives like almond, oat, or coconut milk work beautifully.
6. Stir and Serve
✔ Mix everything together and enjoy hot for a cozy morning boost.
✔ For an iced version, let the coffee cool, then pour over ice for a refreshing, spiced treat.
Health Benefits of This Coffee Mix
✔ Ginger for Digestion & Immunity
A natural remedy for bloating, nausea, and indigestion.
Supports immune function and has anti-inflammatory properties.
✔ Cinnamon: The Antioxidant Powerhouse
Helps regulate blood sugar levels and boost metabolism.
Protects against oxidative stress and enhances circulation.
✔ Honey: A Natural Sweetener with Health Perks
Provides antibacterial properties and supports gut health.
Offers a natural energy boost without artificial sweeteners.
Tips for the Best Experience
✔ Iced Version: For a refreshing summer drink, let the coffee cool completely before adding ice cubes to prevent dilution.
✔ Experiment with Sweeteners: Try agave, maple syrup, or monk fruit sweetener for a unique twist.
✔ Use High-Quality Spices:Fresh ginger and organic cinnamon enhance both flavor and health benefits.
✔ Espresso Lovers: Use double shots of espresso with steamed milk for a spiced ginger-cinnamon latte.
✨ Why You Should Try This Coffee Mix
This ginger-cinnamon coffee isn’t just about flavor—it’s a powerful, natural way to boost digestion, immunity, and metabolism. The warm, comforting spices add a festive, indulgent twist to your daily cup. Whether you need an energizing morning drink or a cozy afternoon treat, this recipe is a must-try.


: Traditional Uses and Healing Properties")