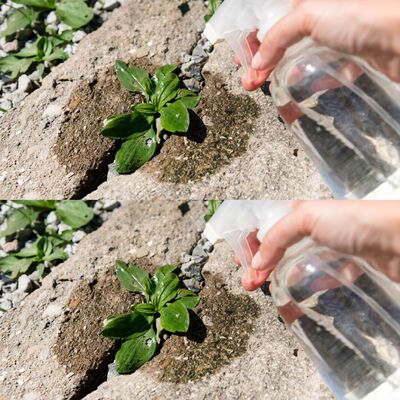
Weeding can be a frustrating task, especially as we get older. Keeping our outdoor spaces clean and tidy without using harmful chemicals can feel like a never-ending battle. But don’t worry, we have a simple solution that has been passed down by seasoned gardeners. With just three basic ingredients – vinegar, coarse salt, and dishwashing liquid – you can easily tackle those pesky weeds.
The combination of white vinegar, salt, and dishwashing liquid creates a powerful natural solution that effectively eliminates weeds while minimizing harm to the environment. Let’s break down the role of each ingredient:
White Vinegar: The acidic properties of vinegar are what make it so effective. When sprayed on weeds, it dries out the plant tissues, causing them to wither and die. Vinegar works even better when applied in direct sunlight, speeding up the drying process.
Coarse Salt: Salt has been used for centuries as a natural desiccant. When applied to the soil, it prevents moisture from being absorbed by the plants, effectively killing the weeds at their roots. Salt also has long-lasting effects, discouraging new weeds from sprouting in treated areas.
Dishwashing Liquid: The dish soap acts as a surfactant, helping the vinegar and salt mixture stick to the weed’s leaves. This increases the potency of the solution by ensuring that the active ingredients remain on the plant and penetrate its surface.
Homemade Weed Killer Recipe
To make the most effective homemade weed killer, it’s important to follow the right proportions. Here’s what you’ll need:
- 1 liter of white vinegar
- A handful of coarse salt
- 1 teaspoon of dishwashing liquid
This recipe will give you approximately five liters of weed killer, enough to cover a significant area of your garden or driveway.
Steps for Preparation:
- In a clean container, pour the liter of white vinegar.
- Gradually add the handful of coarse salt, stirring gently until it fully dissolves.
- Once the salt has dissolved, add the teaspoon of dishwashing liquid and continue stirring until the mixture is well-blended.
- Transfer the solution into a spray bottle for easy application.
Application Tips
Now that you have your weed-killing solution ready, it’s time to put it to work. Here’s how to apply it for maximum efficiency:
Pick the Right Time: It’s best to apply this solution during dry weather. Rain can wash away the weed killer before it has a chance to work, so choose a sunny day when no rain is expected for the next 24 hours.
Spray Directly on Weeds: Focus on spraying the solution directly onto the weeds, making sure to cover their leaves and stems completely. Be careful when applying near desirable plants, as the solution can damage or kill them too.
Avoid Overuse: While this solution is effective, using too much of it, especially the salt component, can harm the long-term health of the soil. Limit its use to paved areas, driveways, or spaces where you don’t plan to grow plants.
Advantages of Homemade Weed Killer
Using a homemade weed killer has several advantages:
Environmentally Friendly: Traditional chemical weed killers contain harmful ingredients that can contaminate soil, water, and harm beneficial insects like bees. This natural solution avoids these issues, making it safer for the environment.
Cost-Effective: The ingredients – vinegar, salt, and dish soap – are inexpensive and commonly found in most households. By using this recipe, you can save money compared to buying commercial herbicides.
Simple and Quick: Making this solution requires no special equipment, and it’s easy to apply. In just a few minutes, you can have a powerful weed killer ready to use.
Zero-Waste Option: Making your own solution helps reduce plastic waste from commercial products. You can reuse containers and avoid unnecessary packaging.
Safety Precautions
While this method is natural, it’s still important to be cautious:
Avoid Overuse in Soil: Using too much salt can change the chemical composition of the soil, making it difficult for any plants to grow in treated areas. It’s best to reserve this method for paved surfaces or areas where you don’t plan to plant anything.
Keep Away from Desired Plants: This solution doesn’t discriminate between weeds and other plants, so be careful where you spray it. If it gets on your flowers, shrubs, or garden plants, it could cause significant damage.
Child and Pet Safety: Be mindful if children or pets play in areas where you’ve applied the solution. While it’s natural, vinegar and salt can still cause irritation if ingested or touched.
Additional Weed Control Options
If you’re looking for other ways to control weeds in your garden, here are a few additional options to consider:
- Mulching: Covering the ground with organic materials like wood chips, straw, or leaves can prevent weeds from getting the sunlight they need to grow.
- Manual Weeding: Although it takes time and effort, pulling weeds by hand ensures they’re removed from the root, reducing the chances of them growing back.
- Ground Cover Plants: Planting low-growing, dense ground cover plants can naturally suppress the growth of weeds by taking up the space and nutrients they would otherwise use.
By using this simple, natural, and economical solution to combat weeds, you contribute to a more sustainable gardening practice, avoiding the harmful chemicals found in commercial herbicides. Not only will you protect your garden’s ecosystem, but you’ll also save money and reduce waste. So grab your spray bottle and say goodbye to those unwanted weeds – naturally!
Remember, whether you’re a novice or an experienced gardener, this simple tip is a must-have for managing invasive weeds in an eco-friendly way. Happy gardening!
