Category

Recipes

Category

If you’re looking for a delicious and healthy treat without any added sugar or flour, you’re in for a treat. This oatmeal, cocoa, and banana recipe is not only nutritious but also incredibly satisfying. It’s perfect for breakfast, a snack, or even dessert. Here’s how you can enjoy a sweet treat while keeping your diet clean and wholesome.

Why This Recipe?

This combination of oatmeal, cocoa, and banana offers a natural sweetness and a wealth of nutrients. Bananas are naturally sweet and provide a great source of potassium, while oats offer fiber and keep you feeling full. Cocoa adds a rich chocolate flavor along with antioxidants, making this treat both delicious and healthy.

Ingredients

To make this delightful and healthy dish, you’ll need:

  • 1 ripe banana
  • 1/2 cup of rolled oats
  • 1 tablespoon of unsweetened cocoa powder
  • 1/2 cup of milk (dairy or non-dairy)
  • 1/2 teaspoon of vanilla extract (optional)
  • A pinch of salt
  • A handful of nuts or seeds for topping (optional)

Instructions

1. Mash the Banana:

  • Start by peeling and mashing the ripe banana in a bowl until it reaches a smooth consistency. The riper the banana, the sweeter your dish will be.

2. Combine Ingredients:

  • Add the rolled oats, unsweetened cocoa powder, milk, vanilla extract (if using), and a pinch of salt to the mashed banana. Mix everything together until well combined.

3. Cook the Mixture:

  • Transfer the mixture to a small pot and cook over medium heat. Stir continuously to prevent sticking. Cook for about 5-7 minutes until the oats are tender and the mixture has thickened.

4. Serve and Enjoy:


  • Once cooked, transfer the oatmeal mixture to a bowl. Top with a handful of nuts or seeds for some extra crunch and added nutrients.

Why You’ll Love It

1. Naturally Sweetened:

  • The ripe banana provides natural sweetness, so there’s no need for added sugar. This makes it a great option for those looking to reduce their sugar intake.

2. Nutrient-Dense:

  • This dish is packed with vitamins, minerals, and fiber. Oats are a great source of complex carbohydrates, which help keep you full and energized.

3. Versatile:


  • You can enjoy this dish hot or cold. For a cold version, prepare the mixture the night before and let it sit in the refrigerator overnight for a delicious breakfast or snack the next day.

4. Easy to Make:

  • With just a few simple ingredients and minimal cooking time, this recipe is quick and easy to prepare. It’s perfect for busy mornings or as a healthy dessert option.

Conclusion

Oatmeal, cocoa, and banana make a perfect combination for a healthy, sugar-free, and flour-free treat. This simple yet delicious recipe is a great way to enjoy a sweet and satisfying dish without compromising your health goals. Give it a try, and you might find yourself making it every day. Enjoy this wholesome and tasty treat, and say goodbye to added sugars!

The recipe that we’re featuring today is for Flourless Pancakes, which have a great flavor and a fluffy texture. Because they are so easy to prepare, these pancakes are a great alternative for a quick and healthy breakfast or brunch. Now let’s learn how to make these delicious goodies. Before beginning the preparation processes, make sure you have all the materials on hand.

Ingredients Needed: 2 large eggs / 1 teaspoon of vanilla essence / 2 ripe bananas / 1/2 teaspoon baking soda / A pinch of salt / Coconut oil (for greasing the pan).

Preparation Steps: Mash the Bananas: In a mixing bowl, start by adding the ripe bananas. Mash them thoroughly with a fork to get a uniformly smooth texture. Combine Ingredients: Add the eggs, baking soda, vanilla extract, and a small amount of salt to the mashed bananas. Combine all of these ingredients and stir until a smooth batter is formed. Every component should be well-incorporated and have a smooth consistency.

Set a non-stick frying pan over medium heat to preheat it. To keep the pancakes from sticking, lightly coat the skillet with coconut oil after it has heated up. By following this step, you can be confident that your pancakes will flip easily and hold their gorgeous golden hue.

Cook the Pancakes: After preheating the skillet, put little portions of the batter into it to make pancake shapes. To make flipping them easier, provide adequate space between each pancake. Cook for about 2 minutes on each side, or until you see a beautiful golden brown color developing on the pancakes. When they are ready to flip, the edges will rise slightly.

Transfer the fried pancakes to a serving platter and serve hot. The best way to enjoy these flourless pancakes is hot, right out of the pan. Serve them with fresh fruit, a dollop of yogurt, or a drizzle of honey for an enjoyable morning. These gluten-free and dairy-free flourless pancakes are not only simple to prepare, but they also satisfy a variety of dietary requirements. They serve as evidence of how basic elements can produce extraordinarily flavorful and rewarding results. These flourless pancakes will wow you whether you’re searching for a healthier substitute for regular pancakes or you just want to try something different. Savor each taste of the food you prepare with enthusiasm!

If you love cheese but are looking for a simpler and healthier alternative to store-bought varieties, why not try making your own at home? It’s surprisingly quick and easy, and you can do it with just a few common kitchen ingredients. Here’s a friendly guide to creating your very own fresh cheese in about 10 minutes.

Ingredients and Tools Needed

  • 1 liter of whole milk (the fresher, the better)
  • 2 tablespoons of white vinegar or lemon juice
  • A pinch of salt (optional, for taste)
  • A cheesecloth or a clean, thin dish towel
  • A strainer or colander
  • A large bowl

Step-by-Step Guide

  1. Heat the Milk: Pour the milk into a large saucepan and slowly heat it on the stove. You want to warm the milk to just before boiling, around 185°F (85°C). It’s important not to let the milk actually boil as this can affect the texture of your cheese.
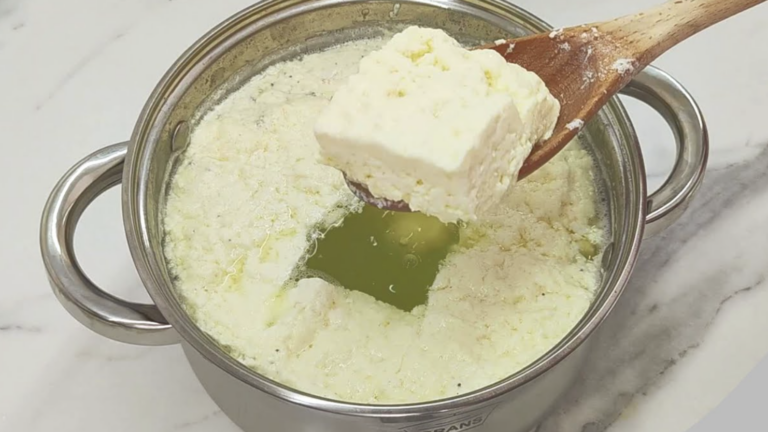
  2. Add the Acid: Once your milk is hot enough, remove it from the heat. Add the white vinegar or lemon juice and stir gently. You’ll see the milk begin to curdle as the acid does its work separating the curds (solids) from the whey (liquid).
  3. Let It Sit: Allow the mixture to sit for a few minutes. This resting period helps the curdling process and makes the cheese easier to strain.
  4. Strain the Curds: Line your strainer or colander with the cheesecloth or dish towel and place it over the bowl. Pour the mixture into the lined strainer to separate the curds from the whey. The liquid whey can be discarded or saved for other recipes (like smoothies or baking).
  5. Season and Press: Once drained, you can add a pinch of salt to the curds for flavor. Then, gather the corners of the cheesecloth and gently squeeze to extract any remaining liquid. For a firmer cheese, press under a heavy object for a few minutes.
  6. Enjoy Your Cheese! Your homemade cheese is ready to eat! It’s delicious spread on crackers, mixed into salads, or simply enjoyed fresh with a drizzle of olive oil and herbs.

Conclusion

Making your own cheese at home is not only a delightful experience but also a healthier alternative to processed store-bought cheese. It allows you to control the ingredients and enjoy the freshness of a product made by your own hands. Try it once, and you might find yourself making it regularly as a new, tasty hobby!

Introduction: As the day winds down and we seek tranquility before bedtime, a soothing beverage can be the perfect companion to our evening ritual. Today, we introduce a gentle yet potent drink that combines the creamy, probiotic-rich kefir with the warm, spicy essence of ginger. This Kefir and Ginger drink is not just a delight to the senses but a boon to your health, ready to be enjoyed in the quiet moments before sleep.

Why Kefir and Ginger? Kefir, a fermented milk product, is celebrated for its probiotics that support gut health and immunity, alongside being a good source of calcium and protein. Ginger, on the other hand, is renowned for its anti-inflammatory and digestive aid properties. It can calm an upset stomach, reduce nausea, and promote a feeling of well-being. When these two ingredients are combined, they create a beverage that not only supports physical health but also provides a calming effect, making it an excellent choice for your pre-sleep routine.

The Calming Effect: Incorporating this Kefir and Ginger drink into your evening can signal to your body that it’s time to slow down and prepare for rest. The probiotics in kefir help your digestive system to settle, while ginger’s warm and soothing qualities can aid in relaxing your body and mind. This drink is a comforting ritual that gently eases you into a peaceful state, conducive to a restful night’s sleep.

How to Prepare Your Kefir and Ginger Drink: Preparing this serene evening drink is simple and quick. Here’s how:

  1. Start with a glass of your favorite kefir. Plain, unsweetened kefir is preferred for its natural qualities and to avoid unnecessary sugars before bed.

  2. Grate a teaspoon of fresh ginger root. If you’re sensitive to strong flavors, you can start with a smaller amount and adjust to taste.

  3. Stir the grated ginger into the kefir until well combined. For a smoother texture, you can strain the ginger pieces out after letting them steep for a few minutes.

  4. Optional: For a hint of sweetness and additional soothing properties, a drizzle of honey can be mixed in.

Conclusion: Embracing this Kefir and Ginger drink as part of your nightly routine is not just about indulging in a soothing beverage; it’s about creating a moment of calm and reflection in your evening. This drink stands as a gentle reminder of the importance of taking care of ourselves, offering both physical nourishment and a mental pause, setting the stage for a night of restful sleep. Let this delightful concoction be your nightly signal that it’s time to unwind, relax, and look forward to the peaceful slumber that awaits.

In the grand tapestry of culinary delights, there exists a simple yet profoundly satisfying combination that might just elevate your dining experience to heavenly heights: sweet potato and eggs. This pairing, unassuming as it may seem, has the power to dethrone bread and outshine steamed buns with its simplicity, flavor, and nutritional content. Let’s delve into a recipe that teaches you how to weave these ingredients into a meal so divine, you’ll wonder how such simplicity can taste so sublime.

A Dish Steeped in Simplicity and Flavor

Sweet potatoes, with their rich, velvety texture and natural sweetness, paired with the versatile and protein-rich egg, create a meal that is both nourishing and comforting. This combination isn’t just a feast for the taste buds; it’s a nutrient-dense choice that supports your well-being with vitamins, minerals, and fiber.

The Recipe: A Gateway to Gastronomic Bliss

Imagine transforming a single sweet potato and three eggs into a dish that’s better than bread and simpler than steamed buns. Here’s how you can achieve this culinary marvel:

  1. Start with the Sweet Potato: Peel and slice your sweet potato into thin rounds. The thinner they are, the quicker they will cook. Boil them until tender but firm, about 5-7 minutes, to bring out their inherent sweetness and creamy texture.

  2. Prepare the Eggs: While the sweet potatoes are boiling, whisk the eggs in a bowl with a pinch of salt and pepper to taste. This mixture will soon cradle the sweet potato slices in a warm embrace.

  3. Combine and Cook: Heat a non-stick pan over medium heat. Dip the sweet potato slices into the egg mixture, ensuring each piece is well-coated. Then, place them in the pan. Pour any remaining egg over the sweet potatoes in the pan, creating a sort of sweet potato-egg omelet or pancake.

  4. Golden Perfection: Cook until the edges start to turn golden and the eggs are set. Flip carefully to cook the other side to a similar golden bliss.

The Result

What you get is a dish that is astonishingly straightforward yet packed with flavors and textures that bread or steamed buns can only dream of. It’s a versatile meal that fits perfectly into any time of the day, be it a hearty breakfast, a light lunch, or a comforting dinner.

Why It Surpasses Expectations

This sweet potato and egg creation goes beyond the ordinary, offering a delightful contrast of textures and flavors. It’s a testament to the beauty of combining wholesome ingredients with a touch of creativity. Not to mention, it’s a healthier alternative, rich in nutrients and lower in calories compared to traditional bread or buns.

So, next time you’re pondering over a simple yet satisfying meal, remember the divine combination of sweet potato and eggs. It’s a humble yet mighty dish that proves, sometimes, the simplest ingredients create the most heavenly meals.

Crafting your own mozzarella cheese at home is a truly enchanting endeavor that brings together basic ingredients to create something extraordinary. No longer will you need to rely on store-bought options when you can enjoy the freshness and flavor of homemade mozzarella in your favorite dishes. Let’s embark on a journey into the delightful world of cheese-making together.

Embrace the Pleasure of Homemade Mozzarella

Creating mozzarella cheese in your own kitchen goes beyond just the end result; it’s about the joy of crafting something from scratch, relishing the taste of freshly made cheese, and sharing your culinary masterpiece with loved ones. With this quick recipe, you can indulge in the goodness of homemade mozzarella whenever the craving strikes.

Gather Your Ingredients

Before we begin, ensure you have all the necessary ingredients:

  • 1 gallon of whole milk (the fresher, the better)
  • 1 1/2 teaspoons of citric acid
  • 1/4 teaspoon of liquid rennet
  • 1 teaspoon of kosher salt (adjust to taste)
  • 1 cup of water (divided into two halves)

Step-by-Step Guide to Making Mozzarella

Now, let’s dive into the process with these simple steps:

  1. Prepare the Milk: Dissolve the citric acid in 1/2 cup of water and add it to the milk in a large pot. Heat the mixture slowly on medium while gently stirring until the milk reaches 90°F (32°C).

  2. Add the Rennet: Dissolve the liquid rennet in the remaining 1/2 cup of water and add it to the milk. Stir gently for about 30 seconds, then let the milk sit undisturbed for 5 minutes until it begins to curdle.

  3. Cut the Curd: Once the milk has set, use a knife to cut the curd into cubes, creating a grid pattern.

  4. Cook the Curd: Gradually heat the curds to 105°F (40°C), gently moving them around. As the curds come together and separate from the whey, they are ready.

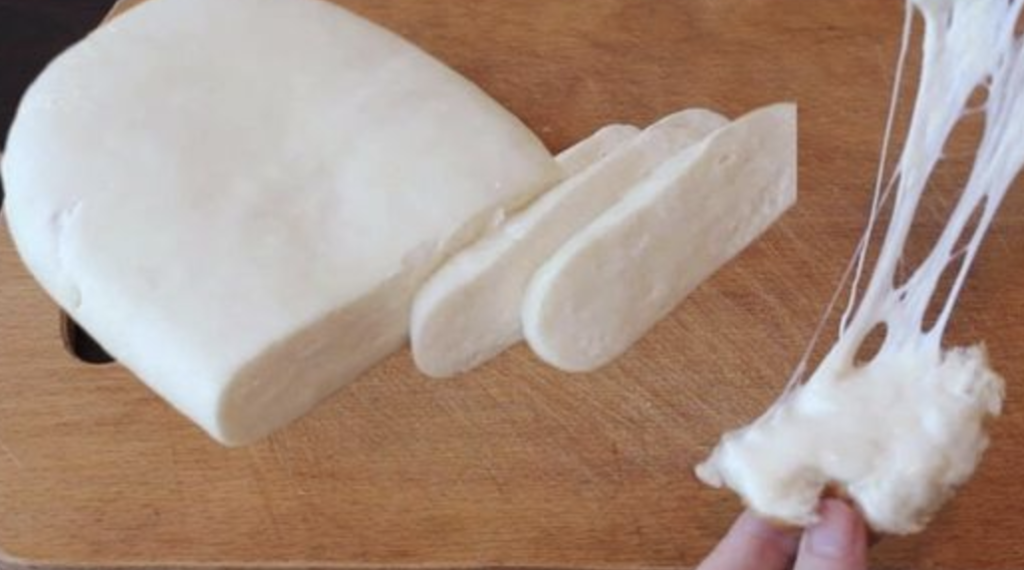
  5. Shape the Mozzarella: Transfer the curds to a bowl using a slotted spoon. Sprinkle in the kosher salt and then fold and stretch the curds until they form a smooth, elastic ball of mozzarella.

  6. Cool Down: Place your freshly made mozzarella into a bowl of ice water to set its shape and cool it down.

Enjoy Your Creation

Congratulations! Your homemade mozzarella is now ready to be savored. Whether you slice it over a fresh salad, melt it onto pizza, or enjoy it as is with a drizzle of olive oil, your homemade cheese adds a personal touch to your meals that’s truly special. So, don your apron, and let’s create delicious mozzarella cheese right in your kitchen.

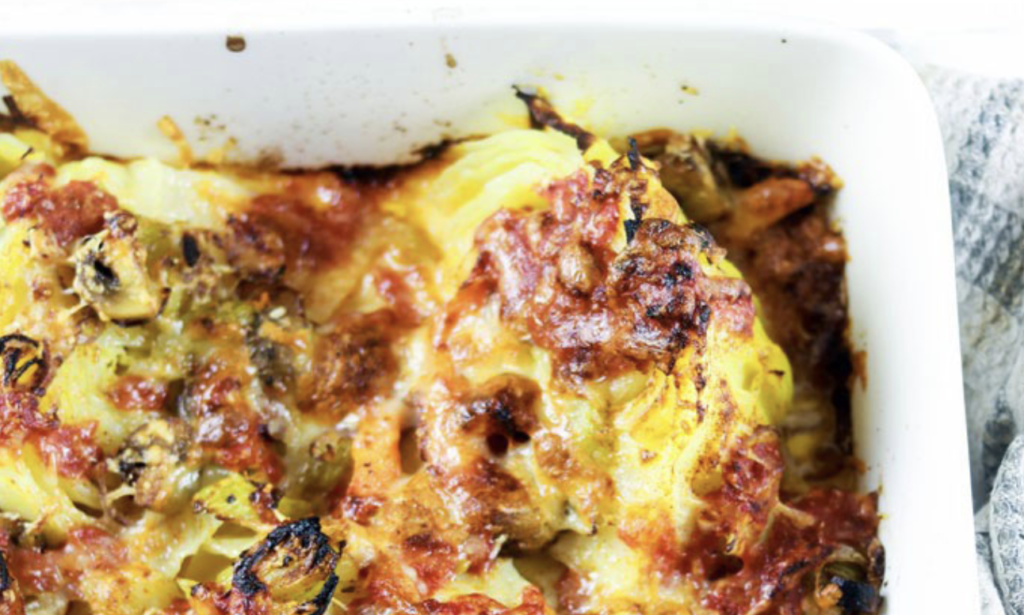
In a culinary world often adorned with intricate recipes and exotic ingredients, there exists a humble yet remarkable dish that not only delights the palate but also champions your well-being. This vegetable bake, brimming with freshness and bursting with flavors, transcends mere sustenance; it’s a boon for those seeking to naturally manage or enhance their blood sugar levels. Let’s delve into this culinary delight that promises not just culinary satisfaction but also a healthful boost.

The Ingredients: A Symphony of Freshness

This recipe harmonizes a diverse array of vegetables and other wholesome components, each chosen for its nutritional richness and taste. Here’s what you’ll need:

  • 400g cabbage
  • 1 onion
  • 3 cloves of garlic
  • 7 mushrooms
  • 1 pepper
  • 3 tomatoes
  • 4 eggs
  • 150g sour cream
  • 250g yogurt
  • Dill
  • 1/2 lemon
  • Salt and ground pepper
  • A dash of olive oil

The Preparation: Where Magic Happens

1. Start with the Cabbage: Soften the cabbage by pouring boiling water over it, preparing it to absorb the flavors of other ingredients.

2. Sauté and Season: In a pan, lightly sauté chopped onion and garlic in olive oil. Add sliced mushrooms and pepper, seasoning with salt and pepper to taste.

3. Tomatoes and Eggs: Peel the tomatoes by pouring boiling water over them, chop, and add to the pan. In a separate bowl, beat eggs, mix with sour cream, and add to the pan.

4. Combine and Bake: Transfer the vegetable and egg mixture to a baking dish. Bake at 180°C for 35 minutes until golden on top, allowing flavors to meld.

5. The Final Touch: Prepare a refreshing yogurt dressing by mixing yogurt with chopped dill, lemon juice, and salt.

Serving: A Moment to Savor

Once out of the oven, let the bake cool slightly before serving. Drizzle the yogurt dressing over the top, enhancing flavor and freshness. This dish not only stands out for its ability to support blood sugar levels but also for its delectable taste.

The Treasure Awaits

This vegetable bake epitomizes the potency of simple, natural ingredients in crafting something profoundly beneficial for your health. It’s a testament to the notion that nourishing our bodies can be both pleasurable and straightforward. So why not indulge in this culinary gem? It’s a stride towards relishing your meals and embracing your health wholeheartedly. Bon appétit!

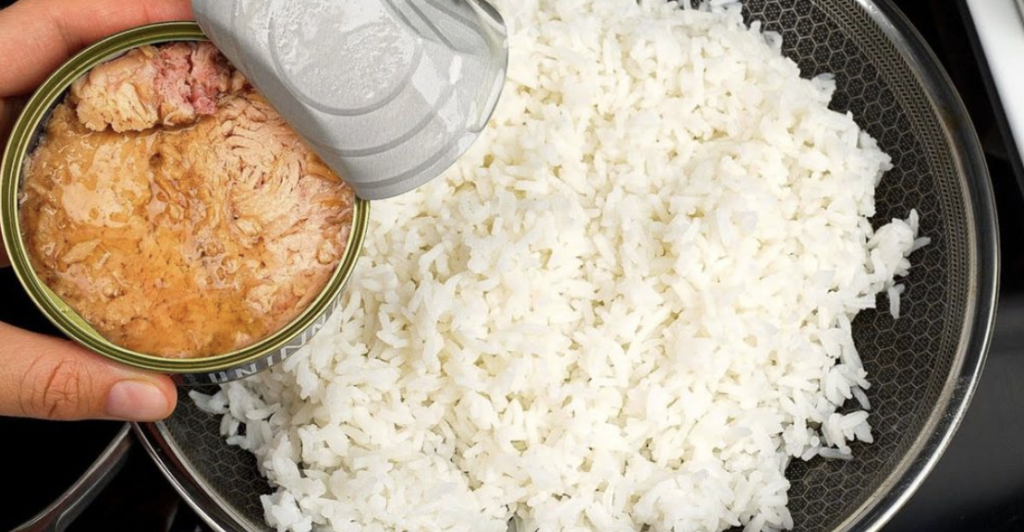
Looking for a quick and delicious meal that will curb your hunger in no time? You’ve come to the right place! This simple yet flavorful recipe featuring canned tuna and rice is exactly what you need. With just a few pantry staples, you can whip up a dish that’s easy to make and incredibly satisfying. Get ready to elevate your mealtime with this wholesome and delicious recipe!

Ingredients:

  • Canned tuna
  • Rice (white, brown, or quinoa)
  • Olive oil
  • Salt, pepper, and herbs/spices of your choice

Recipe:

  1. Cook Rice: Begin by cooking your rice according to the package instructions. While the rice is cooking, you can prepare the rest of the dish.

  2. Prepare Tuna: Open a can of tuna and drain off any excess liquid. Flake the tuna with a fork into bite-sized pieces.

  3. Sauté Tuna: In a separate pan, heat a splash of olive oil over medium heat. Add the flaked tuna to the pan and sauté for a few minutes until heated through.

  4. Combine: Once the rice is cooked, add it to the pan with the tuna and stir to combine. Season the mixture with salt, pepper, or your favorite herbs and spices for extra flavor.

  5. Serve: Serve your tuna and rice hot, garnished with a squeeze of lemon juice or a sprinkle of fresh parsley for a burst of freshness.

Benefits:

This tuna and rice recipe offers not only ease of preparation but also nutritional benefits:

  • Protein and Omega-3: Canned tuna is a rich source of protein and omega-3 fatty acids, essential for a balanced diet.

  • Carbohydrates: Rice provides essential carbohydrates for energy, keeping you feeling full and satisfied.

Conclusion:

With just canned tuna and rice, you can create a delicious and nutritious meal that’s perfect for any day of the week. Whether you’re cooking for yourself or the whole family, this easy recipe is sure to please. So, the next time you’re in need of dinner inspiration, remember this simple yet satisfying dish – it’s a winner every time!

In the realm of home remedies and natural health boosts, there’s a particular recipe that has been passed down through generations, whispered among those seeking a gentler, more holistic approach to wellness. This recipe, a simple yet powerful blend of banana and orange, comes with tales of unbelievable benefits, particularly in restoring eyesight and enhancing overall eye health. Dubbed as a grandmother’s secret, this concoction is not only delicious but packed with nutrients essential for maintaining sharp vision. Let’s explore this miraculous vision restorer and how you can easily incorporate it into your daily routine.

The Nutritional Powerhouses: Banana and Orange

  • Banana: This humble fruit is a powerhouse of nutrition, rich in potassium, vitamin C, and vitamin A. Vitamin A is crucial for protecting the cornea, the surface of the eye, and is a component of rhodopsin, a protein that helps the eyes see in low light conditions.

  • Orange: Bursting with vitamin C, oranges are not just for warding off colds; they’re also vital for eye health. Vitamin C contributes to healthy blood vessels in your eyes, combats cataract formation, and, in combination with other vitamins and nutrients, can slow down age-related macular degeneration.

Crafting the Vision Restoring Blend

Crafting this eyesight-enhancing remedy is as simple as it is rewarding. You’ll need:

  • 1 ripe banana
  • 1 fresh orange

Instructions:

  1. Blend: Peel the banana and orange, and cut them into chunks. Place them in a blender and pulse until you achieve a smooth, creamy consistency. The blend should be easy to drink yet thick enough to feel like a treat.

  2. Enjoy: Drink this blend in the morning to kickstart your day or as an afternoon snack. Its natural sweetness is a perfect pick-me-up, and its nutrients are best absorbed when enjoyed fresh.

The Benefits Beyond Vision

While the banana and orange blend is celebrated for its potential to support eye health, its benefits extend far beyond. This drink is a fantastic source of energy, aids in digestion due to the fiber content, and helps maintain healthy skin and blood pressure levels.

Incorporating this delicious, nutrient-rich drink into your daily routine is a delightful way to support not just your eyesight but your overall health. It’s a testament to the wisdom of simpler times and the power of natural ingredients. So, the next time you’re looking for a healthful boost, remember grandmother’s recipe—a blend of banana and orange might just be the natural miracle you need.

Here’s to clear vision and vibrant health, inspired by the wisdom of generations past.

Who says indulging in something sweet can’t be healthy? In a world where sugar-free, gluten-free, and bake-free treats are becoming more desirable, there’s a delightful recipe that not only satisfies your sweet tooth but also packs a nutritional punch. Let’s dive into a simple yet scrumptious way to make delicious nut snacks that everyone can enjoy, without any guilt!

The Joy of Mixing Nuts for Health and Flavor

Combining various nuts like walnuts, peanuts, almonds, and cashews not only creates a melody of flavors but also amalgamates different health benefits. Nuts are a powerhouse of nutrients, offering proteins, healthy fats, fibers, vitamins, and minerals. The inclusion of lemon zest adds a refreshing twist, while date syrup serves as the perfect natural sweetener, making these snacks a fantastic sugar-free option.

Creating Your Nut Delights

Here’s a quick guide to whipping up these mouthwatering nut snacks:

Ingredients:

  • 50g walnuts
  • 50g peanuts
  • 50g almonds
  • 50g cashew nuts
  • Zest of 1 lemon
  • 3-4 tablespoons of date syrup
  • 80g chocolate (choose a sugar-free version for a completely sugar-free treat)
  • 1 tablespoon of vegetable oil

Instructions:

  1. Mix the Nuts: Begin by coarsely chopping the walnuts, peanuts, almonds, and cashews. Mix them in a bowl, ensuring a good blend of all the varieties.

  2. Add Flavor: Stir in the zest of one lemon to the nut mixture, giving it a refreshing citrus aroma and flavor.

  3. Bind with Date Syrup: Pour the date syrup over the nut and zest mixture. Mix well until all the nuts are evenly coated. This syrup acts as a natural binder and sweetener, eliminating the need for refined sugars.

  4. Chill: Spread the mixture into a tray or mold, pressing down firmly. Place it in the fridge for 3-4 hours to set and harden.

  5. Chocolate Topping: Melt 80 grams of chocolate with a tablespoon of vegetable oil. This mixture will be drizzled over the chilled nut base, adding a rich, decadent layer.

  6. Final Chill: After topping with the melted chocolate, return the tray to the fridge for an additional 30 minutes.

Ready to Enjoy!

Once set, cut or break into pieces and serve. These nut snacks are not just a treat for the palate but also a boon for your health. Perfect for any time of the day, they offer a satisfying crunch, natural sweetness, and the goodness of nuts in every bite.

Embracing a healthier lifestyle doesn’t mean you have to give up on sweet delights. With recipes like this, you can enjoy the best of both worlds—taste and health, without any compromise. Here’s to delicious nut snacks that keep you and your loved ones happy and healthy!