Category

Health & Wellness

Category

Are age spots making you feel less confident about your skin? Don’t worry, there’s a simple and affordable home remedy that can help lighten those spots. And the secret ingredient is something you probably have in your kitchen – baking soda!

Baking soda, also known as sodium bicarbonate, can do wonders for your skin. It acts as a gentle exfoliant, removing dead skin cells and gradually fading age spots. Plus, its alkaline nature helps balance the pH of your skin, promoting its natural health.

Ready to give it a try? Here are two easy ways to use baking soda to lighten age spots:

Ingredients:

  • 2 teaspoons of baking soda
  • Enough water to form a paste

Instructions:

  1. Mix the baking soda with a small amount of water in a bowl until it forms a thick paste.
  2. Gently apply the paste to the age spots using your fingers. Remember, no scrubbing too hard!
  3. Let the paste sit on the spots for about 5 minutes. If you have sensitive skin, start with 2-3 minutes.
  4. Rinse off the paste with lukewarm water and pat dry with a soft towel.
  5. Don’t forget to moisturize the area to keep your skin hydrated.
  6. Repeat this treatment 2-3 times a week, but pay attention to your skin’s response and adjust accordingly.

Ingredients:

  • 2 teaspoons of baking soda
  • 1 teaspoon of fresh lemon juice

Instructions:

  1. In a small bowl, combine baking soda and lemon juice. Be prepared for a little fizz!
  2. Once the fizzing subsides, gently apply the mixture to the age spots using a cotton swab or your fingers.
  3. Leave the mixture on for no longer than 5 minutes, as lemon juice can be photosensitizing.
  4. Rinse off the mixture thoroughly with lukewarm water, and don’t forget to moisturize.
  5. If you’re planning to go outdoors after using lemon juice, make sure to apply sunscreen as it can make your skin more sensitive to UV rays.
  6. Use this treatment once a week to assess your skin’s tolerance and the effect.

Now, a few precautions to keep in mind:

  • Always do a patch test on a small area of your skin before applying any treatment to larger or more visible areas.
  • Baking soda treatments can make your skin sensitive to the sun, so remember to always wear sunscreen to protect it from further damage.
  • Avoid overusing baking soda, as it can strip your skin of essential oils and cause dryness and irritation. Use it wisely.

Remember, using baking soda to treat age spots is a simple and cost-effective method, but results may vary. If you’re dealing with persistent skin issues or want more dramatic results, it’s always a good idea to consult a dermatologist. Take care of your skin and embrace your natural beauty!

When it comes to natural remedies, sometimes the simplest ingredients in our kitchen can be the most effective. Today, let’s explore an amazing combination that might just make you rethink the way you handle those nagging aches and pains. We’re talking about a blend of potato, black pepper, and olive oil – a trio that packs a surprisingly powerful punch against discomfort.

Potatoes are more than just a staple side dish. They have anti-inflammatory properties which can help soothe swelling and pain. The humble potato, particularly when used raw, can be a soothing application for sore areas.

Now, let’s spice things up with black pepper! Black pepper is not just for seasoning; it contains piperine, a compound known for its anti-inflammatory and pain-relieving qualities. It increases absorption of other nutrients and compounds, making it a perfect partner to the potato.

Lastly, we add a drizzle of olive oil, not just for its rich flavor but for its health benefits. Olive oil is celebrated for its anti-inflammatory effects, thanks to the presence of antioxidants known as polyphenols. These help in reducing the common pains associated with joint issues and muscle soreness.

Here’s how you can make this natural pain relief remedy at home:

  1. Grate a Raw Potato: Take a fresh, clean potato and grate it. You want to use the raw potato to capture all its fresh enzymes and anti-inflammatory properties.
  2. Mix in Black Pepper: Add about a teaspoon of freshly ground black pepper to the grated potato. This isn’t just for a kick of flavor – it’s the key ingredient that boosts the pain-relieving process.
  3. Blend with Olive Oil: To bind the mixture and add smoothness, mix in enough olive oil to form a paste. Olive oil makes the application easier and adds an extra layer of soothing effect.

To use, apply this paste directly to the painful area, wrap it gently with a bandage or soft cloth, and let it sit for about 20-30 minutes before washing off. You might feel a gentle warming sensation, a sign that the components are working together to ease the pain.

Remember, while this natural remedy can provide temporary relief, it’s always good to consult with a healthcare provider for persistent pain. Natural doesn’t just mean gentle; it can be powerful, too. So, the next time you feel those familiar twinges, reach for these three kitchen staples and give yourself a moment of natural relief!

That’s quite fascinating! Banana peels contain nutrients that might contribute to hair health, though it’s more commonly anecdotal than scientifically proven. They’re rich in potassium, natural oils, and antioxidants, which can help moisturize the scalp and potentially improve the health and sheen of hair. Some people believe that these nutrients can also impact hair pigmentation, though direct effects on reversing gray hair aren’t widely supported by scientific research.

If you’re thinking of sharing this intriguing use of banana peels with others, here’s a brief outline of how one might use banana peels for hair care:

  1. Collect and Prepare Banana Peels: Gather a few ripe banana peels. The riper, the better, as they are softer and richer in nutrients.
  2. Create a Banana Peel Rub: You can blend the peels into a paste or simply rub the inside of the peel directly onto the scalp and hair.
  3. Application: Apply the banana peel paste or rub the inside of the peel directly on the hair and scalp, massaging gently. Let it sit for about 15-30 minutes.
  4. Rinse: Wash the hair normally with your regular shampoo to remove the banana residue.

This natural treatment is said to add vitality and shine to the hair, and some claim it could impact the color. However, for those interested, it’s a safe and nourishing experiment to try, as it’s all-natural and free from harmful chemicals!

Cloves are celebrated in traditional Indian remedies for their powerful properties, including promoting hair growth and potentially treating baldness. Here’s how you might incorporate this fragrant spice into your hair care routine:

The Indian Secret: Cloves for Rapid Hair Growth

Why Cloves? Cloves contain essential oils that are thought to stimulate the scalp, enhance blood circulation, and promote hair follicle health. This can lead to faster hair growth and, over time, may help reduce hair thinning and loss.

Making Clove Hair Oil:

  1. Ingredients:
    • 1 tablespoon of whole cloves
    • 200 ml of olive oil (you can also use coconut oil as a base)
  2. Preparation:
    • Heat the oil in a small saucepan and add the cloves.
    • Simmer on a low heat for about 10-15 minutes, allowing the essence of the cloves to infuse into the oil.
    • Let the oil cool down and then strain out the cloves.
  3. Application:
    • Apply the clove-infused oil to your scalp and hair roots.
    • Massage gently in circular motions to enhance absorption and stimulate blood flow.
    • Leave it on for at least an hour or, for best results, overnight.
  4. Washing Out:
    • Rinse the oil out with your regular shampoo. If you’re avoiding harsh chemicals, consider a mild, sulfate-free shampoo.

Consistency is Key: For noticeable results, use this treatment at least twice a week. Many people report seeing a difference in their hair texture and growth speed within the first few weeks.

Additional Tips:

  • To boost the effectiveness, you can add other hair-beneficial herbs like fenugreek seeds or amla (Indian gooseberry) to the oil during the infusion process.
  • Ensure you’re also eating a balanced diet rich in vitamins and minerals, which supports hair health from the inside out.

Cloves are more than just a kitchen spice—they’re a multi-purpose powerhouse that might just be the secret ingredient for lustrous, rapidly growing hair!

Castor oil has been praised for its numerous benefits for skin and hair health due to its rich content of ricinoleic acid and other fatty acids, which can promote hydration and aid in cellular repair. Here’s a guide on how to use castor oil effectively before bed to see noticeable results by morning:

Benefits of Castor Oil

  1. Moisturizing Skin: Castor oil is a natural moisturizer that can help soothe dry and flaky skin, thanks to its humectant properties that lock in moisture.
  2. Promoting Hair Growth: When applied to the scalp, castor oil can enhance the health of hair follicles and promote faster and thicker hair growth.
  3. Improving Eyelashes and Eyebrows: Regular application of castor oil can also help thicken eyebrows and lengthen eyelashes.
  4. Reducing Acne: The antibacterial properties of castor oil make it beneficial for reducing acne by keeping bacteria that cause acne at bay.

How to Use Castor Oil Before Bed

For Skin:

  • Step 1: Cleanse your face thoroughly to remove any makeup or impurities.
  • Step 2: Take a small amount of castor oil on your fingertips and apply it gently to your face. You can also mix it with another lighter carrier oil like almond or coconut oil to make it easier to spread and absorb.
  • Step 3: Massage the oil into your skin in circular motions; focus on areas that are particularly dry or acne-prone.

For Hair:

  • Step 1: Warm a small amount of castor oil in your hands or heat it slightly in a microwave. Ensure it’s comfortably warm and not hot.
  • Step 2: Massage the warm oil into your scalp and through the lengths of your hair. Focus on areas that are thinning or where hair is brittle.
  • Step 3: Cover your hair with a shower cap or a towel to prevent oil from staining your pillow as you sleep.

For Eyelashes and Eyebrows:

  • Step 1: Dip a clean mascara brush or a cotton swab into castor oil.
  • Step 2: Carefully apply the oil to your eyebrows and along your eyelash line. Be careful not to get any oil in your eyes.

Tips for Overnight Use

  • Wear Old Clothes: Castor oil is thick and can stain clothing, so wear something old to bed or cover areas that might come in contact with the oil.
  • Protect Your Bedding: Use an old towel over your pillow to avoid stains.
  • Consistency Is Key: For best results, make this a part of your nightly routine.

Potential Side Effects

While castor oil is generally safe for most people, it can cause allergic reactions in some. Always perform a patch test by applying a small amount of the oil to a part of your skin and wait for 24 hours to check for any reaction.

By incorporating castor oil into your nightly routine, you can wake up to noticeably softer, more hydrated skin, and healthier hair. As with any natural remedy, results can vary based on individual factors, but many people report positive changes with regular use.

Adding certain ingredients to your morning coffee can transform it into a health-boosting, fat-burning beverage. These additions can enhance the metabolic rate, provide additional energy, and help maintain a healthy weight when combined with a balanced diet and regular exercise. Here are three popular additions that you can consider incorporating into your coffee as part of your morning routine:

1. Cinnamon

Cinnamon is not only great for adding a sweet, spicy flavor without the sugar, but it also has health benefits that can enhance your coffee. It’s known for its ability to stabilize blood sugar levels and improve insulin sensitivity, which can help in managing or losing weight.

How to Add:

  • Stir in a quarter to a half teaspoon of ground cinnamon to your brewed coffee, or add a cinnamon stick to your coffee grounds before brewing for a subtly infused flavor.

2. Coconut Oil

Coconut oil contains medium-chain triglycerides (MCTs) that are touted for their ability to increase energy expenditure and help the body burn fat more effectively. Adding coconut oil to your coffee can also help suppress appetite, making it a useful addition to a weight loss diet.

How to Add:

  • Add a tablespoon of coconut oil to your hot coffee and stir well until the oil is fully dissolved. For a smoother texture, blend your coffee with the oil using a hand blender or a countertop blender to create a frothy, latte-like consistency.

3. Cayenne Pepper

A little cayenne pepper can go a long way in terms of adding kick and boosting metabolism. Capsaicin, the compound that gives cayenne its heat, has been shown to boost metabolic rate and increase fat burning.

How to Add:

  • Start with a small pinch of cayenne pepper—too much can overpower your coffee. Mix it into your brew to heat things up and kickstart your metabolism in the morning.

Tips for Fat-Burning Coffee:

  • Moderation is Key: While these ingredients can offer health benefits and aid in weight management, they should be used in moderation. For instance, too much coconut oil can add excessive calories, and too much cayenne can irritate the stomach.
  • Balanced Diet: For the best results, consume this fat-burning coffee as part of a balanced diet that includes plenty of fruits, vegetables, lean proteins, and whole grains.
  • Hydration: Remember that caffeine is a diuretic, so it’s important to balance your coffee consumption with plenty of water throughout the day.

Potential Benefits

By incorporating these ingredients into your morning coffee, you may not only enjoy a unique taste experience but also potentially benefit from increased metabolism and energy levels, which can contribute to weight loss efforts. Always consider any dietary restrictions or health conditions you may have and consult with a healthcare provider if unsure about introducing new ingredients into your diet.

Soursop, also known as graviola or guanabana, is a tropical fruit known for its distinctive flavor, which is a combination of strawberry, pineapple, and citrus notes. It’s not only delicious but also packed with vitamins and minerals. Soursop juice is a popular way to enjoy this fruit’s benefits. Here’s a closer look at the health benefits and uses of soursop juice:

Health Benefits of Soursop Juice

  1. Rich in Antioxidants:
    • Soursop is loaded with antioxidants, which help fight free radicals in the body. These antioxidants are crucial for preventing and repairing cell damage, and they may help reduce the risk of chronic diseases such as heart disease, cancer, and diabetes.
  2. Boosts Immunity:
    • High in vitamin C, soursop juice strengthens the immune system, enhancing your body’s ability to ward off and fight infections.
  3. Anti-Inflammatory Properties:
    • Soursop has anti-inflammatory properties that may help reduce pain and swelling in the body. This can be particularly beneficial for people suffering from conditions like arthritis.
  4. May Have Anticancer Properties:
    • Some laboratory studies have shown that soursop can be effective against various types of cancer cells. Research suggests that it may inhibit the growth of cancer cells or even destroy them, although more human studies are needed to support these findings fully.
  5. Improves Gut Health:
    • The fiber in soursop juice helps promote a healthy digestive system, aiding in regular bowel movements and preventing constipation.
  6. May Help Lower Blood Sugar Levels:
    • Some studies have suggested that soursop can help regulate blood sugar levels, which could be beneficial for people with diabetes. However, more research is needed in this area.
  7. Supports Heart Health:
    • Soursop juice can help lower blood pressure and cholesterol levels, which are significant factors in heart health.

Uses of Soursop Juice

  1. As a Nutritious Drink:
    • Enjoy soursop juice on its own as a refreshing, health-boosting drink.
  2. In Smoothies:
    • Blend soursop juice with other fruits like bananas, pineapples, and mangoes for a tropical-flavored smoothie.
  3. In Cocktails and Mocktails:
    • Use soursop juice as a base or mixer in cocktails and mocktails for a unique twist.
  4. For Making Ice Cream or Sorbet:
    • Use soursop juice to make exotic-flavored ice creams or sorbets.
  5. In Sauces and Dressings:
    • Mix soursop juice into dressings and sauces to add a fruity flavor to salads and dishes.

Precautions

While soursop juice offers many health benefits, it’s important to consume it in moderation. There are some concerns about the possible neurological effects of consuming soursop in large quantities due to compounds known as annonacin, which could be harmful if consumed excessively. Additionally, those with a low blood pressure condition or on diabetic medication should consult their healthcare provider before incorporating soursop juice into their diet regularly.

Soursop juice is a versatile and healthful addition to the diet, offering a range of beneficial properties and a delightful taste that’s both refreshing and exotic.

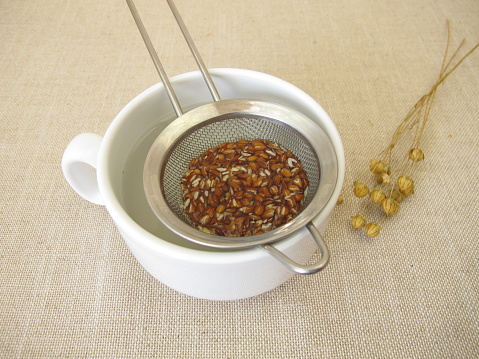
Chia seeds are a fantastic superfood when it comes to weight loss. They’re loaded with fiber, protein, and omega-3 fatty acids, all of which can help in managing hunger and boosting metabolism. Combining chia seeds with lemon creates a detoxifying drink that not only aids in weight loss but also improves hydration and provides a boost of vitamin C. Here’s how you can prepare a simple Chia Seed Lemon Drink for weight loss:

Chia Seed Lemon Detox Water Recipe

Ingredients:

  • 1 tablespoon of chia seeds
  • Juice of 1 lemon
  • 1 glass of water (about 250-300 ml)
  • Optional: A few mint leaves or a teaspoon of honey for flavor

Instructions:

  1. Soak the Chia Seeds:
    • Add the chia seeds to the glass of water and stir well. Let them soak for about 30 minutes to an hour. As they soak, chia seeds will expand and turn gelatinous, which is key to their weight-loss properties.
  2. Add Lemon Juice:
    • Once the chia seeds have gelled, squeeze the juice of one lemon into the glass. Lemon not only adds flavor but also aids in digestion and detoxification.
  3. Mix and Enhance Flavor:
    • Stir the mixture thoroughly to combine the lemon juice and chia seeds evenly. If you like, you can add some mint leaves for a refreshing taste or a teaspoon of honey to sweeten it naturally.
  4. Serve:
    • Drink this chia seed lemon detox water first thing in the morning on an empty stomach to kickstart your metabolism, or enjoy it about 30 minutes before meals to reduce appetite.

Benefits of Chia Seed Lemon Drink for Weight Loss

  • High in Fiber: Chia seeds are very high in fiber, which helps you feel full longer and reduces appetite, making it easier to eat less throughout the day.
  • Hydration and Digestion: Staying hydrated is crucial for maintaining healthy digestion and metabolism. The water content in this drink helps keep you hydrated, while lemon promotes healthy digestion and detoxification.
  • Boosts Metabolism: Lemon contains vitamin C, which has been shown to boost metabolic rate, helping the body burn more calories throughout the day.
  • Natural Detoxifier: Lemon helps flush toxins from the body, and chia seeds support this with their high antioxidant content, aiding overall detoxification.

This chia seed lemon drink is not only beneficial for weight loss but also easy to make and can be a refreshing part of your daily routine. Remember, for the best results in weight loss, it’s important to also maintain a balanced diet and regular exercise regimen.

If you’re looking for a simple, natural way to aid in reducing belly fat, consider cucumber juice as your nighttime companion. This refreshing drink not only hydrates but also comes packed with nutrients that can help in managing weight and improving overall health. Here’s why drinking cucumber juice before bed could be beneficial for burning belly fat:

Benefits of Cucumber Juice

  1. Low in Calories: Cucumber is extremely low in calories but high in water content, making it an ideal food for those looking to lose weight. Drinking cucumber juice can help you feel full, reducing the likelihood of late-night snacking.
  2. Hydration: Staying well-hydrated is crucial for maintaining optimal metabolic rate and efficient digestion. Cucumber juice provides a tasty way to boost your fluid intake, helping your body to burn calories more effectively, even while you sleep.
  3. Rich in Antioxidants: Cucumbers are high in antioxidants, including flavonoids and tannins, which can help combat oxidative stress and inflammation in the body—factors that are often linked with increased belly fat.
  4. Supports Detoxification: Cucumber helps in cleansing the liver, an organ essential for digestion and metabolism. A healthy liver is crucial for the effective breakdown of fats.
  5. Diuretic Properties: The natural diuretic properties of cucumber help to flush out excess water and toxins from the body, which can reduce bloating and support weight loss efforts.

How to Prepare Cucumber Juice for Nighttime Consumption

Ingredients:

  • 1 large cucumber
  • Fresh ginger (optional, for added metabolic boost)
  • Lemon juice (optional, for flavor and added vitamin C)
  • Fresh mint (optional, for a soothing taste)

Instructions:

  1. Wash and Peel: Thoroughly wash the cucumber. You can peel it if you prefer, but keeping the skin on provides additional fiber and nutrients.
  2. Blend: Cut the cucumber into chunks and put it into a blender. Add a small piece of peeled ginger, a squeeze of lemon juice, and a few mint leaves for an extra refreshing taste.
  3. Strain (Optional): For a smoother juice, strain the mixture using a mesh sieve or cheesecloth to remove the pulp.
  4. Serve: Drink the juice fresh, ideally just before bedtime. For a cooling effect, you can chill the juice for a few minutes or add a few ice cubes.

A Word of Caution

While cucumber juice is safe for most people, those with kidney problems should be cautious about consuming too much potassium, which cucumbers contain. Always consult a healthcare provider if you have underlying health conditions or are unsure about making dietary changes.

Conclusion

Drinking cucumber juice before bed isn’t a magic solution for weight loss, but it can be a valuable addition to a healthy diet and lifestyle. With its hydrating and metabolic benefits, cucumber juice can help support your body’s natural fat-burning processes during sleep. Plus, its refreshing taste makes it a pleasant pre-sleep ritual that promotes hydration and well-being.

Apple cider vinegar (ACV) has gained popularity as a natural remedy for various health issues, including weight management and improved digestion. Taking just one tablespoon of apple cider vinegar can help kickstart your metabolism and aid in burning belly fat. Here’s how incorporating apple cider vinegar into your daily routine can be beneficial for those looking to reduce their waistline.

Benefits of Apple Cider Vinegar for Burning Belly Fat

  1. Enhances Fat Loss: ACV is known for its ability to boost fat burning and reduce fat storage. Its acetic acid content helps in the breakdown of fat cells, promoting overall weight loss, including the visceral fat around your belly.
  2. Suppresses Appetite: Apple cider vinegar can increase feelings of fullness, leading to a natural reduction in calorie intake. This is particularly helpful for controlling portions and avoiding overeating.
  3. Regulates Blood Sugar Levels: Consistent blood sugar levels can help prevent cravings and sudden spikes in hunger. ACV has been shown to improve insulin sensitivity during a high-carb meal, which can be beneficial for maintaining steady blood sugar levels.
  4. Improves Metabolism: ACV stimulates your metabolism, helping to speed up the rate at which your body burns calories. An active metabolism is crucial for burning more calories throughout the day, even when at rest.

How to Use Apple Cider Vinegar for Fat Burning

Ingredients:

  • 1 tablespoon of organic, unfiltered apple cider vinegar
  • 1 glass of water (about 8 ounces)
  • Optional: a teaspoon of honey or lemon juice for taste

Instructions:

  1. Mix Well: Add one tablespoon of apple cider vinegar to the glass of water. Stir well to combine. If you find the taste too strong, you can increase the water or add a teaspoon of honey or a few drops of lemon juice to improve the flavor.
  2. Consume Before Meals: Drink this mixture about 20-30 minutes before meals. This timing helps prepare your digestive system and enhances the feeling of fullness from your meal, which can help reduce overall calorie intake.
  3. Consistency is Key: For best results, make this a daily habit. Consistent use of apple cider vinegar can help support ongoing metabolic activity and weight management.

A Word of Caution

While apple cider vinegar offers many health benefits, it is also highly acidic, which can lead to tooth enamel erosion or digestive discomfort if consumed in excess. Always dilute it with water before drinking, and consider using a straw to minimize contact with your teeth. If you have a history of digestive issues like gastritis or ulcers, consult with a healthcare provider before starting regular consumption of apple cider vinegar.

Conclusion

Apple cider vinegar isn’t a miracle solution, but when used as part of a balanced diet and healthy lifestyle, it can be a valuable tool for enhancing metabolic health and supporting weight loss efforts, especially around the belly area. Incorporate this simple ACV drink into your routine and observe the benefits it can offer to your health and waistline.