Category

Health & Wellness

Category

If you’re looking for a simple and natural way to boost your health, turmeric water might be just what you need. This golden drink has been celebrated for centuries for its incredible health benefits. Adding a daily glass of turmeric water to your routine can be a game-changer, and here’s why.

What is Turmeric?

Turmeric is a bright yellow spice that comes from the root of the Curcuma longa plant. It’s commonly used in cooking, especially in Indian cuisine, but its uses extend far beyond the kitchen. The active ingredient in turmeric is curcumin, which has powerful anti-inflammatory and antioxidant properties.

Benefits of Drinking Turmeric Water

  1. Reduces Inflammation

Inflammation is the body’s natural response to injury and infection, but chronic inflammation can lead to various health issues. Curcumin in turmeric is known for its ability to reduce inflammation, helping to manage conditions like arthritis and promoting overall joint health.

  1. Boosts Immunity

A strong immune system is essential for staying healthy, and turmeric water can help. The antioxidants in turmeric support the immune system, helping to fend off illnesses and infections.

  1. Aids Digestion

Turmeric has been used for centuries to improve digestion. It stimulates the production of bile, which helps break down food and absorb nutrients more efficiently. Drinking turmeric water can also help soothe the digestive tract, reducing symptoms of bloating and gas.

  1. Supports Heart Health

Turmeric water can benefit your heart in multiple ways. It helps reduce bad cholesterol levels and prevents the oxidation of cholesterol, which can lead to heart disease. Additionally, its anti-inflammatory properties support overall cardiovascular health.

  1. Enhances Skin Health

If you’re looking to maintain a healthy glow, turmeric water might be your new best friend. Its anti-inflammatory and antioxidant properties help reduce redness and blemishes, promoting clearer and healthier skin.

How to Make Turmeric Water

Making turmeric water is quick and easy. Here’s a simple recipe to get you started:

  1. Ingredients:
    • 1 cup of warm water
    • 1/2 teaspoon of turmeric powder
    • A pinch of black pepper (optional, but it helps with the absorption of curcumin)
    • Honey or lemon to taste (optional)
  2. Instructions:
    • Mix the turmeric powder into the warm water.
    • Add a pinch of black pepper.
    • Stir well until the turmeric is fully dissolved.
    • Add honey or lemon if desired for extra flavor.
    • Drink it first thing in the morning on an empty stomach for best results.

Tips for Best Results

  • Consistency is Key: Make turmeric water a part of your daily routine to fully enjoy its benefits.
  • Quality Matters: Use high-quality turmeric powder to ensure you’re getting the most curcumin.
  • Stay Hydrated: Turmeric water is great, but don’t forget to drink plenty of regular water throughout the day.

Conclusion

Incorporating turmeric water into your daily routine is a simple yet powerful way to enhance your health. From reducing inflammation to boosting your immune system, this golden drink offers numerous benefits that can help you feel your best. Give it a try and see the difference it can make in your life. Cheers to your health!

Craving a delicious, tender beef dish but struggling with tough cuts? There’s a Chinese culinary secret that can transform even the toughest beef into melt-in-your-mouth goodness in just five minutes. Let’s uncover this magic technique and how you can easily do it at home.

The Magic of Velveting

The secret is called “velveting,” a traditional Chinese cooking method that ensures meat stays tender and juicy. This simple technique involves marinating the beef in a mixture of ingredients that break down the tough fibers, resulting in a silky, soft texture.

Why Velveting Works

Velveting works because the marinade ingredients coat the meat, creating a protective barrier that locks in moisture. This not only softens the beef but also prevents it from drying out during cooking. Here’s how you can achieve perfectly tender beef with this easy method.

Ingredients for Velveting Beef

  • 1 pound of beef (thinly sliced against the grain)
  • 1 tablespoon of baking soda
  • 1 tablespoon of cornstarch
  • 1 tablespoon of soy sauce
  • 1 tablespoon of vegetable oil
  • 1 egg white (optional, for extra tenderness)

Steps to Velvet Beef

  1. Slice the Beef: Start by slicing your beef thinly against the grain. This helps break down the muscle fibers, making it easier to tenderize.
  2. Prepare the Marinade: In a bowl, combine the baking soda, cornstarch, soy sauce, vegetable oil, and egg white (if using). Mix well until you have a smooth mixture.
  3. Marinate the Beef: Add the beef slices to the marinade, ensuring each piece is well-coated. Let it sit for about 30 minutes. If you’re in a hurry, even 15 minutes can make a significant difference.
  4. Rinse and Pat Dry: After marinating, rinse the beef under cold water to remove the baking soda. This step is crucial to avoid any residual taste. Pat the beef dry with paper towels.
  5. Quick Cook: Now your beef is ready to be cooked! Stir-fry it in a hot wok or pan for 2-3 minutes until it’s just cooked through. The result? Incredibly tender, juicy beef ready to be used in your favorite stir-fry, noodle, or rice dishes.

Why It Works

Baking soda raises the pH level of the meat, making it more alkaline. This change in pH level causes the muscle fibers to loosen and prevents the proteins from bonding, which keeps the meat tender. Cornstarch helps to create a smooth texture and protect the meat during cooking, while soy sauce adds flavor and egg white enhances the tenderness.

Cooking Tips

  • Don’t Overcook: Velveting makes the beef tender, but overcooking can still make it tough. Cook the beef quickly over high heat.
  • Use Fresh Ingredients: Fresh beef and high-quality soy sauce will yield the best results.

Conclusion

Velveting is a game-changer for anyone looking to enjoy tender, delicious beef without spending hours in the kitchen. This quick and easy Chinese technique ensures that even the toughest cuts of beef become succulent and flavorful in just a few minutes. Try it next time you’re cooking beef, and enjoy the melt-in-your-mouth goodness that velveting brings to your table!

Watermelon isn’t just a quintessential summer fruit; it’s also packed with benefits that might just make you want to enjoy it all year round! Here are ten fantastic reasons to incorporate more watermelon into your diet.

1. Hydration Hero

Watermelon is about 92% water, making it a perfect choice to stay hydrated. This is especially valuable when you want a tasty alternative to plain water.

2. Nutrient Rich

Despite being low in calories, watermelon is rich in important nutrients including vitamins A, C, and many B vitamins. It’s also a good source of antioxidants like lycopene, which gives it its red color.

3. Heart Health

Lycopene in watermelon can help lower cholesterol and blood pressure. Plus, the potassium found in watermelon aids in maintaining a healthy heart by regulating heartbeat and improving blood circulation.

4. Reduces Inflammation

The combination of lycopene and vitamin C in watermelon makes it an excellent food for reducing inflammation and oxidative damage.

5. Digestive Aid

Because it’s full of water and a small amount of fiber, watermelon helps to prevent constipation and promote regularity for a healthy digestive tract.

6. Muscle Soreness Relief

Watermelon contains citrulline, an amino acid that may help reduce muscle soreness. It’s a great snack after exercise to help relieve minor aches.

7. Skin and Hair Benefits

Vitamin A in watermelon is great for your skin, and it helps keep hair moisturized due to its role in sebum production.

8. Cancer-Fighting Properties

Lycopene intake has been linked to a decreased risk of some types of cancer, making watermelon a great choice for supporting long-term health.

9. Eye Health

Watermelon is a good source of beta-carotene which is converted in the body to vitamin A. It helps produce the pigments in the retina of the eye and protects against age-related eye problems.

10. Natural Sweetener

With its natural sweetness, watermelon is a healthy way to satisfy a sweet tooth without adding any extra sugar to your diet.

How to Enjoy Watermelon

You can enjoy watermelon in numerous ways beyond just slicing and serving. Consider adding it to salads for a refreshing twist, blending it into smoothies, or even grilling it for a unique flavor profile. Watermelon can also be incorporated into salsas or used as a hydrating base for a chilled summer soup.

Whether you enjoy it on its own or mixed into other dishes, watermelon not only provides a delightful taste but also contributes to your overall wellness. So, why not pick up a watermelon today and start reaping all these amazing benefits?

If you’re looking for a healthy, refreshing drink that’s easy to make without a juicer, carrot and orange juice is a perfect choice. This vibrant juice combines the natural sweetness of carrots with the tangy zest of oranges, making it a nutritious treat. Here’s a simple guide to making carrot and orange juice using a blender.

Ingredients You’ll Need

  • 4 medium carrots
  • 2 large oranges
  • 1-2 cups of water (adjust to desired consistency)
  • Ice cubes (optional)
  • Honey or sweetener to taste (optional)

Step-by-Step Preparation

1. Prepare the Ingredients:

  • Wash the Carrots: Start by thoroughly washing the carrots to remove any dirt. If you prefer, you can peel the carrots, but it’s not necessary as the skin contains many nutrients.
  • Chop the Carrots: Cut the carrots into small pieces to make blending easier. Aim for chunks about 1-2 inches long.
  • Peel the Oranges: Peel the oranges and remove as much of the white pith as possible, as it can make the juice bitter. Divide the oranges into segments.

2. Blend the Ingredients:

  • Combine in Blender: Place the chopped carrots and orange segments into the blender.
  • Add Water: Pour in 1-2 cups of water to help blend the ingredients smoothly. Start with 1 cup and add more if needed to reach your desired consistency.
  • Blend Until Smooth: Blend on high speed until the mixture is smooth and no large chunks remain. This should take about 1-2 minutes.

3. Strain the Juice:

  • Strain: If you prefer a smoother juice, you can strain the mixture through a fine-mesh sieve, cheesecloth, or a nut milk bag to remove the pulp. Press down with a spoon to extract as much juice as possible.
  • Optional: If you like your juice with more fiber, you can skip the straining step and enjoy it as is.

4. Sweeten and Serve:

  • Add Sweetener: Taste the juice and add honey or your preferred sweetener if desired. Blend again for a few seconds to mix.
  • Serve: Pour the juice into glasses over ice cubes for a refreshing chill. Enjoy immediately for the best flavor and nutrient content.

Tips for the Best Carrot and Orange Juice

  • Adjust Sweetness: Carrots and oranges are naturally sweet, but if you prefer a sweeter juice, a little honey or agave syrup can enhance the flavor.
  • Fresh Ingredients: Use fresh, high-quality carrots and oranges for the best taste and maximum nutrients.
  • Experiment: Feel free to experiment by adding other fruits or vegetables like apples, ginger, or a squeeze of lemon for extra flavor and health benefits.

Conclusion

Making carrot and orange juice with a blender is quick, easy, and doesn’t require any special equipment. This delicious and nutritious drink is perfect for a healthy start to your day or a refreshing mid-afternoon pick-me-up. Give it a try and enjoy the natural goodness of homemade juice!

Are you on the lookout for a natural, refreshing way to support your bones and joints? Consider the traditional Mexican drink, Tepache. This fermented beverage made from the skins of pineapples, not only tantalizes your taste buds but also offers some impressive health benefits, particularly for bone and joint health.

Why Tepache?

Tepache is made by fermenting the skins of pineapples with brown sugar and water, and occasionally spices are added for extra flavor. This process encourages the growth of beneficial bacteria, making Tepache a probiotic-rich drink. Probiotics are known for their ability to support digestive health, which is crucial for overall wellness, including the health of bones and joints.

Bone and Joint Health Benefits

  1. Rich in Manganese: Pineapple skins are high in manganese, a mineral that’s essential for bone formation and the maintenance of bone density. Consuming a manganese-rich diet can contribute to strong, healthy bones.
  2. Vitamin C: Tepache is also a good source of Vitamin C, which is vital for the formation of collagen. Collagen is a key protein in bones and connective tissues in the joints. Adequate Vitamin C intake helps maintain the integrity of your bones and reduces the risk of joint conditions.
  3. Anti-inflammatory Properties: The fermentation process increases the bioavailability of nutrients in pineapple, enhancing their anti-inflammatory properties. This can be particularly beneficial in reducing discomfort and stiffness associated with joint issues.

How to Make Tepache at Home

Making Tepache is a simple and enjoyable process. Here’s a basic guide to get you started:

  • Ingredients: You’ll need the peel of one pineapple, a cup of brown sugar, and about a gallon of water. Optional ingredients include cinnamon sticks or cloves for additional flavoring.
  • Preparation:
    1. Wash the pineapple peel thoroughly.
    2. In a large jar, combine the pineapple peels, brown sugar, and optional spices.
    3. Add water to cover the mixture and stir well.
    4. Cover the jar with a cloth and secure it with a rubber band.
    5. Let the mixture ferment in a warm place for about 2 to 3 days. Check it daily and stir.
    6. Once it’s reached your desired level of fermentation, strain out the solids.
    7. Chill and enjoy your homemade Tepache.

Enjoying Your Tepache

Tepache can be enjoyed on its own or mixed with other beverages for an added twist. Its sweet, slightly tangy flavor makes it a delightful addition to any meal or as a refreshing drink on a warm day. Not only will you savor its taste, but you’ll also reap the benefits of a drink that supports your bone and joint health. Cheers to a simple, tasty way to boost your well-being!

Did you know that a simple ingredient like salt can boost the effectiveness of your laundry detergent? It’s true! Mixing detergent with salt can lead to cleaner, brighter, and fresher-smelling clothes. Let’s dive into how this works and how you can easily incorporate this trick into your laundry routine.

Why Salt Works

Salt, or sodium chloride, is more than just a seasoning for your food. It has natural properties that make it a great addition to your laundry routine. Salt can:

  • Enhance Cleaning Power: Salt helps to soften water, which can improve the effectiveness of your detergent. Soft water allows detergent to work more efficiently, lifting dirt and stains from your clothes.
  • Brighten Colors: Salt helps to set colors, preventing them from fading. It can keep your clothes looking vibrant and new.
  • Prevent Mildew: Salt has natural antibacterial properties that can help prevent the growth of mildew and bacteria, keeping your clothes fresher.

What You’ll Need

  • Your regular laundry detergent
  • Table salt or sea salt

Step-by-Step Guide to Using Salt in Your Laundry

  1. Measure the Detergent: Pour the recommended amount of your usual laundry detergent into the washing machine.
  2. Add the Salt: For a regular-sized load, add about a half cup of salt directly into the drum of the washing machine. For larger loads, you might want to increase the amount to a full cup.
  3. Load the Clothes: Place your clothes into the washing machine as usual.
  4. Run the Cycle: Select your preferred wash cycle and let the machine do its work. The salt will dissolve in the water, enhancing the detergent’s cleaning power.

Tips for Best Results

  • Use Warm Water: Salt dissolves better in warm water, so if your clothes can handle it, use a warm water setting.
  • Test for Colorfastness: Before using salt on brightly colored or new clothes, test a small hidden area to ensure the colors won’t bleed.
  • Regular Use: Make salt a regular part of your laundry routine to continuously enjoy brighter, cleaner clothes.

Conclusion

Incorporating salt into your laundry routine is a simple, cost-effective way to boost the cleaning power of your detergent. This easy trick can lead to brighter, fresher clothes and even help extend the life of your garments. Give it a try, and you might be surprised at just how effective this humble kitchen staple can be in your laundry room. Say goodbye to dull, dingy clothes and hello to a brighter, cleaner wardrobe!

Are age spots making you feel self-conscious about your skin? Don’t worry, there’s an easy and affordable solution that you can find right in your kitchen – baking soda!

Baking soda, also known as sodium bicarbonate, can work wonders for your skin. It acts as a gentle exfoliant, helping to remove dead skin cells and gradually fade age spots. Its alkaline nature also helps to balance the pH of your skin, promoting its natural health.

Are you ready to try it out? Here are two simple ways to use baking soda to lighten age spots:

1. Baking Soda Paste

Ingredients:

  • 2 teaspoons of baking soda
  • Enough water to form a paste

Instructions:

  1. Mix the baking soda with a small amount of water in a bowl until it forms a thick paste.
  2. Gently apply the paste to the age spots using your fingers, but remember not to scrub too hard.
  3. Let the paste sit on the spots for about 5 minutes. If you have sensitive skin, start with 2-3 minutes.
  4. Rinse off the paste with lukewarm water and pat dry with a soft towel.
  5. Don’t forget to moisturize the area to keep your skin hydrated.
  6. Repeat this treatment 2-3 times a week, adjusting as needed based on your skin’s response.

2. Baking Soda and Lemon Juice Mix

Ingredients:

  • 2 teaspoons of baking soda
  • 1 teaspoon of fresh lemon juice

Instructions:

  1. In a small bowl, combine the baking soda and lemon juice. Be prepared for a little fizz!
  2. Once the fizzing subsides, gently apply the mixture to the age spots using a cotton swab or your fingers.
  3. Leave the mixture on for no longer than 5 minutes, as lemon juice can make your skin more sensitive to sunlight.
  4. Rinse off the mixture thoroughly with lukewarm water, and don’t forget to moisturize.
  5. If you’re planning to go outdoors after using lemon juice, be sure to apply sunscreen as it can make your skin more sensitive to UV rays.
  6. Use this treatment once a week to assess your skin’s tolerance and the effectiveness of the mixture.

However, there are a few precautions to keep in mind:

  • Always perform a patch test on a small area of your skin before applying any treatment to larger or more visible areas.
  • Baking soda treatments can make your skin more sensitive to the sun, so remember to wear sunscreen to protect it from further damage.
  • Avoid using baking soda excessively, as it can strip your skin of essential oils and cause dryness and irritation. Use it wisely.

Remember, using baking soda to lighten age spots is a simple and cost-effective method, but please note that individual results may vary. If you’re dealing with persistent skin issues or seeking more significant improvements, it’s always a good idea to consult a dermatologist. Take good care of your skin and embrace your natural beauty!

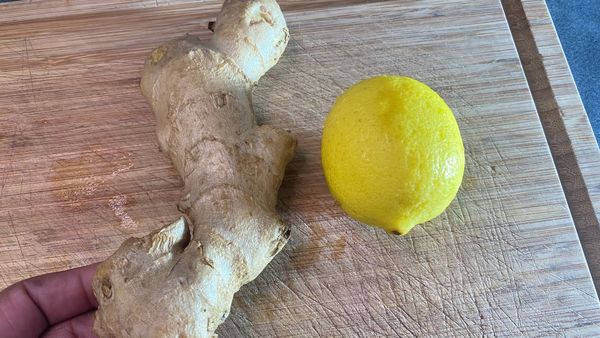
Looking for a simple and delicious way to kickstart your day? Look no further than the powerful combination of ginger and lime! Not only do these two ingredients taste great together, but they also have amazing benefits for your body. From boosting your metabolism to aiding digestion and promoting fat loss, ginger and lime can work wonders for your overall health.

Ginger is a superstar when it comes to increasing your metabolism. Its thermogenic properties raise your body’s temperature, which stimulates your metabolism and helps you burn more calories. Additionally, ginger aids digestion, reduces bloating, and has anti-inflammatory properties that can effectively target belly fat.

Lime, on the other hand, is packed with vitamin C and antioxidants. It works as a detoxifier, improves digestion, and boosts your immune system. The citric acid found in limes helps break down fat and promotes weight loss. With these benefits, it’s easy to see why ginger and lime are a winning combination.

Now, let’s dive into how you can make a refreshing and healthy ginger and lime beverage:

  • 1 small piece of fresh ginger (about 1 inch)
  • 1 lime
  • 1 cup of warm water
  • Honey (optional, for taste)
  1. Peel and grate the fresh ginger.
  2. Squeeze the juice from the lime.
  3. Bring a cup of water to a boil and let it cool slightly until it’s warm enough to drink.
  4. In a cup, add the grated ginger and lime juice.
  5. Pour the warm water over the ginger and lime juice.
  6. Stir well to combine.
  7. If you prefer a sweeter taste, add a teaspoon of honey to the mixture and stir until dissolved.
  8. Drink this ginger and lime mixture every morning on an empty stomach before breakfast to maximize its effectiveness.

For optimal results, incorporate this ginger and lime beverage into your daily routine. Drink one cup every morning before breakfast for seven consecutive days. It’s important to consume it on an empty stomach to allow its fat-burning and detoxifying effects to work effectively.

Here are some additional tips for getting the best results:

  • Use fresh ginger and lime for the best flavor and health benefits.
  • Consistency is key, so make sure to drink this mixture every morning for seven days without skipping.
  • Complement this beverage with a balanced diet rich in fruits, vegetables, lean proteins, and whole grains.
  • Stay hydrated by drinking plenty of water throughout the day to support the detox process and keep your body hydrated.
  • Incorporate regular physical activity into your routine to enhance fat burning and improve overall health.

To maximize the benefits of the drink, it’s best to limit your intake of sugary and processed foods during this period. Additionally, getting enough sleep is crucial for weight loss and overall health. Finally, manage stress by practicing stress-reducing activities such as yoga, meditation, or deep breathing exercises to support your weight loss journey.

By simply incorporating a cup of ginger and lime water into your morning routine for seven days, you can boost your metabolism, improve digestion, and promote fat loss, especially in the belly area. Embrace this natural and refreshing beverage, and witness the difference it can make in achieving your weight loss goals. Cheers to good health!

Maintaining healthy blood vessels and managing cholesterol levels are essential for overall well-being, especially as we age. If you’re looking for a natural way to support your cardiovascular health, look no further than boiled rosemary. This aromatic herb, commonly used in cooking, not only adds flavor to your dishes but also has powerful health benefits that can make a significant difference. Let’s explore how boiled rosemary can help cleanse your blood vessels, reduce cholesterol levels, and how you can easily incorporate it into your routine.

1. The Power of Rosemary

Rosemary is more than just a flavorful herb; it’s a natural powerhouse for your heart and blood vessels. Packed with antioxidants and anti-inflammatory compounds, rosemary helps improve circulation, reduce inflammation, and protect your blood vessels from oxidative stress. One of its key components, rosmarinic acid, works wonders in lowering cholesterol and maintaining healthy arteries.

2. How to Make Rosemary Infusion

Creating a rosemary infusion is incredibly simple, and you’ll experience its benefits with regular use. Here’s a step-by-step guide to preparing this powerful liquid:

Ingredients:

  • 1 liter of water
  • 3-4 sprigs of fresh rosemary (or 2 tablespoons of dried rosemary)

Instructions:

  1. Boil the Water: Start by bringing 1 liter of water to a boil in a saucepan.
  2. Add the Rosemary: Once the water is boiling, add the rosemary sprigs or dried rosemary to the pot. Reduce the heat and let it simmer for about 10 minutes. This allows the beneficial compounds in the rosemary to infuse into the water.
  3. Strain and Cool: After simmering, remove the pot from the heat and strain the liquid to remove the rosemary leaves. Let the infusion cool to a comfortable drinking temperature.
  4. Enjoy Daily: Drink a cup of this rosemary infusion daily, preferably in the morning or before meals, to help cleanse your blood vessels and support healthy cholesterol levels.

3. The Benefits of Rosemary Infusion

Regular consumption of rosemary infusion offers multiple benefits for your cardiovascular health:

  • Cleanses Blood Vessels: The antioxidants in rosemary help remove plaque buildup in the arteries, improving blood flow, and reducing the risk of heart-related issues.
  • Reduces Cholesterol Levels: Rosemary aids in breaking down cholesterol and preventing it from accumulating in the blood vessels.
  • Enhances Circulation: By improving blood circulation, rosemary ensures that your organs and tissues receive the oxygen and nutrients required for optimal functioning.

4. A Natural Approach to Heart Health

Incorporating rosemary infusion into your daily routine is a natural and effective way to support your heart health. With time, you may notice more balanced cholesterol levels and cleaner, more resilient blood vessels. This simple herbal remedy is an easy addition to a heart-healthy lifestyle.

So why not give it a try? With just a few sprigs of rosemary and a bit of time, you can create a powerful elixir that helps keep your blood vessels clear and your cholesterol levels in check. Your heart will thank you for it!

Ginger is a well-known natural remedy that is praised for its numerous health benefits. From aiding digestion to reducing inflammation, it has a wide range of uses. However, it’s important to note that ginger may not be suitable for everyone, especially if you are in the age range of 45 to 65. In certain situations, consuming ginger can actually worsen health conditions or interact negatively with medications. Here are some situations where you should be cautious or avoid ginger altogether.

1. Blood Disorders

Ginger has blood-thinning properties, which can be beneficial for improving circulation. However, if you have a blood disorder such as hemophilia or if you are taking anticoagulant medications like warfarin, aspirin, or clopidogrel, ginger can increase the risk of bleeding. This is because ginger can amplify the effects of these medications, leading to excessive bleeding or bruising.

Avoid ginger if:

  • You have a blood clotting disorder.
  • You are taking blood-thinning medications.

2. Gallstones

Ginger stimulates the production of bile, which helps in digesting fats. While this is generally beneficial, if you have gallstones, ginger could exacerbate the problem. The increased bile production can cause the gallstones to become more active, potentially leading to pain or even the need for surgical intervention.

Avoid ginger if:

  • You have gallstones or a history of gallbladder issues.

3. Pregnancy Complications

Ginger is commonly used to alleviate morning sickness during pregnancy, but it should be consumed with caution. In high doses, ginger can increase the risk of uterine contractions, which could potentially lead to miscarriage or premature labor. It’s especially important to consult a healthcare provider before using ginger during pregnancy, particularly in the first trimester.

Avoid ginger if:

  • You are pregnant and at risk for complications such as miscarriage or preterm labor.

4. Gastrointestinal Disorders

While ginger is often used to soothe an upset stomach, it can actually irritate the digestive system in people with certain gastrointestinal disorders. Conditions like acid reflux, peptic ulcers, or irritable bowel syndrome (IBS) can be worsened by ginger’s spicy nature. The increased stomach acid and irritation can lead to discomfort and exacerbate symptoms.

Avoid ginger if:

  • You have acid reflux, ulcers, or IBS.

5. Low Blood Pressure

Ginger can lower blood pressure, which is usually a good thing for those with hypertension. However, if you already have low blood pressure (hypotension), consuming ginger can lead to dangerously low levels, resulting in dizziness, fainting, or even shock. People who are on blood pressure-lowering medications should also be cautious, as ginger could enhance the effects of these medications.

Avoid ginger if:

  • You have low blood pressure or are taking medications for hypertension.

6. Certain Medications

Ginger can interact with a variety of medications, either reducing their effectiveness or increasing the risk of side effects. In addition to blood thinners and blood pressure medications, ginger may interact with diabetes medications, heart medications, and others. If you’re on any prescription medications, it’s important to consult with your healthcare provider before adding ginger to your diet.

Avoid ginger if:

  • You are taking medications that could interact with ginger.

While ginger is a powerful and beneficial root for many, it’s important to recognize that it’s not suitable for everyone. If you have any of the above conditions or are taking specific medications, it’s best to consult with a healthcare provider before using ginger. By being mindful of these precautions, you can avoid potential complications and ensure that you’re making the best choices for your health.