Category

Health & Wellness

Category

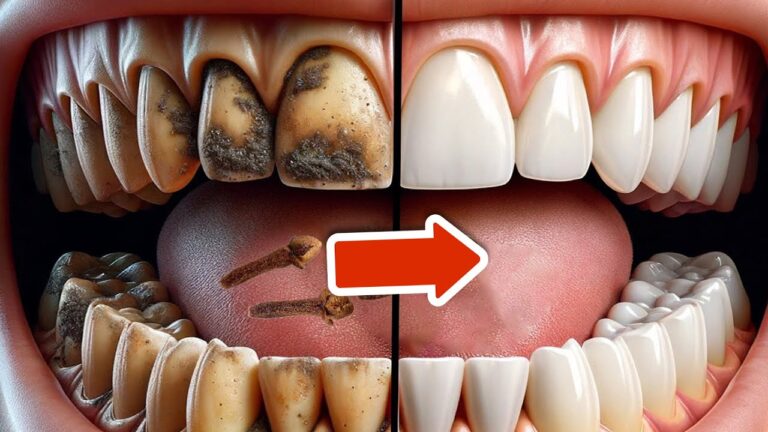
Garlic is renowned worldwide for its culinary uses and numerous health benefits, from boosting immunity to reducing blood pressure. Surprisingly, it also plays an intriguing role in natural dental care, particularly in teeth whitening. While garlic might not be the first remedy that comes to mind for a brighter smile, it’s worth exploring how this pungent bulb can contribute to dental health.

Why Garlic for Teeth Whitening?

Garlic’s benefits for oral health primarily stem from its powerful antibacterial properties, thanks to a compound called allicin. When you chop or crush fresh garlic, allicin is released, helping to combat the bacteria that cause plaque and tartar buildup—common culprits behind tooth discoloration.

1. Natural Antibacterial Effects

Garlic acts as a natural antibiotic, fighting off oral pathogens that can lead to dental plaque. This helps maintain a cleaner mouth and reduces the yellowing of teeth over time. Its antimicrobial properties ensure that less plaque sticks to the teeth, keeping them cleaner and whiter.

2. Reducing Gum Disease

Gum health is crucial for maintaining white, healthy teeth. The antibacterial and anti-inflammatory properties of garlic also help in preventing and reducing the severity of gum diseases like gingivitis, which, if left untreated, can lead to receding gums and stained teeth.

3. Improving Overall Oral Health

By reducing harmful bacteria in the mouth, garlic contributes to a balanced oral microbiome, which is essential for preventing infections and maintaining strong teeth and gums.

How to Use Garlic for Teeth Whitening

It’s important to note that while garlic can be beneficial for oral health, its acidic nature means it should be used cautiously to avoid damaging the enamel.

Here’s a simple method to use garlic for teeth whitening:

  • Garlic Paste Application: Crush a clove of garlic to form a paste, and mix it with a pinch of salt. Apply this mixture to your teeth and leave it on for a minute before thoroughly rinsing your mouth with water. This can be done once a week as part of your dental care routine.

Additional Tips

  • Always rinse your mouth after using garlic on your teeth to avoid potential irritation.
  • Continue regular dental hygiene practices, such as brushing twice a day and using dental floss.

While garlic can provide some benefits for teeth whitening, it’s best used in conjunction with other oral hygiene practices. It’s also wise to consult with a dental professional before starting any new treatment for your teeth.

So, next time you reach for the garlic in your kitchen, remember that it’s not just for enhancing your meals—it might also brighten your smile!


In the realm of natural remedies, ginger is a superstar, renowned for its health benefits ranging from soothing nausea to reducing inflammation. But did you know that placing ginger on your feet can have some surprising health benefits? This simple, cost-effective method might just save you a trip to the pharmacy. Here’s how ginger can be used to enhance your well-being, right from the comfort of your home.

Why Ginger on Your Feet?

Ginger contains a powerhouse of bioactive compounds, including gingerols and shogaols, which are known for their anti-inflammatory and analgesic properties. Applying ginger to your feet takes advantage of these properties in several ways:

  • Enhanced Absorption: The soles of the feet are highly absorbent and can take in the beneficial compounds of ginger directly into the bloodstream.
  • Direct Relief: Applying ginger to the feet can provide targeted relief to tired, sore, and swollen feet. It’s especially beneficial after a long day of standing or walking.

How to Use Ginger on Your Feet

Materials Needed:

  • 1 fresh ginger root
  • A grater or blender
  • A clean cloth or bandage

Instructions:

  1. Prepare the Ginger Paste: Grate the fresh ginger root or blend it into a fine paste.
  2. Apply to Your Feet: Before bed, apply a generous amount of ginger paste to the soles of your feet. You can focus on areas that feel particularly sore or swollen.
  3. Wrap Your Feet: Use the clean cloth or bandage to wrap your feet. This helps in keeping the ginger paste in place and enhances its absorption through the skin.
  4. Leave Overnight: For best results, leave the ginger paste on your feet overnight.
  5. Rinse in the Morning: Wash your feet with warm water in the morning. You might feel a warming sensation and relief from pain and swelling.

Benefits Beyond Pain Relief Aside from reducing foot pain and swelling, this treatment can have other benefits:

  • Improved Circulation: Ginger’s warming effect can improve blood circulation in the feet, which is beneficial for overall foot health.
  • Detoxifying Effects: Some believe that ginger can help draw out impurities from the body through the soles of the feet, although more scientific evidence is needed to fully support this claim.

Conclusion

Using ginger on your feet is an easy, affordable way to harness the spice’s powerful medicinal properties. This treatment can be a practical addition to your health routine, particularly if you’re looking for natural methods to alleviate foot discomfort and improve general well-being. Give it a try tonight and wake up to the soothing effects of this incredible root!

Are you tired of those pesky mosquitoes and other insects interrupting your outdoor time? Look no further! We have a natural and effective solution for you. By combining baby oil and cloves, you can create a homemade repellent that will keep those bugs at bay.

Baby oil and cloves are readily available and safe ingredients, making this DIY repellent a practical choice. The baby oil acts as a gentle and nourishing base for your skin, while the cloves provide natural repellent properties to keep flying insects away.

Now, let’s get started on creating this homemade repellent so you can enjoy the great outdoors without any interruptions.

What You’ll Need

  • 1 Container with a dropper (preferably dark glass)
  • 35 ml of Baby oil (or olive oil)
  • 6 Cloves

Preparation

  1. Take the container and make sure it has a dropper. It’s best to use a dark glass container to preserve the repellent.
  2. Pour 35 ml of baby oil (or olive oil) into the container. You can use any baby oil you have at home.
  3. Add 6 cloves to the container.
  4. Close the container tightly and give it a good shake. This will help infuse the oil with the repellent properties of the cloves.

Application

  1. Apply a few drops of the homemade repellent onto your exposed skin before heading outdoors.
  2. Gently massage the oil into your skin to ensure even coverage.
  3. Reapply every few hours or as needed to maintain its effectiveness.

Now, you’re ready to enjoy nature without worrying about those pesky bugs. Say goodbye to annoying insect bites and hello to uninterrupted outdoor adventures!

If you’re looking for a delicious, nutritious, and easy-to-make salad, this creamy broccoli salad with apples is perfect for you. It’s packed with fresh flavors and a delightful crunch that will make it a favorite at any meal. Here’s how to make the best broccoli salad ever.

Ingredients:

  • 4 cups of fresh broccoli florets
  • 1 large apple, diced (Granny Smith or Honeycrisp work well)
  • 1/2 cup of red onion, finely chopped
  • 1/2 cup of dried cranberries
  • 1/2 cup of sunflower seeds
  • 1/2 cup of shredded carrots
  • 1/2 cup of Greek yogurt
  • 2 tablespoons of apple cider vinegar
  • 1 tablespoon of honey
  • Salt and pepper to taste

Step-by-Step Recipe:

1. Prepare the Ingredients

Start by washing the broccoli and cutting it into bite-sized florets. Dice the apple into small pieces and finely chop the red onion. Shred the carrots if not pre-shredded.

2. Mix the Salad Base

In a large bowl, combine the broccoli florets, diced apple, chopped red onion, dried cranberries, sunflower seeds, and shredded carrots. Toss everything together to mix the ingredients evenly.

3. Make the Dressing

In a separate smaller bowl, whisk together the Greek yogurt, mayonnaise, apple cider vinegar, honey, salt, and pepper. This creamy dressing will add a tangy and slightly sweet flavor to your salad.

4. Combine the Salad and Dressing

Pour the creamy dressing over the salad mixture. Using a large spoon, gently toss the salad until all the ingredients are well coated with the dressing.

5. Chill and Serve

For the best flavor, let the salad chill in the refrigerator for at least 30 minutes before serving. This allows the flavors to meld together beautifully.

Why You’ll Love This Salad

Nutritious and Delicious: This salad is packed with vitamins, fiber, and healthy fats, making it a nutritious choice for any meal.

Perfect Crunch: The combination of crisp broccoli, crunchy sunflower seeds, and juicy apple pieces provides a delightful texture in every bite.

Versatile: It’s perfect as a side dish for lunch or dinner, or even as a main course for a light and refreshing meal.

Easy to Make: With simple ingredients and easy steps, this salad comes together quickly, making it ideal for busy days.

Final Thoughts

This creamy broccoli salad with apples is not only delicious but also incredibly nutritious and easy to prepare. Whether you’re making it for a family dinner, a picnic, or just a healthy lunch, it’s sure to be a hit. Give this recipe a try and enjoy the fresh, vibrant flavors in every bite. Happy cooking!


Are you looking for a natural, powerful way to cleanse your body and boost your health? This incredible drink, made from dried fruits, is said to be 150 times stronger than lemon! It’s an amazing detoxifier that cleanses the intestines and liver, and it’s known as a killer of all bacteria and toxins. Let’s dive into how you can make this potent beverage at home and enjoy its numerous health benefits.

Ingredients:

  • 10 dried figs
  • 10 dried dates
  • 10 dried apricots
  • 1 liter of water

Step-by-Step Recipe:

1. Prepare the Ingredients

Start by washing the dried figs, dates, and apricots thoroughly. This removes any surface dust or residues that might be on the dried fruits.

2. Soak the Fruits

Place the dried fruits in a large bowl and pour enough water over them to cover them completely. Let them soak for about 2 hours. This rehydrates the fruits and makes them easier to blend.

3. Boil the Mixture

After soaking, transfer the fruits and the soaking water into a pot. Add an additional liter of water and bring the mixture to a boil. Reduce the heat and let it simmer for about 30 minutes. This helps to extract the beneficial compounds from the dried fruits into the water.

4. Cool and Blend

Allow the mixture to cool down to room temperature. Once cooled, blend the mixture until you get a smooth, uniform liquid. This ensures all the nutrients are evenly distributed.

5. Strain and Store

Using a fine mesh strainer, strain the blended mixture to remove any pulp. Pour the strained liquid into a clean container or glass jar and store it in the refrigerator. It can be stored for up to a week.

How to Use

Drink a small glass (about 100 ml) of this powerful beverage every morning on an empty stomach. This helps to kickstart your digestion, cleanse your intestines, and detoxify your liver.

Benefits

1. Powerful Detoxification: The combination of figs, dates, and apricots is incredibly effective in flushing out toxins from your body, particularly your liver and intestines.

2. Rich in Nutrients: This drink is packed with vitamins, minerals, and antioxidants that boost your overall health and immune system.

3. Improved Digestion: The natural fibers in the dried fruits aid in digestion and help maintain a healthy gut.

4. Anti-Bacterial Properties: This potent mix is known to kill harmful bacteria and cleanse your body from within.

Final Thoughts

Incorporating this powerful detox drink into your daily routine can have a significant positive impact on your health. It’s natural, easy to make, and incredibly effective at cleansing your body and boosting your immune system. Give it a try and experience the benefits for yourself! Happy detoxing!

If you’re looking for a natural way to support bladder and prostate health, you might want to try this old-time remedy. This simple, healthy recipe using onion peels is something my grandpa swore by. Here’s how to make it and why it’s beneficial.

Ingredients:

  • Peels from 2-3 large onions
  • 1 liter of water

Step-by-Step Recipe:

1. Prepare the Onion Peels

Start by collecting the peels from 2-3 large onions. Make sure the peels are clean and free from any dirt. You can do this by rinsing them lightly under cold running water.

2. Boil the Water

Bring 1 liter of water to a boil in a pot. Once the water is boiling, reduce the heat to a simmer.

3. Add the Onion Peels

Add the cleaned onion peels to the simmering water. Let them simmer gently for about 15-20 minutes. This helps to extract the beneficial compounds from the onion peels.

4. Cool and Strain

After simmering, remove the pot from the heat and let the mixture cool to room temperature. Once cooled, strain the liquid through a fine mesh strainer or cheesecloth to remove the peels.

5. Store the Infusion

Pour the strained onion peel infusion into a clean glass jar or bottle. Store it in the refrigerator. It can be stored for up to 5 days.

How to Use

Drink a cup (about 200 ml) of the onion peel infusion twice a day, preferably in the morning and evening. This routine helps to maintain its effectiveness and provides continuous support for bladder and prostate health.

Benefits

1. Bladder Health: Onion peels are rich in antioxidants and anti-inflammatory compounds that help to soothe and support bladder function.

2. Prostate Health: The natural compounds found in onion peels can help reduce inflammation and support overall prostate health.

3. Rich in Nutrients: Onion peels contain quercetin, a powerful antioxidant that can protect cells from damage and support overall health.

4. Natural Detox: This infusion aids in flushing out toxins from the body, promoting better urinary health.

Final Thoughts

Grandpa’s old recipe with onion peels is a simple, natural way to support bladder and prostate health. It’s easy to make, cost-effective, and has been trusted for generations. Incorporate this healthy infusion into your daily routine and enjoy the benefits of a time-tested remedy. Here’s to better health the natural way!

If you’re looking for a powerful and nutritious drink that’s making waves everywhere, this avocado seed, ginger, and beetroot recipe is a must-try. Packed with antioxidants, vitamins, and minerals, this beverage is not only healthy but also incredibly refreshing. Here’s how to make it and why it’s so popular.

Ingredients:

  • 1 avocado seed
  • 1 medium beetroot, peeled and chopped
  • 1-inch piece of fresh ginger, peeled and sliced
  • 2 cups of water
  • 1 tablespoon of honey (optional)
  • Juice of 1 lemon (optional)

Step-by-Step Recipe:

1. Prepare the Avocado Seed

Start by removing the seed from a ripe avocado. Wash the seed thoroughly to remove any remaining avocado flesh. Using a sharp knife, cut the seed into smaller pieces. This helps it blend more easily.

2. Prepare the Beetroot and Ginger

Peel the beetroot and chop it into small pieces. Peel and slice the ginger as well. These ingredients are key to the flavor and nutritional profile of the drink.

3. Blend the Ingredients

Place the chopped avocado seed, beetroot, and ginger into a blender. Add the water and blend on high until the mixture is smooth. This might take a couple of minutes to ensure the avocado seed is fully ground.

4. Strain the Mixture

For a smoother drink, strain the blended mixture through a fine mesh strainer or cheesecloth to remove any pulp. If you prefer a thicker consistency, you can skip this step.

5. Add Honey and Lemon

If desired, add a tablespoon of honey and the juice of one lemon to the strained mixture. Stir well to combine. The honey adds a touch of sweetness, while the lemon juice enhances the flavor and adds extra vitamin C.

6. Serve and Enjoy

Pour the drink into a glass and enjoy immediately. It’s best served fresh to take advantage of all the nutrients.

Benefits

1. Avocado Seed: Rich in antioxidants and fiber, avocado seeds help reduce inflammation, lower cholesterol, and support digestive health.

2. Beetroot: Packed with vitamins, minerals, and nitrates, beetroot boosts blood flow, enhances stamina, and supports heart health.

3. Ginger: Known for its anti-inflammatory and digestive benefits, ginger also adds a pleasant zing to the drink.

4. Lemon: Adds a refreshing flavor and is high in vitamin C, which boosts the immune system and aids in digestion.

Final Thoughts

This avocado seed, ginger, and beetroot drink is a powerhouse of nutrition that’s gaining popularity for good reason. It’s easy to make, delicious, and offers a wide range of health benefits. Give this recipe a try and see why it’s wanted everywhere. Cheers to your health!

Looking for a nutritious and delicious way to boost your energy and health? This beetroot, chia seeds, and honey recipe is just what you need. Packed with vitamins, minerals, and natural sweetness, this recipe is perfect for a refreshing snack or a healthy breakfast. Here’s how to make it and why it’s so beneficial.

Ingredients:

  • 1 medium beetroot, peeled and chopped
  • 2 tablespoons of chia seeds
  • 1 tablespoon of honey
  • 1 cup of water or your favorite plant-based milk
  • Juice of half a lemon (optional)

Step-by-Step Recipe:

1. Prepare the Beetroot

Start by peeling and chopping the beetroot into small pieces. Beetroot is the star of this recipe, providing vibrant color and a wealth of nutrients.

2. Blend the Beetroot

Place the chopped beetroot in a blender. Add the water or plant-based milk and blend until smooth. This creates a rich, colorful base for your drink.

3. Add Chia Seeds and Honey

Once the beetroot is fully blended, add the chia seeds and honey. The chia seeds add a delightful texture and are packed with omega-3 fatty acids, while honey adds natural sweetness and various health benefits. Blend the mixture again to ensure everything is well combined.

4. Let It Sit

Pour the mixture into a glass or a bowl. Let it sit for about 10-15 minutes. This allows the chia seeds to absorb the liquid and expand, creating a pudding-like consistency.

5. Add Lemon Juice (Optional)

If you like a bit of tanginess, add the juice of half a lemon to the mixture. Stir well to combine. Lemon juice adds a refreshing twist and boosts the vitamin C content.

6. Serve and Enjoy

Your beetroot, chia seeds, and honey recipe is now ready to enjoy! You can serve it as a refreshing drink, a smoothie bowl, or even a healthy dessert.

Benefits

1. Beetroot: Rich in vitamins, minerals, and antioxidants, beetroot helps improve blood flow, lower blood pressure, and boost stamina.

2. Chia Seeds: These tiny seeds are loaded with omega-3 fatty acids, fiber, and protein. They help keep you full and support digestive health.

3. Honey: A natural sweetener with antibacterial and antioxidant properties, honey adds sweetness without refined sugars and supports overall health.

4. Lemon Juice (Optional): Adds a zesty flavor and a dose of vitamin C, which is great for the immune system and skin health.

Final Thoughts

This beetroot, chia seeds, and honey recipe is a fantastic way to start your day or enjoy as a healthy snack. It’s easy to make, delicious, and incredibly nutritious. Give it a try and enjoy the vibrant flavors and health benefits. Happy snacking!


Papaya is a delicious and nutritious fruit, but did you know that its seeds also offer potential health benefits? While often discarded, papaya seeds are packed with nutrients and can be eaten for their health advantages. However, they also come with some risks. Here’s what you need to know about the benefits and risks of eating papaya seeds.

Benefits of Eating Papaya Seeds

1. Rich in Nutrients: Papaya seeds are rich in vital nutrients such as protein, calcium, magnesium, and phosphorus. They also contain antioxidants that help fight free radicals in the body.

2. Digestive Health: Papaya seeds contain enzymes like papain and protease, which aid in digestion by breaking down proteins and helping to maintain a healthy digestive tract.

3. Antiparasitic Properties: One of the most notable benefits of papaya seeds is their antiparasitic properties. They contain compounds that can help eliminate intestinal parasites, making them a natural remedy for digestive issues.

4. Antibacterial Effects: Papaya seeds have antibacterial properties that can help fight off harmful bacteria like E. coli, Salmonella, and Staphylococcus. This makes them beneficial for maintaining a healthy gut.

5. Liver Health: Consuming papaya seeds may help in detoxifying the liver and improving its function. They are often used in traditional remedies for liver health and detoxification.

Risks of Eating Papaya Seeds

1. Potential Toxicity: While papaya seeds are beneficial in small amounts, consuming them in large quantities can be toxic. They contain compounds that can affect the central nervous system and cause poisoning if consumed excessively.

2. Digestive Issues: Eating too many papaya seeds can lead to digestive issues such as stomach cramps, diarrhea, and nausea. It’s essential to consume them in moderation.

3. Pregnancy Concerns: Papaya seeds contain compounds that may affect pregnancy. Pregnant women are advised to avoid eating papaya seeds due to their potential to induce labor or cause harm to the fetus.

4. Allergic Reactions: Some people may be allergic to papaya seeds. Symptoms can include itching, swelling, and difficulty breathing. If you have known allergies, it’s best to avoid them or consult a healthcare provider before consuming.

How to Eat Papaya Seeds

If you want to incorporate papaya seeds into your diet, start with a small amount. You can eat them raw, ground into a powder, or added to smoothies and salads. Always remember to consume them in moderation to avoid any adverse effects.

Final Thoughts

Papaya seeds offer several health benefits, from improving digestion to detoxifying the liver. However, it’s crucial to be aware of the risks associated with their consumption. Enjoy papaya seeds in small amounts to reap their benefits without experiencing negative side effects. As with any dietary change, it’s a good idea to consult with a healthcare provider, especially if you have underlying health conditions or concerns.