Category

Health & Wellness

Category

Potatoes are a beloved and versatile food enjoyed by people all over the world. They not only taste delicious but are also packed with essential nutrients like B-group vitamins, potassium, phosphorus, and magnesium, making them a healthy choice. In this article, we will show you how to grow potatoes in a pot, making it easy and accessible for anyone, especially those between the ages of 45 and 65.

Prepare the Potatoes

To get started, you’ll need a large pot, some soil, and a bag of potatoes. Place the potatoes in a container with the “eye” facing upward. Store them in a cool place and patiently wait for the sprouts to emerge. This step will require a little bit of patience, but trust me, it’s worth it.

Cut the Potatoes

Once the sprouts appear, it’s time to cut the potatoes into pieces. Meanwhile, fill the pot with soil. Bury the potato pieces in the soil, making sure to leave a portion protruding from the surface. This will give your potatoes room to grow and thrive.

Water Regularly

Watering your potatoes regularly is crucial to their growth. However, be mindful not to overwater, as it can lead to fungal growth. Aim to keep the soil consistently moist, but not waterlogged. By doing this, you’ll provide the perfect environment for your potatoes to flourish.

Harvest Time

The best part of growing your own potatoes is the harvest. You’ll know it’s time to harvest when the plant foliage turns yellow. Gently dig into the soil, and there you have it – your very own homegrown potatoes, fresh and ready to be enjoyed.

Growing potatoes in a pot is a simple and rewarding process. Not only will you have a fresh and readily available supply of this versatile vegetable, but you’ll also experience the satisfaction of cultivating it yourself. So why not give it a try and enjoy the taste of your own homegrown potatoes? It’s a great way to connect with nature and savor the goodness of freshly grown produce.

The Spider Plant (Chlorophytum comosum) is not just a decorative piece for your home. Originating from the tropical forests of South Africa, this popular ornamental plant has made its way to homes all around the world, including Italy. And here’s the exciting part – according to a NASA study, the Spider Plant is one of the best plants for purifying indoor air!

Our homes may be filled with toxic substances that we may not even be aware of. Everyday items like paints, glues, and cleaning products release harmful compounds such as benzene, xylene, formaldehyde, and carbon monoxide. These substances can have a detrimental effect on our health, contributing to respiratory problems and even cancer. But fear not, because the Spider Plant is here to help!

This beautiful plant has a remarkable ability to absorb and block these harmful substances, effectively cleaning the air in our homes. With its long green leaves and distinctive white stripe, the Spider Plant not only adds a touch of beauty to any space but also acts as a natural air purifier. It thrives best in well-lit and humid environments, making it a perfect choice for bathrooms or near windows – just be sure to avoid direct sunlight.

One of the best things about the Spider Plant is its adaptability and ease of care. Even if you don’t consider yourself a green thumb, you can still enjoy the benefits of this air-purifying plant. It requires minimal attention and can withstand a variety of conditions, ultimately making it a wonderful addition to your home.

If you’re looking to improve the air quality in your living space, consider adding a Spider Plant. It’s a simple yet effective way to create a healthier environment. Let this incredible plant do its magic and enjoy the fresh, clean air it provides. Your lungs will thank you!

Did you know that fig trees have much more to offer than just their delicious fruit? They also produce a versatile sap that can be used for various purposes. In this guide, we’ll explore how to safely collect and use fig sap, enhancing your sustainable living practices.

What You Should Know Before Collecting Fig Sap

Before you embark on collecting fig sap, it’s essential to keep a few important things in mind:

Safety First: Fig sap contains latex, which can irritate the skin and eyes. To protect yourself, always wear gloves and protective eyewear when handling the sap.

Seasonal Collection: The best time to collect fig sap is during late spring through early autumn when the tree is actively growing, and the sap flow is more abundant.

Tree Health: Only collect sap from healthy, mature trees. This ensures that you avoid stressing young or weakened specimens.

Tools and Materials You Will Need

To collect fig sap, gather the following tools and materials:

  • Gardening gloves
  • Protective eyewear
  • Sharp knife or a small, clean cutting tool
  • Collection container (such as a glass jar or plastic bowl)

A Step-by-Step Guide to Collecting Fig Sap

Follow these steps to safely collect fig sap from a fig tree:

1. Prepare Your Tools: Ensure that all your tools are clean and sharp. A clean cut is less harmful to the tree.

2. Select the Right Spot: Choose a spot on a branch or the trunk where you can easily make a small incision. Avoid areas that appear diseased or damaged.

3. Make a Small Incision: Carefully cut into the bark of the fig tree. The incision should be shallow and no more than a few inches long to minimize damage.

4. Gather the Sap: Position your collection container under the incision to catch the dripping sap. Depending on the flow, you may need to leave it for a few hours.

5. Seal the Cut: Once you have collected enough sap, seal the cut with a natural tree sealant or smooth mud over it to protect the tree from infections.

Utilizing and Maximizing the Benefits of Fig Sap

Fig sap has been utilized for various purposes in different cultures:

1. Natural Remedy: Diluted fig sap has been used as a natural remedy to soothe skin irritations and treat warts.

2. Culinary Enhancements: With the right processing, fig sap can serve as a coagulant in making dairy-free cheese.

3. Gardening Aid: Applying fig sap to other plants can act as a natural deterrent for pests.

Collecting and using fig sap is not only a rewarding endeavor that allows you to connect with nature but also provides a range of benefits. By following these steps, you can ensure a safe and effective collection process, contributing to your eco-friendly, sustainable lifestyle.

Safety Note: Before using fig sap, always perform a patch test with diluted sap to check for allergic reactions. If you’re unsure about proper handling and usage, consult with a professional.

Guavas are not only delicious but also a nutritional powerhouse, providing a wide range of health benefits that many may not be aware of. From boosting the immune system to aiding in weight loss, guavas are an excellent addition to your daily diet. Let’s explore the multiple benefits of guavas in more detail.

Boost Your Immune System with Vitamin C

Guavas are incredibly rich in vitamin C, containing up to four times the amount found in oranges. This essential nutrient is crucial for strengthening the immune system and helping it fight off infections more effectively. It also plays a key role in protecting the body against chronic diseases like cancer and heart disease by fighting free radicals.

Maintain Digestive Health with High Dietary Fiber

One significant benefit of guavas is their high dietary fiber content. Just one guava can provide about 16% of the recommended daily intake of fiber. Fiber is essential for maintaining digestive health as it regulates bowel movements, prevents constipation, and may even reduce the risk of colon cancer. Additionally, fiber promotes a feeling of fullness, making it beneficial for weight management.

Protect Cells with Antioxidant Properties

Guavas are packed with antioxidants like lycopene, beta-carotene, and vitamin A. These compounds are crucial for protecting cells from damage caused by free radicals. By consuming antioxidant-rich foods like guavas, you can help reduce the risks of chronic conditions such as cancer and heart disease, promoting overall health.

Promote Heart Health and Regulate Blood Pressure

Guavas are an excellent source of potassium, which plays a critical role in regulating blood pressure. Adequate potassium intake is associated with lower blood pressure levels, reducing the risk of stroke and heart attacks. By balancing out the negative effects of salt in the body, potassium helps maintain a healthy heart and circulatory system.

A Low-Calorie Snack for Weight Management

For those watching their weight, guavas are an ideal choice. They are low in calories yet high in fiber, making them a satisfying snack without excessive calories. With only about 60 calories per guava, they can help stave off hunger and support weight loss efforts.

Culinary Versatility for Delicious and Healthy Meals

Guavas are incredibly versatile in the kitchen. You can enjoy them raw to savor their natural sweetness and crisp texture. Alternatively, guavas can be sliced into salads, blended into smoothies, or used as a tangy addition to baked goods. The culinary flexibility of guavas makes it easy to incorporate them into your diet in various delicious ways.

Economical and Accessible

Guavas are not only good for your health but also budget-friendly. They are widely available in many parts of the world, particularly in tropical regions, and are generally inexpensive. This accessibility makes guavas an excellent option for individuals and families looking to enhance their diet without breaking the bank.

Embrace Guavas for a Balanced and Nutritious Diet

In conclusion, guavas offer a robust profile of health benefits that make them a valuable addition to any diet. Rich in vital nutrients like vitamin C, dietary fiber, potassium, and antioxidants, guavas support numerous aspects of health, from immune function and digestive health to protecting against chronic diseases and aiding in weight management. Moreover, their culinary flexibility and economic accessibility make guavas an appealing choice for a wide range of people. Embrace the delightful benefits of guavas and consider incorporating them into your daily dietary routine to take full advantage of all that this wonderful fruit has to offer.

This refreshing juice combines the power of pineapple, orange, ginger, and turmeric to create a delicious and anti-inflammatory drink. Each ingredient brings its own health benefits, making this juice perfect for boosting immunity, reducing inflammation, and improving digestion. Let’s get started on making this vibrant, nutrient-packed juice!

Ingredients:

  • 1 cup fresh pineapple (peeled and chopped)
  • 2 oranges (peeled and segmented)
  • 1-inch piece of fresh ginger (peeled and chopped)
  • 1/2 teaspoon turmeric powder (or 1-inch fresh turmeric root, peeled and chopped)
  • 1/2 cup water (or coconut water for extra hydration)
  • Ice cubes (optional)
  • Honey (optional, for extra sweetness)

Instructions:

  1. Prepare the Pineapple: Peel and chop 1 cup of fresh pineapple. Pineapple is rich in bromelain, a natural enzyme that helps reduce inflammation and supports digestion.
  2. Peel and Segment the Oranges: Remove the peel and segment two oranges. Oranges are loaded with vitamin C, which helps boost immunity and fight inflammation.
  3. Peel and Chop the Ginger: Peel a 1-inch piece of fresh ginger and chop it into small pieces. Ginger is a powerful anti-inflammatory and antioxidant that helps soothe digestion and reduce nausea.
  4. Add Turmeric: Add 1/2 teaspoon of turmeric powder or 1-inch of fresh turmeric root to the blender. Turmeric contains curcumin, a potent anti-inflammatory compound that helps protect your body from chronic inflammation and supports joint health.
  5. Blend the Ingredients: Place the chopped pineapple, orange segments, ginger, turmeric, and 1/2 cup of water (or coconut water) in a blender. Blend until smooth.
  6. Optional Sweetener: Taste the juice and add honey if you prefer extra sweetness, though the natural sugars in pineapple and orange should make the juice naturally sweet.
  7. Serve: Pour the juice over ice cubes if you like a chilled drink. Stir well and enjoy!

Health Benefits:

  • Pineapple: Contains bromelain, an enzyme that reduces inflammation and aids in digestion.
  • Oranges: Packed with vitamin C, which strengthens the immune system and fights free radicals.
  • Ginger: Known for its anti-inflammatory and antioxidant properties, ginger also supports digestion and helps relieve pain.
  • Turmeric: Contains curcumin, which is a natural anti-inflammatory that can reduce joint pain and support overall health.

Enjoy Your Anti-Inflammatory Juice!

This pineapple, orange, ginger, and turmeric juice is not only delicious but also a fantastic way to fight inflammation and support your overall health. It’s perfect as a morning pick-me-up or a post-workout drink to help your body recover. Drink it regularly to enjoy all the health benefits!


Watermelon is one of the most refreshing and hydrating fruits, but there’s a trick to making the most out of it—using the whole fruit without wasting a thing! If you’ve been tossing out the watermelon “corks” (the rind and seeds), it’s time to stop! These parts are not only edible but also full of nutrients and can be transformed into delicious and healthy treats. Here’s how you can make the most out of your watermelon, including those often-discarded parts!

1. Watermelon Rind Pickles: A Tasty Snack

Watermelon rind, often discarded, is actually loaded with nutrients like vitamins B and C, and it’s surprisingly versatile! You can pickle the rind and turn it into a sweet, tangy snack that’s perfect for munching or adding to salads.

Ingredients:

  • 2 cups watermelon rind (white part only, green skin removed)
  • 1/2 cup vinegar (apple cider or white)
  • 1/2 cup water
  • 1/4 cup honey (or another natural sweetener)
  • 1/2 teaspoon salt
  • Optional: cinnamon sticks, cloves, or ginger for extra flavor

Instructions:

  1. Prepare the rind: Remove the green outer skin and cut the white rind into bite-sized pieces.
  2. Make the brine: In a saucepan, bring the water, vinegar, honey, and salt to a boil.
  3. Pickle the rind: Add the rind to the brine and simmer for 5-7 minutes until tender.
  4. Cool and refrigerate: Let the mixture cool before transferring it to a jar. Store in the fridge and enjoy within a week.

2. Watermelon Seed Snacks: A Nutritious Crunch

Instead of throwing away the seeds, try roasting them! Watermelon seeds are packed with magnesium, iron, and healthy fats, making them a great snack option.

Ingredients:

  • 1 cup watermelon seeds (rinsed and dried)
  • 1 teaspoon olive oil
  • A pinch of salt or your favorite seasoning (like cinnamon or chili powder)

Instructions:

  1. Prepare the seeds: Rinse and dry the watermelon seeds thoroughly.
  2. Roast the seeds: Toss the seeds with olive oil and salt, then spread them on a baking sheet.
  3. Bake: Roast in the oven at 325°F (160°C) for about 15 minutes, stirring halfway through, until they’re crispy and golden.
  4. Enjoy: Let the seeds cool and store them in an airtight container for a crunchy, healthy snack!

3. Watermelon Juice: Hydrating and Refreshing

Of course, you can’t forget the classic watermelon juice, which is delicious, hydrating, and packed with antioxidants and vitamins. Simply blend the watermelon flesh (along with some mint or lime for extra flavor) for a revitalizing drink.

Instructions:

  1. Cut the watermelon flesh into cubes and remove the seeds.
  2. Blend the watermelon until smooth.
  3. Strain the juice if you prefer it smoother, or leave it pulpy for extra fiber.
  4. Serve chilled over ice with a splash of lime juice or fresh mint leaves for a refreshing twist.

4. Watermelon Rind Smoothies: A Hidden Health Boost

The watermelon rind can also be blended into smoothies for added nutrients. It’s mild in flavor and pairs well with fruits like bananas and strawberries.

ngredients:

  • 1 cup watermelon rind (peeled, green part removed)
  • 1 ripe banana
  • 1/2 cup frozen berries (strawberries or blueberries)
  • 1 cup almond milk (or any milk of your choice)
  • 1 tablespoon honey (optional)

Instructions:

  1. Add all the ingredients to a blender.
  2. Blend until smooth and creamy.
  3. Pour into a glass and enjoy a fiber-rich, hydrating smoothie.

5. Watermelon Salad: A Refreshing Meal

Watermelon flesh can be diced and tossed into salads for a sweet and savory mix. Pair it with feta cheese, mint, and a drizzle of olive oil for a perfect summer dish.

Ingredients:

  • 2 cups watermelon cubes
  • 1/2 cup crumbled feta cheese
  • Fresh mint leaves
  • 1 tablespoon olive oil
  • A squeeze of lemon juice
  • Salt and pepper to taste

Instructions:

  1. Combine the watermelon cubes, feta, and mint in a bowl.
  2. Drizzle with olive oil and lemon juice.
  3. Season with salt and pepper, then toss gently to combine.
  4. Serve chilled as a refreshing side or light meal.

Conclusion

Watermelon is more than just a sweet, juicy fruit—it’s a whole package of nutritional goodness, from the flesh to the rind and seeds. Instead of throwing away those “corks” and parts you thought were waste, you can turn them into delicious snacks, drinks, and meals. So next time you enjoy a watermelon, make the most of it by trying these healthy and tasty recipes!

Plantain weed, scientifically known as Plantago major, may be considered a stubborn weed by some, but it offers numerous health benefits and has been used in traditional medicine for centuries. This hardy plant with oval-shaped leaves and tall spikes of seeds can be found in yards, fields, and along roadways. Let’s explore the uses, nutritional content, and potential risks of this widely available herb.

Don’t confuse plantain weed with the banana-like fruit. Plantain weed, also known as broadleaf plantain, is a perennial plant that forms a rosette pattern close to the ground. You’ll often find it thriving in areas with disturbed soil, like roadsides and gardens.

Historically, plantain weed has been used in herbal medicine to treat various ailments, including coughs, wounds, and digestive issues. While modern scientific research is still underway to confirm all of its traditional uses, some studies support its potential health benefits.

Did you know that several parts of the plantain weed are actually edible? Here are some delicious ways to include them in your meals:

Leaves: The young, tender leaves can be eaten raw in salads or smoothies. Older leaves can still be used in soups, stews, or sautéed like other leafy greens. Cooking the older leaves helps soften their texture.

Seeds: The seeds, which have a nutty flavor, can be consumed as well. They are sometimes referred to as “poor man’s asparagus” because of their appearance. Even when the seed spikes turn brown, the seeds remain edible. However, it’s important to consume them in moderation to avoid a drop in blood pressure.

Seed Shoots: These shoots can be harvested and used in various dishes for added crunch and flavor.

Plantain weed is highly nutritious, packed with essential vitamins and minerals, such as:

  • Calcium: Supports bone health and muscle function.
  • Vitamin K: Plays a crucial role in blood clotting and bone health.
  • Vitamin C: Acts as a powerful antioxidant, boosting the immune system and promoting healthy skin.
  • Vitamin A: Supports eye health and immune function.

By adding plantain weed to your diet, you can enhance your nutritional intake and support overall health.

Beyond its nutritional value, plantain weed has a long history in traditional and herbal medicine. Here are some potential health benefits that have been studied:

Anti-Inflammatory Properties: Plantain leaves contain compounds with anti-inflammatory effects. While more research is needed to confirm these effects in humans, its traditional use as an anti-inflammatory remedy shows promise.

Digestive Health: The seeds of plantain weed are rich in soluble fiber, similar to psyllium. This type of fiber can help manage diarrhea and promote regular digestion.

Wound Healing: Plantain has been used for wound healing due to its antimicrobial, antioxidant, and anti-inflammatory properties. Studies have shown its potential for promoting skin healing.

Interested in incorporating plantain weed into your routine? Here are a few ways you can use it:

Fresh Plant Use: If you have plantain growing in your yard, you can add the young leaves to salads, smoothies, or soups. The seeds can also be harvested and used as a topping. Cooking the older leaves can help reduce their toughness.

Herbal Supplements: Plantain supplements are available in various forms. The standard dosage is generally 3 to 5 grams per day. It can also be applied topically to help heal minor wounds or skin irritations.

Topical Application: Plantain weed can be made into salves or poultices for cuts, insect bites, or rashes. A simple poultice can be made by crushing fresh leaves and applying them to the affected area.

To identify plantain weed, look for the following characteristics:

  • Leaf Shape: The leaves are large, oval-shaped, and grow in a spiral rosette close to the ground.
  • Seed Spikes: The seeds grow on tall, slender spikes that emerge from small, yellowish-white flowers.
  • Growth Environment: Plantain is typically found in temperate regions where the soil has been disturbed by human activity.

While plantain weed is generally safe to eat, some people may experience side effects:

Digestive Issues: In rare cases, consuming plantain may cause nausea, vomiting, bloating, or diarrhea. It is advisable to start with a small amount if you are trying it for the first time.

Allergic Reactions: Though uncommon, some individuals may experience skin irritation or allergic reactions when handling plantain weed. Perform a patch test before applying it to the skin.

In conclusion, plantain weed is not just a stubborn weed, but a valuable herb with a range of potential health benefits. Whether you choose to incorporate it into your diet or use it as a supplement, plantain weed can contribute to your overall well-being.


When flu season arrives, it brings with it uncomfortable symptoms like chest congestion, mucus buildup, and persistent coughing. While there are many over-the-counter remedies available, did you know that you can find effective relief right in your own kitchen? In this article, we will explore two powerful natural remedies that can help manage mucus and chest congestion without relying on pharmaceuticals.

To create a natural solution that clears mucus and congestion, you’ll need the following ingredients:

  • 1 tablespoon of black pepper
  • 2 tablespoons of grated fresh ginger
  • 1 tablespoon of honey
  • 3 cups of water

Here’s how you can prepare and use the remedy:

  1. Heat the water: Pour the 3 cups of water into a small saucepan and place it over medium heat.
  2. Add the ingredients: Once the water reaches a boil, add the grated ginger and black pepper.
  3. Boil the mixture: Let it boil for about 3 minutes to release the beneficial compounds from the ginger and pepper.
  4. Cool down: Allow the mixture to cool until it’s at a comfortable temperature.
  5. Sweeten with honey: Stir in the honey to taste, which will add natural sweetness and help soothe the throat.

Recommended Use:

  • Drink this solution 3 to 4 times a day to alleviate congestion and coughing.
  • For milder cases, one cup in the morning on an empty stomach may be sufficient to manage mucus buildup and keep airways clear.

The combination of ginger, black pepper, and honey offers natural anti-inflammatory and soothing properties that ease respiratory discomfort and reduce mucus production.

If you’re looking for a stronger, longer-term remedy to fight off colds and the flu, try this natural tonic. It includes a mix of powerful ingredients known for their immune-boosting and antimicrobial properties, targeting not only symptoms but also supporting your body’s natural defenses against infections.

You’ll need the following ingredients:

  • Freshly chopped or crushed garlic
  • Freshly chopped onion
  • Grated fresh ginger root
  • Fresh grated horseradish
  • Fresh cayenne pepper (seeded), thinly sliced or chopped
  • Freshly squeezed lemon juice
  • Raw honey (optional, for added sweetness)

Here’s how you can prepare and use the tonic:

  1. Blend the ingredients: Combine the garlic, onion, ginger, horseradish, and cayenne pepper in a blender. Blend until it becomes smooth and free of lumps.
  2. Store the mixture: Transfer the blended mixture to an airtight glass jar and close it tightly to preserve the potency of the ingredients.
  3. Steeping period: Let the mixture sit in a cool, dark place for two weeks. Shake the jar gently once a day to ensure the ingredients are well-mixed and infused.
  4. Strain the tonic: After two weeks, strain the mixture using a fine sieve or cheesecloth. Retain only the liquid and discard the solid remnants.
  5. Optional sweetening: If desired, add some raw honey to the strained liquid for a bit of natural sweetness and additional throat-soothing properties.

How to Use the Tonic:

  • Take 1 tablespoon of this potent tonic up to three times a day, especially during cold and flu season, to help prevent symptoms from worsening or to speed up recovery if you’re already sick.
  • It can be consumed straight or mixed with a little warm water if the flavor is too intense.

Benefits of the Ingredients

  • Ginger: Known for its anti-inflammatory and warming properties, ginger helps open up airways, reduces mucus production, and soothes throat irritation. It also supports the immune system.
  • Garlic: Garlic is a natural antimicrobial that helps kill pathogens in the body. It contains compounds like allicin, which boost immune response and reduce the duration of colds.
  • Onion: Onions have natural expectorant properties, making them useful for breaking down mucus and easing chest congestion. They also contain antioxidants that support overall respiratory health.
  • Horseradish: This root vegetable acts as a natural decongestant. Its pungent aroma helps open up blocked nasal passages and clear out mucus buildup.
  • Cayenne Pepper: The active component in cayenne pepper, capsaicin, thins mucus and promotes drainage. It also stimulates circulation, speeding up the recovery process.
  • Lemon Juice: Rich in vitamin C, lemon juice boosts the immune system and fights off infections. It adds a refreshing flavor to the tonic and balances the heat from other ingredients.
  • Honey: Optional but beneficial, honey adds natural sweetness and has soothing effects on a sore throat. It also possesses antimicrobial properties and can help calm a persistent cough.

Natural remedies offer a gentle and holistic approach to dealing with common health problems like colds and congestion. They are often made with easily accessible ingredients that have a long history of traditional use in promoting wellness. Unlike many over-the-counter medications, natural remedies tend to have fewer side effects, making them a safer choice for long-term use.

As we age, it becomes increasingly important to maintain a fresh and clean-smelling home. We want our living spaces to be welcoming to guests and to provide us with comfort. But sometimes, unwanted odors can invade our homes, leaving us in need of a quick and reliable solution. Instead of relying on store-bought air fresheners that only mask unpleasant smells, why not try these excellent folk remedies that work flawlessly and provide even better results?

Fight Mustiness with the Aroma of Coffee

If you enjoy the captivating smell of freshly brewed coffee, you’re in luck! It turns out that coffee can help clear the air of unwanted odors. Simply place a frying pan on the stove and add a tablespoon of ground or bean coffee. Heat it for about 30 seconds, being careful not to burn it. Then, turn off the stove and transfer the coffee to a cup or saucer. Put it in the room where you want to freshen the air. This trick is especially useful when you’re expecting guests and your apartment is filled with lingering kitchen odors.

Banish Dampness with the Power of Bay Leaves

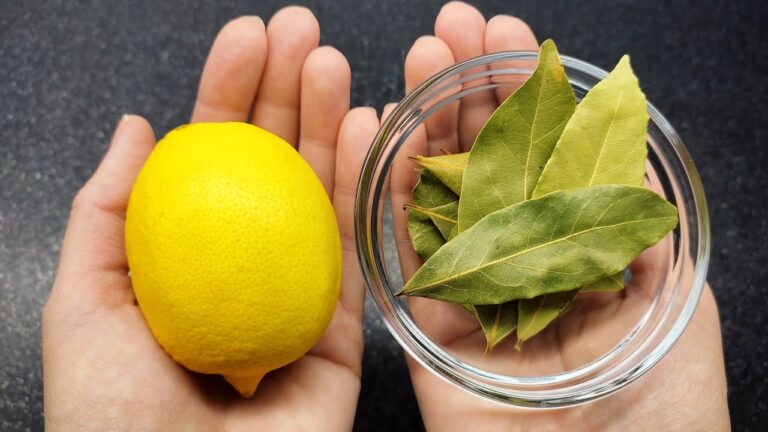
The musty smell of dampness can be quite unpleasant, particularly in the bathroom. But fear not, bay leaves are here to save the day! Place a few bay leaves on a saucer and set them on fire. You can even go around the entire apartment if necessary. The soothing aroma of bay leaves will help combat the dampness and leave your home smelling fresh.

Say Goodbye to Lingering Cooking Odors

We’ve all experienced the lingering smell of burnt food on a frying pan. To quickly eliminate this pungent odor, grab a saucepan and add half a liter of water, 100 ml of 9% vinegar, a sliced lemon, and 5 cloves (or mint). Bring the mixture to a boil, allowing the fragrant steam to permeate your kitchen. This remedy is effective in getting rid of any persistent smells in your apartment.

Keep Drainpipes Fresh and Clean

Unpleasant odors from drainpipes can be a real nuisance. Fortunately, a simple yet effective remedy exists. Pour a tablespoon of salt, baking soda, and 2 tablespoons of 9% vinegar directly into the drain. Let it sit for 30 minutes, then rinse it off with boiling water from the kettle. This will leave your drainpipes smelling fresh and clean.

Aromatherapy for Every Room

To create an inviting atmosphere in your home, consider using essential oils. In the bathroom, add a few drops of your favorite essential oil to the inside of the toilet paper roll. This will release a subtle aroma with every pull. In the bathroom, add 2-3 drops of essential oil to the corner of a hand towel. As long as the towel hangs in the bathroom, it will infuse the space with a pleasant scent. For the kitchen, place 2-3 cotton pads infused with lemongrass oil at the bottom of the trash can, under the bag. Finally, in the living rooms, put scented cotton pads in the closets and on the radiator to spread a refreshing fragrance throughout the space. Alternatively, you can also place an ordinary bar of toilet soap between your linens in the closet for a subtle yet lovely scent.

With these simple and natural tips, you can effortlessly maintain a fresh and inviting home. Say goodbye to unpleasant odors and welcome guests with a warm and pleasant atmosphere.


Cottonwood trees, belonging to the genus Populus, are not only beautiful additions to landscapes but also offer a wide range of health benefits and practical uses. This guide will explore the medicinal properties, harvesting techniques, and various applications of cottonwood buds.

Medicinal Benefits of Cottonwood

Cottonwood buds have been treasured for their healing properties for centuries. Let’s take a closer look at some of their remarkable benefits:

1. Nature’s Anti-Inflammatory and Pain Reliever

Cottonwood buds contain salicin, a compound similar to aspirin. This natural ingredient makes them effective in reducing inflammation and relieving pain. Soothe your aching muscles, ease arthritis discomfort, and bid farewell to general aches with cottonwood bud salve.

2. Rejuvenate Your Skin

Harness the power of cottonwood bark tannins to care for your skin. These tannins have astringent properties, making them useful in treating acne and oily skin. By incorporating cottonwood extracts into creams and lotions, you can promote wound healing, reduce irritation, and treat various skin conditions.

3. Breathe Easy with Cottonwood

Need relief from respiratory issues like congestion, bronchitis, or persistent coughs? Inhaling steam from cottonwood leaves can clear your airways and offer soothing relief. Discover the comfort of traditional remedies to keep your respiratory health in check.

4. The Antioxidant Boost You Need

The leaves of cottonwood trees are rich in flavonoids, which offer antioxidant protection. These powerful compounds combat oxidative stress and reduce the risk of chronic diseases. Embrace cottonwood’s natural antioxidants to boost your overall well-being.

5. Accelerated Wound Healing

Traditional wisdom has relied on the tannins and other compounds found in cottonwood to promote faster wound healing and reduce the risk of infection. Embark on a healing journey with the aid of this remarkable tree.

Harvesting and Preparing Cottonwood Buds

If you are eager to harness the benefits of cottonwood buds, here are some steps to help you get started:

Harvesting:

Late winter or early spring is the best time to harvest cottonwood buds, just before they begin to open. Look for buds that are sticky with resin, as these contain the highest concentration of beneficial compounds. Use pruning shears to clip the buds from the branches, taking care not to damage the tree.

Preparing Cottonwood Oil:

Ingredients:

  • Fresh cottonwood buds
  • Extra virgin olive oil (or any other carrier oil)

Steps:

  1. Pinch or blend the buds to help release the resin.
  2. Place the buds in a double boiler and cover them with olive oil.
  3. Gently heat the mixture on low for several days until the oil turns a deep golden color. Make sure it does not boil.
  4. Strain the oil through a muslin cloth to remove solid particles.
  5. Store the oil in an amber glass jar to protect it from sunlight.

Making Cottonwood Salve:

Ingredients:

  • 1 cup of cottonwood oil
  • 1/4 cup of shaved beeswax

Steps:

  1. Heat the cottonwood oil on low and slowly add beeswax shavings, stirring until melted.
  2. Test the consistency by allowing a small amount to cool. Adjust by adding more oil or beeswax if necessary.
  3. Pour the mixture into small containers and allow it to cool completely.
  4. Use the salve to soothe sore muscles, treat minor burns and scrapes, and soften rough hands.

Cottonwood Bud Tincture:

Ingredients:

  • Fresh cottonwood buds
  • High-proof grain alcohol (such as Everclear)

Steps:

  1. Fill a jar with cottonwood buds and cover them with alcohol.
  2. Seal the jar and let it steep for 6-8 weeks, shaking it occasionally.
  3. Strain the tincture through a fine mesh sieve lined with muslin cloth.
  4. Store the tincture in dark dropper bottles.

Usage:

Take small doses (15-30 drops) in water every few hours to relieve pain, reduce fever, and alleviate respiratory issues.

Environmental and Practical Uses of Cottonwood

Beyond its medicinal benefits, the cottonwood tree is also an environmental superstar with practical uses. Let’s explore:

Environmental Benefits:

  • The extensive root systems of cottonwood trees help stabilize soil, preventing erosion and protecting against floods.
  • Enjoy the shade provided by their dense foliage, which lowers urban temperatures and reduces energy consumption.
  • Cottonwood trees act as carbon sinks, absorbing and storing carbon dioxide, thus mitigating climate change.

Wildlife Habitat:

  • Cottonwood trees provide essential habitat and food for various wildlife species. Birds nest in their thick branches, and small mammals feast on their seeds and buds.
  • By embracing cottonwood trees, we can promote biodiversity and support the overall health of ecosystems.

Practical Uses:

  • Harness the strength of cottonwood wood for making fence posts, fuel, and small handcrafted items like bowls and statues.
  • Embrace the wisdom of indigenous cultures by utilizing cottonwood for making tools, mortars, and even musical instruments.

Note: The information provided in this article is for educational and informational purposes only and is not intended as medical advice. Always consult with a qualified healthcare professional before using any herbal remedies, especially if you have existing health conditions, are pregnant, or are taking other medications. The benefits and uses described are based on traditional practices and scientific studies; however, individual results may vary. Use herbal products responsibly and be aware of any potential allergies or side effects.

The cottonwood tree is a versatile and valuable species, offering numerous health benefits and practical uses. From its anti-inflammatory and skin-healing properties to its role in environmental conservation, the cottonwood tree is an essential part of both traditional and modern herbal practices. By learning how to harvest and prepare cottonwood buds, you can harness the full potential of this remarkable tree for health and well-being.