Category

Health & Wellness

Category

If you’re looking for a simple, delicious, and healthier alternative to store-bought bread, then mixing rice with yeast is the perfect recipe to try. Not only is it easy to make, but this homemade bread will also surprise you with its soft texture and incredible taste. Plus, it’s free from unhealthy additives, making it a great option for everyone!

Ingredients:

  • 1 cup of cooked rice (any type you prefer)
  • 2 cups of warm water
  • 2 teaspoons of active dry yeast
  • 3 cups of flour (whole wheat or any other healthy option)
  • 1 teaspoon of salt
  • Optional: seeds or herbs for added flavor

Steps to Make Your Rice Bread:

  1. Prepare the Yeast Mixture: Start by dissolving the yeast in 2 cups of warm water. Let it sit for 5-10 minutes until the yeast becomes frothy and active.
  2. Combine Rice and Yeast: In a large mixing bowl, add the cooked rice and pour in the yeast mixture. Stir everything together until well combined. The rice adds a unique texture and a bit of natural sweetness to your bread.
  3. Add Flour and Salt: Gradually add the flour and salt to the rice and yeast mixture, stirring until a dough forms. You can use your hands to knead the dough gently. It should be soft but not sticky.
  4. Let It Rise: Cover the dough with a cloth and place it in a warm spot for about an hour, allowing it to rise until it doubles in size. This step is crucial for creating a fluffy and light bread.
  5. Bake to Perfection: Preheat your oven to 350°F (175°C). After the dough has risen, transfer it into a greased loaf pan or shape it into rolls. Bake for 30-35 minutes, or until the bread turns golden brown.

Why This Bread Will Amaze You

This rice bread recipe results in a bread that is soft, moist, and flavorful. The rice adds a slightly chewy texture, while the yeast ensures a perfect rise and lightness. It’s a fantastic alternative to store-bought bread, without preservatives or unnecessary additives.

Conclusion

Stop buying bread filled with additives and preservatives. By mixing rice with yeast, you can enjoy homemade bread that’s both delicious and wholesome. Give it a try, and you’ll never look at store-bought bread the same way again!

Flies and mosquitoes can be a real nuisance, especially during warmer months. But did you know that you can keep them away using natural, safe methods without relying on chemical sprays? Here’s a simple and effective solution to get rid of these pesky insects for good. With a few ingredients you probably already have at home, you can enjoy a fly and mosquito-free home.

The Powerful Ingredients:

  • Lemon and Cloves: This combination is a natural insect repellent that works wonders. Flies and mosquitoes are repelled by the strong scent of cloves, while lemon enhances the effect.
  • Vinegar: Another great natural solution is vinegar. The smell is unpleasant for flies and mosquitoes, so placing a small bowl of vinegar in your home will keep them away.
  • Lavender Essential Oil: Mosquitoes, in particular, dislike the smell of lavender. A few drops of lavender oil around your house will not only repel them but also leave your home smelling fresh and pleasant.

How to Use Them:

  1. Lemon and Cloves Combo:
    • Cut a lemon in half.
    • Stick about 10-12 whole cloves into each lemon half.
    • Place these lemon-clove combos around your house, especially near windows, doors, or any area where flies and mosquitoes tend to enter.

    You’ll notice a significant reduction in these insects within a day or two!

  2. Vinegar Trap:
    • Pour a small amount of vinegar into a bowl.
    • Place the bowl near areas where flies tend to gather.
    • The strong smell of vinegar will deter them from staying in your home.
  3. Lavender Spray:
    • Mix a few drops of lavender essential oil with water in a spray bottle.
    • Spray this solution around your home, especially in rooms where mosquitoes are common. Not only does it repel them, but it also leaves a calming, fresh scent behind.

Why It Works

Flies and mosquitoes have a strong aversion to certain scents, and using these natural ingredients takes advantage of that. The lemon and cloves emit a smell that irritates flies, while mosquitoes find the aroma of lavender unbearable. These methods are not only effective but also chemical-free, making them safe to use around pets and family members.

Conclusion

If you want to keep flies and mosquitoes out of your home naturally, try this simple trick with lemon, cloves, vinegar, and lavender. In just a few minutes, you’ll have a natural barrier that will make your home a no-fly (or mosquito) zone. Enjoy a peaceful, insect-free home without any harsh chemicals!

Bay leaves have been used for centuries in both cooking and medicine, but did you know that simply holding a bay leaf in your hands can bring numerous health benefits? This humble herb has natural properties that can support your health in surprising ways, and it’s so simple that you won’t believe the results!

Relieves Stress and Anxiety

Bay leaves contain compounds that help reduce stress and anxiety. Holding or rubbing a bay leaf between your hands releases its natural oils, which have a calming effect on the mind and body. The soothing scent of the leaf can help relieve nervous tension and promote relaxation. Next time you feel stressed, try this natural remedy before reaching for medication.

Eases Joint Pain

Bay leaves are also known for their anti-inflammatory properties. If you suffer from joint pain or arthritis, holding a bay leaf and gently massaging your hands can help reduce inflammation and pain. The oils released from the leaf can soothe aching joints and provide relief without the need for over-the-counter painkillers.

Boosts Energy and Focus

The unique scent of bay leaves not only calms your nerves but can also help boost your focus and energy levels. By holding a bay leaf in your hands and inhaling its aroma, you can stimulate mental clarity and improve concentration. It’s a simple, natural way to enhance productivity and stay sharp throughout the day.

Improves Breathing

If you have respiratory issues, bay leaves can help clear your airways. When held and gently rubbed, the natural oils from the bay leaf release into the air, acting as a mild decongestant. Breathing in the aroma of the leaf can help you breathe more easily, especially if you’re dealing with a cold or allergies.

Conclusion

Why spend money at the pharmacy when you can enjoy the benefits of a simple bay leaf? From relieving stress and joint pain to boosting energy and improving breathing, this natural remedy is easy to try and can make a big difference in your health. So, next time you’re feeling stressed or dealing with pain, grab a bay leaf, and let nature do its work!

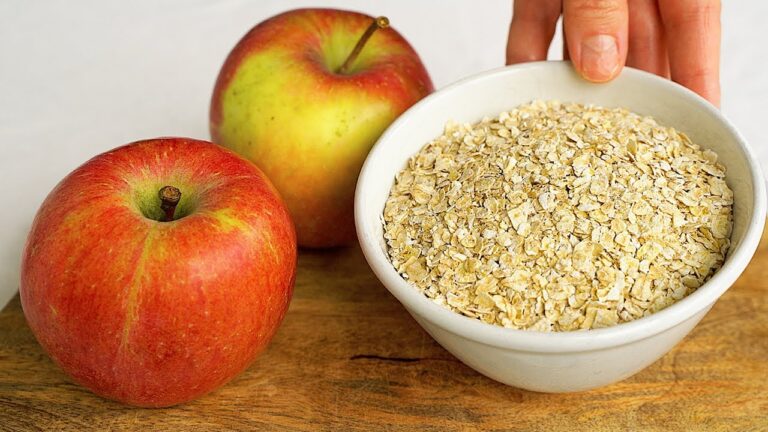
If you’re looking for a powerful, natural health booster, look no further than the combination of parsley and apple. This mix is packed with nutrients, and its benefits are truly impressive. Whether you’re aiming to detox your body, improve digestion, or boost your overall wellness, this dynamic duo can make a noticeable difference. Here’s the secret behind this super combo and why it’s 100% effective.

Detoxifies the Body

Parsley is a natural detoxifier that helps cleanse your liver and kidneys, flushing out toxins from the body. Combined with the fiber and antioxidants in apples, this mix works like a natural cleanse. Drinking a smoothie or juice made from parsley and apples can improve your digestion, help your body get rid of harmful substances, and leave you feeling refreshed.

Rich in Vitamins and Minerals

Both parsley and apples are loaded with essential vitamins and minerals. Parsley is rich in vitamins A, C, and K, which support your immune system and help with healthy skin, bones, and vision. Apples, on the other hand, are high in vitamin C and provide dietary fiber that promotes gut health. Together, they deliver a nutrient-packed boost that can energize your day.

Promotes Weight Loss

This mix is an excellent addition to your diet if you’re looking to shed a few pounds. The fiber in apples keeps you feeling full longer, curbing your appetite, while parsley helps to reduce water retention and bloating. This combo supports healthy digestion and metabolism, making it easier to maintain a balanced weight.

Improves Digestion

Parsley is known to promote better digestion by stimulating the production of digestive enzymes, while apples provide dietary fiber to aid in smooth digestion. Together, they can help relieve bloating, indigestion, and improve the health of your digestive system overall.

Recipe for a Parsley-Apple Health Drink:

  • 1 bunch of fresh parsley
  • 1 medium apple (any variety)
  • 1 cup of water or fresh lemon juice
  • Optional: A small piece of ginger for an extra kick

Instructions:

  1. Chop the parsley and apple into small pieces.
  2. Blend them together with water or lemon juice until smooth.
  3. Pour into a glass and enjoy this refreshing and health-boosting drink!

Conclusion

Mixing parsley with apple is truly a secret weapon for your health. This 100% effective combo detoxifies your body, boosts your immune system, aids digestion, and even helps with weight loss. Try adding this powerful drink to your routine, and you’ll see noticeable benefits in no time!

Fermented garlic is a powerhouse of flavor and nutrition. Not only does the fermentation process enhance the health benefits of garlic, but it also makes it easier to digest and milder in taste. Fermenting garlic increases its probiotic content, which is great for gut health, and enhances its natural immune-boosting properties. Here’s how to make fermented garlic and the amazing benefits you can expect from incorporating it into your diet.

How to Make Fermented Garlic:

Ingredients:

  • 10-12 fresh garlic cloves (peeled)
  • 1 cup of filtered water
  • 1 tablespoon of sea salt (non-iodized, to encourage fermentation)

Equipment:

  • A small glass jar with a lid (preferably with a fermentation airlock if you have one)

Instructions:

  1. Prepare the Garlic:
    • Peel the garlic cloves. You can crush them lightly with the flat side of a knife to make peeling easier, but leave them whole for fermentation.
  2. Make the Brine:
    • In a separate bowl, dissolve the sea salt in filtered water to create a brine solution.
  3. Pack the Garlic into the Jar:
    • Place the peeled garlic cloves into your glass jar. Make sure to leave some space at the top for the brine and any expansion during fermentation.
  4. Pour the Brine:
    • Pour the saltwater brine over the garlic, ensuring that all the garlic cloves are fully submerged. If any garlic floats to the top, use a fermentation weight or a small, clean object to keep them below the liquid surface. This prevents mold from forming.
  5. Seal and Ferment:
    • Close the jar with the lid. If using a fermentation airlock, this will allow gases to escape while preventing air from entering, which ensures a proper anaerobic environment.
    • Place the jar in a cool, dark place (around 60-70°F or 16-21°C) for about 1-2 weeks. During fermentation, bubbles will form, and the brine may become cloudy—this is completely normal.
  6. Check and Taste:
    • After one week, taste the garlic. If it’s tangy and the flavor is to your liking, it’s ready! If you prefer a stronger flavor, leave it for an additional week.
  7. Store in the Refrigerator:
    • Once the garlic is fermented to your liking, transfer the jar to the refrigerator. The cold will slow the fermentation process and keep the garlic fresh for several months.

Benefits of Fermented Garlic:

  1. Boosts Immune System
    • Garlic is well-known for its immune-boosting properties, thanks to its high content of sulfur compounds like allicin. Fermentation enhances these compounds, making them more bioavailable, which means your body can absorb them more easily. Regular consumption of fermented garlic may help strengthen your immune defenses.
  2. Supports Gut Health
    • The fermentation process introduces beneficial bacteria (probiotics) into the garlic, which can improve digestion and support a healthy gut. These probiotics help balance the microbiome, aiding in better nutrient absorption and overall gut health.
  3. Reduces Inflammation
    • Fermented garlic is rich in antioxidants that help reduce inflammation in the body. Chronic inflammation is linked to various health problems, including heart disease and arthritis, so incorporating fermented garlic into your diet can help lower inflammation levels.
  4. Improves Heart Health
    • Regular consumption of garlic has been linked to reduced cholesterol levels and lower blood pressure. The enhanced bioavailability of fermented garlic’s active compounds makes it particularly effective at promoting cardiovascular health. It helps improve circulation and may reduce the risk of heart disease.
  5. Boosts Energy and Detoxification
    • Garlic contains compounds that support detoxification, helping your liver and kidneys remove toxins from your body more efficiently. Fermented garlic is also easier to digest, meaning your body can access its energy-boosting nutrients more effectively.
  6. Antibacterial and Antiviral Properties
    • Garlic has natural antibacterial and antiviral properties, and these effects are amplified in its fermented form. Consuming fermented garlic can help fight infections, including colds, flu, and other bacterial and viral illnesses.

How to Use Fermented Garlic:

  • Salads and Dressings: Add fermented garlic to your salads, or blend it into dressings for a tangy kick.
  • Smoothies and Juices: A small clove of fermented garlic in your smoothie can boost its nutritional value.
  • Condiments: Mash fermented garlic into butter, dips, or spreads for extra flavor and health benefits.
  • Cooking: Use fermented garlic in soups, stews, or stir-fries, but add it at the end of cooking to preserve its probiotic properties.

Conclusion:

Fermented garlic is a simple, nutrient-dense addition to your diet that brings a host of health benefits. From boosting immunity and improving heart health to supporting digestion, this flavorful ingredient is worth the minimal effort to make at home. Try adding fermented garlic to your meals and experience the powerful health boost it provides!

Rosemary, a fragrant herb commonly used in cooking, has gained recognition for its remarkable health benefits. When consumed in just a tablespoon daily, rosemary offers a range of powerful effects on your body and mind. Packed with antioxidants, anti-inflammatory compounds, and essential nutrients, rosemary is not just a flavor booster – it’s a health-boosting miracle that’s changing lives. Here’s how taking just one tablespoon of rosemary each day can transform your health and well-being.

1. Boosts Memory and Cognitive Function

Rosemary has long been associated with improving memory and cognitive performance. The compounds in rosemary, especially rosmarinic acid and carnosic acid, help protect the brain from oxidative stress and enhance blood circulation, which delivers more oxygen and nutrients to the brain.

  • Benefit: Improved memory, focus, and mental clarity. It may even help prevent age-related cognitive decline and conditions like Alzheimer’s disease.

2. Reduces Inflammation and Pain

One tablespoon of rosemary a day provides anti-inflammatory benefits thanks to its active compounds. Rosemary can reduce inflammation throughout the body, helping to alleviate conditions such as arthritis, muscle pain, and headaches. It’s also been used as a natural remedy for menstrual cramps and joint pain.

  • Benefit: Reduced inflammation, less joint pain, and relief from headaches and muscle soreness.

3. Supports Digestion and Gut Health

Rosemary is a natural digestive aid that can help relieve indigestion, bloating, and gas. Its ability to stimulate the production of bile helps in breaking down fats and promoting smoother digestion. Additionally, its antibacterial properties can help balance gut flora and reduce harmful bacteria in the digestive tract.

  • Benefit: Improved digestion, relief from bloating and indigestion, and better overall gut health.

4. Strengthens the Immune System

Rosemary is rich in antioxidants, particularly carnosol and rosmarinic acid, which help protect the body from oxidative damage caused by free radicals. This can lead to a stronger immune system, reducing the likelihood of illness and infections.

  • Benefit: Enhanced immune system, protection from colds, flu, and infections.

5. Improves Circulation and Heart Health

Rosemary promotes better circulation by expanding blood vessels, allowing blood to flow more easily through the body. This can improve heart health, lower blood pressure, and reduce the risk of heart disease. The antioxidants in rosemary also help protect the heart and blood vessels from oxidative damage.

  • Benefit: Improved circulation, heart health, and lower risk of cardiovascular diseases.

6. Promotes Hair Growth and Scalp Health

Rosemary is a popular natural remedy for hair health. Its ability to stimulate blood circulation can promote hair growth, while its antimicrobial properties help keep the scalp healthy by reducing dandruff and irritation. Drinking rosemary tea or applying it directly to the scalp can encourage stronger, thicker hair.

  • Benefit: Enhanced hair growth, stronger hair, and a healthier scalp.

7. Aids in Detoxification

Rosemary is a natural diuretic, which helps the body flush out toxins by promoting healthy kidney function. It can also stimulate liver detoxification, which helps improve overall body health and function.

  • Benefit: Better detoxification, reduced water retention, and improved kidney and liver health.

8. Enhances Mood and Reduces Stress

Rosemary is known for its mood-boosting and calming effects. Inhaling rosemary or consuming it in tea form can help reduce stress and anxiety. The herb’s natural compounds interact with the brain’s neurotransmitters, promoting relaxation and mental clarity.

  • Benefit: Reduced stress and anxiety, improved mood, and enhanced relaxation.

How to Take 1 Tablespoon of Rosemary Daily:

  1. Rosemary Tea: Steep 1 tablespoon of dried or fresh rosemary leaves in hot water for 5-10 minutes. Drink the tea to enjoy the benefits.
  2. In Cooking: Add a tablespoon of dried or fresh rosemary to your meals, such as soups, stews, roasted vegetables, or marinades.
  3. Infused Oil: Mix a tablespoon of rosemary with olive oil for a flavorful and health-boosting dressing that you can use on salads or as a dip.
  4. Smoothies: Add a tablespoon of rosemary to your daily smoothie for an antioxidant boost.

Conclusion

Incorporating just one tablespoon of rosemary into your daily routine can significantly improve your health, from boosting memory and reducing inflammation to promoting digestion and heart health. Whether you enjoy it in tea, cooking, or infused in oils, rosemary is truly a miracle herb that can transform your well-being. Try adding rosemary to your diet today, and experience its life-changing benefits for yourself!

Excess uric acid in the body can lead to painful conditions like gout, kidney stones, and joint discomfort. Fortunately, lowering uric acid levels naturally is easier than you think. By making simple lifestyle and dietary changes, you can reduce uric acid buildup and improve your overall health. Here are 8 easy ways to remove excess uric acid from your body:

1. Stay Hydrated

Water is your best friend when it comes to flushing out excess uric acid. Staying hydrated helps dilute the uric acid in your bloodstream and promotes the kidneys to eliminate it through urine.

  • Tip: Drink at least 8-10 glasses of water per day. You can also include herbal teas and infused water (like lemon or cucumber water) to keep things interesting.

2. Eat More Fiber

Fiber helps the body eliminate uric acid by improving digestion and promoting regular bowel movements. Foods high in fiber also help balance blood sugar levels, which can prevent uric acid spikes.

  • Tip: Add fiber-rich foods like oats, whole grains, fruits, vegetables, and chia seeds to your diet to aid in uric acid removal.

3. Limit Purine-Rich Foods

Purines are compounds found in certain foods that break down into uric acid in the body. Limiting purine-rich foods can prevent excess uric acid buildup.

  • Foods to Avoid: Red meat, organ meats (liver, kidneys), shellfish (shrimp, crab), sardines, and alcohol (especially beer).
  • Alternatives: Lean proteins like chicken, turkey, eggs, and plant-based proteins like tofu and legumes.

4. Drink Lemon Water

Lemon juice helps alkalize the body and neutralize uric acid, making it easier for your kidneys to filter and eliminate it. The vitamin C in lemons also helps reduce uric acid levels.

  • Tip: Start your morning with a glass of warm lemon water by squeezing the juice of half a lemon into a glass of water.

5. Avoid Sugary Beverages and Foods

Fructose, a type of sugar found in sugary drinks and processed foods, increases uric acid production in the body. Cutting back on these foods can help reduce uric acid levels.

  • Foods to Avoid: Soft drinks, fruit juices with added sugar, candy, and processed snacks.
  • Alternative: Opt for water, herbal teas, and natural sweeteners like stevia or honey in moderation.

6. Eat More Cherries and Berries

Cherries, especially tart cherries, are known to help lower uric acid levels due to their high antioxidant content, particularly anthocyanins. Berries like strawberries and blueberries also help reduce inflammation and uric acid buildup.

  • Tip: Snack on fresh cherries or drink cherry juice regularly. You can also add a variety of berries to your breakfast or smoothies.

7. Add Apple Cider Vinegar to Your Routine

Apple cider vinegar is another natural remedy that can help detoxify the body and eliminate excess uric acid. The acetic acid in apple cider vinegar helps break down uric acid and improve kidney function.

  • Tip: Mix 1 tablespoon of apple cider vinegar in a glass of water and drink it once or twice daily. Always dilute it to protect your teeth and stomach.

8. Get Regular Exercise

Exercise helps improve circulation, metabolism, and overall kidney function, which can aid in the removal of uric acid. Staying active also helps you maintain a healthy weight, reducing the risk of uric acid buildup.

  • Tip: Engage in moderate physical activity, such as walking, cycling, swimming, or yoga, for at least 30 minutes a day. However, avoid excessive or intense workouts, as they can temporarily increase uric acid levels.

Bonus Tip: Manage Stress

High stress levels can contribute to uric acid buildup by increasing inflammation and disrupting the body’s natural balance. Relaxation techniques such as meditation, deep breathing, and sufficient sleep can help lower stress and keep uric acid levels in check.


Conclusion

Removing excess uric acid is easier than you think with these simple lifestyle and dietary changes. By staying hydrated, eating the right foods, and incorporating some natural remedies like lemon water, cherries, and apple cider vinegar, you can keep your uric acid levels in check and prevent the painful conditions associated with high uric acid. Start making these small adjustments today for better health!

Eating soaked almonds every morning can do wonders for your health. Almonds are already packed with nutrients, but soaking them enhances their benefits even more by making them easier to digest and increasing their nutrient availability. Here’s what really happens when you make soaked almonds a part of your morning routine:

1. Improved Digestion

Soaking almonds helps remove the phytic acid in their skin, which can interfere with nutrient absorption. Once the almonds are soaked, they become easier to digest, and your body can absorb more of their nutrients.

  • Benefit: You’ll experience smoother digestion and better nutrient uptake, which supports overall gut health.

2. Boosts Brain Function

Almonds are rich in vitamin E, which is known to improve memory and cognitive function. They also contain healthy fats and nutrients like riboflavin and L-carnitine that boost brainpower and may help reduce the risk of neurodegenerative diseases.

  • Benefit: Eating soaked almonds in the morning can sharpen your memory, improve focus, and support long-term brain health.

3. Enhances Energy Levels

Soaked almonds are a great source of protein, healthy fats, and fiber, which provide sustained energy throughout the day. The slow release of these nutrients helps keep your energy levels stable, preventing those mid-morning crashes.

  • Benefit: You’ll feel energized and more alert throughout the day after starting your morning with soaked almonds.

4. Supports Heart Health

Almonds are high in monounsaturated fats and antioxidants that support heart health. They help lower bad cholesterol (LDL) levels and increase good cholesterol (HDL), reducing the risk of heart disease.

  • Benefit: Regularly eating soaked almonds can promote a healthier heart and lower your chances of heart-related issues.

5. Helps with Weight Management

Despite being calorie-dense, almonds can actually help you manage your weight. The fiber and protein in soaked almonds help you feel fuller for longer, reducing cravings and preventing overeating.

  • Benefit: You’ll feel more satisfied after meals, making it easier to maintain a healthy weight or even shed a few pounds.

6. Strengthens Bones

Almonds are a good source of calcium, magnesium, and phosphorus, all of which are essential for maintaining strong bones. Soaking almonds boosts their absorption, ensuring your body gets the full benefit of these bone-building nutrients.

  • Benefit: Regularly eating soaked almonds can strengthen your bones and reduce the risk of conditions like osteoporosis.

7. Promotes Healthy Skin

The vitamin E and antioxidants in soaked almonds help fight free radicals that can damage your skin. This can slow down signs of aging, improve skin tone, and reduce issues like acne and inflammation.

  • Benefit: You’ll notice glowing skin and a more youthful appearance as your skin becomes healthier from within.

8. Regulates Blood Sugar Levels

Almonds have a low glycemic index and are rich in healthy fats, which help control blood sugar spikes. Soaking almonds increases their nutrient availability, making them even more effective at regulating blood sugar levels.

  • Benefit: Eating soaked almonds can help manage blood sugar levels, making them especially beneficial for people with diabetes or those at risk.

9. Boosts Immunity

Almonds are packed with antioxidants and essential vitamins like vitamin E and B vitamins that help strengthen your immune system. Soaking almonds makes these nutrients more bioavailable, giving your immune system an extra boost.

  • Benefit: With a stronger immune system, your body will be better equipped to fight off infections and illnesses.

10. Reduces Inflammation

Almonds contain anti-inflammatory compounds such as polyphenols and healthy fats that help reduce inflammation in the body. This can be especially beneficial for people with inflammatory conditions like arthritis or heart disease.

  • Benefit: Regularly consuming soaked almonds can help reduce inflammation and support overall health.

How to Soak Almonds:

  1. Rinse 8-10 raw almonds and place them in a bowl.
  2. Cover the almonds with water and let them soak overnight (6-8 hours).
  3. In the morning, drain the water and peel the skin off the almonds. The skins will come off easily after soaking.
  4. Enjoy them first thing in the morning for maximum benefits!

Conclusion:

Eating soaked almonds every morning can have an unbelievable impact on your health. From boosting brainpower and energy to improving digestion and heart health, the benefits are remarkable. Try incorporating this simple habit into your routine, and experience the amazing transformations for yourself!

Apple cider vinegar (ACV) is a powerful natural remedy for removing warts, and it’s incredibly easy to use! Warts are caused by the human papillomavirus (HPV) and can be tough to get rid of, but the acidity and antiviral properties of ACV make it a potent solution. Many people report seeing warts shrink or disappear in just 24 hours! Here’s how to use apple cider vinegar to get rid of warts quickly and effectively.

How Apple Cider Vinegar Works to Remove Warts:

  • Acidic Nature: The high acidity of apple cider vinegar breaks down the tissue of the wart, causing it to peel away from the skin.
  • Antiviral Properties: ACV has antiviral properties that help kill the virus responsible for the wart.
  • Natural Exfoliant: It softens the wart and encourages the body to shed the infected skin, allowing healthy skin to grow in its place.

How to Use Apple Cider Vinegar to Remove Warts:

Ingredients:

  • Apple cider vinegar (raw, unfiltered is best)
  • Cotton ball or gauze
  • Bandage or medical tape

Instructions:

  1. Clean the Wart Area:
    • Gently wash the wart and surrounding skin with mild soap and water. Pat it dry with a clean towel.
  2. Soak the Cotton Ball in ACV:
    • Soak a small cotton ball or piece of gauze in apple cider vinegar. Ensure it’s saturated but not dripping.
  3. Apply to the Wart:
    • Place the soaked cotton ball directly over the wart, ensuring it fully covers the area.
  4. Secure with a Bandage:
    • Use a bandage or medical tape to secure the cotton ball in place, keeping it pressed against the wart. This ensures the vinegar stays in contact with the wart for several hours.
  5. Leave It On:
    • Leave the apple cider vinegar on the wart for at least 24 hours. You can replace the cotton ball after 12 hours if needed, but many people leave it on overnight.
  6. Remove and Check:
    • After 24 hours, remove the cotton ball and bandage. The wart should appear darker, and the skin around it may be red or irritated. This is normal and indicates the vinegar is working.
  7. Repeat if Necessary:
    • For tougher warts, you may need to repeat this process over the next few days. The wart will eventually turn black, dry out, and fall off.

What to Expect:

  • Within 24 Hours: Many people notice the wart shrinking or darkening after just 24 hours of using apple cider vinegar.
  • After a Few Days: The wart will continue to darken and may begin to dry out or scab. The area will eventually heal as healthy skin replaces the wart.
  • For Larger Warts: It may take up to a week of daily applications to fully remove larger or more stubborn warts.

Tips for Best Results:

  • Be Consistent: For best results, apply apple cider vinegar to the wart consistently each day until the wart is gone.
  • Protect the Skin Around the Wart: ACV is acidic and may cause irritation to the surrounding skin. To avoid this, apply petroleum jelly or coconut oil around the wart to protect the healthy skin.
  • Don’t Pick at the Wart: Let the wart fall off naturally as it dries out. Picking at it can lead to scarring or infection.

Why Apple Cider Vinegar is Effective:

  • Natural and Inexpensive: Apple cider vinegar is a safe, natural, and cost-effective treatment compared to chemical wart removers.
  • Minimal Side Effects: Unlike some over-the-counter treatments, ACV doesn’t contain harsh chemicals, although it may cause slight stinging or irritation.
  • Quick Results: Many people find that ACV works faster than other remedies, sometimes shrinking or removing warts in just a day or two.

Conclusion:

Apple cider vinegar is a highly effective and incredibly easy way to remove warts in as little as 24 hours. Its antiviral properties, combined with its acidic nature, help break down the wart tissue and encourage it to fall off naturally. If you’re dealing with a stubborn wart, give this simple, natural remedy a try and see how quickly it works for you!

Cloves are a potent natural remedy with numerous health benefits, and one surprising use is applying them directly to the belly to alleviate digestive issues and promote overall well-being. This simple, yet effective trick can save you a trip to the pharmacy by relieving bloating, gas, and discomfort. Cloves have been used for centuries in traditional medicine to treat various ailments, and their essential oils can provide quick relief when applied topically.

Here’s how using cloves on your belly can benefit you and how to do it at home!

Why Cloves Work:

Cloves contain eugenol, a compound known for its anti-inflammatory, antimicrobial, and soothing properties. These benefits can be absorbed through the skin and help reduce discomfort in the digestive tract. When applied to the belly, cloves can ease issues such as indigestion, bloating, gas, and abdominal pain.

Benefits of Applying Cloves to Your Belly:

  1. Relieves Bloating and Gas:
    • Cloves help reduce gas and bloating by relaxing the muscles in your digestive tract. Applying them topically to your belly can promote better digestion and relieve uncomfortable bloating.
  2. Reduces Stomach Discomfort:
    • Cloves have natural pain-relieving properties that can soothe stomach cramps and abdominal pain. They can help reduce the intensity of digestive discomfort, making you feel better quickly.
  3. Promotes Healthy Digestion:
    • The essential oils in cloves stimulate digestive enzymes, which can enhance your digestion and prevent issues like indigestion and acid reflux.
  4. Anti-Inflammatory Properties:
    • Eugenol in cloves acts as an anti-inflammatory agent, reducing inflammation in the stomach and intestines. This can provide relief from digestive conditions like gastritis.
  5. Fights Infections:
    • Cloves have antibacterial and antiviral properties, making them effective at fighting digestive infections, whether it’s a mild stomach bug or food poisoning.

How to Use Cloves on Your Belly:

What You’ll Need:

  • 1 tablespoon of ground cloves (or whole cloves if you prefer)
  • 2-3 tablespoons of olive oil or coconut oil (for dilution)
  • A clean cloth or gauze

Instructions:

  1. Prepare the Clove Oil Mixture:
    • Mix 1 tablespoon of ground cloves with 2-3 tablespoons of olive oil or coconut oil in a small bowl. You can use whole cloves, but grinding them releases more of the beneficial oils.
  2. Warm the Mixture:
    • Heat the clove oil mixture slightly in the microwave or on the stove until it’s warm (not hot). This will help open your skin’s pores and allow better absorption of the clove’s essential oils.
  3. Apply to Your Belly:
    • Massage the warm clove oil mixture onto your belly in gentle circular motions. Focus on areas where you feel discomfort or bloating. Continue massaging for 5-10 minutes to help the oil penetrate the skin.
  4. Cover with a Warm Cloth:
    • After massaging, place a warm cloth or gauze over your belly to allow the clove oil to continue working. Leave it on for about 15-20 minutes.
  5. Repeat if Necessary:
    • You can use this remedy up to twice a day, especially if you’re experiencing severe bloating or digestive discomfort.

Alternative Method: Clove Compress

  • For a quick remedy, boil a few whole cloves in water for 5-10 minutes. Soak a cloth in the clove-infused water, and place the warm compress on your belly for 10-15 minutes. This method provides a more diluted, gentle relief.

Additional Tips:

  • Essential Oils: If you have clove essential oil, you can mix a few drops with a carrier oil (like coconut or olive oil) and apply it directly to your belly for the same benefits.
  • Caution: Always dilute cloves or clove oil with a carrier oil to avoid irritation. Clove oil can be quite potent, so don’t apply it directly to the skin without dilution.

Conclusion:

By simply applying clove oil to your belly, you can relieve digestive discomfort, bloating, and gas without the need for over-the-counter medications. This natural remedy is not only effective but also budget-friendly. Cloves have powerful medicinal properties that can promote digestion and overall gut health. Try this easy trick and discover how cloves can help you feel better naturally!