Category

Health & Wellness

Category

Fenugreek seeds, or methi dana, are a fantastic natural remedy for hair growth and preventing hair fall. They are rich in proteins, nicotinic acid, and lecithin, all of which promote healthy hair. The high content of iron and protein in fenugreek also helps strengthen hair follicles and prevent hair thinning. Using fenugreek water as part of your hair care routine can help boost hair growth and reduce hair loss.

Here’s how you can make fenugreek water for hair growth and how to use it effectively:

Ingredients:

  • 2 tablespoons of fenugreek seeds (methi dana)
  • 2 cups of water

Instructions:

  1. Soak the Seeds:
    • Take 2 tablespoons of fenugreek seeds and soak them in 2 cups of water overnight. This allows the seeds to release their nutrients into the water.
  2. Strain the Water:
    • In the morning, strain the water and set aside the seeds. The water will be infused with nutrients from the seeds and will have turned a yellowish color.
  3. How to Use:
    • Hair Rinse: After washing your hair with shampoo, use the fenugreek water as a final rinse. Pour it over your hair, gently massaging it into your scalp. Leave it in for 10-15 minutes, then rinse with cool water. For best results, use this fenugreek rinse 2-3 times a week.
    • Leave-In Spray: Pour the fenugreek water into a spray bottle and spritz it onto your scalp and hair roots. You can leave this on your scalp for a few hours or even overnight for deeper nourishment before rinsing it off.

Benefits of Fenugreek Water for Hair Growth:

  1. Promotes Hair Growth:
    • Fenugreek seeds are rich in iron and protein, both essential for strong hair structure. They also contain nicotinic acid, which promotes hair growth and repairs damaged hair follicles.
  2. Reduces Hair Fall:
    • The lecithin content in fenugreek helps strengthen the hair shaft, preventing hair breakage and reducing hair fall. The proteins and vitamins in fenugreek help fortify the hair strands, making them less prone to damage.
  3. Hydrates the Scalp:
    • Fenugreek water acts as a natural moisturizer and hydrates the scalp, preventing dryness and dandruff. A well-hydrated scalp is key to healthy hair growth.
  4. Adds Shine and Volume:
    • Regular use of fenugreek water adds a natural shine and volume to your hair. It keeps hair soft, smooth, and less prone to frizz.
  5. Improves Scalp Health:
    • Fenugreek seeds have anti-inflammatory and antifungal properties that can help improve scalp health and prevent issues like dandruff and scalp infections.

Tips for Best Results:

  • Consistency is Key: Use fenugreek water consistently, at least 2-3 times a week, to see noticeable improvements in hair growth and reduced hair fall.
  • Fenugreek Paste: For an extra boost, you can also grind the soaked seeds into a paste and apply it directly to your scalp as a hair mask. Leave it on for 20-30 minutes before rinsing.
  • Balanced Diet: While fenugreek water helps externally, make sure to maintain a balanced diet rich in nutrients like biotin, iron, and omega-3 fatty acids to support hair growth from within.

By incorporating fenugreek water into your hair care routine, you can naturally boost hair growth, reduce hair fall, and maintain healthy, vibrant hair!

Lemon peels are often discarded without a second thought, but they’re packed with beneficial compounds and versatile uses. From cleaning to skincare, here are 12 unusual ways to use lemon peels that will make you think twice before tossing them away!

1. Natural Air Freshener

Lemon peels can be used as a natural air freshener to bring a refreshing citrus scent into your home. Simply simmer a few lemon peels in a pot of water for an hour, and the steam will fill your space with a fresh, clean smell.

2. Homemade Lemon Vinegar Cleaner

Combine lemon peels with white vinegar for an all-natural cleaning solution. Place the peels in a jar, fill it with vinegar, and let it sit for two weeks. Strain the liquid and transfer it to a spray bottle for a powerful, eco-friendly cleaner that works on counters, floors, and bathroom surfaces.

3. Keep Insects Away

Lemon peels can act as a natural insect repellent. Place dried lemon peels in areas where ants, flies, and mosquitoes are common, such as windowsills or doorways. The strong citrus scent keeps bugs away without chemicals.

4. Refresh Cutting Boards

Rub lemon peels directly on your cutting boards to remove stains, odors, and bacteria. The acidity of lemon helps sanitize the surface, while the peel’s natural oils condition the wood.

5. DIY Lemon Scrub for Skin

Lemon peels are rich in citric acid and vitamin C, making them great for exfoliating and brightening the skin. Mix finely grated lemon zest with sugar and coconut oil to create a natural scrub that leaves your skin glowing and smooth.

6. Make Lemon Zest

Before discarding lemon peels, zest them to use in your favorite recipes. The zest adds a burst of citrusy flavor to desserts, marinades, salads, and dressings. You can also dry the zest and store it for later use.

7. Flavor Olive Oil

Create a gourmet lemon-infused olive oil by adding lemon peels to a bottle of olive oil. Let the mixture sit for about a week, and you’ll have a fragrant oil perfect for drizzling over salads, vegetables, and fish.

8. Natural Deodorizer for Trash Cans

Place lemon peels at the bottom of your trash can or compost bin to neutralize odors. As they decompose, they release a fresh citrus scent that keeps unpleasant smells at bay.

9. Whiten Teeth Naturally

Lemon peels contain d-limonene, a compound that can help remove surface stains from teeth. Gently rub the white part of a lemon peel on your teeth for a minute, then rinse. However, use sparingly, as the acidity of lemon can wear down enamel if overused.

10. Shine Chrome Faucets

Rub lemon peels on chrome fixtures, such as faucets and showerheads, to remove water stains and restore their shine. The citric acid in the peel helps break down mineral deposits, leaving your fixtures sparkling.

11. Soothe Sore Throat

Lemon peels have antibacterial properties that can help soothe a sore throat. Boil lemon peels in water for 10 minutes, strain, and drink the liquid with a little honey. It’s a natural, soothing remedy for colds and throat irritation.

12. Deodorize Your Fridge

Place lemon peels in a bowl inside your refrigerator to absorb unpleasant odors. You can enhance the effect by sprinkling baking soda over the peels for extra freshness.

Bonus Tip: Lemon Peel Powder

Dry out lemon peels and grind them into a fine powder. Lemon peel powder can be used in baking, teas, face masks, or even cleaning products. It’s a concentrated way to make the most of their nutrients and aroma.

Final Thoughts

Lemon peels are versatile and full of beneficial properties, so instead of throwing them away, start incorporating them into your home, cleaning routine, and even skincare! These 12 unusual ways will help you maximize the potential of lemon peels and reduce waste in the process.

Ginger, a root known for its strong, spicy flavor and numerous health benefits, is an excellent natural remedy for various ailments. Boiling ginger and drinking the liquid, commonly known as ginger tea, is a time-honored tradition used worldwide to improve health. Here’s why ginger tea is beneficial and how you can prepare it at home to enjoy its healing properties.

Benefits of Ginger Tea:

  • Digestive Aid: Ginger is well-known for its ability to ease nausea, promote digestion, and soothe stomach discomfort. It stimulates saliva, bile, and gastric enzymes, which helps break down and digest food.
  • Anti-inflammatory: Ginger contains gingerols and shogaols, compounds with anti-inflammatory properties that can help reduce pain and swelling, making it beneficial for arthritis sufferers and those experiencing muscle soreness.
  • Immune Booster: The antioxidant properties of ginger boost the immune system. Drinking ginger tea is especially helpful during the cold and flu season to fend off infections.
  • Circulatory Support: Ginger improves blood circulation, which can warm up the body and may also help to lower blood pressure and prevent heart conditions.

How to Make Ginger Tea:

Making ginger tea at home is simple and only requires fresh ginger and water. Here’s how you can prepare it:

Ingredients:

  • 1-2 inches of fresh ginger root
  • 2 cups of water
  • Optional: Honey, lemon juice, or mint for flavor

Instructions:

  1. Prepare the Ginger: Wash the ginger root thoroughly. Peel it and slice it thinly to maximize the surface area, which helps release more of its active ingredients.
  2. Boil the Ginger: In a small pot, add the sliced ginger to the water and bring it to a boil. Lower the heat and let the ginger simmer for about 10-20 minutes, depending on how strong you want the tea to be. The longer it simmers, the more intense the flavor and benefits.
  3. Strain and Serve: Remove the pot from heat and strain the tea into a mug. Discard the ginger pieces.
  4. Add Flavor: If you like, add a squeeze of lemon juice for extra vitamin C and a refreshing taste, a few leaves of mint for a cooling effect, or a spoonful of honey to sweeten it naturally.

Tips for Enjoying Ginger Tea:

  • Frequency: You can drink ginger tea daily. Morning is a great time to enjoy it to stoke your digestive fire for the day, or sip it after meals to aid digestion.
  • Quantity: One to two cups a day is generally enough to enjoy the health benefits without overdoing it.
  • Caution: While ginger is safe for most people, it can interact with some medications and isn’t recommended for people with certain health conditions, like those with gallstones, or those on blood thinners. As with any herbal remedy, check with your healthcare provider if you have any health concerns.

Drinking ginger tea is an excellent way to harness the natural benefits of ginger in a soothing, enjoyable way. Try incorporating this healthy beverage into your routine and you might just find yourself grateful for the noticeable boost to your well-being.

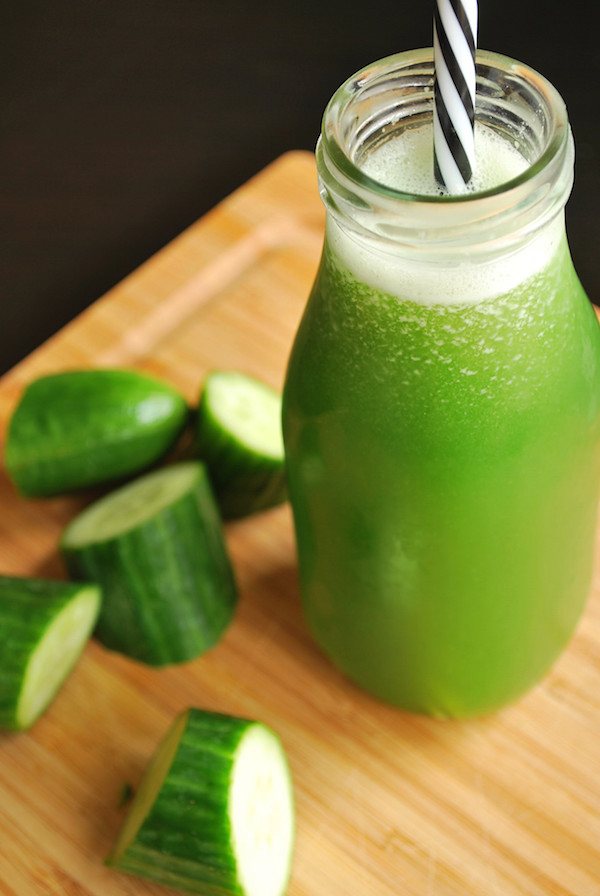
Cucumbers are not only refreshing and hydrating but also packed with nutrients that can be beneficial for eye health, including vitamin K, vitamin C, and beta-carotene. Consuming a cucumber-based concoction daily can potentially help in maintaining and even enhancing your vision, especially when it comes to seeing objects that are far away. Here’s a simple recipe that incorporates cucumber in a way that’s both delicious and beneficial for your eyes.

Benefits of Cucumber for Vision:

  • Hydration: Cucumbers are made up of about 96% water, which is essential for maintaining overall hydration, including the hydration of eye tissues.
  • Vitamin C: This antioxidant is crucial for eye health, protecting the eyes against UV light and environmental pollutants.
  • Beta-Carotene: The body converts beta-carotene into vitamin A, which is vital for good vision, especially in low-light conditions.

Cucumber Vision-Enhancing Recipe:

This simple recipe can be consumed daily to help nourish your eyes and support better vision.

Ingredients:

  • 1 large cucumber
  • 1 lemon
  • 1 tablespoon of honey (optional, for sweetness)
  • 2 cups of water or coconut water (for additional hydration and electrolytes)

Instructions:

  1. Prepare the Cucumber: Wash the cucumber thoroughly. Peel it if it’s not organic to reduce pesticide exposure. Chop it into chunks.
  2. Blend Ingredients: Add the cucumber chunks, juice of one lemon, and water or coconut water into a blender. Blend until smooth.
  3. Strain (Optional): If you prefer a smoother texture, strain the mixture using a fine mesh sieve or cheesecloth to remove the pulp.
  4. Add Honey: Stir in a tablespoon of honey if you prefer a bit of sweetness. This step is optional but can enhance the flavor.
  5. Store: Keep the cucumber drink in the refrigerator and consume one tablespoon daily. It’s best enjoyed chilled.

Serving Suggestions:

  • Morning Routine: Incorporate this cucumber elixir into your morning routine to kickstart your day with hydration and essential nutrients.
  • Pre-Meal Beverage: Drink a tablespoon of this elixir before meals to aid in digestion and improve nutrient uptake.

Additional Tips:

  • Consistency is Key: Regular consumption is necessary to see benefits. Incorporate this drink into your daily diet for at least a few weeks to notice changes.
  • Freshness: Always use fresh cucumbers for the best taste and nutrient content.
  • Diet and Lifestyle: Remember that maintaining good vision involves more than just one remedy. Ensure you’re also getting enough omega-3 fatty acids, zinc, and lutein through your diet, and always wear sunglasses during prolonged exposure to sunlight.

While this cucumber elixir is a healthy addition to any diet, it’s important to note that improving vision significantly also depends on factors such as genetics, age, and overall health. If you have concerns about your eyesight, consulting with an eye care professional is recommended.

Papaya seeds are often discarded, but they’re packed with health benefits. Rich in nutrients, antioxidants, and enzymes, they support digestion, detoxify the body, and offer antibacterial and anti-inflammatory properties. Here’s how you can eat them and make the most of their health benefits.


Health Benefits of Papaya Seeds

  1. Improves Digestion
    • Papaya seeds contain digestive enzymes like papain that help break down proteins and improve gut health.
  2. Supports Liver Detox
    • Papaya seeds aid in cleansing the liver by removing toxins and improving liver function.
  3. Kills Parasites
    • They contain compounds like carpaine that help eliminate intestinal parasites.
  4. Anti-Inflammatory Properties
    • Their anti-inflammatory effects may help reduce joint pain and other inflammatory conditions.
  5. Antibacterial Effects
    • Papaya seeds can fight harmful bacteria like E. coli, Staphylococcus, and Salmonella.

How to Prepare and Eat Papaya Seeds

  1. Fresh from the Papaya
    • Scoop out the seeds from a fresh papaya.
    • Rinse them thoroughly to remove the jelly-like coating.
    • You can eat them fresh, but they have a strong, peppery taste.
  2. Dried Papaya Seeds
    • Spread the seeds on a tray and air dry them or use a dehydrator.
    • Once dried, grind them into a powder and store in an airtight container.
  3. Crushed or Ground
    • Use crushed or ground papaya seeds as a seasoning in salads, soups, or smoothies. They have a flavor similar to black pepper.
  4. With Honey
    • Mix a small amount of fresh or dried seeds with honey to mask their strong flavor.
  5. In Smoothies
    • Blend ½–1 teaspoon of papaya seeds into your morning smoothie for an easy, nutritious boost.

How Much to Eat

  • Start with ½ teaspoon per day to allow your body to adjust.
  • Gradually increase to 1–2 teaspoons per day, depending on your tolerance and health goals.
  • Avoid consuming large quantities, as papaya seeds are potent and may cause digestive discomfort if overused.

Precautions

  • Pregnant Women: Avoid papaya seeds as they may cause uterine contractions.
  • Children: Use only under a doctor’s supervision due to their potency.
  • Medical Conditions: Consult your doctor if you’re on medication or have any health concerns.

Storage Tips

  • Fresh Seeds: Store in an airtight container in the refrigerator for up to 5–7 days.
  • Dried Seeds: Keep in a cool, dry place in an airtight container for up to several months.

Incorporate Papaya Seeds into Your Routine

Papaya seeds are a natural powerhouse of nutrients and health benefits. With their strong flavor, they might take some getting used to, but their positive effects on digestion, detox, and overall health make them worth it. Start small and enjoy the benefits of this incredible superfood! ?✨

If you’re looking for a refreshing and energizing drink, combining watermelon with ginger creates a vibrant beverage that not only tastes great but also boosts your energy levels naturally. Here’s why this combination works so well and how you can make your own watermelon ginger juice at home.

Health Benefits of Watermelon and Ginger

Watermelon: This juicy fruit is loaded with water and essential nutrients, including vitamins A, B6, and C, as well as potassium and magnesium. Watermelon is also rich in lycopene, an antioxidant that helps fight oxidative stress and inflammation.

Ginger: Known for its potent anti-inflammatory properties and digestive benefits, ginger can also help increase circulation and boost energy levels. Its sharp, spicy flavor complements the sweetness of watermelon beautifully.

How to Make Watermelon Ginger Juice

Ingredients:

  • 4 cups of fresh watermelon cubes (seeds removed)
  • 1 inch of fresh ginger root, peeled
  • Juice of 1 lime (optional, for added zest)
  • Ice cubes (optional, for serving)
  • Fresh mint leaves (optional, for garnish)

Instructions:

  1. Prepare Ingredients: Cut the watermelon into cubes, and peel the ginger. If you prefer a bit of tang, have a lime ready to squeeze.
  2. Juice the Ingredients: In a blender, combine the watermelon cubes and ginger. Blend until smooth. For an extra kick of freshness and a bit of tang, add the juice of one lime.
  3. Strain the Juice (Optional): For a smoother texture, strain the juice using a fine mesh sieve or cheesecloth to remove the pulp and bits of ginger.
  4. Serve: Pour the juice over ice cubes in glasses. Garnish with fresh mint leaves for an additional refreshing touch.
  5. Enjoy: Refresh yourself with this energizing and hydrating drink!

Tips for the Best Watermelon Ginger Juice

  • Chill Your Ingredients: For a cooler drink, refrigerate the watermelon and ginger before juicing. This way, you might not even need ice.
  • Adjust to Taste: If the ginger’s spice is too strong, use less. If you like your drink a bit sweeter, you can add a little honey or agave syrup.
  • Hydration: This drink is excellent for hydration, making it perfect for hot days or after workouts.

Conclusion

Watermelon juice with ginger is not just a thirst quencher—it’s a health booster packed with vitamins, antioxidants, and minerals. It’s a natural energy drink that can help keep you refreshed and revitalized. Try making it at home and adjust the ingredients according to your taste preferences for a perfect blend of health and flavor!

Sleeping positions can significantly impact your overall health and sleep quality. While there are various positions people prefer, sleeping on your left side is often recommended by healthcare professionals for several key health benefits. Here’s a detailed look at why adopting this sleeping posture might be a good idea:

1. Enhances Digestion

Sleeping on your left side can improve your digestive system’s efficiency. The stomach and pancreas hang naturally when lying on the left, which optimizes digestion. This position allows gravity to facilitate the movement of food waste through the ascending colon, which can help reduce the risk of constipation and may lead to a more restful sleep due to less digestive discomfort.

2. Benefits to Circulation and Heart Health

For the heart, sleeping on the left side can be especially beneficial. This position may enhance circulation and cardiovascular health because of the body’s anatomy. The heart is better positioned to pump downhill and the aorta curves from the heart and descends into the abdomen on the left side. This alignment can ease the heart’s workload as it pumps blood downward to the rest of the body.

3. Relieves Back Pain

Individuals suffering from chronic back pain may find relief when sleeping on their left side, particularly with a supportive pillow between their knees. This position can help align the spine better and distribute weight more evenly, reducing pressure points and potentially easing pain.

4. Helps Reduce Heartburn

For those suffering from acid reflux or gastroesophageal reflux disease (GERD), sleeping on the left side can make a significant difference. This position prevents stomach contents from flowing back into the esophagus, thus minimizing the risk and discomfort of heartburn during the night.

5. Ideal for Pregnant Women

Sleeping on the left side is often advised for pregnant women. This position prevents the uterus from pressing against the liver, which is on the right side, and promotes better blood flow to the fetus, uterus, and kidneys. Enhancing maternal blood circulation can also increase the amount of nutrients that reach the placenta and the baby.

Conclusion

Switching to sleeping on your left side could offer numerous health benefits, from improved digestion and back pain relief to better heart health and reduced heartburn. It’s particularly beneficial for pregnant women, aiding in the safety and efficiency of nutrient flow to the baby. As with any new habit, it may take some time to adjust, but the potential health benefits make it worth trying. If you’re considering changing your sleeping position, it may also be helpful to consult with a healthcare provider, especially if you have existing health concerns.

Combining honey with onions might sound unusual, but this mixture has been used as a traditional remedy for various ailments for centuries. Both ingredients are powerhouses of nutritional benefits and when combined, they can offer a unique set of health advantages. Here’s what happens to your body when you consume honey mixed with onions:

1. Enhanced Respiratory Health

One of the most well-known benefits of honey and onion is their ability to alleviate respiratory conditions. Onions contain quercetin, an antioxidant that helps reduce inflammation and acts as an antihistamine. This can be particularly beneficial for those suffering from allergies, asthma, or colds. Honey acts as a natural cough suppressant and can soothe sore throats. Together, they help in reducing congestion and calming respiratory ailments.

2. Boosted Immune System

Both honey and onions have strong antibacterial properties. Honey is known for its effectiveness against various strains of bacteria, and onions are rich in vitamin C, which is vital for the immune system. Consuming honey and onions can help fortify your body’s natural defenses against infections.

3. Improved Digestive Health

Onions are rich in prebiotics, which feed beneficial gut bacteria and improve overall gut health. Honey, being a natural prebiotic, also supports the growth of good bacteria in the digestive tract. This combination can help regulate digestion and prevent gastrointestinal disorders.

4. Anti-inflammatory Effects

Both honey and onions have anti-inflammatory properties. Chronic inflammation is associated with many diseases, including heart disease, diabetes, arthritis, and Alzheimer’s disease. Regular consumption of honey and onions can reduce inflammation markers in the body, thereby potentially reducing the risk of these conditions.

5. Antioxidant Properties

Honey and onions are both excellent sources of antioxidants. These substances help combat oxidative stress in the body, which is linked to aging and many chronic diseases. By neutralizing free radicals, the antioxidants in honey and onions can help protect your body’s cells and enhance overall health.

How to Use Honey and Onion Together

  • Honey and Onion Syrup for Cough: Chop an onion and cover it with honey in a bowl. Let it sit overnight. The onion will release its juices, mixing with the honey to form a syrup. Take a spoonful of this syrup to relieve coughs or sore throats.
  • Daily Health Tonic: Finely chop an onion and mix it with a tablespoon of honey. Consume this mixture once a day as a preventive measure to boost immune function and promote respiratory health.

Conclusion

Eating honey mixed with onions offers multiple health benefits, from boosting the immune system and improving respiratory health to providing anti-inflammatory and antioxidant effects. While it may not be the most common or appetizing combination, its potential health benefits make it worth considering as a supplement to a healthy diet. As always, it’s wise to consult with a healthcare provider before starting any new health regimen, especially if you have underlying health conditions or allergies.

Are you searching for a simple and natural way to maintain youthful and glowing skin? Look no further! Bay leaf and cornstarch, two common kitchen staples, have surprising skincare benefits that can leave your skin feeling soft, smooth, and refreshed. Let’s explore how this powerful duo can revolutionize your skincare routine, regardless of your age.

Why Bay Leaf and Cornstarch?

Bay Leaf: Known for its natural antioxidants and soothing properties, bay leaf can help reduce redness and improve skin tone. It also possesses mild antibacterial benefits, supporting clear and healthy skin.

Cornstarch: A gentle and natural ingredient, cornstarch absorbs excess oil, leaving your skin with a silky-smooth finish. It’s hailed for its calming properties, making it an excellent choice for soothing sensitive or irritated skin.

How to Make the Bay Leaf and Cornstarch Mask

Ingredients:

  • 3–4 bay leaves
  • 1 tablespoon of cornstarch
  • 1 cup of water

Instructions:

Prepare the Bay Leaf Water

  1. Boil the cup of water and add the bay leaves. Allow them to simmer for approximately 10 minutes to extract their valuable nutrients.
  2. Remove the bay leaves and let the infused water cool down to a warm (not hot) temperature.

Mix the Mask

  1. In a bowl, combine the cooled bay leaf water with the cornstarch. Stir until achieving a smooth, paste-like consistency.

Apply to Your Face

  1. Wash your face with a gentle cleanser and pat it dry.
  2. Using clean fingers or a brush, apply the mask evenly to your face, while avoiding the delicate eye area.

Relax and Let It Work

  1. Leave the mask on for 15–20 minutes. You’ll feel it tightening as it dries, which is a promising sign!

Rinse Off

  1. Gently rinse off the mask with lukewarm water and pat your skin dry.

You’ll Notice the Benefits

With regular use, this mask can improve the texture of your skin, brighten its appearance, and provide a more youthful glow. Its natural ingredients are gentle yet effective, ensuring you a refreshed and radiant complexion.

Pro Tips

  • For optimal results, use this mask once a week.
  • Always utilize fresh bay leaves to maximize their beneficial properties.
  • If you have very sensitive skin, perform a patch test before applying the mask to your face.

Go ahead and give this natural remedy a try—experience the sensation of turning back the clock on your skin’s aging process!

Are cockroaches causing a ruckus in your home? Don’t fret! With these natural remedies, you can easily say goodbye to these pesky pests. Here are a couple of options you can try:

1. Dettol Solution

Dettol, known for its strong antiseptic properties, can also be lethal for cockroaches. Although it’s not specifically labeled for pest control, it can still be highly effective.

Preparation: Mix 1 part Dettol with 3 parts water in a spray bottle.

Application: Spray the solution directly on cockroaches or in areas where they frequently appear.

2. Boric Acid

Boric acid is another powerful tool in eliminating cockroaches from your home.

Preparation: Mix 50 ml of Dettol Liquid with boric acid.

Application: Apply the mixture in areas where cockroaches are commonly found, such as behind kitchen counters, in cupboards, or along baseboards.

It’s important to take extra precautions when using these remedies. Keep children and pets away from the treated areas until the solution dries up completely.

By following these natural pest control remedies, you can bid farewell to cockroach invasions and enjoy a pest-free environment in your home. Stay tuned for more helpful tips!