Category

Health & Wellness

Category

Discover the powerful health benefits of combining celery and beetroot in a nutritious juice blend. This combination is not just delicious but packed with vitamins, minerals, and antioxidants that promote overall wellness and help manage various health issues. Here’s why celery and beetroot juice is a secret they don’t want you to know about, and how you can make this health-boosting beverage at home.

Health Benefits of Celery and Beetroot Juice:

1. Promotes Heart Health:

  • Beetroot is renowned for its ability to help lower blood pressure thanks to its high levels of nitrate. These nitrates improve blood flow and reduce arterial stiffness.
  • Celery contains phthalides, which can help relax the artery walls and increase blood flow, further supporting cardiovascular health.

2. Enhances Athletic Performance:

  • The nitrates in beetroot convert to nitric oxide in the body, which can enhance oxygen delivery and endurance in athletes. Drinking beetroot and celery juice may help extend the time to exhaustion and improve athletic performance.

3. Detoxification and Cleansing:

  • Celery is a natural diuretic that helps remove toxins, salts, and waste from the body through increased urine production.
  • Beetroot supports liver detoxification processes and helps purify the blood.

4. Anti-Inflammatory Properties:

  • Both beetroot and celery are rich in antioxidants that help reduce inflammation in the body. This can be beneficial for people suffering from inflammatory conditions like arthritis.

5. Supports Digestive Health:

  • Celery provides a high amount of dietary fiber, which helps maintain a healthy digestive tract and prevent constipation.
  • Beetroot also contributes additional fiber and has been shown to promote healthy bowel function.

How to Make Celery and Beetroot Juice:

Ingredients:

  • 2 medium beetroots, peeled and washed
  • 3-4 stalks of celery, washed
  • 1 green apple (optional, for sweetness and added flavor)
  • 1/2 lemon, peeled (for added vitamin C and tangy flavor)
  • 1 inch of ginger (optional, for a spicy kick and digestive benefits)

Instructions:

  1. Prepare Ingredients: Roughly chop the beetroots, celery, apple, and ginger into chunks small enough to fit your juicer’s feed chute.
  2. Juicing: Start by juicing the harder vegetables first (beetroot and apple), then move on to the softer celery and finish with lemon and ginger for maximum juice yield.
  3. Mix Well: Once all the ingredients have been juiced, stir the mixture to ensure the flavors are well combined.
  4. Serve Fresh: Drink the juice immediately to benefit from all the nutrients before they degrade. For best results, consume on an empty stomach.

Additional Tips:

  • Consistency: For optimal health benefits, try incorporating this juice into your routine 2-3 times a week.
  • Organic Produce: Whenever possible, use organic vegetables to minimize exposure to pesticides and chemicals.
  • Hydration: Stay hydrated, especially when starting any detox regimen with diuretic ingredients like celery.

Celery and beetroot juice not only offers numerous health benefits but is also a simple way to boost your nutrient intake in a delicious form. This secret blend could be just what you need to elevate your health and vitality.


Unwanted facial hair can be bothersome, especially as we age. But did you know that you can use onion to help reduce and remove it? Onions, along with other natural ingredients, can weaken hair follicles over time, leading to thinner hair and potentially less hair growth. Best of all, it’s a simple and natural process that you can do at home. Let me show you how.

Why Onion Works for Hair Removal

Onions contain sulfur, which has a hair-weakening effect when applied over time. They also have antioxidants and other nutrients that nourish the skin and reduce inflammation. This makes onion an excellent natural alternative for gentle hair removal, without the need for harsh chemicals.

Onion Hair Removal Remedy

Ingredients

  • 1 small onion
  • 1 tablespoon of fresh lemon juice (for hair lightening and removal)
  • Optional: 1 tablespoon of gram flour (for exfoliation)

Instructions

  1. Prepare the Onion Paste: Peel the onion and chop it into small pieces. Blend the pieces into a smooth paste.
  2. Add Lemon Juice: Mix the onion paste with fresh lemon juice. Lemon helps lighten the hair and makes it easier to remove, while also acting as a natural astringent.
  3. Optional – Add Gram Flour: To enhance exfoliation, you can add a tablespoon of gram flour to the mixture. This will help create a paste that sticks well to the skin.
  4. Apply to the Face: Apply the paste to areas with unwanted hair, such as the upper lip, chin, or jawline. Make sure to spread it evenly.
  5. Let It Sit: Leave the mixture on your face for 15-20 minutes or until it dries.
  6. Massage and Remove: Gently rub in circular motions to help remove the dried paste. This motion also works to pull out finer hairs.
  7. Rinse Off: Wash your face with lukewarm water and pat dry. Follow with a light moisturizer, as lemon can be slightly drying.

Frequency

For best results, use this remedy 2-3 times a week. With consistent use, you may notice reduced hair growth in just a few weeks.

Important Tips

  • Patch Test First: Onions and lemon can be strong for sensitive skin. Before applying the mixture to your face, do a small patch test to make sure you don’t experience any irritation.
  • Avoid Sun Exposure: Lemon juice can make your skin more sensitive to sunlight. If you plan to go outside after using this remedy, always apply sunscreen to protect your skin.
  • Consistency is Key: Natural remedies take time to show results. Stick with it, and you may gradually notice a reduction in hair growth.

By using this natural onion-based remedy regularly, you can achieve softer, hair-free skin over time. It’s a gentle and effective alternative to harsh chemical hair removal products.


Have you ever tried mixing cloves with white vinegar for cleaning? If not, you might be missing out on a powerful, natural cleaning solution that can transform how you maintain your home. Here’s what happens when you combine these two simple ingredients and why the final result is so incredible.

Why Use Cloves and White Vinegar?

  • Cloves: This spice is not only aromatic but also has strong antimicrobial properties. It can help to disinfect and deodorize areas around your home, leaving behind a pleasantly spicy scent.
  • White Vinegar: Known for its cleaning prowess, white vinegar cuts through grease, removes soap scum, and breaks down grime. Its acidic nature makes it excellent for killing mold, bacteria, and viruses.

How to Prepare and Use This Mixture:

  1. Ingredients:
    • 1 cup of white vinegar
    • 1 tablespoon of whole cloves
  2. Preparation:
    • Combine the white vinegar and cloves in a glass jar.
    • Seal the jar and let it infuse for about 1-2 weeks in a cool, dark place. The longer it infuses, the stronger the scent and antimicrobial properties will be.
  3. Usage:
    • After the infusion period, strain the cloves from the vinegar and pour the vinegar into a spray bottle.
    • Use this clove-infused vinegar as a cleaning spray for surfaces in your kitchen, bathroom, or any area that needs a good disinfecting. It works particularly well on glass and mirrored surfaces, leaving a streak-free finish.

Benefits of Using Clove-Infused Vinegar:

  • Enhanced Cleaning Power: The combination of vinegar’s acidity and cloves’ antimicrobial properties boosts your cleaning regimen, making it more effective against germs and odors.
  • Natural and Non-Toxic: This mixture is a great alternative to commercial cleaners that may contain harmful chemicals. It’s safe for use around children and pets, provided they don’t ingest it.
  • Cost-Effective: Both ingredients are inexpensive and readily available, making this a budget-friendly cleaning option.
  • Pleasant Aroma: Unlike plain vinegar, which can have a pungent smell, the addition of cloves provides a warm, inviting fragrance to your cleaning solution.

Conclusion: Putting cloves in white vinegar not only enhances the cleaning capabilities of the vinegar but also turns it into a pleasant-smelling solution that can tackle germs and grime around your home. Whether you’re looking to step up your eco-friendly cleaning game or just want a homemade cleaner that smells great and works effectively, clove-infused vinegar might just be the incredible result you’re looking for. Give it a try and enjoy the benefits of natural cleaning!

Eating ginger every day can have several profound impacts on your health, thanks to its potent bioactive compounds and nutrients. Known primarily for its anti-inflammatory and antioxidant effects, ginger has been used in various forms of traditional medicine and is celebrated for its multiple health benefits. Here’s what happens to your body when you incorporate ginger into your daily diet:

1. Digestive Health Improvement

Ginger is famous for its ability to ease digestive issues. It helps stimulate saliva, bile, and gastric enzymes that aid in digestion, potentially reducing symptoms of indigestion and discomfort associated with bloating. Regular consumption can also help alleviate nausea and vomiting, especially morning sickness in pregnant women.

2. Anti-Inflammatory Effects

The bioactive substance in ginger known as gingerol is highly effective at reducing inflammation. It can be particularly beneficial for managing symptoms of inflammatory conditions like arthritis, offering relief from pain and swelling.

3. Enhanced Immune Response

Ginger has immune-boosting properties, which can enhance your body’s defenses against infections. Regular ginger consumption can help fight off common respiratory infections like the cold or flu.

4. Improved Cardiovascular Health

Ginger’s anti-inflammatory and antioxidant properties can help manage or lower the risk of cardiovascular diseases. It can reduce blood cholesterol levels and prevent blood clotting, which helps in lowering blood pressure and enhancing heart health.

5. Pain Relief

Due to its anti-inflammatory properties, ginger can act as a natural pain reliever. It’s often used to alleviate menstrual pain, headaches, and muscle soreness after exercise.

6. Antioxidant Effects

Ginger contains a wealth of antioxidants that prevent stress and damage to your body’s DNA. These can help fight chronic diseases and aging processes.

7. Blood Sugar Regulation

Some studies suggest that ginger can help stabilize blood sugar levels. This can be particularly advantageous for people with diabetes, as it helps manage symptoms and prevent complications.

8. Weight Management

Ginger may play a role in weight loss by increasing metabolism and fat burning while decreasing fat absorption and appetite. This can be a helpful addition to a weight loss regimen.

9. Lower Risk of Cancer

Research has suggested that the antioxidant properties of ginger can contribute to its anti-cancer properties. Gingerol, the main bioactive compound in ginger, could potentially help prevent various types of cancer.

10. Enhanced Brain Function

Ginger can help enhance brain function by improving reaction time and memory. Additionally, its anti-inflammatory and antioxidant actions can help prevent inflammatory responses that contribute to aging and cognitive decline.

Conclusion

Incorporating ginger into your daily diet can offer a range of health benefits, from improving digestive health to reducing the risk of chronic diseases. However, it’s important to consume it in moderation, as excessive intake can lead to gastrointestinal irritation in some people. Always consult with a healthcare provider to ensure it’s safe for you, especially if you have existing health conditions or are on medication.

4

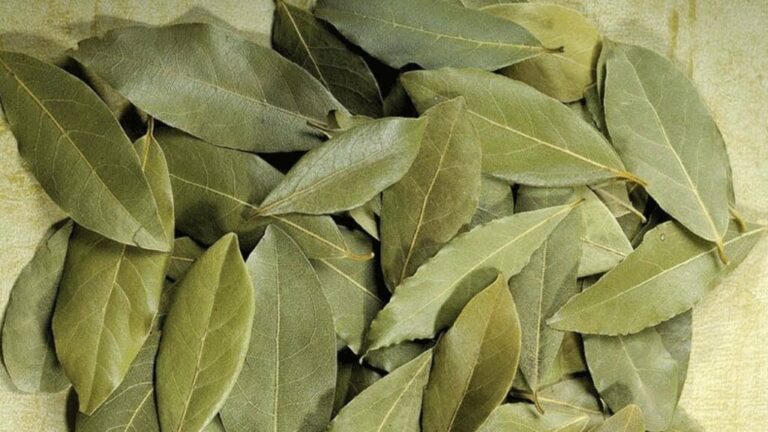
Burning bay leaves is an ancient practice with roots in different cultures, where it’s been used for various purposes, from religious ceremonies to natural home remedies. Here’s what happens when you burn a few bay leaves in your home:

Aroma and Air Purification

When you burn bay leaves, they release a distinct and pleasant fragrance due to the essential oils they contain, like cineol, pinene, and linalool. These compounds have a sharp, sweet scent that can freshen up the air in your home, masking odors and creating a more inviting atmosphere.

Stress Reduction and Calmness

The compounds released by burning bay leaves have been found to have mild sedative properties. Inhaling the smoke from burning bay leaves can help reduce stress and promote a sense of calm. The linalool in particular is known to lower the levels of stress hormones in the body, helping you feel more relaxed.

Improved Respiratory Health

The smoke from bay leaves has anti-inflammatory properties that can benefit respiratory health by opening up congested airways. Burning bay leaves can be particularly helpful during cold and flu season, as inhaling the vapors can alleviate symptoms like congestion and sinusitis.

Enhanced Focus and Fatigue Relief

The compounds in bay leaves can also help alleviate fatigue and boost mental clarity. The aroma of burning bay leaves might improve your focus and alertness, making it easier to concentrate on tasks at hand.

Insect Repellent

Bay leaves are a natural insect repellent, as many pests dislike their strong scent. Burning bay leaves can help keep away insects like flies, cockroaches, and moths, providing a chemical-free option for pest control in your home.

Conclusion

Burning bay leaves can be a simple yet effective way to enhance your home’s environment, promoting relaxation, respiratory health, and focus while also keeping pests at bay. Next time you’re looking to create a soothing atmosphere or need a natural air freshener, consider burning a few bay leaves and experience the benefits yourself.

Combining bay leaves and cloves creates a powerful and aromatic blend that can be used for various purposes, from culinary delights to home remedies. Here’s why this combination is so beneficial and how you can use it effectively:

Culinary Uses

Bay leaves and cloves are both aromatic spices that are commonly used in cooking. Together, they can add a rich, warm flavor to many dishes.

  • Spice Mix: Grind bay leaves and cloves together to make a spice mix that can be added to marinades, stews, soups, and sauces. It’s particularly good in meat dishes and adds depth to vegetarian recipes as well.
  • Tea: You can also steep both in hot water to make a fragrant herbal tea. This tea can be soothing and may offer digestive benefits.

Health Benefits

The combination of bay leaves and cloves isn’t just good for the taste buds; it also offers several health benefits.

  • Digestive Health: Both bay leaves and cloves stimulate digestion and can alleviate digestive issues such as bloating, gas, and indigestion.
  • Antimicrobial Properties: Cloves are known for their strong antimicrobial properties, and bay leaves have been used to reduce inflammation. Together, they can help fight infections and support the immune system.
  • Pain Relief: Clove oil is a well-known remedy for dental pain, and when combined with the anti-inflammatory properties of bay leaves, it can be used to relieve other types of pain as well.

Home Remedies

  • Air Freshener: Burn a mixture of dried bay leaves and cloves to create a natural air freshener. This not only makes your home smell great but can also help in reducing household bacteria and viruses in the air.
  • Insect Repellent: Both spices are effective natural insect repellents. Place sachets with dried bay leaves and cloves in closets, drawers, or any areas where pests are a problem.

Aromatherapy

  • Relaxation: The aromatic blend of bay leaves and cloves is excellent for aromatherapy. Burn them as incense or use them in an essential oil diffuser to help reduce stress and anxiety, promoting relaxation and a sense of well-being.

Conclusion

Mixing bay leaves and cloves together gives you a versatile blend that is beneficial for both your health and your home. Whether used in cooking, as a natural remedy, or simply for their pleasant aroma, this combination is sure to bring something special to your daily routine. Try it out, and you might just find yourself thanking this simple yet effective recipe!

Aloe vera is not just any ordinary household plant; it is a skin care superstar packed with incredible benefits. This miraculous plant is known for its soothing, hydrating, and healing properties, making it a wonderful solution for various skin concerns. If you are between the ages of 45 and 65, here are 7 reasons why you should consider incorporating aloe vera into your skin care routine:

1. Soothes Sunburn

Aloe vera is renowned for its soothing properties. The gel from the plant forms a protective layer that helps retain moisture and promotes healing. It is particularly effective at calming sunburnt skin due to its anti-inflammatory properties.

2. Moisturizes Skin

Unlike many conventional moisturizers that can leave a greasy film on the skin, aloe vera gel is light and absorbs quickly, making it ideal for oily skin. It can also be used as an aftershave treatment, hydrating and healing small cuts and nicks.

3. Accelerates Wound Healing

Aloe vera is widely used as a treatment for sores and burns because of its ability to accelerate wound healing. Its antibacterial and anti-inflammatory properties can speed up the skin repair process when applied to minor cuts and abrasions.

4. Fights Aging

Aloe vera contains a wealth of antioxidants including beta-carotene, vitamin C, and E. These antioxidants help improve the skin’s natural firmness, keep it hydrated, and reduce the visibility of wrinkles and fine lines.

5. Reduces Acne and Infection

The gel’s anti-inflammatory properties help reduce skin inflammations, blistering, and itchiness. It also aids in the prevention of acne through gentle cleansing and antimicrobial properties. Aloe vera can reduce the severity of acne and prevent future outbreaks.

6. Lightens Blemishes on the Face

Aloe vera has remarkable skin healing properties that can reduce scar formation and lighten blemishes and dark spots. This is partly due to aloin, a component found in aloe vera, which has skin lightening properties.

7. Nourishes and Cures the Skin

Aloe vera is packed with over 75 potentially active constituents, including vitamins, enzymes, minerals, sugars, lignin, saponins, salicylic acids, and amino acids. These components nourish the skin and help with a range of skin conditions, including dry skin and severe flaking.

How to Use Aloe Vera Gel on Your Face and Skin:

  • Direct Application: Apply fresh aloe vera gel directly to your skin and leave it on as a mask for about 30 minutes before rinsing.
  • As a Moisturizer: Use it as a daily moisturizer by applying a thin layer to your face and neck after washing.
  • For Acne: Apply a small amount of aloe vera gel directly onto your acne spots and leave it on overnight.

In conclusion, aloe vera is a natural and effective solution for many skin conditions. Whether you are dealing with sunburn, acne, or signs of aging, incorporating aloe vera into your skincare routine can work wonders. For best results, use pure aloe vera gel directly from the plant or choose a trusted over-the-counter brand that offers pure aloe vera without any added ingredients. So go ahead, unlock the benefits of aloe vera and give your skin the care it deserves!

Are you looking for a simple and affordable way to improve your skin? Look no further than baking soda! This versatile ingredient can be used in various skincare routines to help cleanse and enhance your skin’s texture. Let’s explore three effective methods to incorporate baking soda into your facial care regimen.

Ingredients:

  • 2 teaspoons of baking soda
  • Water

Instructions:

  1. Make the Paste: In a small bowl, mix the baking soda with just enough water to form a thick paste.
  2. Apply Gently: Using your fingertips, apply the paste to your face in a circular motion, avoiding the eye area to prevent irritation.
  3. Rinse Thoroughly: After massaging for about one minute, rinse your face with warm water, followed by a splash of cold water to close the pores.
  4. Moisturize: Pat your skin dry with a clean towel and apply a moisturizer suitable for your skin type.

This method is excellent for removing dead skin cells, leaving your face feeling smooth and refreshed.

Ingredients:

  • 1 tablespoon of baking soda
  • 1 teaspoon of fresh lemon juice
  • Water (if needed)

Instructions:

  1. Prepare the Mask: Mix the baking soda and lemon juice. If the mixture is too thick, add a few drops of water.
  2. Apply to Face: Using a brush or your fingers, apply the mask evenly across your face, avoiding sensitive areas like the eyes and mouth.
  3. Wait and Wash: Let the mask sit for about 5-10 minutes. Be careful not to leave it on for too long, as lemon can be drying and irritating.
  4. Rinse Off: Rinse with lukewarm water, then apply a moisturizer.

This mask helps brighten the skin and may assist in fading dark spots and acne scars due to the bleaching properties of lemon.

Ingredients:

  • 1 tablespoon of baking soda
  • 1 tablespoon of coconut oil

Instructions:

  1. Combine Ingredients: Mix the baking soda with coconut oil to form a paste.
  2. Apply with Care: Gently massage the mixture onto your face in circular motions. The coconut oil moisturizes while the baking soda gently exfoliates.
  3. Rinse Off: After scrubbing for a couple of minutes, rinse with warm water and pat dry.
  4. Hydrate: Follow up with a light moisturizer or let the coconut oil continue to hydrate your skin if your skin type allows.

This scrub is particularly beneficial for dry skin types, as it exfoliates without stripping away moisture.

  • Always do a patch test on your arm before applying baking soda to your face, especially if you have sensitive skin.
  • Limit the use of baking soda on your skin to once or twice a week. Overuse can disrupt the skin’s pH balance, leading to dryness and irritation.
  • If you experience any redness, burning, or irritation, discontinue use immediately and consult a dermatologist if symptoms persist.

By incorporating baking soda into your skincare routine using these methods, you can enjoy exfoliated, bright, and moisturized skin with simple and cost-effective home remedies. So why not give it a try and see the amazing results for yourself!

A 90-year-old grandmother has revealed her simple yet effective skincare remedy using tomatoes and red onions. She claims that this natural facial treatment has helped her maintain youthful and radiant skin, making her look decades younger. Let’s explore the power of this homemade remedy and how it can benefit you too!

Why Tomato and Red Onion?

Tomatoes

Tomatoes are packed with lycopene, a powerful antioxidant that protects the skin from environmental damage, which can cause premature aging. Additionally, they contain vitamin C, a vital nutrient for collagen production and maintaining skin elasticity.

Red Onions

Red onions are known for their skin-lightening properties, thanks to their high vitamin C content. They can reduce pigmentation and even out skin tone. These onions also have anti-inflammatory properties that can help minimize redness and swelling.

How to Make the Tomato and Red Onion Facial

Ingredients:

  • 1 ripe tomato
  • 1 small red onion

Instructions:

  1. Prepare the Ingredients:
    • Finely grate the red onion to extract its juice.
    • Puree the tomato in a blender until it becomes smooth.
  2. Mix the Facial Mask:
    • Combine equal parts of tomato puree and red onion juice. Stir until the mixture forms a consistent paste.
  3. Apply the Mask:
    • Start by washing your face with a mild cleanser and gently patting it dry.
    • Using your fingers or a clean brush, apply the tomato and red onion mask evenly over your face, avoiding the eye area.
    • Allow the mask to sit on your face for about 15-20 minutes.
  4. Rinse Off:
    • Rinse the mask off with lukewarm water, and then splash your face with cold water to help close the pores.
    • Gently pat your skin dry with a clean towel.
  5. Moisturize:
    • Finish the process by applying a moisturizer suitable for your skin type. This will help hydrate and protect your skin.

Best Practices and Frequency

Test for Sensitivity: Before applying the mask to your entire face, it’s wise to do a patch test on a small area of skin to ensure you don’t have any adverse reactions.

Frequency of Use: For best results, use the tomato and red onion facial mask 2-3 times a week. Consistent use will lead to visible improvements in your skin tone and texture.

Sun Protection: Remember to always apply sunscreen during the day, as this mask can make your skin more sensitive to UV rays.

Additional Tips

  • For an extra soothing effect, you can add a teaspoon of honey to the mask. Honey has moisturizing and antibacterial properties that can enhance the benefits of the tomato and red onion facial.
  • If you experience any irritation or discomfort while using the mask, rinse it off immediately and consult a dermatologist if needed.

This age-defying facial mask, recommended by a 90-year-old grandmother, harnesses the natural goodness of tomatoes and red onions to help you achieve younger-looking skin in just a few days. Give it a try and embrace the radiant glow!

If you’re looking for a natural way to boost your respiratory health and fend off coughs, ginger and lemon could be your go-to remedies. This dynamic duo has been used for centuries to enhance immune function, clear congestion, and promote overall wellness. Here’s an easy recipe that harnesses the power of both ginger and lemon to help clear your lungs and stop coughing, especially useful during the cold and flu season.

Ingredients

  • Fresh Ginger Root: 1 large piece (about 100 grams), peeled and sliced
  • Lemon: 2 large, organic, thoroughly washed
  • Honey: 2 tablespoons (optional, for additional antibacterial properties and to sweeten)
  • Water: 4 cups

Instructions

  1. Prepare the Ingredients:
    • Slice the ginger into thin strips. This increases the surface area and allows more of its juices and active ingredients to seep into the water.
    • Cut the lemons into slices. You can squeeze some of the slices to release the juice and leave others whole for a milder flavor.
  2. Boil the Ginger:
    • In a large pot, bring the water to a boil. Once boiling, add the sliced ginger.
    • Reduce the heat and let it simmer for about 20-30 minutes. The longer you let the ginger simmer, the stronger and more potent the infusion will be.
  3. Add Lemon and Honey:
    • After simmering, turn off the heat. Add the lemon slices and honey to the pot and stir. The residual heat will gently release the lemon’s essential oils and melt the honey into the concoction.
  4. Steep and Strain:
    • Cover the pot and let the mixture steep for about 10 minutes. This allows the flavors to meld together and the therapeutic properties to intensify.
    • Strain the mixture to remove the solids. You can press the ginger and lemon slices with a spoon against the strainer to extract as much liquid as possible.
  5. Serve or Store:
    • Serve the drink warm to help soothe the throat and clear the nasal passages.
    • Any leftover mixture can be stored in the refrigerator for up to a week. Reheat gently as needed.

Benefits

  • Ginger: Known for its anti-inflammatory properties, ginger helps reduce irritation in the respiratory tract. It’s also an expectorant, helping to break up and expel mucus.
  • Lemon: High in vitamin C and antioxidants, lemon boosts the immune system and decreases the severity and duration of colds.
  • Honey: Offers antimicrobial properties which can soothe sore throats and is often used to treat coughs effectively.

Usage

  • Drink this ginger-lemon brew at the first sign of a cough or respiratory discomfort. It can also be used as a preventive measure during the flu season or when you feel you need a respiratory and immune boost.

This simple, natural remedy is a fantastic way to maintain lung health, prevent respiratory infections, and soothe a persistent cough. Enjoy it regularly to harness its full benefits!