Category

Health & Wellness

Category

Varicose veins can be unsightly and uncomfortable, often leading people to seek various remedies. One natural approach that has gained attention is the use of lemon, attributed to its citric acid and vitamin C content. Here’s how you can use lemon daily to help manage and potentially reduce the appearance of varicose veins:

How Lemons Can Help

Vitamin C and Bioflavonoids: Lemons are rich in vitamin C and bioflavonoids, which can strengthen the walls of blood vessels, potentially reducing the bulging and visibility of varicose veins.

Anti-inflammatory Properties: The anti-inflammatory properties of lemon can help reduce swelling and discomfort associated with varicose veins.

Daily Routine with Lemon for Varicose Veins

  1. Topical Application:
    • Lemon Massage: Before bed, gently rub a slice of lemon over the varicose veins using circular motions. The acids in the lemon can act as a mild irritant to the skin, so it’s important to test on a small area first. After massaging for a few minutes, rinse the area with water.
    • Lemon Essential Oil: If direct lemon application is too harsh, consider using lemon essential oil diluted with a carrier oil like coconut or olive oil, and massage the affected area. The essential oil is less abrasive but still carries the benefits of lemon.
  2. Internal Consumption:
    • Lemon Water: Start your day with a glass of warm lemon water. This not only hydrates but also provides vitamin C to help strengthen vascular health. Squeeze half a lemon into a glass of warm water and drink it on an empty stomach.
    • Incorporate in Diet: Add lemon zest and juice to your meals, be it salads, teas, or fish dishes. This increases your overall intake of vitamin C and bioflavonoids.

Considerations and Cautions

  • Skin Sensitivity: Lemon juice is acidic and can irritate the skin, especially if you have sensitive skin. Always dilute it if you’re applying it directly and never apply it to open wounds or eczema.
  • Sun Sensitivity: Applying lemon juice can make your skin more sensitive to sunlight, increasing the risk of sunburn. Avoid sun exposure after applying lemon juice to the skin.
  • Medical Advice: While lemon can be a helpful natural remedy, it’s important to consult with a healthcare provider about the best treatment plan for varicose veins, especially if they cause discomfort or complications.

Conclusion

While lemons offer health benefits, including potentially improving the appearance of varicose veins through their vitamin C and anti-inflammatory properties, they are not a guaranteed or instant cure. Combining lemon treatments with other lifestyle changes like regular exercise, maintaining a healthy weight, and wearing compression stockings can provide more comprehensive results in managing varicose veins.

Onions are celebrated not only for their culinary versatility but also for their medicinal properties. Rich in flavonoids and sulfur compounds, onions have been used traditionally to enhance circulation and reduce inflammation, making them an excellent choice for natural varicose vein treatments. Here are two potent onion-based recipes designed to help reduce the appearance of varicose veins:

Recipe 1: Onion and Apple Cider Vinegar Compress

Ingredients:

  • 1 medium onion, finely chopped
  • 1/2 cup apple cider vinegar

Instructions:

  1. Prepare the Mixture: Combine finely chopped onion with apple cider vinegar in a bowl. Let it sit for a few hours to allow the onion to infuse the vinegar with its juices.
  2. Apply the Compress: Soak a clean cloth in the onion and vinegar mixture, then apply it to the affected areas. Wrap the area with a plastic wrap to keep the compress in place and enhance absorption.
  3. Duration: Leave the compress on for about 30 minutes to an hour.
  4. Frequency: Repeat this treatment daily for best results. Consistent use over time can help diminish the visibility of varicose veins.

Recipe 2: Onion Paste Wrap

Ingredients:

  • 2 onions, blended into a paste
  • A few drops of lavender or rosemary essential oil (optional for fragrance and additional anti-inflammatory effect)

Instructions:

  1. Make Onion Paste: Use a food processor or blender to turn the onions into a smooth paste. If desired, add a few drops of essential oil for extra benefits and a more pleasant scent.
  2. Apply the Paste: Spread the onion paste directly on the varicose veins and cover with a clean cloth or bandage.
  3. Leave It On: Allow the paste to work on your skin for about an hour. The natural compounds in the onion will penetrate the skin, helping to reduce swelling and improve circulation.
  4. Wash Off: Remove the cloth or bandage and wash the area with cool water.
  5. Repeat: Use this wrap every day. Regular application can progressively reduce the prominence of varicose veins.

Additional Tips and Precautions

  • Skin Sensitivity Test: Before using onion on your skin, especially if mixed with other potent ingredients like apple cider vinegar or essential oils, perform a patch test to ensure you don’t have an adverse reaction.
  • Sun Sensitivity: Applying onion to the skin can increase sensitivity to sunlight. Avoid sun exposure immediately after using these treatments to prevent skin irritation.
  • Consultation with Health Professionals: If you have severe varicose veins or experience pain and significant discomfort, it is essential to consult with a healthcare provider for appropriate treatments.

Conclusion

While no home remedy can guarantee the complete eradication of varicose veins instantly, regular use of these onion-based recipes may gradually improve their appearance and alleviate discomfort. Combined with a healthy lifestyle, including proper diet and exercise, these natural remedies can help you manage varicose veins more effectively.

Collagen is crucial for maintaining skin elasticity and reducing the appearance of wrinkles. Here are three top natural recipes that can help stimulate collagen production and improve skin texture, especially beneficial even if you’re around 70 years old.

1. Aloe Vera and Vitamin E Mask

Ingredients:

  • 2 tablespoons of fresh aloe vera gel
  • 1 capsule of Vitamin E

Instructions:

  1. Extract Aloe Vera Gel: If you’re using fresh aloe vera, slice a leaf from the plant, peel off the outer layer, and scoop out the gel.
  2. Combine Ingredients: Mix the aloe vera gel with the oil from one Vitamin E capsule in a bowl.
  3. Apply: Apply this mixture to your face, focusing on areas with wrinkles. Aloe vera hydrates the skin while Vitamin E’s antioxidant properties help repair and protect skin cells.
  4. Duration: Leave the mask on for about 20-30 minutes.
  5. Rinse Off: Wash off with lukewarm water and pat dry.
  6. Frequency: Use this mask 2-3 times a week for best results.

2. Avocado and Honey Mask

Ingredients:

  • 1 ripe avocado
  • 1 tablespoon of raw honey

Instructions:

  1. Prepare Avocado: Mash the avocado in a bowl until it’s smooth.
  2. Mix: Add the raw honey to the mashed avocado and mix well. The fats in avocado are excellent for moisturizing the skin, and honey is a natural humectant that attracts moisture.
  3. Apply: Spread the mask evenly over your face and neck.
  4. Duration: Leave it on for about 20 minutes.
  5. Rinse Off: Remove with warm water, then splash with cold water to close the pores.
  6. Frequency: Apply this mask once a week to nourish the skin and help stimulate collagen production.

3. Banana and Yogurt Mask

Ingredients:

  • 1 ripe banana
  • 2 tablespoons of plain yogurt (Greek yogurt for extra protein)
  • A few drops of rosewater (optional for added fragrance and soothing properties)

Instructions:

  1. Prepare Banana: Mash the banana thoroughly until there are no lumps.
  2. Combine Ingredients: Mix the mashed banana with yogurt and rosewater until you achieve a smooth paste. Bananas contain vitamins A, B, and E, which are potent skin-softening agents that help counteract wrinkles.
  3. Apply: Cover your face evenly with the mixture, concentrating more on the wrinkled areas.
  4. Duration: Keep the mask on for 15-20 minutes.
  5. Rinse Off: Wash your face with lukewarm water and end with a splash of cold water.
  6. Frequency: Use this mask twice a week for effective results.

Additional Tips

  • Skin Care Routine: Incorporate these masks into a consistent skincare routine that includes gentle cleansing and adequate hydration.
  • Sun Protection: Always apply sunscreen during the day, as UV exposure can break down collagen and cause further wrinkling.
  • Healthy Diet: Support your skin health by maintaining a diet rich in antioxidants and omega-3 fatty acids, which can help protect and rejuvenate the skin.

These natural remedies can enhance your skin’s appearance by boosting hydration and stimulating collagen production, making them a valuable addition to your skincare regimen, especially as you mature.

Prunes and lemons are powerful in their health benefits, particularly for heart health. Prunes are rich in fiber, potassium, and antioxidants, which help manage cholesterol levels and improve cardiovascular health. Lemons are loaded with vitamin C and flavonoids, which can strengthen blood vessels and reduce the risk of stroke and heart attack. Combining these two creates not only a heart-healthy dessert but one that is delicious and simple to make, all without adding sugar. Here’s how to prepare it:

Ingredients:

  • 1 cup of pitted prunes
  • Juice of 1 large lemon
  • Optional: zest of the lemon for added flavor and nutrients

Instructions:

Prune and Lemon Puree

  1. Soak the Prunes: Place the prunes in a bowl and cover them with warm water. Let them soak for about an hour until they become soft and plump. This makes them easier to blend and increases their sweetness naturally.
  2. Blend Prunes and Lemon: Drain the prunes and place them in a blender. Add the fresh lemon juice (and zest, if using) to the prunes.
  3. Puree the Mixture: Blend the ingredients until smooth. If the mixture is too thick, you can add a little bit of water to achieve the desired consistency.
  4. Chill and Serve: Transfer the puree to a serving dish and chill in the refrigerator for at least an hour. This dessert can be enjoyed on its own or topped with a sprinkle of nuts or seeds for added texture.

Prune and Lemon Balls

  1. Prepare Ingredients: After soaking the prunes as described above, drain them but do not blend yet.
  2. Chop Prunes: Chop the prunes into small pieces and place them in a mixing bowl.
  3. Add Lemon and Form Balls: Mix lemon juice (and zest) into the chopped prunes. Use your hands to mix well and then form small balls from the mixture.
  4. Refrigerate: Place the prune and lemon balls on a tray lined with parchment paper and refrigerate until they are firm, about 2-3 hours.
  5. Roll in Coconut or Nuts (Optional): For added flavor and crunch, roll the balls in finely chopped nuts or coconut flakes before refrigerating.

Benefits:

  • Heart Health: Both prunes and lemons contribute to lowering blood pressure and cholesterol, two major risk factors for heart disease and stroke.
  • Digestive Health: Prunes are particularly known for their ability to aid digestion and prevent constipation, thanks to their high fiber content.
  • Antioxidant Power: The antioxidants in prunes and the vitamin C in lemons help fight free radicals, reducing oxidative stress and inflammation in the body.

Tips:

  • Consistency in Consumption: For lasting health benefits, incorporate this dessert into your regular diet.
  • Variety and Balance: While this dessert is healthy, overall diet variety and balance are crucial for preventing heart disease and strokes.

This simple, no-sugar-added dessert not only satisfies sweet cravings but also packs a nutritious punch, supporting heart health and overall wellness. Enjoy this delightful treat knowing you’re doing something good for your body!

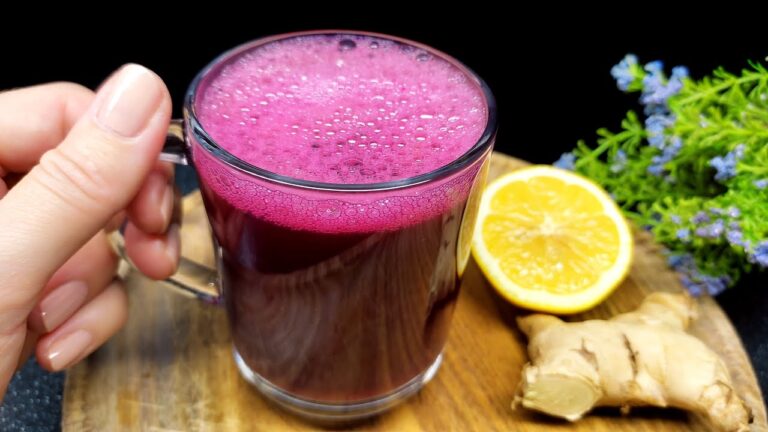
Looking to shed some extra weight? Look no further than the powerful combination of lemon and ginger. These two ingredients are known for their fat-burning and metabolism-boosting properties, making them an effective natural remedy for weight loss. Let’s explore how you can prepare and use this potent belly fat burner.

  • Lemon: Packed with vitamin C and antioxidants, lemons help detoxify the body, increase metabolism, and promote fat loss. They also act as a natural diuretic, reducing water retention and bloating.
  • Ginger: Famous for its ability to boost metabolism, improve digestion, and curb appetite, ginger is a fantastic ally in weight loss. Its thermogenic properties help the body burn fat more efficiently.

Ingredients:

  • 1 large lemon
  • 1-inch piece of fresh ginger root
  • 2 cups of water
  • 1 teaspoon of honey (optional, for taste)
  • A pinch of cayenne pepper (optional, for an extra metabolism boost)

Instructions:

To prepare the lemon and ginger drink:

  1. Wash the lemon thoroughly and cut it in half. Squeeze the juice from both halves and set it aside.
  2. Peel the ginger root and thinly slice it or grate it to release more of its juices.

To make the ginger infusion:

  1. In a small pot, bring 2 cups of water to a boil. Once boiling, add the sliced or grated ginger.
  2. Reduce the heat and let the ginger simmer in the water for about 10 minutes. This allows the beneficial compounds in ginger to infuse into the water.

To complete the drink:

  1. After simmering, remove the pot from heat and let it cool slightly. Strain the ginger water into a cup or pitcher.
  2. Add the freshly squeezed lemon juice to the ginger water and stir well.
  3. For added taste, you can include a teaspoon of honey or a pinch of cayenne pepper. Stir until everything is well combined.

To consume the drink:

Drink a cup of this lemon and ginger concoction twice a day. Start your morning with it on an empty stomach, and have another cup before dinner in the evening.

This lemon and ginger drink works in several ways to promote weight loss:

  • Boosts Metabolism: The combination of ginger and lemon stimulates your metabolism, helping your body burn calories more effectively.
  • Promotes Fat Loss: Both lemon and ginger have thermogenic properties that increase body heat and aid in burning fat, especially around the belly area.
  • Reduces Appetite: Ginger is known for its appetite-suppressing effects, helping you consume fewer calories. Lemon also stabilizes blood sugar levels, curbing cravings.
  • Aids Digestion: This drink improves digestion, reduces bloating, and promotes a flatter and more toned stomach.

To get the most out of this lemon and ginger drink, follow these tips:

  • Consistency Is Key: Drink this mixture consistently, twice a day, for at least two weeks to see optimal results.
  • Combine with a Balanced Diet: Pair this drink with a diet rich in whole foods, lean proteins, and vegetables for maximum effectiveness.
  • Stay Hydrated: Drinking plenty of water throughout the day enhances the detoxifying effects of the drink and helps flush out toxins from your body.
  • Limit Processed Foods: Avoid sugary and processed foods as much as possible, as they can counteract the drink’s fat-burning effects.

While this drink is generally safe, some individuals may experience mild side effects:

  • Gastric Sensitivity: The acidity of lemon and the spiciness of ginger may cause some gastric discomfort. If this occurs, consider reducing the amount of ginger or diluting the drink with more water.
  • Tooth Enamel: Lemon juice can gradually erode tooth enamel due to its acidity. To protect your teeth, use a straw when drinking this mixture and rinse your mouth with plain water afterward.

The lemon and ginger drink is an excellent natural remedy for burning belly fat and losing weight. By incorporating it into your daily routine, you can boost your metabolism, enhance fat burning, and achieve noticeable results in just two weeks. Remember, for the best outcomes, combine this powerful drink with a healthy diet and lifestyle. Give it a try, and you may be pleasantly surprised at how quickly those extra kilos disappear!

Apple cider vinegar (ACV) and baking soda are two popular household items often touted for their health benefits. Together, they are sometimes recommended as a natural remedy for various ailments, from digestion issues to skin care. But what’s the truth about mixing these two? Is it healthy? Let’s delve into the details.

Understanding Apple Cider Vinegar and Baking Soda

Apple Cider Vinegar: ACV is made from fermented apple juice and is praised for its acetic acid content, which is believed to have several health benefits, including antimicrobial and antioxidant effects.

Baking Soda: Also known as sodium bicarbonate, baking soda is a base commonly used in baking and for neutralizing acids. It’s also used as a home remedy for acid reflux and as a mild disinfectant.

The Combination

When combined, apple cider vinegar and baking soda react chemically, neutralizing each other’s pH. This mixture results in a fizzing reaction, producing carbon dioxide. The theory behind consuming this mixture is that it can help balance the body’s pH, aid digestion, and detoxify the system.

Potential Benefits

  1. Digestive Aid: Some proponents believe that the combination can help balance stomach acid and alleviate symptoms like heartburn and indigestion.
  2. Detoxification: The mixture is sometimes used in detox regimens, with claims that it helps flush toxins from the body and improves liver function.
  3. pH Balance: It’s thought that this mixture can help maintain a healthy alkaline pH level, which some alternative health practitioners believe is important for fighting off diseases.

Health Considerations and Risks

While there are anecdotal reports of health benefits, scientific evidence supporting the health claims of drinking apple cider vinegar and baking soda together is limited. Moreover, there are several risks and considerations to keep in mind:

  • Tooth Enamel Erosion: Both ACV and baking soda are abrasive and acidic, which can damage tooth enamel if used frequently.
  • Gastrointestinal Issues: Consuming this mixture might lead to discomfort, including bloating and gas, due to the release of carbon dioxide.
  • Electrolyte Imbalance: Excessive consumption of baking soda can lead to electrolyte and acid/base imbalances, particularly in people with renal or cardiovascular diseases.

Recommendations

If you’re considering trying apple cider vinegar and baking soda for health reasons, it’s crucial to approach this remedy with caution:

  • Consult with a Healthcare Provider: Especially if you have underlying health conditions or take medications.
  • Moderation is Key: If you choose to try this remedy, use it sparingly and not as a daily supplement.
  • Watch for Adverse Reactions: Be aware of any negative symptoms like stomach pain, nausea, or dental sensitivity.

Conclusion

The combination of apple cider vinegar and baking soda might offer some health benefits, but these are not well-supported by scientific research. As with any home remedy, it’s important to use it wisely and consider professional medical advice, especially if you have health concerns or conditions. While natural remedies can complement a healthy lifestyle, they should not replace evidence-based medical treatments.

Baking soda, or sodium bicarbonate, is a common household item with a variety of uses, ranging from baking to cleaning and even medical applications. While it is praised for its versatility and effectiveness, it’s important to also consider the potential dangers associated with its use, especially when ingested or used for health purposes.

Benefits of Baking Soda

  1. Digestive Aid: Baking soda is well-known for its ability to neutralize stomach acid, making it an effective remedy for heartburn and indigestion. A small amount dissolved in water can provide quick relief from stomach discomfort.
  2. Oral Health: It’s commonly used as a homemade toothpaste or mouthwash. Baking soda helps remove plaque and can whiten teeth. Its mild abrasive properties help scrub away surface stains on teeth.
  3. Skin Care: As a mild antiseptic, baking soda can help treat mild skin irritations and insect bites. It’s also used in homemade deodorants and as a body scrub to exfoliate skin gently.
  4. Cleaning Agent: Beyond health uses, baking soda is a powerful cleaning tool. It can help remove tough stains, neutralize odors, and clean difficult areas like ovens and tiles.
  5. Exercise Enhancer: Some athletes use baking soda as a supplement to enhance performance, as it can help buffer lactic acid buildup in muscles during intense exercise.

Dangers of Baking Soda

  1. Electrolyte Imbalance and Acid/Base Changes: When consumed inappropriately or in large amounts, baking soda can disturb electrolyte and acid-base balance in the body. This can lead to serious conditions such as metabolic alkalosis, hypokalemia, or hypernatremia.
  2. Stomach Rupture: Consuming baking soda in large doses or after a large meal can lead to the production of excessive stomach gas. This has, in rare cases, resulted in stomach rupture due to the rapid release of gas.
  3. Drug Interactions: Baking soda can interact with various medications, affecting how they are absorbed and metabolized by your body. This includes prescription drugs, over-the-counter medications, and herbal supplements.
  4. Tooth Enamel Erosion: While it can whiten teeth, excessive use of baking soda can erode tooth enamel due to its abrasive nature.
  5. Skin Irritation: Some people may find that baking soda irritates their skin, especially when used undiluted or in large quantities.

Recommendations

  • Consult with a Healthcare Provider: If you plan to use baking soda as a treatment, especially if taking other medications or if you have health concerns.
  • Use in Moderation: Whether for health, beauty, or cleaning, use baking soda sparingly and appropriately to avoid adverse effects.
  • Be Aware of Dosage: Be cautious with the amount used, particularly if ingesting it for health reasons. Small amounts typically suffice.

Conclusion

Baking soda is a useful and multifunctional substance, but it comes with potential risks that should not be overlooked. Understanding both the benefits and the dangers can help you use baking soda safely and effectively. Whether you’re using it in your baking recipes, as a home remedy, or as a cleaning agent, respecting its powerful properties is crucial to preventing harm and maximizing benefits.

Skin tags and warts are common skin issues that, while generally harmless, can be unsightly and bothersome. Removing them overnight might sound appealing, but it’s important to approach this with safe and effective methods. Here’s a guide on how to do it responsibly and effectively.

Understanding Skin Tags and Warts

Skin Tags: These are small, soft, skin-colored growths that hang off the skin and are typically found on the neck, armpits, under the breasts, or around the groin. They are benign and painless.

Warts: These are usually harder, rougher, and more grainy in texture than skin tags and can appear anywhere on the body. They are caused by viruses in the human papillomavirus (HPV) family and can spread through direct contact.

Safe At-Home Methods

For overnight removal, there are no guaranteed safe methods because most treatments take time. However, some treatments can start to work quickly, and you might see significant improvement by morning.

  1. Apple Cider Vinegar (ACV)
    • How to Use: Soak a cotton ball in apple cider vinegar, place it on the wart or skin tag, and secure it with a bandage overnight. ACV is acidic and can help break down the tissue of skin tags and warts, causing them to fall off over time.
    • Caution: ACV can be harsh on the skin. It’s advisable to use a small amount and check for any skin irritation.
  2. Tea Tree Oil
    • How to Use: Apply a drop of tea tree oil directly on the skin tag or wart and cover with a bandage overnight. Tea tree oil has antiviral and antiseptic properties.
    • Caution: Tea tree oil can be potent. Always dilute it with a carrier oil if you have sensitive skin, and do a patch test first.
  3. Garlic
    • How to Use: Crush a fresh garlic clove to make a paste, apply it to the wart or skin tag, and cover with a bandage overnight. Garlic has antiviral properties that can be effective against warts.
    • Caution: Garlic can cause skin irritation and burns when left on the skin for extended periods.

Medical Treatments

If you’re looking for quick, reliable results, consider consulting a healthcare provider for the following treatments:

  1. Cryotherapy: This involves freezing the skin tag or wart with liquid nitrogen. It’s a quick procedure typically done in a dermatologist’s office.
  2. Surgical Removal: For larger or more stubborn warts and skin tags, surgical removal by a professional is often the best option.
  3. Salicylic Acid: Over-the-counter treatments containing salicylic acid can effectively remove warts and sometimes skin tags. These treatments usually require consistent application over several weeks.

Important Considerations

  • Consultation: Always consult with a dermatologist or healthcare provider before attempting to remove skin tags or warts, especially if they’re large, painful, or in a sensitive area.
  • Avoid DIY Surgery: Do not attempt to cut or remove skin tags or warts yourself. This can lead to bleeding, infection, and scarring.

Conclusion

While it’s tempting to want to remove skin tags and warts overnight, it’s important to approach this with caution and consider safe, effective, and sometimes slower methods. For the best and safest results, consultation with a healthcare professional is recommended.

Drinking celery juice has become a popular wellness trend, touted for its numerous health benefits. If you’re considering incorporating celery juice into your daily routine, you might be curious about the effects of drinking it continuously for a week. Here’s what you might experience if you drink celery juice every morning for 7 days.

Day 1-3: Adjusting to the Taste and Effects

Taste and Digestion: Celery juice has a distinct, slightly bitter taste, which can take some getting used to. Initially, you might experience changes in your digestion. Celery juice acts as a natural diuretic and has laxative effects, which can help relieve constipation and bloat but might also cause increased urination and loose stools.

Hydration and Detoxification: Celery is high in water and potassium, which aids in hydration and supports kidney function. This could result in a mild detox effect, where you may notice an increase in sweating or the need to urinate more frequently as your body begins to flush out toxins.

Day 4-5: Noticeable Health Benefits

Improved Digestion and Less Bloating: As your body adjusts, you might notice improved digestion and reduced bloating. The natural salts in celery help to restore hydrochloric acid in the stomach, which aids in digestion and nutrient absorption.

Increased Energy Levels: Many people report feeling more energetic and alert after consuming celery juice regularly. This could be due to its detoxifying properties, improved nutrient absorption, and hydration effects.

Day 6-7: Long-Term Benefits Begin to Show

Clearer Skin: Celery juice’s hydration and detoxifying properties may contribute to clearer, more vibrant skin. It’s also rich in antioxidants and anti-inflammatory compounds, which can help to reduce inflammation and oxidative stress—common culprits behind skin issues.

Stabilized Blood Pressure: Celery juice contains phthalides, which are compounds that can help lower blood pressure by relaxing the blood vessels. If you have hypertension, you might start to notice a subtle decrease in your blood pressure levels.

Reduced Inflammation: Thanks to its high antioxidant content, drinking celery juice regularly can help reduce inflammation throughout the body. This might be particularly beneficial if you suffer from inflammatory conditions such as arthritis or asthma.

Things to Consider

  1. Moderation and Medical Advice: While celery juice is generally safe for most people, consuming it in large quantities may lead to imbalances or sensitivities. If you have any medical conditions or take medications, particularly for blood pressure or thyroid issues, consult with a healthcare provider before starting a celery juice regimen.
  2. Nutritional Balance: Celery juice should not be considered a meal replacement. It’s low in calories and does not have sufficient protein or fat. Ensure you maintain a balanced diet throughout the day to support overall health.
  3. Organic vs. Non-Organic: If possible, choose organic celery to minimize exposure to pesticides. Celery is often listed on the “Dirty Dozen” list of fruits and vegetables with high levels of pesticide residue.

Conclusion

Drinking celery juice for 7 days can have various positive effects on your body, from improved digestion and more stable energy levels to potential benefits for skin health and inflammation. However, it’s important to approach this practice as part of a balanced diet and consult with a healthcare provider to ensure it’s appropriate for your health needs.

Imagine swapping out a cabinet full of medications for a warm, comforting drink that not only tastes great but also revitalizes your entire body. That’s the power of golden milk, a traditional remedy that has been cherished for its incredible health benefits. It’s no wonder that my grandma, at 86, says she feels like she’s 40 again since she started drinking this golden elixir.

What is Golden Milk?

Golden milk is a soothing blend of turmeric, milk, and spices, known for its anti-inflammatory and antioxidant properties. The star ingredient, turmeric, is a powerful spice that’s been used in Ayurvedic medicine for thousands of years. It contains curcumin, a compound that can help reduce inflammation, improve brain function, and support heart health.

Why Golden Milk?

For my grandma, golden milk has been a game-changer. She used to take multiple medications for various ailments, but since incorporating golden milk into her daily routine, she’s noticed significant improvements in her health and well-being. She feels more energetic, her joints don’t ache as much, and her overall mood has brightened. It’s as if this simple drink has turned back the clock!

How to Make Golden Milk

Ingredients:

  • 1 cup of milk (dairy or plant-based, like almond or coconut milk)
  • 1/2 teaspoon of turmeric powder
  • A pinch of black pepper (to enhance the absorption of curcumin)
  • 1/4 teaspoon of cinnamon powder
  • 1/4 teaspoon of ginger powder (optional, for extra warmth)
  • 1 teaspoon of honey or maple syrup (optional, for sweetness)

Instructions:

  1. In a small pot, combine the milk, turmeric, black pepper, cinnamon, and ginger powder.
  2. Heat the mixture over medium heat, stirring constantly, until it’s warm but not boiling.
  3. Remove the pot from the heat and let it cool slightly.
  4. If you like, stir in honey or maple syrup for added sweetness.
  5. Pour the golden milk into a cup and enjoy it warm.

How to Use It

My grandma drinks a cup of golden milk every evening before bed. It not only helps her unwind and sleep better, but it also sets her up for a great day ahead. The benefits of golden milk are cumulative, so the more you incorporate it into your routine, the more you may notice improvements in your overall health.

Golden milk is more than just a tasty treat; it’s a natural remedy that can help you feel rejuvenated and full of life. If it can make my 86-year-old grandma feel like she’s 40 again, imagine what it could do for you! Give it a try and experience the golden magic for yourself.