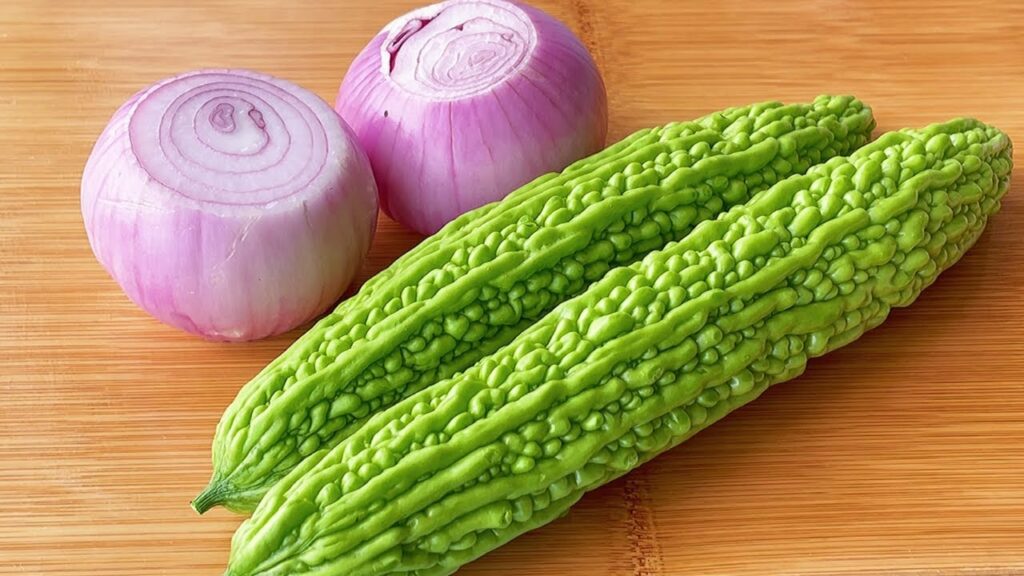
Category

Health & Wellness

Category


In the search for natural remedies to ease arthritis discomfort, one often overlooked resource is the avocado seed. While many of us enjoy the creamy flesh of avocados in salads, smoothies, and spreads, the seed itself is typically discarded. However, it holds potent properties that can help manage arthritis pain. Here’s how you can make a simple avocado seed tincture at home for instant relief.

Why Avocado Seed?

Avocado seeds are rich in antioxidants and anti-inflammatory compounds, making them an excellent natural remedy for reducing inflammation associated with arthritis. These seeds also contain catechins and procyanidins, which are known to alleviate swelling and pain.

Making Your Own Avocado Seed Tincture

Ingredients:

  • 1 avocado seed
  • Vodka or another high-proof alcohol (for extraction)
  • A clean jar with a lid

Instructions:

1. Prepare the Seed: Start by washing the avocado seed to remove any remaining fruit flesh. Allow it to dry, then finely grate it or chop it into small pieces to increase the surface area.

2. Maceration: Place the chopped or grated avocado seed into the jar. Pour enough vodka over it to completely cover the seed material. The alcohol acts as a solvent to extract the active compounds from the avocado seed.

3. Seal and Store: Close the jar tightly and store it in a cool, dark place. Let the mixture sit for at least two weeks to a month, shaking the jar gently every few days to mix the contents.

4. Strain: After the maceration period, strain the mixture through a fine mesh sieve or cheesecloth into another clean jar or bottle. Press or squeeze the seed material to extract as much liquid as possible.

5. Usage: For arthritis pain, use a small amount of the tincture by applying it directly to the affected area and gently massaging it in. You can also dilute a few drops in water and take it orally, but consult with a healthcare provider before ingestion to ensure safety.

Important Considerations

While avocado seed tincture can be a helpful natural remedy, it’s crucial to use it in conjunction with a holistic approach to arthritis management that includes a healthy diet, regular exercise, and medical advice from healthcare professionals.

Conclusion

Making use of the entire avocado, including the seed, aligns with a sustainable and holistic approach to health. This simple avocado seed tincture might just provide the relief you need from arthritis pain, helping you to move more freely and enjoy daily activities.


High blood pressure is a common concern that can lead to serious health issues if not managed properly. While maintaining a healthy lifestyle and adhering to medical advice are crucial, there are also natural remedies that can complement these efforts. One simple and effective approach involves the use of water and chia seeds, two ingredients that are not only accessible but also beneficial for cardiovascular health.

Why Water and Chia Seeds? Staying well-hydrated is essential for maintaining healthy blood pressure levels. Water helps to keep your blood vessels open and eases the workload on your heart. Chia seeds, on the other hand, are a superfood known for their high omega-3 fatty acid content, fiber, and antioxidants. These nutrients are beneficial in reducing inflammation, enhancing blood flow, and ultimately lowering blood pressure.

How to Use Water and Chia Seeds for Blood Pressure:

Ingredients:

  • 1 tablespoon of chia seeds
  • 1 glass of water (about 8 ounces)
  • Optional: a squeeze of fresh lemon juice for taste

Instructions:

  1. Soak the Chia Seeds: Start by soaking the chia seeds in a glass of water. Allow them to sit for about 30-40 minutes. As they soak, the chia seeds will absorb the water and form a gel-like consistency. This process makes the seeds easier to digest and helps release their nutrients more efficiently.
  2. Add Flavor (Optional): If you prefer a bit of flavor, squeeze some fresh lemon juice into the water. Lemon not only enhances the taste but also adds vitamin C, which is beneficial for reducing blood pressure.
  3. Drink Regularly: Consume this drink once a day, preferably in the morning. This allows your body to harness the benefits throughout the day. Making this a regular part of your routine can help manage your blood pressure levels effectively.

Additional Tips for Blood Pressure Management:

  • Maintain a Balanced Diet: Focus on eating a variety of fruits, vegetables, whole grains, and lean proteins. Reducing salt intake is also crucial for lowering blood pressure.
  • Exercise Regularly: Engage in moderate physical activities such as walking, swimming, or cycling for at least 150 minutes per week.
  • Monitor Your Health: Keep regular tabs on your blood pressure levels and consult with your healthcare provider to adjust treatments as necessary.

By incorporating natural remedies like water and chia seeds into your daily routine, along with following a healthy lifestyle, you can effectively manage high blood pressure. This not only improves your overall health but also enhances your quality of life. Remember, natural remedies are a complement to, not a substitute for, prescribed medical treatments. Always consult your healthcare provider before making significant changes to your health regimen.


Looking for a natural way to achieve a brighter smile and healthier teeth? The secret might just be in your kitchen spice rack! Cloves and bay leaves, often used for their aromatic qualities in cooking, can also be effective, natural remedies for removing tartar and whitening teeth. Here’s how you can use these common spices to enhance your dental health in just a few minutes.

Why Cloves and Bay Leaves?

  • Cloves are packed with eugenol, a compound with powerful antiseptic and anti-inflammatory properties, making it excellent for oral health. It can help fight oral bacteria and reduce gum swelling.
  • Bay Leaves have been used in traditional remedies for their antibacterial properties and can help in breaking down tartar and whitening teeth.

How to Use Cloves and Bay Leaves for Teeth Whitening:

Ingredients:

  • 1 teaspoon of cloves
  • 2-3 dried bay leaves

Instructions:

  1. Prepare the Mixture:
    • Grind the cloves and bay leaves together into a fine powder. Using a mortar and pestle will help you achieve the finest consistency, which is ideal for this application.
  2. Application:
    • Wet your toothbrush and dip it into the powder. Brush your teeth with this mixture, focusing especially on areas that seem more stained or where tartar has built up.
  3. Let It Sit:
    • After brushing for about two minutes, let the mixture sit on your teeth for an additional minute to allow the active ingredients to work on breaking down the tartar and whitening your teeth.
  4. Rinse Thoroughly:
    • Rinse your mouth well with water to remove all the residue. It’s important to ensure no particles are left behind, as they can be strong and somewhat abrasive.
  5. Repeat:
    • For noticeable results, use this treatment twice a week. Overuse can be abrasive to your enamel, so moderation is key.

Benefits and Considerations: This natural method can help reduce the visibility of tartar and whiten your teeth, giving you a fresher, brighter smile. However, it’s important to continue with your regular dental hygiene routine, including brushing twice daily with fluoride toothpaste and flossing. While cloves and bay leaves can provide a natural boost in oral cleanliness and aesthetics, they do not replace professional dental treatments for more severe issues.

By incorporating cloves and bay leaves into your oral care routine, you’re tapping into the power of nature to maintain your smile, not just enhancing its appearance but also supporting overall oral health. Give this simple yet effective remedy a try and you may find it’s just what your dental care routine was missing!


Dealing with foot fungus can be uncomfortable and a bit embarrassing, but thankfully, there are several home remedies you can try to alleviate this common issue. These treatments are simple, effective, and can be done with ingredients you likely already have at home. Here are seven ways to treat foot fungus easily and comfortably from your own home.

1. Tea Tree Oil Tea tree oil is renowned for its antifungal and antibacterial properties, making it a powerful treatment for foot fungus. Simply apply a few drops of tea tree oil directly to the affected area twice a day using a cotton swab. For sensitive skin, dilute the oil with a carrier oil like coconut oil before application.

2. Apple Cider Vinegar Apple cider vinegar creates an acidic environment that is inhospitable to fungus. Mix one part vinegar with two parts warm water in a basin and soak your feet for about 20 minutes. Dry your feet thoroughly afterward, as fungus thrives in moist environments.

3. Garlic Garlic has natural antifungal properties that can combat foot fungus. Crush a few cloves of garlic to make a paste and apply it directly to the affected areas. Leave it on for 30 minutes before washing it off. Repeat daily until you see improvement.

4. Baking Soda Baking soda can absorb moisture, making it great for treating foot fungus. Make a paste with baking soda and water, and apply it to your feet. Let it sit for 10-15 minutes then wash and dry your feet thoroughly.

5. Plain Yogurt The live active cultures in plain yogurt can help kill fungus. Apply a layer of plain yogurt to the affected area and let it dry. Once dried, rinse it off with warm water. Yogurt is gentle and can be used daily.

6. Cornstarch Cornstarch is excellent at absorbing moisture, which helps keep your feet dry and free from fungus. Apply cornstarch to clean, dry feet before putting on socks. This can be done every morning as a preventative measure.

7. Essential Oils Essential oils such as oregano oil and lavender oil also have antifungal properties. Mix a few drops with a carrier oil and apply to the affected area. Essential oils are potent, so it’s important to dilute them to avoid skin irritation.

These home remedies are generally safe and effective for treating mild foot fungus. However, if your condition doesn’t improve or worsens, it’s important to consult with a healthcare provider. Meanwhile, maintaining good foot hygiene, keeping your feet dry, and changing socks regularly can help prevent the growth of foot fungus.


Have you ever wondered how to transform ordinary onions into an extraordinary dish that you’ll want to make again and again? The secret lies in a simple technique: cutting the onions before boiling them. This method enhances the natural sweetness and tenderness of the onions, making them a versatile and delightful addition to any meal. Here’s a step-by-step guide to preparing onions that will change the way you think about this humble vegetable.

Why Pre-Cut and Boil Onions? Cutting onions before boiling helps them cook more evenly and release their natural sugars, resulting in a softer texture and a milder, sweeter flavor. This process not only reduces the sharpness associated with raw onions but also makes them more digestible and gentle on the stomach.

Ingredients:

  • 4 large onions
  • Water for boiling
  • Salt to taste
  • Optional: butter, herbs, or spices for added flavor

Instructions:

  1. Prepare the Onions: Start by peeling the onions and slicing them into even pieces, either rings or half-moons depending on your preference. This shape allows them to cook uniformly and absorb flavors better.
  2. Boil the Onions: Fill a pot with enough water to cover the onions and bring it to a boil. Add a pinch of salt to the water—it helps enhance the onions’ flavor. Once the water is boiling, carefully add your sliced onions. Reduce the heat to a simmer and let the onions cook for about 10-15 minutes, or until they are completely tender.
  3. Drain and Season: Once the onions are tender, drain the water and return the onions to the pot. At this stage, you can add a knob of butter for richness or sprinkle some herbs (like thyme or rosemary) and spices (like black pepper or paprika) for extra flavor. Toss everything together to coat the onions evenly.
  4. Serve: Transfer the boiled and seasoned onions to a serving dish. They can be enjoyed as a side dish with meats, added to sandwiches for a sweet and tender bite, or used as a base for gravies and sauces.

Enjoy Your Meal: This boiled onion recipe is not just delicious but also incredibly easy to prepare. Whether you’re looking for a simple side dish or a tasty new way to enjoy onions, this recipe promises to make onions a highlight of your dining experience. Try it once, and you might find yourself making it a regular part of your culinary repertoire!


While avocados are widely praised for their creamy texture and health benefits, not many know that their seeds are just as valuable. Often discarded, avocado seeds can be transformed into a nourishing tea that’s rich in vitamins and beneficial for heart health, including helping to reduce high blood pressure. Here’s a closer look at how making avocado seed tea can be a game-changer for your wellness routine.

What’s in Avocado Seed Tea?

Avocado seeds are packed with nutrients, including a good dose of essential vitamins such as B6, C, K, B5 (pantothenic acid), and E. These vitamins play crucial roles in the body, from boosting immune function to enhancing skin health. The seeds also contain antioxidants that help reduce oxidative stress, a key factor in heart disease, making this tea an excellent choice for supporting heart health.

Benefits of Avocado Seed Tea:

  • Reduces Blood Pressure: The potassium and antioxidants in avocado seeds can help lower blood pressure by promoting blood vessel relaxation and reducing inflammation.
  • Rich in Antioxidants: Avocado seed tea is a good source of antioxidants, which protect against free radical damage.
  • Supports Heart Health: The fiber and amino acids in avocado seeds can help improve cholesterol levels and maintain a healthy heart.

How to Make Avocado Seed Tea:

  1. Prepare the Seed: Start by removing the seed from an avocado and washing it thoroughly to remove any residual fruit.
  2. Chop or Grate the Seed: Carefully chop the seed into smaller pieces or grate it to increase the surface area, which helps to extract more nutrients when steeped.
  3. Boil the Seed: Place the chopped or grated avocado seed into a pot with about 4 cups of water. Bring to a boil, then reduce the heat and let it simmer for about 10 to 15 minutes.
  4. Strain and Serve: Strain the tea into a cup, discarding the solid pieces. You can add honey or lemon for flavor if desired.

Enjoying Your Tea:

Avocado seed tea has a slightly bitter taste, so sweetening it with a natural sweetener like honey or enhancing it with a squeeze of lemon can make it more palatable. Enjoy this tea as part of your daily routine to tap into its heart-healthy benefits.

Whether you’re seeking to boost your heart health or simply want to maximize the benefits of every part of your avocados, avocado seed tea offers a unique and beneficial addition to your diet. Enjoy the warmth and wellness of this hearty brew any time of day!


High blood pressure, or hypertension, is a common condition that can lead to serious health issues if left unmanaged. While long-term strategies include lifestyle changes and medication, there are also immediate remedies that can help manage your blood pressure levels. One effective remedy is a natural drink made from garlic, okra, and other supportive ingredients. This drink not only helps in managing blood pressure but also supports weight loss.

Ingredients and Benefits:

  • Garlic: Known for its cardiovascular benefits, garlic is a powerhouse when it comes to lowering blood pressure. It enhances blood flow and helps relax blood vessels.
  • Okra: Rich in potassium and magnesium, okra helps in balancing electrolytes and is beneficial for blood pressure control.
  • Lemon: Adding a squeeze of lemon not only enhances the flavor but also provides vitamin C, which is great for arterial health.
  • Honey: A natural sweetener to make the remedy more palatable, honey adds its own set of antioxidants.

Recipe for Garlic Okra Weight Loss Drink:

Ingredients:

  • 1-2 cloves of garlic, finely minced
  • 2-3 okra pods, ends trimmed and sliced vertically
  • Juice of half a lemon
  • 1 teaspoon of honey
  • 1 glass of water

Instructions:

  1. Prepare the Ingredients: Begin by finely mincing the garlic and slicing the okra pods vertically. These preparations help release the active compounds of the ingredients.
  2. Steep the Ingredients: Boil the water and add the minced garlic and okra pods. Allow them to steep for about 5-10 minutes. This process extracts the beneficial nutrients from the garlic and okra.
  3. Strain and Season: After steeping, strain the mixture into a glass. Add the fresh lemon juice and a teaspoon of honey to enhance the flavor and add a bit of sweetness.
  4. Drink Warm: Consume this drink warm for best results. It’s recommended to drink it on an empty stomach in the morning or before bedtime.

Additional Tips for Blood Pressure Management:

While this drink is helpful, it’s important to incorporate other healthy habits:

  • Regular Exercise: Aim for at least 30 minutes of moderate exercise most days of the week.
  • Balanced Diet: Eat a diet rich in fruits, vegetables, whole grains, and low-fat dairy.
  • Stress Management: Practice relaxation techniques such as deep breathing, meditation, or yoga.

This garlic and okra drink is just one of many steps you can take to manage high blood pressure and promote overall health. Always consult with your healthcare provider before starting any new health regimen, especially if you have pre-existing conditions or are on medication.


If you’re looking for a natural way to boost your energy and vitality, look no further than this simple yet powerful concoction of dried fruits, nuts, and tinctures. My grandmother swears by it, and at 70, she runs around like a young girl. Here’s her secret recipe and how it can benefit you too.

The Power of Dried Fruits, Nuts, and Tinctures

Dried fruits and nuts are nutrient-dense foods packed with essential vitamins, minerals, and healthy fats. When combined with the right tinctures, they can provide a powerful boost to your overall health and well-being.

  • Dried Fruits: Rich in natural sugars, fiber, and antioxidants, dried fruits like raisins, apricots, and dates provide quick energy and help in digestion.
  • Nuts: Almonds, walnuts, and cashews are excellent sources of healthy fats, protein, and essential nutrients that support heart health and brain function.
  • Tinctures: Herbal tinctures, such as those made from ginseng, echinacea, or elderberry, can enhance immune function, boost energy levels, and provide anti-inflammatory benefits.

Benefits of This Daily Spoonful

  1. Boosts Energy:
    • The natural sugars from dried fruits provide a quick energy boost, while the healthy fats and protein from nuts offer sustained energy throughout the day.
  2. Supports Heart Health:
    • Nuts are known for their heart-healthy properties, including lowering bad cholesterol and reducing inflammation. Combined with the antioxidants in dried fruits, this mixture supports cardiovascular health.
  3. Enhances Brain Function:
    • Nuts contain omega-3 fatty acids and antioxidants that support brain health, improving memory and cognitive function.
  4. Strengthens Immunity:
    • The addition of herbal tinctures can enhance the immune-boosting properties of this mixture, helping to fend off illnesses and keep you healthy.

Simple Recipe for Vitality

Ingredients:

  • 1 cup of mixed dried fruits (raisins, apricots, dates)
  • 1 cup of mixed nuts (almonds, walnuts, cashews)
  • 1 tablespoon of your preferred herbal tincture (such as ginseng or echinacea)

Instructions:

  1. Prepare the Mixture:
    • Chop the dried fruits and nuts into small, bite-sized pieces. Place them in a large mixing bowl.
  2. Add the Tincture:
    • Drizzle the herbal tincture over the dried fruits and nuts. Mix well to ensure that the tincture is evenly distributed.
  3. Store Properly:
    • Transfer the mixture to an airtight container and store it in a cool, dry place.
  4. Daily Consumption:
    • Each day, take one spoonful of this mixture. You can eat it on its own, add it to your morning cereal, or mix it into yogurt for an extra health boost.

Conclusion

Incorporating a spoonful of this dried fruits, nuts, and tincture mixture into your daily routine can make a significant difference in your energy levels and overall health. My grandmother’s experience is a testament to its effectiveness. She enjoys more energy, better health, and a youthful zest for life. Try this natural remedy and see how it can enhance your vitality and well-being. You might just find yourself feeling more energetic and vibrant, ready to take on each day with the enthusiasm of youth!


Are you looking for a delicious and healthy way to shed those extra pounds, especially around your belly? Look no further than this refreshing cucumber and tomato salad. My mother incorporated this simple salad into her daily routine and lost an incredible 25 kg in just a month! Here’s how you can make this tasty dish and enjoy its benefits.

Why Cucumber and Tomato Salad?

Cucumbers and tomatoes are not only low in calories but also packed with nutrients that aid in weight loss and overall health.

  • Cucumbers: Hydrating and low in calories, cucumbers are high in water content and fiber, helping you feel full and satisfied without adding extra calories.
  • Tomatoes: Rich in antioxidants like lycopene, tomatoes boost metabolism and support fat loss. They also provide vitamins and minerals essential for good health.

Benefits of This Salad

  1. Burns Belly Fat:
    • The high water content and fiber in cucumbers help flush out toxins and reduce bloating, contributing to a flatter belly. Tomatoes support metabolism, aiding in fat burning.
  2. Low-Calorie Meal:
    • This salad is light yet satisfying, making it an excellent choice for a low-calorie meal that keeps you full and helps control your appetite.
  3. Boosts Metabolism:
    • The combination of cucumbers and tomatoes is packed with vitamins and antioxidants that support metabolic health and enhance your body’s ability to burn fat.
  4. Promotes Hydration:
    • Staying hydrated is crucial for weight loss, and the high water content in cucumbers helps keep you hydrated, aiding in overall bodily functions and weight management.

Simple Cucumber and Tomato Salad Recipe

Ingredients:

  • 1 large cucumber, thinly sliced
  • 2 medium tomatoes, chopped
  • 1 small red onion, thinly sliced (optional)
  • 2 tablespoons of fresh lemon juice
  • 1 tablespoon of olive oil
  • Salt and pepper to taste
  • Fresh herbs (such as parsley or basil) for garnish

Instructions:

  1. Prepare the Vegetables:
    • Start by washing and slicing the cucumber and tomatoes. Thinly slice the red onion if you’re using it.
  2. Mix the Dressing:
    • In a small bowl, whisk together the lemon juice, olive oil, salt, and pepper. This simple dressing adds flavor without unnecessary calories.
  3. Combine and Toss:
    • In a large salad bowl, combine the cucumber, tomatoes, and red onion. Pour the dressing over the salad and toss gently to combine.
  4. Garnish and Serve:
    • Garnish with fresh herbs like parsley or basil for added flavor and nutrients. Serve immediately for the best taste.

Conclusion

This cucumber and tomato salad is not just a tasty addition to your meals; it’s a powerful ally in your weight loss journey. By incorporating this salad into your daily routine, you can enjoy a low-calorie, nutrient-packed dish that helps burn belly fat and promotes overall health. My mother’s impressive weight loss is a testament to its effectiveness. Try this refreshing salad and see the benefits for yourself. Enjoy your path to a healthier, slimmer you!


Starting your day with a nutritious breakfast sets the tone for a healthy and energetic day ahead. If you have oatmeal, apples, and bananas on hand, you’re just five minutes away from a delicious and wholesome morning meal. This easy oatmeal recipe not only tastes great but also packs a nutritious punch, ensuring you begin your day right. Here’s how to whip up this quick breakfast in no time.

Ingredients Needed:

  • Oatmeal (1 cup)
  • 1 apple
  • 1 banana
  • Optional toppings: cinnamon, honey, or nuts

Step-by-Step Preparation:

  1. Cook the Oatmeal:
    • Pour one cup of oatmeal into a bowl. Add two cups of water or milk for creamier texture. Microwave on high for about 2-3 minutes, or follow the stovetop instructions on your oatmeal package.
  2. Prepare the Fruits:
    • While the oatmeal cooks, wash the apple and slice it into bite-sized pieces. Peel the banana and cut it into slices.
  3. Combine and Serve:
    • Once the oatmeal is cooked, stir it thoroughly to get a smooth consistency. Add the sliced apples and bananas to the bowl. Mix gently to combine.
  4. Add Toppings:
    • For an extra touch of flavor, sprinkle some cinnamon on top for a warm, spicy note. If you prefer a bit of sweetness, drizzle some honey over the oatmeal. You can also add a handful of nuts like walnuts or almonds for added crunch and nutrients.

Benefits of This Breakfast:

  • High in Fiber: Oatmeal, apples, and bananas are all high in dietary fiber, which is great for digestion and can help keep you full longer.
  • Rich in Nutrients: This meal provides a good mix of essential vitamins, minerals, and antioxidants, thanks to the fruits and oats.
  • Energy Boosting: Oats are a fantastic source of complex carbohydrates that provide sustained energy, while bananas offer a quick energy boost with their natural sugars.

Additional Tips:

  • Variety: Feel free to mix up the fruits according to what’s available or in season. Pears, berries, or peaches also go wonderfully with oatmeal.
  • Make it Dairy-Free: Use almond milk, soy milk, or water instead of dairy milk if you prefer a plant-based option.

Conclusion:

This oatmeal with apples and bananas is the perfect quick breakfast for a busy morning. It’s not only easy to make but also delicious and packed with health benefits. Whether you’re just starting your day or need a hearty mid-morning snack, this oatmeal recipe is sure to satisfy. Enjoy this nourishing breakfast and kickstart your day in the healthiest way!