Category

Health & Wellness

Category

Cooking rice is a simple task, but did you know that there’s a secret trick that many professional chefs and hotels use to make their rice taste incredible? By adding a few extra ingredients, you can elevate your rice to a whole new level of flavor and texture. Let’s uncover the secret to making your rice rich, flavorful, and perfectly textured, just like they do in hotels.

The Secret: Enhance the Flavor with These Simple Additions

Instead of just using water, professional chefs often add broth or stock to their rice to infuse it with flavor. Broth adds a depth of flavor to the rice, making it more savory and rich without needing extra seasoning. Here’s how you can do it at home:

  1. Use Broth or Stock Instead of Water
    • Replace the water in your recipe with an equal amount of chicken, beef, or vegetable broth.
    • If you’re concerned about sodium levels, use low-sodium broth or dilute the broth with a bit of water.

Adding aromatics like garlic, onions, or whole spices can also enhance the flavor of your rice. These subtle flavors will make your dish more complex and aromatic. Here’s how you can incorporate aromatics into your rice:

  1. Add Aromatics
    • Sauté finely chopped onions, garlic, or shallots in a bit of olive oil or butter before adding the rice and broth.
    • For extra flavor, you can also add whole spices like bay leaves, cloves, or a cinnamon stick to the pot.

Incorporating fat into your rice can improve its texture, making it more tender and less sticky. It also adds richness and enhances the flavor. Here’s how you can incorporate fat into your rice:

  1. Incorporate Fat
    • After sautéing your aromatics, stir in 1-2 tablespoons of butter, olive oil, or coconut oil before adding the rice and liquid. This coats the rice grains, helping them cook evenly and develop a silky texture.
    • If you prefer a lighter option, you can simply add a small amount of fat at the end of cooking and fluff it into the rice.

Seasoning is key to ensure that your rice is well-seasoned throughout. Adding salt and other seasonings to the cooking liquid will prevent bland rice and infuse it with flavor. Here’s how you can season your rice:

  1. Seasoning is Key
    • Add a pinch of salt to the broth before cooking. Adjust the amount based on your taste and the saltiness of your broth.
    • You can also add other seasonings like a bay leaf, a splash of soy sauce, or a sprinkle of herbs like thyme or rosemary for an extra layer of flavor.

How to Cook the Perfect Rice

To achieve the perfect rice every time, follow these simple steps:

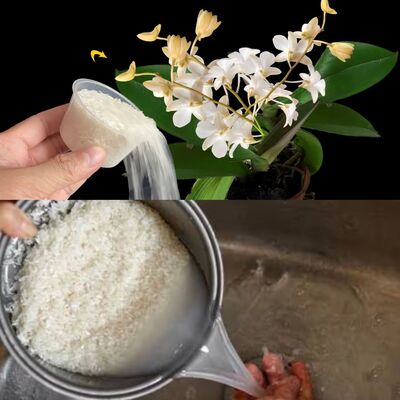
  • Rinse the Rice: Before cooking, rinse your rice under cold water until the water runs clear. This removes excess starch, preventing the rice from becoming too sticky.
  • Sauté the Aromatics: In your cooking pot, heat a small amount of oil or butter over medium heat. Add your chosen aromatics (like onions and garlic) and sauté until soft and fragrant.
  • Toast the Rice: Add the rinsed rice to the pot and stir it for a minute or two to coat the grains with the oil and lightly toast them. This step adds a subtle nutty flavor and helps the grains stay separate.
  • Add Liquid: Pour in your broth or stock, then add any seasonings you like. Stir once to distribute the ingredients evenly.
  • Cook the Rice: Bring the liquid to a boil, then reduce the heat to low, cover the pot, and let the rice simmer. Cooking times will vary depending on the type of rice, but generally, white rice takes about 15-18 minutes, and brown rice takes 40-45 minutes.
  • Let it Rest: Once the rice is cooked, remove the pot from the heat and let it sit, covered, for about 5-10 minutes. This allows the rice to finish cooking and absorb any remaining liquid.
  • Fluff and Serve: Fluff the rice with a fork, stirring in a bit of extra butter or oil if desired, and serve.

Conclusion

Next time you cook rice, try this hotel-inspired method by replacing plain water with flavorful broth, adding aromatics, and incorporating a bit of fat. These simple additions can transform your rice from a basic side dish into a flavorful and luxurious part of your meal. Once you try it, you’ll never go back to cooking rice with just water again!

Honey and water are more than just simple kitchen staples; they can be a powerful duo in your skincare routine, offering natural and rejuvenating effects that some say can rival even the most expensive cosmetic treatments. This natural remedy is touted for its ability to hydrate, nourish, and rejuvenate the skin, helping you achieve a youthful, glowing complexion. Here’s how honey and water can work wonders for your skin and how to use them effectively.

Why Honey and Water Are So Powerful

Honey: Honey is a natural treasure trove of antioxidants, enzymes, and nutrients that nourish and hydrate the skin. Its natural humectant properties draw moisture into the skin, keeping it plump and hydrated. Honey also has antibacterial and anti-inflammatory properties, which help calm and heal the skin, reducing redness, acne, and signs of aging.

Water: Water is essential for maintaining skin hydration and elasticity. Drinking plenty of water helps to flush out toxins, keep the skin hydrated from within, and maintain a healthy glow. When used in conjunction with honey, water helps to dilute the honey slightly, making it easier to apply and allowing it to penetrate the skin more effectively.

How to Use Honey and Water for Youthful Skin

1. Honey and Water Face Mask

Ingredients:

  • 1 tablespoon raw, organic honey
  • 1 teaspoon warm water

Instructions:

  1. Mix the Ingredients: In a small bowl, combine the honey and warm water. Stir until the honey is fully dissolved in the water, creating a smooth, spreadable mixture.
  2. Apply to the Face: Using your fingers or a brush, apply the honey and water mixture evenly to your face. Focus on areas where you have fine lines, wrinkles, or dry patches.
  3. Let It Sit: Leave the mask on your face for 15-20 minutes. During this time, the honey will hydrate your skin, and its natural enzymes will work to exfoliate and rejuvenate.
  4. Rinse Off: After 15-20 minutes, rinse your face with lukewarm water, gently massaging your skin in circular motions as you rinse off the honey. Pat your face dry with a clean towel.
  5. Moisturize: Follow up with your favorite moisturizer to lock in the hydration and keep your skin feeling soft and supple.

Results: With regular use, this honey and water mask can help smooth fine lines, reduce the appearance of wrinkles, and leave your skin looking more youthful and radiant.

2. Honey and Water Drink for Skin Health

Ingredients:

  • 1 tablespoon raw, organic honey
  • 1 glass of warm water

Instructions:

  1. Mix the Drink: Stir the honey into a glass of warm water until it is fully dissolved. Drink this mixture first thing in the morning on an empty stomach.
  2. Hydrate from Within: Drinking honey and water regularly can help keep your skin hydrated from the inside out, promote digestion, and provide your body with antioxidants and nutrients that support overall skin health.

Results: This daily drink can contribute to a healthier, more glowing complexion over time, complementing your topical skincare routine.

Additional Tips

  • Consistency Is Key: For best results, incorporate honey and water into your skincare routine consistently. Use the mask 2-3 times a week and drink the honey-water mixture daily.
  • Choose High-Quality Honey: Opt for raw, organic honey, as it retains more of the natural enzymes and nutrients that are beneficial for your skin.
  • Stay Hydrated: In addition to using honey and water, ensure you are drinking plenty of water throughout the day to keep your skin hydrated and healthy.

Conclusion

Honey and water can be a powerful, natural alternative to expensive cosmetic treatments like Botox. With their ability to hydrate, nourish, and rejuvenate the skin, this simple duo can help you achieve a youthful, glowing complexion at any age. Incorporate honey and water into your daily routine, and watch as your skin transforms, leaving you looking refreshed and radiant.

Are you a fan of natural remedies and homemade solutions? Well, here’s a surprising combination for you – cloves and coffee! Not only does this mixture enhance the flavor of your coffee, but it also provides a multitude of benefits for your health and even some household chores. Let’s dive into why and how you should mix cloves with coffee.

Cloves: These aromatic flower buds are not only famous for their rich, warm flavor, but they also offer numerous health benefits. Cloves have antibacterial, antiviral, and anti-inflammatory properties, making them a powerful addition to your coffee.

Coffee: We all love coffee for its stimulating effects and its rich, complex flavor. With the added benefit of antioxidants, coffee can also improve mental alertness and physical performance.

  • Enhanced Flavor: Adding cloves to your coffee brings a warm, spicy flavor that makes your morning cup even more enjoyable.
  • Antioxidant Boost: Both cloves and coffee are rich in antioxidants, which work to protect your cells from damage caused by free radicals.
  • Improved Digestion: Cloves aid in digestion and help reduce bloating and gas, making your coffee experience easier on your stomach.
  • Natural Remedy: The antibacterial and antiviral properties of cloves make this mixture a fantastic immune system booster.
  • Household Uses: Believe it or not, this clove and coffee mix can also be used as a natural pest repellent. Say goodbye to pesky insects!

Ingredients:

  • Ground coffee (enough for your usual brew)
  • Whole or ground cloves (1-2 teaspoons)

Instructions:

  1. Prepare Your Coffee: Start by measuring out your usual amount of ground coffee for brewing.
  2. Add Cloves: If you have whole cloves, grind them into a fine powder using a spice grinder or mortar and pestle. Mix 1-2 teaspoons of ground cloves into your ground coffee.
  3. Brew as Usual: Brew your coffee the way you normally would, whether you use a drip coffee maker, French press, or espresso machine. As the coffee brews, the cloves will infuse and add a delightful spiced flavor.
  4. Serve: Pour your freshly brewed clove-infused coffee into a cup and savor the deliciousness.
  • Pest Repellent: Place a small bowl of the clove and coffee mix in your pantry or kitchen to naturally repel insects like ants and moths. Their strong aroma acts as a deterrent.
  • Air Freshener: Need a natural air freshener? Fill a small cloth bag with the clove and coffee mix and place it in closets, drawers, or any area that could use a fresh scent.
  • Adjust to Taste: Start with a small amount of cloves and adjust according to your taste preference. Remember, too many cloves can overpower the coffee.
  • Freshness Matters: For the best flavor and aroma, use fresh cloves and high-quality coffee.
  • Feel Free to Experiment: Don’t be afraid to experiment! Try adding other spices like cinnamon, nutmeg, or cardamom to create your unique coffee blend.

By mixing cloves with coffee, you not only create a flavorful and delicious beverage, but you also enjoy a variety of health benefits. This simple mixture enhances the taste of your coffee, supports your health, and can even be used around the house. So why not give it a try? You might find that you rely less on store-bought products, thanks to the versatility of cloves and coffee!

Looking to jazz up your dinner routine? Sweet potatoes are not only nutritious but can transform into a scrumptious, easy-to-make dish that you’ll want to add to your regular meal rotation. This recipe for roasted sweet potatoes is vegan-friendly and so delightful, it just might become your new favorite!

Ingredients:

  • 4 medium sweet potatoes, peeled and cubed
  • 2 tablespoons of olive oil
  • 1 teaspoon of smoked paprika
  • 1/2 teaspoon of garlic powder
  • Salt and pepper to taste
  • Fresh parsley, chopped (for garnish)

Instructions:

  1. Preheat your oven to 400°F (200°C). This hot temperature is perfect for getting those sweet potatoes nicely roasted.
  2. Prepare the potatoes: In a large bowl, toss the peeled and cubed sweet potatoes with olive oil, smoked paprika, garlic powder, salt, and pepper until they are evenly coated. The olive oil not only adds a subtle richness but also helps the spices cling to the potatoes.
  3. Roast the sweet potatoes: Spread the seasoned sweet potatoes in a single layer on a baking sheet. Make sure they have a little space between them for even cooking. Pop them in the oven and roast for about 25-30 minutes. Halfway through, give them a gentle stir to ensure all sides get a chance to crisp up.
  4. Check for doneness: The sweet potatoes are ready when they are tender on the inside and crispy on the edges. A quick poke with a fork should tell you if they’re done.
  5. Serve and enjoy: Transfer the roasted sweet potatoes to a serving dish and sprinkle with fresh parsley for a pop of color and freshness. This dish is delicious on its own or can be paired with a simple salad or steamed greens for a complete meal.

Sweet potatoes are a wonderful source of vitamins, fiber, and minerals, making them a fantastic choice for anyone looking to eat healthily. This recipe is not only easy to prepare but also packs a punch of flavor that makes it a delightful addition to any dinner table.

So, the next time you’re in the mood for something simple yet utterly satisfying, give these roasted sweet potatoes a try. They just might surprise you with how easy and delicious healthy eating can be!

Cloves are a potent spice with a rich history in traditional medicine, used for their antibacterial, anti-inflammatory, and antioxidant properties. Chewing on cloves, especially on an empty stomach, can amplify their health benefits. Here’s what happens when you start your day with this simple ritual:

Health Benefits of Cloves

  1. Digestive Health: Cloves can stimulate the secretion of digestive enzymes, which can help reduce indigestion and alleviate gastric discomfort. Their eugenol content, a natural pain reliever, can also help manage stomach pains and cramping.
  2. Antibacterial Properties: Eugenol is also effective against bacteria. Chewing cloves may contribute to better oral health by reducing bacterial growth and helping to manage gum diseases.
  3. Liver Protection: Cloves contain antioxidants that help in preventing liver disease due to their ability to help decrease oxidative stress.
  4. Regulates Blood Sugar: Cloves can help regulate blood sugar levels as they enhance insulin production, making them beneficial for people with diabetes.
  5. Boosts Immune System: The vitamin C and antioxidants in cloves strengthen the immune system by fighting off oxidative stress and infections.

What Happens When You Chew Cloves on an Empty Stomach?

  • Enhanced Absorption: Taking cloves on an empty stomach ensures that their compounds, such as eugenol, are absorbed more effectively without the interference of other foods.
  • Immediate Antimicrobial Effect: Chewing cloves first thing in the morning can kill oral pathogens, freshen your breath, and reduce plaque buildup.
  • Stimulates Metabolism: The thermogenic properties of cloves help in boosting the metabolic rate, which can aid in weight loss.

How to Use Cloves Daily

  • Direct Chewing: Simply take two whole cloves and chew them slowly. If the flavor is too intense, you can start with one clove and gradually increase.
  • Cloves with Water: If chewing cloves directly is too pungent, you can crush them and stir into a glass of warm water to drink.
  • Cloves and Honey: Mix crushed cloves with a teaspoon of honey to make the experience sweeter and smoother.

Tips for Chewing Cloves

  • Start Small: If you’re new to using cloves, start with a smaller amount and gradually build up to two cloves as your tolerance increases.
  • Check for Allergies: Ensure you’re not allergic to cloves. Start by consuming a small piece and monitor your body’s response.
  • Quality Matters: Use organic cloves if possible, as they are free from pesticides and tend to have a richer flavor and better nutrient profile.

Cautions

  • Potent Spice: Cloves are very strong and can cause irritation to the digestive tract if consumed in excess. Stick to the recommended amount.
  • Not for Everyone: Pregnant women and individuals with certain medical conditions or those on specific medications should consult with a healthcare provider before starting any new dietary supplement, including cloves.

Incorporating cloves into your morning routine can significantly boost your health by leveraging their potent medicinal properties. This simple habit could lead to improvements in digestion, immune function, and overall wellness.

Lemon and honey tea is a popular remedy often touted for its potential health benefits, including weight loss and detoxification. While no drink can magically melt away belly fat in just a week, incorporating lemon and honey tea into a healthy diet and lifestyle might help you move towards your weight loss goals. Here’s why this tea can be beneficial and how you can incorporate it into a healthy weight loss regimen.

Benefits of Lemon and Honey Tea

  1. Boosts Metabolism: Lemon is high in vitamin C and antioxidants, which can help boost your metabolic rate. A higher metabolism helps the body burn fat more efficiently, which is essential for weight loss.
  2. Aids Digestion: Lemon helps promote healthy digestion by loosening toxins in your digestive tract. Honey is a natural antibacterial and can soothe the stomach and reduce digestive issues.
  3. Detoxifies the Body: Both lemon and honey have detoxifying properties. Regular consumption can help flush out toxins from the body, which might aid in fat loss.
  4. Reduces Water Retention: Lemon has diuretic properties, which can help reduce water retention and bloating.

How to Make Lemon and Honey Tea

Ingredients:

  • 1 cup of hot water
  • Juice of ½ a lemon
  • 1 tablespoon of raw honey

Instructions:

  1. Prepare the Water: Boil water and allow it to cool slightly before adding it to the cup. This ensures that the heat does not destroy the natural enzymes in the honey and lemon.
  2. Add Lemon and Honey: Squeeze the juice of half a lemon into the cup of warm water. Add a tablespoon of raw honey to the mix.
  3. Stir Well: Mix the ingredients thoroughly until the honey dissolves.
  4. Drink on an Empty Stomach: For best results, drink lemon and honey tea in the morning on an empty stomach to kickstart your metabolism and digestion for the day.

Considerations for Weight Loss

  • Realistic Expectations: It’s important to have realistic expectations about weight loss. Rapid weight loss in a short period is often not sustainable and can even be unhealthy. Gradual changes in diet and lifestyle are generally more effective for long-term weight management.
  • Healthy Diet and Exercise: Lemon and honey tea can be a part of a weight loss plan, but it should be complemented with a balanced diet and regular physical activity. Focus on a nutrient-rich diet and incorporate both cardiovascular and strength training exercises into your routine.
  • Stay Hydrated: Drinking adequate amounts of water is essential for metabolism and helps with weight loss. Ensure you stay well-hydrated throughout the day.

Conclusion

While lemon and honey tea alone won’t eliminate belly fat overnight, it can be a beneficial addition to a comprehensive weight loss plan. Alongside a healthy diet and regular exercise, it can help you achieve and maintain a flat stomach over time. Always remember that consistency is key in any weight loss journey.

Varicose veins can be unsightly and uncomfortable, often leading people to seek various remedies. One natural approach that has gained attention is the use of lemon, attributed to its citric acid and vitamin C content. Here’s how you can use lemon daily to help manage and potentially reduce the appearance of varicose veins:

How Lemons Can Help

Vitamin C and Bioflavonoids: Lemons are rich in vitamin C and bioflavonoids, which can strengthen the walls of blood vessels, potentially reducing the bulging and visibility of varicose veins.

Anti-inflammatory Properties: The anti-inflammatory properties of lemon can help reduce swelling and discomfort associated with varicose veins.

Daily Routine with Lemon for Varicose Veins

  1. Topical Application:
    • Lemon Massage: Before bed, gently rub a slice of lemon over the varicose veins using circular motions. The acids in the lemon can act as a mild irritant to the skin, so it’s important to test on a small area first. After massaging for a few minutes, rinse the area with water.
    • Lemon Essential Oil: If direct lemon application is too harsh, consider using lemon essential oil diluted with a carrier oil like coconut or olive oil, and massage the affected area. The essential oil is less abrasive but still carries the benefits of lemon.
  2. Internal Consumption:
    • Lemon Water: Start your day with a glass of warm lemon water. This not only hydrates but also provides vitamin C to help strengthen vascular health. Squeeze half a lemon into a glass of warm water and drink it on an empty stomach.
    • Incorporate in Diet: Add lemon zest and juice to your meals, be it salads, teas, or fish dishes. This increases your overall intake of vitamin C and bioflavonoids.

Considerations and Cautions

  • Skin Sensitivity: Lemon juice is acidic and can irritate the skin, especially if you have sensitive skin. Always dilute it if you’re applying it directly and never apply it to open wounds or eczema.
  • Sun Sensitivity: Applying lemon juice can make your skin more sensitive to sunlight, increasing the risk of sunburn. Avoid sun exposure after applying lemon juice to the skin.
  • Medical Advice: While lemon can be a helpful natural remedy, it’s important to consult with a healthcare provider about the best treatment plan for varicose veins, especially if they cause discomfort or complications.

Conclusion

While lemons offer health benefits, including potentially improving the appearance of varicose veins through their vitamin C and anti-inflammatory properties, they are not a guaranteed or instant cure. Combining lemon treatments with other lifestyle changes like regular exercise, maintaining a healthy weight, and wearing compression stockings can provide more comprehensive results in managing varicose veins.

Onions are celebrated not only for their culinary versatility but also for their medicinal properties. Rich in flavonoids and sulfur compounds, onions have been used traditionally to enhance circulation and reduce inflammation, making them an excellent choice for natural varicose vein treatments. Here are two potent onion-based recipes designed to help reduce the appearance of varicose veins:

Recipe 1: Onion and Apple Cider Vinegar Compress

Ingredients:

  • 1 medium onion, finely chopped
  • 1/2 cup apple cider vinegar

Instructions:

  1. Prepare the Mixture: Combine finely chopped onion with apple cider vinegar in a bowl. Let it sit for a few hours to allow the onion to infuse the vinegar with its juices.
  2. Apply the Compress: Soak a clean cloth in the onion and vinegar mixture, then apply it to the affected areas. Wrap the area with a plastic wrap to keep the compress in place and enhance absorption.
  3. Duration: Leave the compress on for about 30 minutes to an hour.
  4. Frequency: Repeat this treatment daily for best results. Consistent use over time can help diminish the visibility of varicose veins.

Recipe 2: Onion Paste Wrap

Ingredients:

  • 2 onions, blended into a paste
  • A few drops of lavender or rosemary essential oil (optional for fragrance and additional anti-inflammatory effect)

Instructions:

  1. Make Onion Paste: Use a food processor or blender to turn the onions into a smooth paste. If desired, add a few drops of essential oil for extra benefits and a more pleasant scent.
  2. Apply the Paste: Spread the onion paste directly on the varicose veins and cover with a clean cloth or bandage.
  3. Leave It On: Allow the paste to work on your skin for about an hour. The natural compounds in the onion will penetrate the skin, helping to reduce swelling and improve circulation.
  4. Wash Off: Remove the cloth or bandage and wash the area with cool water.
  5. Repeat: Use this wrap every day. Regular application can progressively reduce the prominence of varicose veins.

Additional Tips and Precautions

  • Skin Sensitivity Test: Before using onion on your skin, especially if mixed with other potent ingredients like apple cider vinegar or essential oils, perform a patch test to ensure you don’t have an adverse reaction.
  • Sun Sensitivity: Applying onion to the skin can increase sensitivity to sunlight. Avoid sun exposure immediately after using these treatments to prevent skin irritation.
  • Consultation with Health Professionals: If you have severe varicose veins or experience pain and significant discomfort, it is essential to consult with a healthcare provider for appropriate treatments.

Conclusion

While no home remedy can guarantee the complete eradication of varicose veins instantly, regular use of these onion-based recipes may gradually improve their appearance and alleviate discomfort. Combined with a healthy lifestyle, including proper diet and exercise, these natural remedies can help you manage varicose veins more effectively.

Collagen is crucial for maintaining skin elasticity and reducing the appearance of wrinkles. Here are three top natural recipes that can help stimulate collagen production and improve skin texture, especially beneficial even if you’re around 70 years old.

1. Aloe Vera and Vitamin E Mask

Ingredients:

  • 2 tablespoons of fresh aloe vera gel
  • 1 capsule of Vitamin E

Instructions:

  1. Extract Aloe Vera Gel: If you’re using fresh aloe vera, slice a leaf from the plant, peel off the outer layer, and scoop out the gel.
  2. Combine Ingredients: Mix the aloe vera gel with the oil from one Vitamin E capsule in a bowl.
  3. Apply: Apply this mixture to your face, focusing on areas with wrinkles. Aloe vera hydrates the skin while Vitamin E’s antioxidant properties help repair and protect skin cells.
  4. Duration: Leave the mask on for about 20-30 minutes.
  5. Rinse Off: Wash off with lukewarm water and pat dry.
  6. Frequency: Use this mask 2-3 times a week for best results.

2. Avocado and Honey Mask

Ingredients:

  • 1 ripe avocado
  • 1 tablespoon of raw honey

Instructions:

  1. Prepare Avocado: Mash the avocado in a bowl until it’s smooth.
  2. Mix: Add the raw honey to the mashed avocado and mix well. The fats in avocado are excellent for moisturizing the skin, and honey is a natural humectant that attracts moisture.
  3. Apply: Spread the mask evenly over your face and neck.
  4. Duration: Leave it on for about 20 minutes.
  5. Rinse Off: Remove with warm water, then splash with cold water to close the pores.
  6. Frequency: Apply this mask once a week to nourish the skin and help stimulate collagen production.

3. Banana and Yogurt Mask

Ingredients:

  • 1 ripe banana
  • 2 tablespoons of plain yogurt (Greek yogurt for extra protein)
  • A few drops of rosewater (optional for added fragrance and soothing properties)

Instructions:

  1. Prepare Banana: Mash the banana thoroughly until there are no lumps.
  2. Combine Ingredients: Mix the mashed banana with yogurt and rosewater until you achieve a smooth paste. Bananas contain vitamins A, B, and E, which are potent skin-softening agents that help counteract wrinkles.
  3. Apply: Cover your face evenly with the mixture, concentrating more on the wrinkled areas.
  4. Duration: Keep the mask on for 15-20 minutes.
  5. Rinse Off: Wash your face with lukewarm water and end with a splash of cold water.
  6. Frequency: Use this mask twice a week for effective results.

Additional Tips

  • Skin Care Routine: Incorporate these masks into a consistent skincare routine that includes gentle cleansing and adequate hydration.
  • Sun Protection: Always apply sunscreen during the day, as UV exposure can break down collagen and cause further wrinkling.
  • Healthy Diet: Support your skin health by maintaining a diet rich in antioxidants and omega-3 fatty acids, which can help protect and rejuvenate the skin.

These natural remedies can enhance your skin’s appearance by boosting hydration and stimulating collagen production, making them a valuable addition to your skincare regimen, especially as you mature.

Prunes and lemons are powerful in their health benefits, particularly for heart health. Prunes are rich in fiber, potassium, and antioxidants, which help manage cholesterol levels and improve cardiovascular health. Lemons are loaded with vitamin C and flavonoids, which can strengthen blood vessels and reduce the risk of stroke and heart attack. Combining these two creates not only a heart-healthy dessert but one that is delicious and simple to make, all without adding sugar. Here’s how to prepare it:

Ingredients:

  • 1 cup of pitted prunes
  • Juice of 1 large lemon
  • Optional: zest of the lemon for added flavor and nutrients

Instructions:

Prune and Lemon Puree

  1. Soak the Prunes: Place the prunes in a bowl and cover them with warm water. Let them soak for about an hour until they become soft and plump. This makes them easier to blend and increases their sweetness naturally.
  2. Blend Prunes and Lemon: Drain the prunes and place them in a blender. Add the fresh lemon juice (and zest, if using) to the prunes.
  3. Puree the Mixture: Blend the ingredients until smooth. If the mixture is too thick, you can add a little bit of water to achieve the desired consistency.
  4. Chill and Serve: Transfer the puree to a serving dish and chill in the refrigerator for at least an hour. This dessert can be enjoyed on its own or topped with a sprinkle of nuts or seeds for added texture.

Prune and Lemon Balls

  1. Prepare Ingredients: After soaking the prunes as described above, drain them but do not blend yet.
  2. Chop Prunes: Chop the prunes into small pieces and place them in a mixing bowl.
  3. Add Lemon and Form Balls: Mix lemon juice (and zest) into the chopped prunes. Use your hands to mix well and then form small balls from the mixture.
  4. Refrigerate: Place the prune and lemon balls on a tray lined with parchment paper and refrigerate until they are firm, about 2-3 hours.
  5. Roll in Coconut or Nuts (Optional): For added flavor and crunch, roll the balls in finely chopped nuts or coconut flakes before refrigerating.

Benefits:

  • Heart Health: Both prunes and lemons contribute to lowering blood pressure and cholesterol, two major risk factors for heart disease and stroke.
  • Digestive Health: Prunes are particularly known for their ability to aid digestion and prevent constipation, thanks to their high fiber content.
  • Antioxidant Power: The antioxidants in prunes and the vitamin C in lemons help fight free radicals, reducing oxidative stress and inflammation in the body.

Tips:

  • Consistency in Consumption: For lasting health benefits, incorporate this dessert into your regular diet.
  • Variety and Balance: While this dessert is healthy, overall diet variety and balance are crucial for preventing heart disease and strokes.

This simple, no-sugar-added dessert not only satisfies sweet cravings but also packs a nutritious punch, supporting heart health and overall wellness. Enjoy this delightful treat knowing you’re doing something good for your body!