Category

Health & Wellness

Category

Did you know that garlic and onion peels are packed with nutrients and powerful compounds that can benefit your health, home, and garden? Most of us throw them away without realizing their true value, but once you learn the surprising uses of these peels, you’ll never want to waste them again. Let’s explore how garlic and onion peels can be turned into gold for your daily life!

1. Health Benefits of Garlic and Onion Peels

Garlic Peels
Garlic peels contain potent antioxidants like phenylpropanoids, which have anti-inflammatory, anti-aging, and heart-protective benefits. These compounds support overall health by helping fight off free radicals and promoting better immune function.

Onion Peels
Onion peels are rich in quercetin, a powerful antioxidant that can reduce blood pressure, prevent clogged arteries, and boost your immune system. They also have anti-inflammatory properties, making them useful for improving heart health and reducing the risk of chronic diseases.

How to Use Garlic and Onion Peels for Health

Garlic and Onion Peel Tea
You can make a nutrient-packed tea by boiling garlic and onion peels together. This tea helps with inflammation, boosts immunity, and promotes cardiovascular health.

Ingredients:

  • A handful of garlic peels
  • A handful of onion peels
  • 2 cups of water

Instructions:

  1. Rinse the peels thoroughly to remove dirt or pesticides.
  2. Boil 2 cups of water and add the garlic and onion peels.
  3. Let the mixture simmer for about 10-15 minutes.
  4. Strain the liquid and enjoy the tea warm.

Benefits:

  • Supports heart health
  • Boosts the immune system
  • Reduces inflammation and fights free radicals

2. Garlic and Onion Peels for Cooking

Flavorful Broths
Instead of tossing those peels, add them to homemade broths or soups. Both garlic and onion peels add depth of flavor and a boost of nutrients to your dishes. Simply toss the peels into the pot while simmering your broth and strain them out before serving.

How to Use:

  • Add a handful of onion and garlic peels to any soup, broth, or stew.
  • Let them simmer along with your vegetables and remove them before serving.

Benefits:

  • Enhances the flavor of soups and stews
  • Adds additional vitamins and antioxidants to your meals

3. Use Peels in the Garden

Natural Fertilizer
Both garlic and onion peels are rich in nutrients that can benefit your garden. When decomposed, they release essential minerals like potassium, calcium, and magnesium, which nourish your plants and improve soil health.

How to Use:

  • Dry the peels and grind them into a powder.
  • Sprinkle this powder around your plants or add it to your compost pile.
  • Alternatively, soak the peels in water for a few days to create a nutrient-rich “peel tea” for watering your plants.

Benefits:

  • Enriches soil with valuable nutrients
  • Promotes healthy plant growth
  • Keeps pests away naturally (especially garlic peels, which repel insects)

4. Natural Dye for Fabrics

Eco-Friendly Dye
Onion peels, particularly red and yellow varieties, can be used as a natural dye for fabrics and Easter eggs! The pigment in onion peels produces beautiful shades of orange, yellow, and brown, making them a great eco-friendly option for DIY dye projects.

How to Use:

  • Boil onion peels in water for about 30 minutes.
  • Strain the liquid and soak your fabric or eggs in the dye.
  • For a deeper color, leave the fabric in the dye overnight.

Benefits:

  • Creates natural, eco-friendly dyes
  • Beautiful colors for fabric or craft projects

5. Repel Pests Naturally

Pest Control
Garlic and onion peels can be used as natural pest repellents in the home and garden. The strong smell of garlic peels repels insects like aphids and spider mites, while onion peels can deter pests from entering your home.

How to Use:

  • Scatter garlic peels around your garden plants to keep pests at bay.
  • Place onion peels in corners or areas where you notice ants or other insects.

Benefits:

  • Keeps pests away without chemicals
  • Safe for pets and children

Conclusion

Garlic and onion peels are true hidden treasures that offer a wide range of benefits, from boosting your health to enhancing your garden and even adding natural color to your fabrics. Don’t let these valuable peels go to waste! Start incorporating them into your daily routine, and you’ll be amazed at how versatile and useful they can be.

Try these tips, and you’ll never look at garlic and onion peels the same way again!

Beetroot is not only a delicious and nutritious vegetable, but it’s also a fantastic natural source to boost collagen production, which keeps your skin looking youthful and firm. Rich in antioxidants, vitamins, and minerals, beetroot promotes skin elasticity, fights wrinkles, and improves overall skin health. Incorporating beetroot into your nightly routine can do wonders for your skin! Here are two simple beetroot recipes to boost your collagen levels and leave you amazed by the results.

1. Beetroot Juice for Collagen and Skin Glow

Drinking fresh beetroot juice before bed is a powerful way to give your skin the nutrients it needs to produce more collagen. Beetroot is packed with vitamin C, which is essential for collagen synthesis, and its antioxidants help combat free radicals that damage skin cells and cause aging.

Ingredients:

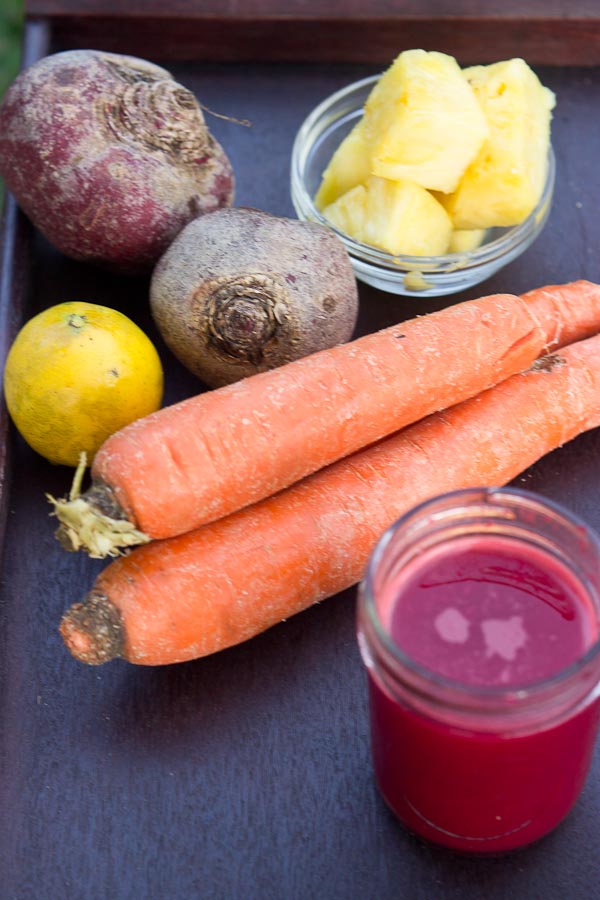
  • 1 medium beetroot (peeled and chopped)
  • 1 small carrot (optional, for added sweetness)
  • ½ apple (optional, for sweetness)
  • ½ lemon (juice)
  • 1-inch piece of ginger (optional, for a boost of anti-inflammatory benefits)
  • 1 cup of water

Instructions:

  1. In a blender, combine the beetroot, carrot, apple (if using), ginger, and water. Blend until smooth.
  2. Strain the mixture through a fine strainer or cheesecloth to remove the pulp.
  3. Squeeze in the juice of half a lemon and stir well.
  4. Drink the juice every night before bed.

Benefits:

  • Boosts collagen production
  • Improves skin elasticity
  • Brightens skin tone
  • Flushes toxins for a clearer complexion

2. Beetroot Face Mask for Firm, Radiant Skin

Applying a beetroot face mask is another fantastic way to directly nourish your skin with the antioxidants and vitamins needed for collagen production. This DIY mask brightens your complexion, smooths fine lines, and provides a natural glow.

Ingredients:

  • 1 small beetroot (peeled and grated or juiced)
  • 1 tablespoon of yogurt (or coconut milk for a vegan option)
  • 1 teaspoon of honey (optional, for added hydration)
  • 1 tablespoon of rice flour or oatmeal (for gentle exfoliation)

Instructions:

  1. In a small bowl, mix the grated or juiced beetroot with yogurt, honey (if using), and rice flour or oatmeal.
  2. Stir until you get a smooth paste.
  3. Apply the mixture evenly to your face and neck, avoiding the eye area.
  4. Leave the mask on for 15-20 minutes.
  5. Rinse off with lukewarm water, and follow up with your favorite moisturizer.

Benefits:

  • Stimulates collagen production for firmer skin
  • Exfoliates dead skin cells, leaving skin smooth and refreshed
  • Brightens dark spots and evens out skin tone
  • Provides deep hydration and nourishment

Why Beetroot Is a Collagen-Boosting Superfood

  • High in Vitamin C: Vitamin C is essential for collagen production, and beetroot contains plenty of it. This helps the skin retain its firmness and elasticity.
  • Rich in Antioxidants: The antioxidants in beetroot, especially betalains, help protect the skin from oxidative stress and aging.
  • Detoxifying Properties: Beetroot helps purify the blood and flush toxins out of the body, leading to clearer skin and improved circulation, which is vital for skin health.
  • Promotes Healthy Blood Flow: Beetroot improves blood flow, ensuring that your skin gets the oxygen and nutrients it needs to look fresh and youthful.

Conclusion

By incorporating beetroot into your nightly routine—whether through a delicious juice or a revitalizing face mask—you’ll give your skin a natural collagen boost that promotes a youthful, glowing complexion. Try these beetroot recipes consistently, and you’ll be amazed at the results!

Banana leaves, the large, flexible, and waterproof foliage of the banana plant, are more than just an exotic cooking accessory. Widely used in tropical and subtropical regions, these leaves are an integral part of culinary traditions across Asia, Africa, and South America. Beyond their utility in the kitchen, banana leaves also offer several health benefits that can contribute positively to your lifestyle.

Health Benefits of Banana Leaves

  1. Antioxidant Properties: Banana leaves are rich in polyphenols, a type of antioxidant found in many plant-based foods. These antioxidants help combat free radicals in the body, which are linked to many chronic diseases including cancer and heart disease.
  2. Antibacterial Effects: The leaves have inherent antibacterial properties that can kill off harmful bacteria. In traditional practices, food served on banana leaves gains this antibacterial benefit, making it safer to eat.
  3. Eco-Friendly and Hygienic: Using banana leaves as plates is not only environmentally friendly but also hygienic. The waxy coating on the leaves repels dirt and bacteria, and since they are used only once before being discarded or composted, there is less risk of contamination.
  4. Chemical-Free Packaging: Unlike plastic or other synthetic materials, banana leaves are a natural food wrapper. They don’t leach any harmful chemicals into the food and can withstand high temperatures without melting or tearing.
  5. Mental Health Benefits: The practice of eating on banana leaves is often considered therapeutic. The pleasing aesthetics of a natural plate, combined with the traditional significance and the act of eating with hands, can enhance the eating experience, promoting satisfaction and psychological well-being.

Culinary Uses of Banana Leaves

  • Steaming, Grilling, and Baking: Banana leaves can be used as a wrapping material for steaming, grilling, or baking. The leaves impart a subtle, grassy aroma to the food and prevent sticking, keeping the moisture intact within the food.
  • Serving Platters: In many cultures, banana leaves are used as disposable platters for serving food. This not only adds beauty to the presentation but also gives a slight flavor enhancement to the dish.

How to Use Banana Leaves

  • Preparation: Before using banana leaves, they should be rinsed with water and wiped down. It’s also common to briefly pass them over an open flame to make them more pliable and to release their natural aromas.
  • Cooking: Wrap fish, meat, rice, or vegetables in banana leaves and then cook them as desired. The leaves can be secured with a string or toothpick to keep the package intact during cooking.
  • Serving: Use whole or cut pieces as a liner on serving plates or trays for an elegant touch to your dining presentation.

Environmental Impact

Using banana leaves as an alternative to plastic or other disposable materials can significantly reduce waste and pollution. They are 100% biodegradable and sustainable, providing a practical and eco-friendly solution for reducing your carbon footprint.

Conclusion

Banana leaves are more than just an exotic relic of tropical culinary traditions; they offer a variety of health and environmental benefits that can make a significant positive impact on our lives. By incorporating the use of banana leaves in cooking and serving, you can enjoy these benefits while also partaking in a rich cultural practice that enhances the overall dining experience.

Ginseng, a revered herb in traditional medicine, especially in Asia, is known for its potent anti-aging properties. Rich in antioxidants and other beneficial compounds, ginseng can help combat the signs of aging and rejuvenate the skin. Here are seven ways you can use ginseng to maintain youthful, radiant skin at home.

1. Ginseng Tea Tonic

Drinking ginseng tea regularly can help improve your skin from the inside out. Ginseng boosts the circulation of your blood, which increases the supply of essential nutrients to your skin cells.

  • Preparation: Steep a ginseng root or ginseng tea bag in hot water for 5-8 minutes. Drink once or twice daily.

2. Ginseng Face Mask

Applying ginseng directly to your skin can help brighten and tighten your complexion.

  • Ingredients: 1 teaspoon ginseng powder, 1 tablespoon honey, and a few drops of lemon juice.
  • Instructions: Mix all the ingredients to form a paste. Apply to your face and leave on for 20 minutes. Rinse with lukewarm water.

3. Ginseng Infused Oil

Ginseng infused oil can be used as a nightly serum to help smooth fine lines and wrinkles.

  • Preparation: Add a few slices of ginseng root to your favorite carrier oil (like jojoba or almond oil) and let it infuse for 2-3 weeks in a cool, dark place. Use a few drops on your face each night before bed.

4. Ginseng Under-Eye Treatment

Ginseng can help reduce puffiness and dark circles under the eyes.

  • Instructions: Mix ginseng extract with your regular under-eye cream or a bit of coconut oil. Apply gently under the eyes with your ring finger.

5. Ginseng and Yogurt Soothing Mask

This mask is great for calming the skin and reducing the appearance of age spots.

  • Ingredients: 2 tablespoons plain yogurt, 1 teaspoon ginseng powder.
  • Instructions: Mix the ingredients and apply to clean skin. Leave on for 15 minutes, then rinse with cool water.

6. Ginseng Exfoliating Scrub

Ginseng’s anti-inflammatory properties make it an excellent addition to homemade scrubs.

  • Ingredients: ½ cup sugar, ¼ cup coconut oil, 1 teaspoon ginseng powder.
  • Instructions: Combine all ingredients in a bowl. Use the scrub to gently exfoliate your skin in a circular motion, then rinse off in the shower.

7. Ginseng Bath Soak

A ginseng bath can help soothe the skin and relax the body, promoting overall skin health.

  • Ingredients: A handful of ginseng slices, one cup Epsom salts.
  • Instructions: Fill your bathtub with warm water, add the Epsom salts and ginseng slices, and soak for 20-30 minutes.

Tips for Using Ginseng

  • Quality Matters: Always use high-quality ginseng for the best results. Whether you’re using the root or powder, make sure it’s from a reputable source.
  • Patch Test: Before applying ginseng or any new ingredient to your face, do a patch test on a small area of skin to ensure there is no irritation or allergic reaction.
  • Consistency is Key: As with any natural remedy, regular use is needed to see significant results. Be patient and consistent with your ginseng treatments.

Incorporating ginseng into your skincare routine can help you harness its anti-aging benefits, leaving your skin looking younger and more vibrant.

Combining cloves and Vaseline can be a surprising yet powerful beauty and health hack that offers various benefits. This simple but effective combination can be used for skin care, pain relief, and more. Let’s explore how you can make the most of this unlikely duo!

Why Cloves and Vaseline Work Together

Cloves are rich in eugenol, a compound known for its powerful anti-inflammatory, antimicrobial, and analgesic properties. This makes cloves ideal for treating acne, soothing pain, and fighting infections.

On the other hand, Vaseline, also known as petroleum jelly, acts as an excellent moisturizer that creates a protective barrier on the skin. It helps lock in moisture, soothe irritated skin, and serves as a base for the cloves, allowing their healing properties to penetrate more deeply into the skin.

Now let’s dive into the different ways you can use this amazing combination:

1. Acne and Blemish Treatment

Cloves contain antimicrobial properties that can help treat acne and reduce pimples. By mixing ground cloves or clove oil with Vaseline, you can take advantage of the eugenol in the cloves to fight acne-causing bacteria while moisturizing and protecting your skin from drying out.

How to Use:

  • Mix 1/2 teaspoon of ground cloves or a few drops of clove oil with 1 teaspoon of Vaseline to form a smooth paste.
  • Apply the mixture directly to acne spots or blemishes and leave it on for 15-20 minutes.
  • Rinse off with warm water and pat dry.
  • Repeat this 2-3 times a week for clearer skin.

2. Relieves Muscle and Joint Pain

Cloves are known for their analgesic properties, making them great for relieving muscle and joint pain. By mixing them with Vaseline, you can create a soothing blend that provides relief for sore muscles, joint pain, or even arthritis. The Vaseline helps keep the cloves on the skin, allowing the eugenol to penetrate and relieve pain.

How to Use:

  • Mix 1 teaspoon of ground cloves or a few drops of clove oil with 2 teaspoons of Vaseline to create a balm.
  • Massage the balm into the sore or aching areas.
  • Let the mixture sit on the skin for 30 minutes or longer.
  • For ongoing relief, apply daily.

3. Lip Plumper and Moisturizer

Cloves can be used as a natural lip plumper due to their ability to stimulate blood flow. By mixing cloves with Vaseline, you can give your lips a fuller look while keeping them hydrated and soft.

How to Use:

  • Mix a pinch of ground cloves or a few drops of clove oil with 1 teaspoon of Vaseline until well combined.
  • Apply the mixture to your lips and leave it on for about 10 minutes.
  • You’ll feel a slight tingling sensation as the cloves work to plump your lips.
  • Wipe off the mixture and apply a moisturizing lip balm or use Vaseline to keep your lips soft.

4. Foot Care for Cracked Heels

The moisturizing properties of Vaseline, combined with the anti-inflammatory and antimicrobial effects of cloves, make this mixture ideal for healing cracked heels and soothing sore feet. The cloves also help stimulate blood circulation, promoting healing.

How to Use:

  • Mix 1 teaspoon of ground cloves or clove oil with 2 teaspoons of Vaseline to create a thick paste.
  • Apply the mixture generously to cracked heels or dry areas of the feet.
  • Put on socks and leave the mixture on overnight for the best results.
  • In the morning, wash off the mixture with warm water and gently exfoliate the skin.
  • Repeat this 2-3 times a week for smooth, soft feet.

5. Anti-Aging Face Mask

Cloves are packed with antioxidants that can help fight the signs of aging, including fine lines, wrinkles, and age spots. By combining cloves with Vaseline, you can create a natural mask that tightens the skin and reduces the appearance of wrinkles.

How to Use:

  • Mix 1/2 teaspoon of ground cloves or clove oil with 1 teaspoon of Vaseline until well blended.
  • Apply the mixture to your face, focusing on areas with fine lines or wrinkles.
  • Leave it on for 15-20 minutes.
  • Rinse with warm water and pat dry.
  • Use this mask once or twice a week for glowing, youthful skin.

Final Thoughts

The combination of cloves and Vaseline is a versatile and powerful remedy that can be used for everything from acne treatment to pain relief and skincare. The natural properties of cloves make this mixture a must-try for anyone looking to boost their skin health, relieve pain, or enhance their beauty routines. Give it a try, and you’ll soon be thanking yourself for this simple yet effective secret!

If you’re looking for a natural way to reduce age spots, the combination of parsley and baking soda could be the solution you need! Both ingredients are known for their skin-brightening properties, and when used together, they can help fade dark spots and improve overall skin tone. Parsley is rich in vitamins and antioxidants that support skin health, while baking soda works as a gentle exfoliant. Here’s how you can use this powerful combination to tackle age spots and reveal radiant skin.

Why Parsley and Baking Soda Work

  • Parsley: High in vitamins A and C, parsley acts as a natural skin brightener. It helps reduce pigmentation and dark spots by promoting skin regeneration. It also contains antioxidants that combat free radicals, which can lead to skin aging.
  • Baking Soda: Baking soda exfoliates dead skin cells, helping to lighten age spots over time. Its alkaline properties balance the skin’s pH, which promotes a healthier complexion.

How to Use Parsley and Baking Soda for Age Spots

Ingredients:

  • A handful of fresh parsley (about 1/2 cup, chopped)
  • 1 tablespoon baking soda
  • 1 tablespoon lemon juice (optional, for extra brightening)
  • 1/2 cup water

Instructions:

1. Prepare Parsley Extract

  • Boil 1/2 cup of water and pour it over the chopped parsley.
  • Let it steep for 15-20 minutes, then strain the parsley water into a small bowl.
  • Let it cool to room temperature.

2. Create the Paste

  • In a separate bowl, mix 1 tablespoon of baking soda with 1 tablespoon of lemon juice (optional) until it forms a paste.
  • Add the cooled parsley water to the baking soda mixture and stir until it forms a smooth paste.

3. Apply to Age Spots

  • Gently apply the parsley and baking soda paste to the areas with age spots.
  • Use circular motions to exfoliate the skin and allow the paste to sit on your skin for 10-15 minutes.

4. Rinse and Moisturize

  • Rinse off the paste with lukewarm water and pat your skin dry.
  • Follow up with a moisturizer to prevent any dryness, as baking soda can have a drying effect on the skin.

How Often to Use:

For best results, apply this parsley and baking soda paste 2-3 times a week. Over time, you should notice a reduction in the appearance of age spots and an improvement in skin brightness.

Additional Tips:

  • Lemon juice is optional, but its high vitamin C content can boost the skin-brightening effect of the paste.
  • Always use sunscreen after applying this treatment, as both lemon and baking soda can make your skin more sensitive to the sun.
  • Make sure to patch test the mixture on a small area of your skin first to ensure there’s no irritation.

Why This Method Is Effective:

  • Natural Ingredients: Parsley and baking soda are simple, natural alternatives to harsh chemical treatments.
  • Brightens Skin: The vitamins and minerals in parsley nourish the skin, while baking soda gently removes dead cells, revealing fresher, more radiant skin.
  • Affordable and Easy: This is a budget-friendly solution you can create at home with just a few ingredients.

Conclusion: A Natural Way to Fade Age Spots

Parsley and baking soda create a powerful, natural treatment for age spots that brightens and rejuvenates the skin. With regular use, this homemade remedy can help fade dark spots and leave your complexion looking fresh and even-toned. Try it and enjoy the radiant results!

Cloves are tiny but mighty when it comes to health benefits. These aromatic flower buds, often used in cooking and baking, also have powerful medicinal properties. When boiled and consumed as a tea, cloves can help improve digestion, boost immunity, reduce inflammation, and much more. Here’s why you’ll want to start drinking clove tea and how to make it.

Health Benefits of Clove Tea

1. Improves Digestion

Cloves are known for their ability to stimulate the production of digestive enzymes. Drinking clove tea can help relieve indigestion, bloating, and gas, making your digestive system work more efficiently. Cloves also have antibacterial properties that can help protect the stomach lining and fight harmful bacteria.

2. Boosts Immunity

Cloves are packed with antioxidants and compounds like eugenol, which have powerful antimicrobial properties. These compounds help strengthen the immune system by fighting off infections and reducing oxidative stress in the body. A warm cup of clove tea can help keep your immune defenses strong, especially during cold and flu season.

3. Reduces Inflammation and Pain

Cloves have natural anti-inflammatory properties, making them helpful for reducing inflammation in the body. If you suffer from arthritis, joint pain, or general inflammation, drinking clove tea may offer some relief. The eugenol in cloves acts as a natural pain reliever, which is why cloves are also used for toothache relief.

4. Supports Respiratory Health

Clove tea is excellent for soothing a sore throat, reducing cough, and clearing congestion. The warming effect of clove tea helps open up the respiratory passages, providing relief from respiratory issues like bronchitis or asthma. Clove’s antimicrobial properties also help fight respiratory infections.

5. Regulates Blood Sugar Levels

Cloves may help regulate blood sugar levels by improving the function of insulin. This is especially beneficial for individuals with diabetes or those looking to manage their blood sugar naturally. Drinking clove tea regularly can support better blood sugar control.

How to Make Clove Tea

Making clove tea is simple, and you only need a few ingredients to enjoy its numerous health benefits.

Ingredients:

  • 1 cup of water
  • 3-4 whole cloves
  • Honey or lemon (optional for taste)

Instructions:

  1. Boil the Cloves:
    Bring 1 cup of water to a boil and add 3-4 whole cloves to the water.
  2. Simmer:
    Reduce the heat and let the cloves simmer for about 5-10 minutes to release their beneficial compounds.
  3. Strain and Serve:
    Remove from heat, strain the liquid into a cup, and discard the cloves. You can add a teaspoon of honey or a squeeze of lemon to enhance the flavor if desired.
  4. Drink Warm:
    Drink the tea while it’s warm to experience its full soothing and healing effects.

How Often to Drink Clove Tea

For best results, drink clove tea once a day. If you’re using it for specific issues like respiratory health or digestion, you can drink it up to twice a day.

Precautions:

  • Clove tea is generally safe for most people, but it’s best to consume it in moderation.
  • Pregnant or breastfeeding women should consult their healthcare provider before drinking clove tea regularly.
  • People on blood-thinning medications should also consult a doctor, as cloves have blood-thinning properties.

Conclusion:

Boiling cloves and drinking the resulting tea can offer numerous health benefits, from improved digestion and immunity to reduced inflammation and pain relief. Incorporating clove tea into your routine is an easy, natural way to support your overall health. Give it a try, and you’ll be grateful for the soothing and healing effects of this simple yet powerful remedy!

Cinnamon is not only a fragrant spice that enhances the flavor of many dishes, but it’s also a powerful natural remedy that can help lower cholesterol and regulate blood sugar levels. By simply boiling cinnamon sticks and drinking the resulting tea, you can support your heart health and manage blood sugar levels naturally. Let’s explore how this simple remedy works and how to prepare it.

Why Cinnamon Works for Cholesterol and Blood Sugar

Cinnamon is rich in antioxidants and compounds that have anti-inflammatory, cholesterol-lowering, and blood sugar-regulating properties. Here’s why cinnamon is effective:

  • Regulates Blood Sugar: Cinnamon helps improve insulin sensitivity, allowing the body to use insulin more efficiently. This helps lower blood sugar levels by slowing the breakdown of carbohydrates in the digestive tract, which prevents spikes after meals.
  • Lowers Cholesterol: Studies have shown that cinnamon can reduce LDL cholesterol (bad cholesterol) and triglycerides, while maintaining or even increasing HDL cholesterol (good cholesterol). This supports overall heart health and reduces the risk of cardiovascular disease.
  • Rich in Antioxidants: Cinnamon is packed with polyphenols, which protect the body from oxidative stress and inflammation, both of which can contribute to high cholesterol and elevated blood sugar levels.

How to Prepare Cinnamon Stick Tea

This simple cinnamon stick tea can be easily incorporated into your daily routine to help lower cholesterol and blood sugar levels.

Ingredients:

  • 2–3 cinnamon sticks (use Ceylon cinnamon for best results)
  • 4 cups of water
  • Optional: lemon or honey (for added flavor, but avoid honey if you’re managing blood sugar)

Instructions:

  1. Boil the Water:
    Bring 4 cups of water to a boil in a pot.
  2. Add Cinnamon Sticks:
    Once the water is boiling, add 2–3 cinnamon sticks to the pot. Reduce the heat to a simmer.
  3. Simmer:
    Let the cinnamon sticks simmer in the water for about 15–20 minutes. This allows the beneficial compounds from the cinnamon to infuse into the water.
  4. Strain and Serve:
    After simmering, remove the pot from heat and strain the tea into a cup. You can add a squeeze of lemon for a fresh taste, or a small amount of honey if you’re not concerned about blood sugar.
  5. Drink Regularly:
    For best results, drink cinnamon tea daily, either in the morning or before meals. Consistent use can help manage cholesterol and blood sugar levels over time.

Health Benefits of Drinking Cinnamon Tea

  1. Lowers Blood Sugar Levels
    Drinking cinnamon tea regularly can help manage and reduce blood sugar levels, making it especially helpful for people with type 2 diabetes or those at risk. The compounds in cinnamon improve insulin sensitivity and help the body process sugar more effectively.
  2. Reduces LDL Cholesterol and Triglycerides
    Cinnamon has been shown to lower LDL (bad cholesterol) and triglycerides while maintaining or raising HDL (good cholesterol). By drinking cinnamon tea, you can support heart health and reduce your risk of developing heart disease.
  3. Boosts Metabolism
    Cinnamon is also known to help boost metabolism, which can aid in weight management. This can indirectly help manage cholesterol and blood sugar, as excess weight is often linked to higher cholesterol levels and insulin resistance.
  4. Anti-Inflammatory and Antioxidant Properties
    The antioxidants in cinnamon help reduce inflammation and protect your cells from damage caused by free radicals. This can reduce the risk of chronic diseases, including cardiovascular disease and type 2 diabetes.

Additional Tips for Best Results

  • Pair with a Healthy Diet: While cinnamon can be a powerful natural remedy, it’s important to combine it with a balanced diet that’s rich in whole grains, lean proteins, fruits, and vegetables. Reducing refined sugars and unhealthy fats is key to managing cholesterol and blood sugar levels.
  • Exercise Regularly: Regular physical activity can help improve cholesterol levels and lower blood sugar. Aim for at least 30 minutes of exercise most days of the week.
  • Stay Hydrated: Drinking plenty of water throughout the day supports overall health and helps the body manage blood sugar levels effectively.

Final Thoughts

Boiling cinnamon sticks and drinking the resulting tea is a simple, natural way to help lower your cholesterol and regulate blood sugar levels. With its powerful health benefits and delicious flavor, cinnamon tea can easily become a part of your daily routine. Combine this remedy with a healthy lifestyle, and you’ll be well on your way to better heart and metabolic health!

Water retention, or edema, occurs when excess fluid builds up in the body, leading to swelling and discomfort. Fortunately, there are natural remedies that can help reduce this excess water. One simple and effective method is boiling apple peels to create a refreshing tea that can help your body eliminate excess fluid naturally. Apple peels are rich in nutrients that promote healthy kidney function and reduce bloating. Let’s explore how to use boiled apple peels to relieve water retention.

Why Apple Peels Help with Water Retention

Apple peels contain a range of beneficial compounds that support your body’s natural detoxification process:

  • High in Potassium: Potassium helps balance sodium levels in the body, which is key in reducing water retention. Apple peels are naturally rich in potassium, helping to flush out excess sodium and water from the body.
  • Natural Diuretic Properties: Apple peels act as a mild diuretic, helping your kidneys remove excess fluids more efficiently, reducing bloating and swelling.
  • Rich in Fiber: The fiber in apple peels promotes better digestion and can help reduce bloating caused by poor digestion or constipation.
  • Antioxidants: Apple peels are rich in antioxidants, particularly quercetin, which helps reduce inflammation and can further aid in relieving swelling caused by water retention.

How to Make Apple Peel Tea for Water Retention

This simple tea made from apple peels can help your body naturally release excess water.

Ingredients:

  • Peels from 2-3 organic apples (red or green)
  • 4 cups of water
  • Optional: cinnamon stick or lemon for added flavor

Instructions:

  1. Prepare the Apple Peels:
    Wash the apples thoroughly before peeling to remove any dirt or chemicals. It’s best to use organic apples to avoid pesticides.
  2. Boil the Peels:
    Add the apple peels to a pot with 4 cups of water. Bring the water to a boil.
  3. Simmer:
    Once the water reaches a boil, reduce the heat and let the peels simmer for about 15-20 minutes. This will allow the beneficial compounds to infuse into the water.
  4. Strain the Tea:
    After simmering, strain the tea to remove the apple peels. You can add a cinnamon stick or a squeeze of lemon for extra flavor and additional health benefits.
  5. Drink Regularly:
    Drink the apple peel tea 1-2 times per day, especially in the morning or before meals. Regular consumption can help your body release excess water and reduce swelling.

Additional Tips to Reduce Water Retention Naturally

While apple peel tea can be highly effective, there are additional steps you can take to further reduce water retention:

  1. Stay Hydrated:
    Drinking plenty of water may seem counterintuitive, but staying hydrated actually helps flush out excess fluids by encouraging kidney function and balancing your body’s water levels.
  2. Reduce Salt Intake:
    Too much sodium is a common cause of water retention. Reducing salt in your diet helps prevent water buildup in tissues.
  3. Eat Potassium-Rich Foods:
    Besides apple peels, other potassium-rich foods like bananas, spinach, and avocados help regulate fluid balance and promote the excretion of excess sodium.
  4. Get Moving:
    Physical activity, even light exercise, can help reduce water retention by promoting circulation and preventing fluid from pooling in the legs and feet.
  5. Increase Magnesium Intake:
    Magnesium helps regulate fluid balance in the body. Incorporating magnesium-rich foods like nuts, seeds, and leafy greens into your diet can aid in reducing water retention.

Final Thoughts

Boiling apple peels to create a natural diuretic tea is an easy and effective way to help your body get rid of excess water and reduce bloating. Rich in potassium, antioxidants, and fiber, apple peel tea supports your body’s natural fluid balance and promotes healthy kidney function. Combine this tea with a balanced diet, proper hydration, and regular exercise, and you’ll soon find relief from water retention naturally!

Ginger has long been known for its powerful health benefits, especially when it comes to detoxifying the liver and cleansing the intestines. If you’re feeling sluggish, experiencing digestive issues, or looking to boost your energy levels, this simple ginger recipe can help transform your health. Ginger’s anti-inflammatory and detoxifying properties make it a natural remedy that can leave you feeling light, refreshed, and energized—so much so, you might feel like running again!

Why Ginger Is So Powerful for Intestinal and Liver Health

  • Anti-Inflammatory: Ginger is known for its ability to reduce inflammation, which can benefit both your liver and digestive system. Chronic inflammation can lead to liver damage and digestive issues, and ginger helps soothe this inflammation.
  • Aids Digestion: Ginger stimulates the production of digestive enzymes, helping your body break down food more efficiently and cleanse the intestines from toxins and waste buildup.
  • Boosts Liver Detoxification: Ginger supports liver function by boosting its natural detoxifying processes. It helps flush out toxins, improves bile production, and enhances liver function, ensuring the liver can filter impurities from the blood effectively.
  • Increases Circulation: By improving blood circulation, ginger helps transport nutrients more efficiently throughout the body, allowing organs like the liver and intestines to function at their best.

Ginger Detox Recipe for Cleaning the Intestines and Liver

This easy-to-make recipe combines the power of ginger with a few other natural ingredients to cleanse your system and give your body a natural boost.

Ingredients:

  • 1–2 inches of fresh ginger root (peeled and sliced)
  • 1 lemon (for added detox and vitamin C)
  • 1 tablespoon of honey (optional, for taste)
  • 4 cups of water
  • 1/2 teaspoon of turmeric powder (optional, for added anti-inflammatory benefits)

Instructions:

  1. Boil the Water:
    Start by boiling 4 cups of water in a pot.
  2. Add Ginger:
    Once the water reaches a boil, add the sliced ginger root to the pot. Reduce the heat and let it simmer for about 10–15 minutes. This will allow the ginger to infuse into the water, releasing its beneficial compounds.
  3. Add Lemon Juice and Optional Ingredients:
    After the ginger has simmered, remove the pot from heat. Squeeze the juice from one lemon into the ginger water for extra detox benefits. You can also add 1/2 teaspoon of turmeric powder for additional anti-inflammatory properties. Stir in honey if desired for a touch of sweetness.
  4. Strain and Serve:
    Strain the ginger tea into a cup, discarding the ginger slices. Drink the tea while it’s warm.
  5. Drink Regularly:
    For best results, drink this ginger tea in the morning on an empty stomach or in the evening before bed. Drinking it daily will help cleanse your liver and intestines, reduce inflammation, and boost your energy levels.

How This Ginger Recipe Cleanses Your Body

  1. Cleanses the Liver:
    Ginger helps the liver filter toxins and supports bile production, which is essential for breaking down fats and removing waste from the body. Over time, this can improve liver health, reducing fatigue and boosting energy.
  2. Detoxifies the Intestines:
    The combination of ginger and lemon works to gently cleanse the intestines, removing waste buildup that can lead to bloating and sluggish digestion. This helps the body absorb nutrients more effectively and reduces digestive discomfort.
  3. Reduces Inflammation:
    Both ginger and turmeric have potent anti-inflammatory effects, which help reduce swelling and pain, particularly in the joints. By reducing inflammation, this recipe can help you move more freely and feel more energetic.
  4. Boosts Energy:
    By cleansing the liver and intestines, this recipe helps your body function more efficiently, boosting metabolism and increasing energy levels. You’ll feel lighter, more energetic, and ready to take on your day with renewed vitality.

Additional Tips

  • Stay Hydrated: Drink plenty of water throughout the day to support the detoxification process and help flush out toxins.
  • Eat Fiber-Rich Foods: Incorporate high-fiber foods like vegetables, fruits, and whole grains into your diet to further promote the cleansing of your intestines.
  • Exercise: Regular physical activity can boost circulation and support the detox process by encouraging sweating and stimulating your digestive system.

Final Thoughts

This ginger detox recipe is a simple yet powerful way to cleanse your liver and intestines, helping to improve your digestion, reduce inflammation, and boost your overall energy. With regular use, you’ll notice improvements in your energy levels, digestion, and perhaps even feel like you’re running again with youthful vitality! Try it today, and let ginger work its magic on your body.