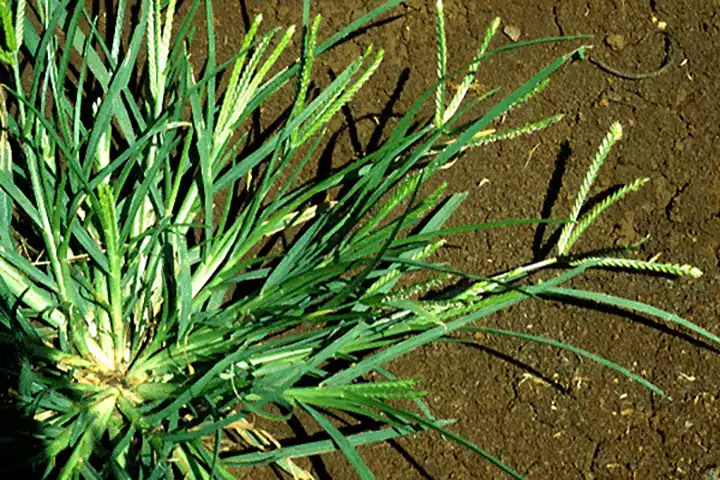
Category

Health & Wellness

Category

Aloe Vera Juice is a cherished beverage that not only tastes refreshing but also offers numerous health benefits. Known as a natural elixir, this easy-to-make drink can do wonders for your well-being. So let’s explore the many advantages of Aloe Vera Juice and learn how to prepare it using a recipe straight from Grandma’s kitchen.

Why Drink Aloe Vera Juice?

1. Hydrates and Refreshes: Aloe Vera Juice is incredibly hydrating, making it the perfect drink to keep you refreshed and energized throughout the day.

2. Supports Digestion: With its soothing properties, Aloe Vera Juice can help maintain a healthy digestive system by relieving issues like constipation and promoting overall gut health.

3. Boosts Immunity: Packed with vitamins, minerals, and antioxidants, this drink helps give your immune system a boost, keeping you healthy and warding off common ailments.

4. Promotes Healthy Skin: Regular consumption of Aloe Vera Juice can improve the health of your skin, leaving it hydrated and glowing from the inside out.

How to Make Fresh Aloe Vera Juice

Ingredients:

  • 1 large Aloe Vera leaf
  • 2 cups water
  • 1 tablespoon honey or lemon juice (optional, for flavor)

Instructions:

Prepare the Aloe Vera Leaf:

  • Carefully cut a large leaf from an Aloe Vera plant. Wash it thoroughly to remove any dirt.

Extract the Gel:

  • Place the leaf on a cutting board and cut off the spiky edges. Slice the leaf open lengthwise and use a spoon to scoop out the clear gel. Avoid the yellowish latex layer, as it can be bitter and cause stomach discomfort.

Blend the Gel:

  • Add the extracted gel to a blender along with 2 cups of water. Blend until smooth. For a touch of sweetness or added flavor, you can include honey or lemon juice.

Strain and Store:

  • Strain the juice through a fine-mesh sieve or cheesecloth to remove any pulp. Pour the juice into a clean jar and store it in the refrigerator.

Enjoy:

  • Your fresh Aloe Vera Juice is now ready! Drink a small glass in the morning or savor it as a refreshing beverage throughout the day.

Tips for Enjoying Aloe Vera Juice

  • Flavor Variations: Add a splash of fruit juice like apple or orange for a delightful twist.
  • Smoothies: Incorporate Aloe Vera Juice into your favorite smoothie recipes to give them an extra health boost.
  • Moderation: Start with small amounts to see how your body reacts, as Aloe Vera can have a laxative effect if consumed in large quantities.

Conclusion

Aloe Vera Juice is a fantastic way to stay hydrated and naturally support your health. Using Grandma’s simple recipe, you can enjoy this refreshing drink anytime. Whether you’re looking to improve digestion, boost your immune system, or simply enjoy a tasty beverage, Aloe Vera Juice is a wonderful addition to your daily routine. Give it a try and savor the natural goodness of this age-old remedy!


Are you looking for a delicious way to add more fruits and vegetables to your daily diet? Why not try a smoothie that blends the sweetness of bananas, the creaminess of avocados, and the earthiness of carrots? This Banana, Avocado, and Carot Smoothie is not only tasty but packed with essential nutrients.

Benefits of the Ingredients

  • Bananas are a fantastic source of natural sweetness and are rich in potassium, which helps maintain normal blood pressure and heart function.
  • Avocados bring a smooth texture and heart-healthy fats to the smoothie, along with fiber which is great for digestion.
  • Carrots provide beta-carotene, fiber, vitamin K1, and antioxidants, which are beneficial for eye health and immune support.

Together, these ingredients create a powerhouse of nutrition that supports overall well-being while being extremely palatable.

What You’ll Need

  • 1 ripe banana
  • 1 ripe avocado
  • 2 medium carrots, peeled and chopped
  • 1 cup of water or almond milk (for a creamier texture)
  • Ice cubes (optional, for a chilled version)
  • Honey or another sweetener to taste (optional)

Step-by-Step Guide

1. Prepare Your Ingredients: Begin by peeling the banana and avocado. Remove the pit from the avocado and chop both into smaller pieces. Peel and chop the carrots into manageable pieces.

2. Blend: Place the banana, avocado, and carrots into your blender. Add a cup of water or almond milk for smoother blending. If you like your smoothie chilled, you can add some ice cubes.

3. Adjust Consistency and Taste: Blend the ingredients until the mixture is smooth. If the smoothie is too thick, you can add more water or almond milk to reach your desired consistency. Taste the smoothie, and if you find it needs a bit of extra sweetness, add honey or your preferred sweetener.

4. Serve Immediately: Pour the smoothie into glasses and enjoy immediately to take advantage of all the vitamins and minerals.

Enjoy Your Smoothie

This Banana, Avocado, and Carrot Smoothie is more than just a treat; it’s a nutrient-dense drink that promotes good health and tastes fantastic. It’s perfect for a quick breakfast, a midday snack, or a refreshing post-workout boost. This smoothie is an excellent way to nurture your body while indulging in something delicious. So, blend up this simple recipe and savor every sip!


For anyone looking to enhance their digestive health while enjoying a refreshing, tasty drink, a papaya smoothie is an excellent choice. Known for its digestive enzymes and high fiber content, papaya can be a delightful addition to your wellness routine. Here’s how to whip up a super healthy papaya smoothie that’s perfect for supporting your digestive system.

The Benefits of Papaya

Papaya isn’t just delicious; it’s packed with health benefits, particularly for digestion. This tropical fruit contains an enzyme called papain, which aids in breaking down proteins and can help reduce indigestion and bloating. It’s also rich in fiber, which promotes a healthy digestive tract and can help maintain regular bowel movements.

Ingredients Needed

To make this papaya smoothie, you’ll need the following simple ingredients:

  • 1 ripe papaya
  • 1 banana (for creaminess and natural sweetness)
  • 1 cup of low-fat yogurt or kefir (for probiotics and a smooth texture)
  • 1/2 teaspoon of ginger (for an additional digestive aid)
  • A handful of ice cubes (optional for a cooler drink)
  • Honey or another sweetener to taste (optional)

Instructions for Making Your Smoothie

1. Prepare the Fruit: Begin by peeling the papaya, removing the seeds, and cutting it into chunks. Peel the banana as well.

2. Blend the Ingredients: Place the papaya chunks, banana, and ginger into a blender. Add the yogurt or kefir to help create a smooth, creamy texture. If you prefer a colder beverage, add a handful of ice cubes.

3. Blend until Smooth: Blend all the ingredients until the mixture is smooth. If the smoothie seems too thick, you can add a little water or more yogurt to achieve the desired consistency.

4. Sweeten if Desired: Taste your smoothie, and if you find it needs a bit of extra sweetness, add some honey or your preferred sweetener and blend again to mix.

5. Serve and Enjoy: Pour the smoothie into a glass and enjoy immediately to make the most of its nutrients and freshness.

Enjoying Your Smoothie

This papaya smoothie is not just beneficial for digestion and gut health; it’s also incredibly refreshing and satisfying. It’s perfect as a start to your day or as a nutritious snack to keep you going. Regular consumption of this papay-rich smoothie could help you feel lighter, support your digestive health, and enjoy the natural sweetness and flavors of some of nature’s best ingredients.


Papaya leaves, often overshadowed by the popular fruit, hold a treasure trove of health benefits and have been used in traditional medicine for ages. Rich in enzymes, antioxidants, and vitamins, these leaves can be a fantastic natural remedy for a variety of health issues. Here’s a look at some of the benefits of papaya leaves and how you can process them for medicinal use.

Key Benefits of Papaya Leaves

  1. Boosts Immunity: Papaya leaves are rich in vitamins A, C, and E, which are essential for boosting the immune system.
  2. Supports Digestive Health: The enzyme papain in papaya leaves aids in digestion by breaking down proteins and can help relieve indigestion and bloating.
  3. Anti-Inflammatory Properties: They contain anti-inflammatory compounds that can help reduce inflammation in the body, making them beneficial for those dealing with arthritis and joint pain.
  4. Supports Blood Platelet Production: Papaya leaves are known to help maintain healthy blood platelet levels, which is particularly beneficial during recovery from certain illnesses.
  5. Antimicrobial: These leaves have antimicrobial properties that can help fight bacterial and viral infections.
  6. Rich in Antioxidants: Antioxidants in papaya leaves help combat free radicals, reducing the risk of chronic diseases.
  7. Supports Hair Health: The extract of papaya leaves can be used to promote hair growth and combat dandruff.
  8. Anti-Cancer Properties: Some studies suggest that papaya leaves have compounds that can act against cancerous cells.
  9. Helps Manage Blood Sugar Levels: They can help in regulating blood sugar levels, making them useful for people managing diabetes.

How to Process Papaya Leaves for Medicinal Use

Making Papaya Leaf Juice:

  • Wash a few fresh papaga leaves thoroughly.
  • Cut the leaves into small pieces, removing the main stems.
  • Using a pestle and mortar, crush the leaves to extract the juice. For those who prefer, a blender can also be used followed by straining the mixture through a cloth.
  • Consume the juice in small doses as it is quite potent. Start with one tablespoon per day and monitor how your body reacts.

Preparing Papaya Leaf Tea:

  • Chop clean papaga leaves and boil them in a pot of water for 15 minutes.
  • Strain the tea and allow it to cool.
  • You can drink this tea once or twice a day.

Enjoying the Benefits

Incorporating papaya leaves into your wellness routine could enhance your health in numerous ways, from boosting immunity to supporting digestive health. Whether as a juice or tea, this powerful natural remedy offers a gentle yet effective way to care for your body using the gifts of nature. Try introducing papaya leaf preparation


Cardamom, often referred to as the “queen of spices,” is not only loved for its intense, sweet flavor but also for its impressive health benefits. Incorporating cardamom into your daily meals can lead to noticeable improvements in various aspects of your health. Let’s explore what happens to your body when you make cardamom a staple in your diet.

Digestive Health Boost

Cardamom is particularly renowned for its ability to aid in digestion. It helps manage problems like bloating, gas, and indigestion by enhancing the secretion of bile acid in the stomach. It’s also beneficial in reducing the frequency and discomfort of heartburn.

Detoxification Properties

This spice is a natural diuretic, which means it can help the body eliminate waste and excess water through urination. Regular consumption of cardamom boosts the removal of toxins from the body, which supports the health of your kidneys and urinary tract.

Antioxidant and Anti-Inflammatory Effects

Cardamom is packed with antioxidants, which help protect cells from damage by free radicals and thereby reduce the risk of chronic diseases. The anti-inflammatory properties of cardamom can significantly lower inflammation in the body, which is especially beneficial for improving overall heart health and preventing chronic conditions.

Respiratory Relief

For those who struggle with respiratory issues, cardamom can be a breath of fresh air. It helps improve circulation within the lungs, making it easier to breathe. This spice is often used in traditional remedies for treating colds, coughs, and asthma.

Enhanced Oral Health

Cardamom’s antibacterial properties are effective in fighting common oral pathogens. Chewing on cardamom pods can freshen your breath and reduce the risk of oral infections, such as gum disease and cavities.

Blood Pressure Regulation

The fiber and essential oils in cardamom can help lower blood pressure levels. Regular intake has been linked to better heart rhythm and a healthier heart.

Adding Cardamom to Your Diet

Introducing cardamom to your diet is simple. You can add a few pods or a pinch of ground cardamom to your morning tea or coffee. It can also be incorporated into smoothies, baked goods, and savory dishes to enhance flavor and provide health benefits.

Embrace the Spice of Life

Making cardamom a part of your daily routine can lead to a wealth of health benefits. From improving your digestive health to enhancing respiratory function and even protecting your heart, this spice adds more than just flavor to your meals—it adds life-enhancing qualities that can significantly boost your well-being. Why not spice up your life with a little cardamom today?


Feeling sluggish or weighed down? It might be time to give your intestines and liver a natural cleanse. With just two powerful ingredients—ginger and orange—you can create a refreshing and health-boosting drink. This simple recipe can help detoxify your body, improve digestion, and boost your energy levels, making you feel as vibrant as ever.

Why Ginger and Orange?

Ginger: This spicy root is celebrated for its digestive and anti-inflammatory properties. It helps stimulate digestion, reduce bloating, and enhance liver function. Ginger is also known for its ability to reduce nausea and improve circulation.

Orange: Oranges are packed with vitamin C and antioxidants, which are essential for boosting the immune system and supporting liver health. The natural sugars in oranges provide a gentle detoxification, while their fiber content aids in digestion.

Ingredients:

  • 1-inch piece of fresh ginger
  • 1 large orange
  • 1 cup of water
  • Optional: honey or a pinch of cinnamon for extra flavor

How to Make the Ginger and Orange Detox Drink:

  1. Prepare the Ingredients: Peel the ginger and cut it into small pieces. Peel the orange and separate it into segments.
  2. Blend the Ingredients: Place the ginger pieces and orange segments into a blender. Add the cup of water to help blend the ingredients smoothly. If you like, you can add a teaspoon of honey or a pinch of cinnamon for additional flavor.
  3. Blend Until Smooth: Blend the mixture until it’s smooth and well-combined. If the consistency is too thick, you can add a bit more water.
  4. Strain the Mixture: For a smoother drink, strain the blended mixture through a fine mesh sieve or cheesecloth to remove any pulp.
  5. Serve and Enjoy: Pour the drink into a glass and enjoy it fresh. For best results, drink this detoxifying beverage in the morning on an empty stomach.

Benefits of Regular Use:

  • Enhanced Digestion: Ginger helps to stimulate digestive enzymes and improve gut health, while the fiber in oranges aids in regular bowel movements.
  • Liver Detoxification: The antioxidants in ginger and oranges support liver function, helping to flush out toxins and improve overall liver health.
  • Increased Energy Levels: By improving digestion and detoxifying the liver, this drink can help increase your energy levels and reduce feelings of fatigue.
  • Boosted Immune System: The high vitamin C content in oranges, combined with the anti-inflammatory properties of ginger, helps boost the immune system and protect against illnesses.

Tips for Success:

  • Fresh Ingredients: Use fresh ginger and oranges to maximize the health benefits and flavor.
  • Consistency: Incorporate this drink into your daily routine for the best results. Consistency is key to experiencing the full benefits of natural detoxification.
  • Stay Hydrated: Alongside this drink, make sure to drink plenty of water throughout the day to help flush out toxins and stay hydrated.

By making this ginger and orange detox drink a part of your morning routine, you can naturally cleanse your intestines and liver, leading to improved digestion and increased vitality. Enjoy the refreshing taste and the multitude of health benefits with each sip. Here’s to feeling lighter, healthier, and more energetic!

The liver is an important organ that plays a vital role in transforming toxins into waste and eliminating them from our bodies. However, due to our modern lifestyles filled with toxins, our liver can become overwhelmed and sluggish, leading to the inability to properly eliminate toxins. Instead, these toxins are stored in fat cells, particularly in the belly area, which can result in a condition called fatty liver disease.

What is fatty liver disease?

Fatty liver disease occurs when there is an excess of fat in the liver. While a small amount of fat in the liver is normal, when it exceeds 5% to 10% of the liver’s total weight, it leads to fatty liver disease. There are two types of fatty liver disease: non-alcoholic fatty liver disease and alcoholic liver disease. The former is caused by factors like high cholesterol or genetics, while the latter is a result of excessive alcohol consumption.

Signs that your liver needs detoxification

If you’re between the ages of 45 and 65, it’s essential to be aware of these warning signs that may indicate your liver is in need of detoxification:

1. Unexplained weight gain

When your liver is not functioning optimally to eliminate toxins, reducing calories and exercising regularly may not be as effective. The unfiltered toxins are stored in fat cells, and when the liver fails to metabolize fat properly, it circulates through the gut and back to the liver.

2. Allergies

A healthy liver produces antibodies that attack allergens. However, if the liver’s function declines, the allergens are stored in the body. This leads the brain to respond by producing histamine, causing allergy symptoms such as itchiness, fogginess, and headaches.

3. Chronic tiredness

Toxins hinder the metabolism of muscle tissues, resulting in physical fatigue and body aches. Over time, this tiredness can escalate into moodiness, depression, and angry outbursts.

4. Excessive sweating

When the liver becomes overworked and its function decreases, it heats up. As a large organ, the liver transfers this heat to the rest of the body, causing excessive sweating as it tries to cool down.

5. Acne that won’t go away

Toxins in the liver can disrupt hormonal balance, leading to acne breakouts. If your acne is a result of a sluggish liver, external cleansing alone won’t suffice. It’s crucial to improve liver function to effectively treat this condition.

6. Bad breath

If your oral health is good, yet you still suffer from persistent bad breath, your liver may be the problem. It’s recommended to consult with a physician to determine if your liver could be contributing to this issue.

Ways to improve fatty liver disease

Fortunately, fatty liver disease can be reversed and eased with a proper diet. Here are two delicious and nutritious recipes that can help combat the effects of fatty liver disease:

  1. Breakfast Smoothie
    • Ingredients:
      • 1 banana
      • 1 cup Greek yogurt
      • Crushed ginger root
      • 2 tablespoons peanut butter
      • 1 teaspoon dandelion root
    • Instructions:
      • Chop the banana and blend it with Greek yogurt, crushed ginger root, peanut butter, and dandelion root.
      • Blend until smooth and serve immediately.
  2. Incorporate liver-friendly foods into your diet
    • Foods like dandelion root, bananas, sweet potatoes, liver, and ginger root can all contribute to improved liver health.
    • Mix and match your favorite ingredients and incorporate them into your diet one to two times a day.

Remember, taking care of your liver is essential for overall well-being. By being aware of these warning signs and making dietary changes, you can support liver health and prevent the negative effects of fatty liver disease.


There’s nothing quite like the comfort and versatility of a good vegetable broth. Whether you’re using it as a base for soups, stews, or just sipping it on its own, a homemade vegetable broth is a fantastic way to enjoy rich, natural flavors without any added chemicals or preservatives. Here’s how to make the best vegetable broth right in your kitchen.

Why Make Homemade Vegetable Broth?

Homemade vegetable broth is a wonderful way to use up leftover vegetables and their scraps, making it both economical and environmentally friendly. Plus, you have complete control over the ingredients, ensuring a healthier and more flavorful broth.

Ingredients:

  • 2 large carrots, chopped
  • 2 celery stalks, chopped
  • 1 large onion, chopped
  • 3 cloves of garlic, smashed
  • 1 potato, chopped (optional, for extra body)
  • 1 small bunch of parsley
  • 2 bay leaves
  • 1 teaspoon of black peppercorns
  • 1 teaspoon of salt (adjust to taste)
  • 10 cups of water
  • Optional: other vegetables like mushrooms, leeks, or zucchini

How to Make Vegetable Broth:

  1. Prepare the Vegetables: Wash and chop all the vegetables. You don’t need to peel them, but make sure they are clean. Using the skins and ends of vegetables can add extra nutrients and flavor to your broth.
  2. Combine Ingredients: Place the chopped vegetables, garlic, parsley, bay leaves, peppercorns, and salt in a large stockpot. Add 10 cups of water.
  3. Simmer: Bring the mixture to a boil over medium-high heat. Once it reaches a boil, reduce the heat to low and let it simmer uncovered for about 45 minutes to an hour. The longer it simmers, the more flavorful the broth will be.
  4. Strain the Broth: After simmering, remove the pot from heat and let it cool slightly. Use a fine mesh sieve or cheesecloth to strain the broth into another pot or large bowl. Discard the solids.
  5. Cool and Store: Let the broth cool to room temperature before storing. Pour the broth into airtight containers or jars. It can be stored in the refrigerator for up to a week or frozen for up to three months.

Benefits of Homemade Vegetable Broth:

  • No Chemicals or Preservatives: You control the ingredients, ensuring a healthier, cleaner broth.
  • Rich in Nutrients: Homemade broth is packed with vitamins and minerals from the vegetables.
  • Versatile: Use it as a base for soups, stews, risottos, or even as a warm drink.

Tips for Success:

  • Use Fresh Vegetables: Fresh, organic vegetables will yield the best flavor and nutritional value.
  • Save Scraps: Keep a bag in your freezer to collect vegetable scraps for making broth later.
  • Adjust Seasonings: Feel free to adjust the seasonings to suit your taste. Add herbs like thyme or rosemary for extra flavor.

Making your own vegetable broth is a simple and rewarding process. Not only do you get a delicious, nutrient-packed broth, but you also reduce waste and avoid unwanted additives. Enjoy the rich, homemade taste in all your favorite dishes!


Maintaining a healthy gut is essential for overall well-being. Many health experts believe that “death begins in the gut,” highlighting the importance of a clean and functioning digestive system. If you’re looking to cleanse your intestines and improve your digestive health, dates can be a fantastic natural remedy. Here’s how you can use dates to help rid your body of toxins and keep your gut healthy.

Why Dates?

Dates are not only delicious but also incredibly nutritious. They are rich in fiber, which aids in digestion and helps maintain regular bowel movements. Dates are also packed with essential vitamins and minerals, including potassium, magnesium, and B vitamins, which support overall gut health. Their natural sweetness makes them a pleasant addition to your diet, and their benefits are numerous.

Ingredients:

  • 5-6 dates, pitted
  • 1 cup of warm water
  • Optional: a pinch of cinnamon or ginger for added flavor and health benefits

How to Make the Date Cleanse Drink:

  1. Prepare the Dates: Begin by pitting the dates if they aren’t already pitted. You can use fresh or dried dates, but make sure they are clean and free from any preservatives.
  2. Soak the Dates: Place the dates in a cup of warm water. Allow them to soak for at least 1-2 hours, or overnight if possible. This helps to soften the dates and makes them easier to blend.
  3. Blend the Mixture: Transfer the soaked dates and water into a blender. Add a pinch of cinnamon or ginger if you like. Blend until smooth and well-combined.
  4. Serve: Pour the mixture into a glass and enjoy immediately. For best results, drink this date cleanse mixture first thing in the morning on an empty stomach.

Benefits of Regular Use:

  • Fiber-Rich: Dates are high in dietary fiber, which helps to bulk up stools and promote regular bowel movements, effectively cleansing the intestines.
  • Natural Sweetness: Unlike refined sugars, the natural sugars in dates provide energy without causing blood sugar spikes, making them a healthier alternative.
  • Nutrient-Dense: Dates are packed with essential vitamins and minerals that support overall gut health and aid in the detoxification process.

Tips for Success:

  • Consistency: Incorporate the date cleanse drink into your routine regularly, ideally every morning, to maintain optimal digestive health.
  • Hydration: Drink plenty of water throughout the day to help flush out toxins and keep your digestive system hydrated.
  • Balanced Diet: Pair this cleanse with a balanced diet rich in fruits, vegetables, whole grains, and lean proteins to support overall gut health.

By integrating this simple and delicious date cleanse drink into your daily routine, you can naturally support your digestive health and help your body eliminate toxins. Enjoy the sweet taste and the myriad of health benefits that come with this natural intestinal cleanse. Here’s to a healthier, happier gut!


Cleaning household items can often require strong chemicals, but there’s an amazing trick involving Coca-Cola and eggshells that delivers impressive results naturally. This simple combination can tackle stubborn stains and grime with ease. Here’s how you can use Coca-Cola and eggshells to achieve a sparkling clean, and why it works so well.

Why Coca-Cola and Eggshells?

Coca-Cola: Known for its acidity, Coca-Cola contains phosphoric acid, which can break down tough stains and dissolve rust. This makes it an effective cleaner for various surfaces.

Eggshells: Eggshells are slightly abrasive and contain calcium carbonate, which can help scrub away grime without scratching surfaces. When combined with the acidity of Coca-Cola, they form a powerful cleaning duo.

Ingredients:

  • 1 can of Coca-Cola
  • 2-3 eggshells, cleaned and crushed

How to Use Coca-Cola and Eggshells for Cleaning:

  1. Prepare the Eggshells: Start by thoroughly cleaning the eggshells to remove any residue. Once clean, crush the eggshells into small pieces using a mortar and pestle or by placing them in a plastic bag and using a rolling pin.
  2. Mix with Coca-Cola: Pour the Coca-Cola into a bowl and add the crushed eggshells. Stir the mixture gently to combine the ingredients.
  3. Apply the Mixture: Dip a cloth or sponge into the mixture and apply it to the surface you want to clean. This could be anything from a dirty stove top to a rusty tool. The slight abrasiveness of the eggshells combined with the acidic properties of Coca-Cola will help break down the grime.
  4. Scrub and Rinse: Use the cloth or sponge to scrub the area, applying more mixture as needed. After scrubbing, rinse the area with water to remove any residue. Wipe it dry with a clean cloth.

Incredible Uses:

  • Removing Rust: The acidity in Coca-Cola helps dissolve rust on metal surfaces, while the eggshells provide gentle abrasion to scrub it away.
  • Cleaning Grime: Tough kitchen grime, particularly on stove tops or pots and pans, can be tackled effectively with this mixture.
  • Polishing Surfaces: The combination can help polish surfaces, making them shine without the need for harsh chemicals.

Benefits of Using Coca-Cola and Eggshells:

  • Natural and Non-Toxic: This method uses common household items, avoiding the need for strong chemicals.
  • Effective Cleaning: The acidic and abrasive properties work together to tackle tough stains and grime.
  • Cost-Effective: Both Coca-Cola and eggshells are inexpensive and readily available, making this a budget-friendly cleaning solution.

Tips for Success:

  • Thorough Rinsing: Ensure you rinse the cleaned area well to remove any sticky residue from the Coca-Cola.
  • Proper Disposal: Dispose of the eggshells and Coca-Cola mixture responsibly after use.

By using this simple trick, you can harness the unexpected cleaning power of Coca-Cola and eggshells. Whether you’re dealing with rust, grime, or just want to polish up some surfaces, this natural combination offers a surprising and effective solution. Give it a try and see the incredible results for yourself!