Category

Gardening

Category

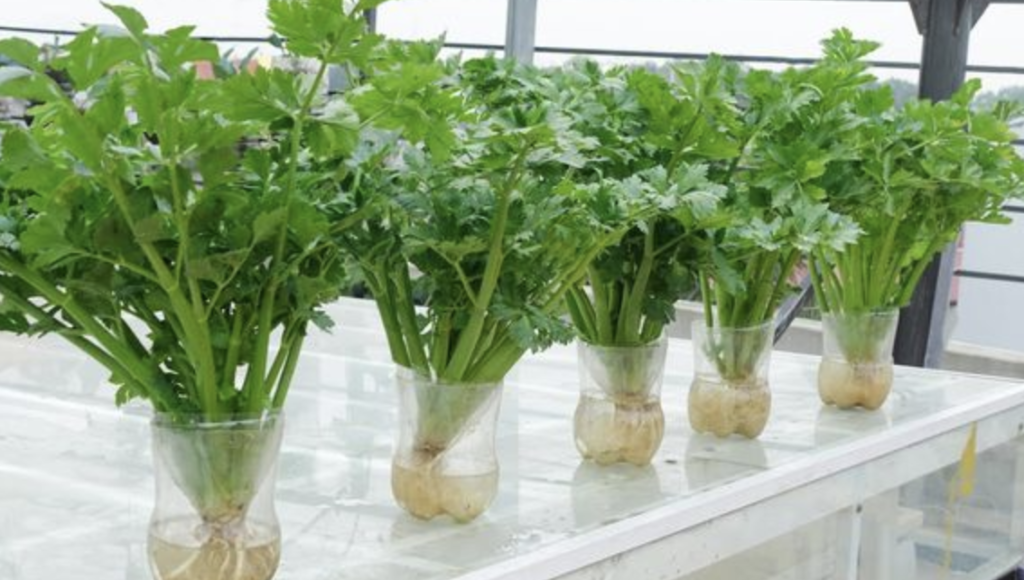
Growing your own fresh and crunchy celery has never been easier with this innovative method using plastic bottles. Let’s explore how you can transform ordinary bottles into thriving celery patches right on your windowsill.

Benefits of Using Plastic Bottles for Celery Growth

  1. No Soil, No Mess: This method eliminates the need for messy soil, making it a clean and convenient gardening option.
  2. Water-Wise Gardening: By recycling water within the bottle, you reduce water wastage and the need for constant watering.
  3. Space-Saving: Perfect for those with limited outdoor space, you can create a celery patch on your windowsill or balcony.
  4. Environmentally Friendly: Repurposing plastic bottles contributes to waste reduction and promotes sustainability.

How to Get Started

  1. Prepare Your Bottle: Cut a clean, clear plastic bottle in half, using the bottom half as your container. Create small drainage holes at the bottom.
  2. Save the Celery Base: Instead of discarding the base of celery, place it in a shallow dish of water until roots and new leaves sprout.
  3. Transfer to the Bottle: Once growth is evident, carefully transfer the celery base to the prepared bottle. Fill the bottle with water, ensuring roots are submerged while the top remains above water.
  4. Care and Harvest: Change the water every few days to maintain freshness. In a few weeks, your celery will grow beautifully. Harvest as needed, but avoid removing more than a third of the plant at a time.

Conclusion: A Satisfying Outcome

Growing celery in plastic bottles is a fulfilling experience that yields delicious results with minimal effort. It demonstrates the power of ingenuity and recycling in sustainable gardening. Whether you’re a seasoned gardener or a beginner, this project promises flavorful additions to your culinary endeavors. So, grab a plastic bottle and embark on a journey to enjoy home-grown, earth-friendly celery right from your windowsill!

Gardening enthusiasts are continually seeking innovative and sustainable ways to care for their plants while conserving resources and reducing costs. In this article, we introduce two simple yet highly effective do-it-yourself (DIY) methods for watering plants using everyday household items. These methods are not only cost-effective but also environmentally friendly, ensuring your plants receive the right amount of water with minimal waste.

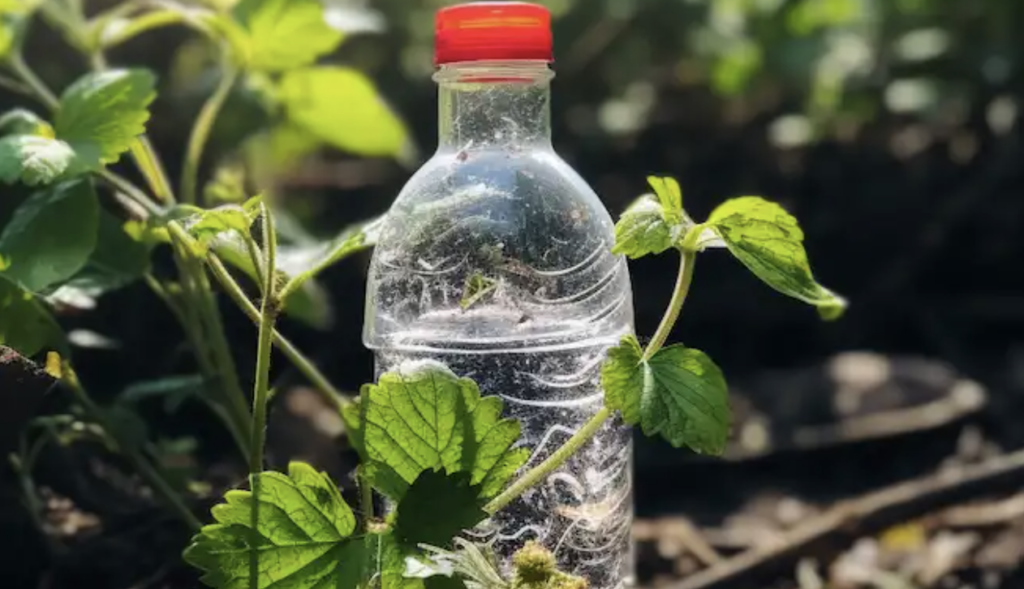
Method 1: Slow-Release Watering Using a Buried Plastic Bottle

Materials Needed:

  • A large plastic bottle (2-liter size works well)
  • Marker
  • Sharp tool (awl or heated iron rod)
  • Water

Step-by-Step Guide:

  1. Prepare the Bottle: Clean the bottle and remove labels. Mark two lines on it – one approximately 15 centimeters from the bottom and another 10 centimeters from the neck.
  2. Create Water Outlet: Make a small hole about 7 centimeters from the bottle’s bottom.
  3. Fill the Bottle: Fill it with water up to the lower line and tighten the cap.
  4. Place the Bottle: Dig a hole near the plant and bury the bottle up to the marked line, with the hole facing the plant.
  5. Final Step: Fill the bottle completely, close the cap, and cover it with soil, leaving the neck exposed.

Advantages:

  • Efficient water use through targeted delivery to the root zone.
  • Reduces the need for frequent watering, saving time and resources.
  • Ideal for vegetable gardens and outdoor plants.

Method 2: Wicking System with a Plastic Bottle and Fabric/String

Materials Needed:

  • Plastic bottle
  • Cotton fabric or thick cotton string
  • Water
  • Sharp tool for making a hole

Step-by-Step Guide:

  1. Prepare the Bottle: Clean the bottle and make a hole in the cap.
  2. Thread the Fabric/String: Cut a piece of fabric or string, thread it through the cap, ensuring it’s long enough to reach the soil.
  3. Fill and Seal: Fill the bottle with water, replace the cap with the fabric/string, ensuring it’s saturated.
  4. Position the Bottle: Place the bottle cap side down in the soil near the plant, with the fabric/string extending into the soil.

Advantages:

  • Direct water delivery to roots, ensuring consistent moisture.
  • Suitable for indoor and outdoor potted plants.
  • Low maintenance and easy to monitor.

These two methods offer gardeners sustainable, cost-effective solutions for plant watering, particularly useful during dry spells or when away from home. By utilizing simple materials like plastic bottles and fabric, these methods align with eco-friendly gardening practices, prioritizing water conservation and efficiency.

Whether you have a vegetable garden, potted plants, or a mix of both, these DIY solutions can help maintain healthy, hydrated plants with minimal effort and cost. Embracing such sustainable practices not only benefits your garden but also contributes positively to environmental conservation.

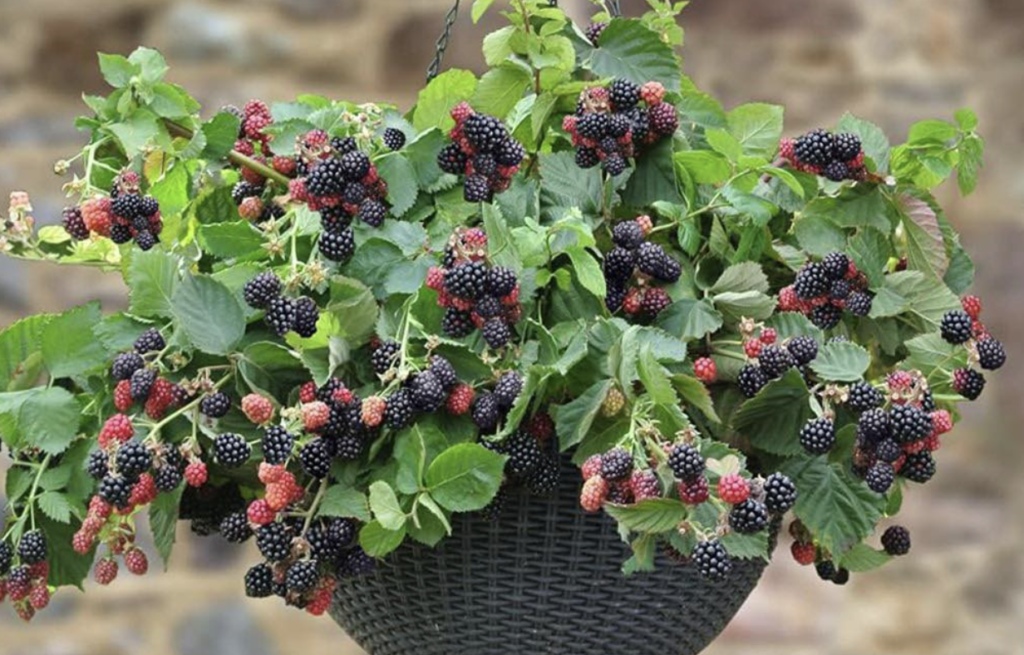
Blackberries, renowned for their delectable flavor and vigorous growth, thrive remarkably well when cultivated in containers. Whether you’re constrained by space or aiming for controlled growth, growing blackberries in pots offers a fulfilling endeavor. Let’s explore the essential aspects of nurturing these delicious berries successfully.

Understanding Blackberry Growth

Similar to raspberries, blackberries feature rhizomes that spread underground, giving rise to canes. These canes progress through stages: primocanes, young and green, and floricanes, mature and woody, capable of fruit production.

Selecting the Right Variety

When selecting blackberry varieties, consider their growth habits. Some bear fruit on primocanes (young canes), while others produce on floricanes (second-year canes). Understanding this distinction aids in managing pruning and harvesting.

Soil Mix Preparation

Prepare a well-balanced potting mix to support blackberry growth. Opt for a standard potting mix rich in organic matter, supplemented by an acid-loving mix to slightly lower the pH. Blackberries thrive in slightly acidic soil, making this mix conducive to their growth.

Potting and Planting

Ensure the container provides ample space for blackberry growth. Plant the blackberry shrub, ensuring the soil level matches that of the pot. Gently tease the roots to encourage outward growth rather than circling.

Optimal Care for Container-Grown Blackberries

  • Sunlight: Provide full sun exposure, though blackberries tolerate partial shade.
  • Airflow: Ensure adequate airflow to prevent issues from excessive humidity.
  • Moisture: Maintain consistent soil moisture, especially during the fruiting season.
  • Fertilization: Apply organic fertilizers formulated for berries regularly.
  • Pruning: Minimal pruning may be necessary for container-grown blackberries, depending on the variety.

Challenges and Pest Management

Watch for signs of overwatering to prevent root rot. Protect berries from common pests like birds and fruit flies using netting to ensure a successful harvest.

Harvesting and Enjoyment

Harvest ripe blackberries promptly to prevent pest damage. Enjoy them fresh or incorporate them into various culinary creations, relishing their antioxidants and exquisite flavor.

Container gardening facilitates the cultivation of blackberries even in small spaces, offering a continuous supply of these delightful fruits. By prioritizing proper care, soil management, and addressing potential challenges, you can experience the satisfaction of growing blackberries at home.

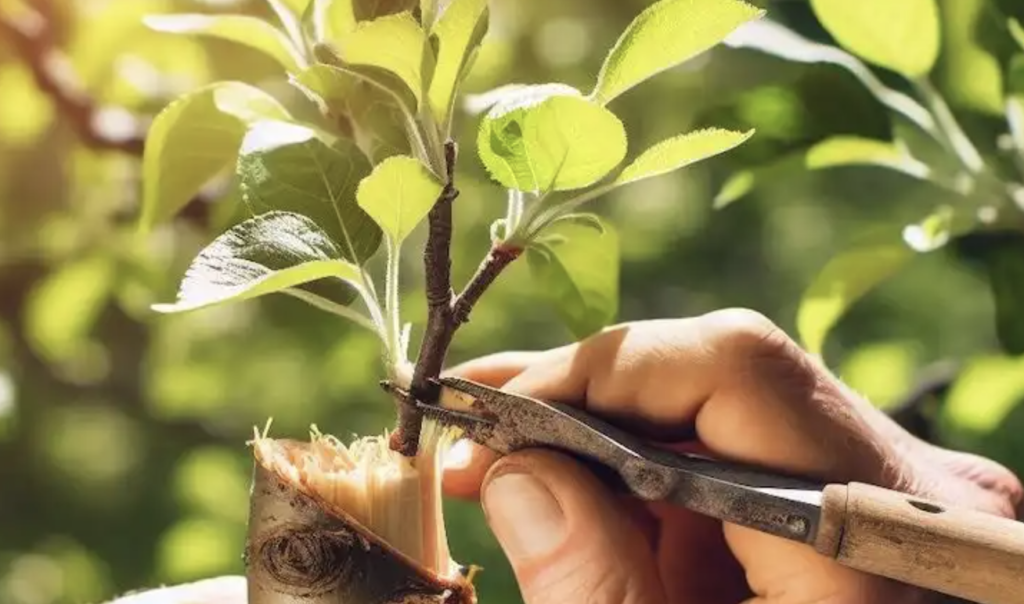
Grafting is a horticultural technique employed to merge parts from two plants, ensuring they grow as a single, enhanced entity. Primarily used in fruit tree propagation, grafting amalgamates the desirable traits of both the rootstock and the scion. Here’s an in-depth manual on how to graft trees effectively, focusing on the method of grafting under the bark.

1. Timing is Key:

  • Optimal time: Late winter or early spring before sap flow (bud break) initiates, facilitating healing and growth during the growing season.

2. Selecting Scion and Rootstock:

  • Scion: Choose a healthy, disease-free one-year-old scion with 2-3 buds.
  • Rootstock: Ensure compatibility, health, and establishment. The rootstock size may vary based on the grafting method.

3. Essential Grafting Techniques:

  • Whip Grafting: Suitable for similar-sized rootstocks and scions. Make matching diagonal cuts on both and join to align cambium layers.
  • Cleft Grafting: Ideal for larger rootstocks. Create a vertical cut in the rootstock and insert a wedge-shaped scion.
  • Bud Grafting (Budding): Insert a mature bud into a rootstock cut, commonly done in summer.

4. Grafting Under the Bark:

  • Ideal for large rootstocks and when bark separates easily from the wood (spring).
  • Process: Create a T-shaped cut in the rootstock bark, peel back flaps, and insert the scion with buds and a small wood piece. Secure the scion, ensuring contact with the rootstock cambium layer.

5. Post-Grafting Care:

  • Seal the graft with wax or tape to prevent drying.
  • Provide ample water, refrain from fertilizing until graft takes.
  • Monitor for growth or failure, adjusting care as needed.

6. Tips for Success:

  • Sanitize tools to prevent disease spread.
  • Make precise cuts for optimal cambium contact.
  • Label grafted plants for tracking.
  • Exercise patience; grafts may take time to establish.

Grafting is a gratifying process, enabling gardeners to create unique fruit tree combinations or repair damaged trees. Understanding each method’s advantages aids in selecting the most suitable technique. With diligence and practice, successful and fruitful growth is achievable in your garden or orchard.

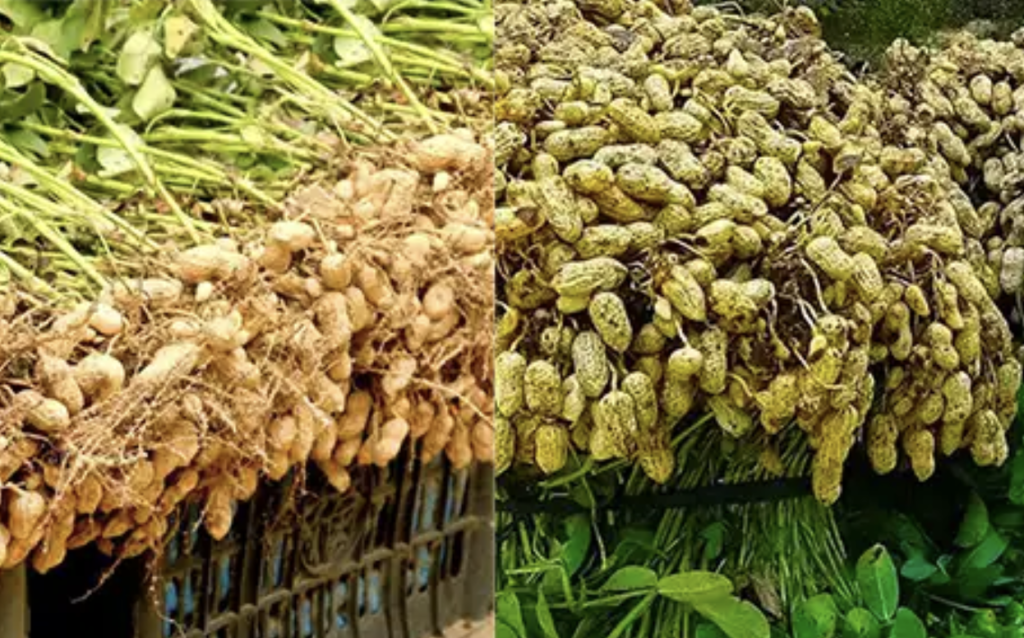
Growing peanuts from store-bought nuts is a rewarding gardening project that can yield delicious results. Follow these steps to get started:

Step 1: Choosing Peanuts

  • Opt for fresh, raw, uncooked peanuts in their shells.
  • Avoid roasted or salted peanuts as they won’t germinate.

Step 2: Preparation and Planting

  • Peanuts require a long growing season (100-130 frost-free days).
  • Start indoors 5-8 weeks before the last frost date for an early start, especially in Northern climates.
  • Plant in well-draining, loose soil, adding sand and aged compost if needed.
  • Sow seeds 1-2 inches deep and 24-36 inches apart in rows spaced at least 72 inches apart.

Step 3: Location and Soil

  • Choose a sunny site, as peanuts need full sun.
  • Use row covers to protect young plants from spring frosts.
  • Soil should be light, loamy, and slightly acidic (pH 5.5-7.0).

Step 4: Watering and Care

  • Water at least 1 inch per week, maintaining even moisture but not waterlogging the soil.
  • Add mulch once seedlings are half a foot tall to retain moisture and control weeds.

Step 5: Fertilization

  • Peanuts are nitrogen-fixers, so they require less nitrogen.
  • Focus on calcium, as it’s crucial for pod development.
  • Use a low-nitrogen or balanced fertilizer before planting.

Step 6: Pruning and Propagation

  • Pruning isn’t typically required but may be done for maintenance.
  • Propagate peanuts using seeds, selecting healthy, mature ones for saving and planting the following spring.

Step 7: Harvesting and Storing

  • Harvest time is about 100-150 days after planting.
  • Remove the entire plant from the soil for harvesting.
  • Store raw peanuts in a mesh bag in a dry place or roast them for consumption.

Growing peanuts can be a fun and fruitful endeavor, especially if you have a sunny spot and a bit of patience. With the right care, you can enjoy home-grown peanuts right from your backyard!

Embark on a delightful and sustainable hobby by growing mushrooms at home. Explore the simplicity and efficiency of using buckets with holes to enjoy multiple harvests of freshly harvested fungi. Follow this comprehensive guide to kickstart your mushroom-growing adventure right in the comfort of your own home.

Materials Needed:

Ensure you have all the necessary materials at hand before beginning your mushroom-growing journey.

  • Straw
  • Water
  • Large pot for boiling
  • Mushroom seeds (spawn)
  • Plastic buckets with holes
  • Clean cloth or lid for covering the buckets
  • Watering can or spray bottle
  • A cool, dark place for incubation

Step 1: Preparing the Straw

Gather suitable straw and chop it into pieces approximately 2-4 inches in length to prepare for the cultivation process.

Step 2: Boiling the Straw

Sterilize the chopped straw by boiling it in water. Let it simmer until sterilized, then allow it to cool down to room temperature.

Step 3: Acquiring Mushroom Seeds

Purchase mushroom seeds, also known as mushroom spawn, from a reliable supplier. Choose from various mushroom species like oyster, shiitake, or white button mushrooms based on your preferences.

Step 4: Layering Straw and Mushroom Seeds

Begin layering the plastic bucket with holes, alternating between cooled, boiled straw and mushroom seeds. Ensure even distribution for optimal mushroom growth.

Step 5: Incubation

Cover the bucket with a clean cloth or a lid with small holes and place it in a cool, dark area with temperatures ranging from 70°F to 75°F (21°C to 24°C). During this incubation period, the mycelium will colonize the straw.

Step 6: Daily Watering

Maintain consistent moisture levels by watering the mushrooms once or twice a day using a watering can or spray bottle. Avoid overwatering to prevent contamination.

Step 7: Harvesting

Around 21 days later, tiny mushroom pins will appear on the straw’s surface. Keep up with moisture levels, and as these pins mature, gently twist and pull them from the substrate when they reach the desired size.

Step 8: Continued Harvesting

Enjoy multiple harvests by picking mushrooms before they release spores, ensuring a consistent supply of fresh, homegrown mushrooms throughout the year.

Disclaimer:

Growing mushrooms at home requires attention to detail and proper sterilization to prevent contamination. Follow safety guidelines when handling potentially contaminated materials or consuming homegrown mushrooms. If in doubt, consult local experts or mycology professionals for guidance.

Unlock the joy of home mushroom cultivation using buckets with holes and savor the satisfaction of harvesting your own fresh mushrooms. Experiment with different species and techniques to elevate your culinary experiences and enjoy the delightful flavors of homegrown produce. Happy mushroom growing!

Growing grapes from seeds in containers is indeed an exciting and rewarding project for gardening enthusiasts. Here’s a detailed guide to help you navigate the process successfully:

1. Acquiring Grape Seeds:

  • Choose ripe grapes from healthy vines.
  • Gently extract seeds from the grapes and rinse them to remove any pulp or residue.

2. Seed Preparation:

  • Place the seeds in a damp paper towel, seal them in a plastic bag, and refrigerate for 2-3 months to stratify them.

3. Germination Process:

  • Fill small containers with well-draining potting mix and plant the stratified seeds.
  • Keep the soil consistently moist and place the containers in a warm, sunny location.

4. Tender Care and Maintenance:

  • Provide support for young vines as they grow.
  • Monitor soil moisture and water when needed.
  • Thin out seedlings once they reach a few inches in height, keeping the strongest ones.

5. Transplantation and Container Tips:

  • Transfer seedlings to larger containers as they outgrow their initial homes.
  • Choose containers with adequate drainage and use a quality potting mix rich in organic matter.

6. Special Tricks and Tips:

  • Prune the vines regularly to encourage strong growth and fruit development.
  • Apply balanced fertilizer during the growing season, but avoid over-fertilization.
  • Ensure grapevines receive 6-8 hours of direct sunlight daily for optimal growth.

7. Patience Rewarded:

  • Understand that growing grapes from seeds is a long-term endeavor, and it may take several years for the vines to mature and produce fruit.
  • Embrace the joy of nurturing your unique grape varieties from seeds to fruitful vines.

Embarking on the journey of growing grapes from seeds in containers requires patience and dedication, but the experience is incredibly fulfilling. With proper care and attention, you’ll witness the transformation of tiny seeds into flourishing grapevines, ready to reward you with delicious fruits.

Growing an almond tree from a seed at home can indeed be a fulfilling endeavor, yielding both aesthetic beauty and nutritious nuts over time. Here’s a comprehensive guide to help you through the process:

Step 1: Obtain Almond Seeds

  • Selecting Seeds: Choose raw, fresh, and untreated almonds. You can collect them from another almond tree or purchase them raw and untreated.
  • Stratification: Soak the almonds in water for 48 hours, then wrap them in a moist paper towel, place them in a plastic bag, and refrigerate for several weeks to stratify them and encourage germination.

Step 2: Planting the Seed

  • Timing: Spring is the optimal time for planting almond seeds.
  • Soil Preparation: Almond trees thrive in well-draining soil with a pH level between 6 and 7.5. Enrich the planting area with compost.
  • Planting Depth: Plant the seeds 2-3 inches deep in the soil and water thoroughly.
  • Location: Select a sunny location for your almond tree, as they require full sunlight to thrive.

Step 3: Caring for Your Almond Tree

  • Watering: Ensure regular watering, especially during the tree’s early years. Mature trees are drought-tolerant but benefit from consistent watering.
  • Pruning: Focus on developing a healthy framework for the tree in its early years, and prune for sunlight and air circulation in subsequent years to minimize disease risk.
  • Fertilizing: Use balanced fertilizer during the growing season to nourish the tree.

Step 4: Protecting the Tree

  • Pests and Diseases: Keep a lookout for common pests and diseases and take preventative measures as needed.
  • Winter Protection: Young almond trees may need protection from harsh winters using mulch and protective wraps.

Step 5: Harvesting Almonds

  • Waiting Period: Almond trees typically start producing nuts in the 3rd or 4th year and reach full production after 5-6 years.
  • Harvest Time: Almonds are ready for harvest in late summer to early fall when the hulls split, revealing the shell.
  • Drying: Allow harvested almonds to dry in a cool, dry place for about a week before storing or consuming them.

Step 6: Enjoying the Rewards

  • Roasting and Eating: Roast your almonds for a delicious snack or use them in cooking.
  • Admiring the Blossoms: Enjoy the beautiful blossoms that almond trees provide in the spring, adding aesthetic appeal to your garden.

Final Thoughts:

Growing an almond tree requires patience and care, but the rewards – including delicious nuts and beautiful blossoms – are well worth the effort. Ensure you tend to the tree’s needs throughout its life, and you’ll reap the bountiful rewards in the years to come.

Note: Always consider your local climate and consult with local experts to ensure almonds are suitable for your area before planting.

Growing chili peppers at home adds a spicy twist to your gardening adventure. In this comprehensive guide, we’ll navigate through the essential steps and tips for successfully nurturing chili peppers in containers, along with an unconventional approach involving vitamin B complex for enhanced plant vitality.

Container Selection:

Choose containers with ample depth and drainage holes to accommodate chili pepper roots. Opt for containers with a capacity of at least 5 gallons to support robust growth and development.

Soil Preparation:

Prepare a well-draining potting mix enriched with organic matter. Chili peppers thrive in slightly acidic to neutral soil conditions. Incorporate compost to boost fertility and create a nutrient-rich environment for your plants.

Planting Chili Pepper Seeds:

Plant chili pepper seeds in the container, adhering to the spacing recommendations on the seed packet. Ensure the containers are positioned in a sunny location, as chili peppers flourish in full sunlight.

Watering:

Maintain consistent soil moisture, especially during flowering and fruiting stages. Avoid overwatering, as chili peppers are prone to root rot. Water deeply when the top inch of soil feels dry to the touch.

Fertilizing:

Apply a balanced, water-soluble fertilizer or a fertilizer formulated specifically for peppers. Adhere to recommended application rates to supply essential nutrients for healthy plant growth and fruit production.

Unconventional Approach – Vitamin B Complex:

Experiment with an unconventional method to enhance chili pepper growth:

Vitamin B Complex Boost:

  • Dissolve a vitamin B complex tablet in water as per package instructions.
  • Apply the solution to the soil or use it as a foliar spray.
  • Vitamin B complex is believed to promote overall plant health and may contribute to increased fruit production.

Caution:

While exploring unconventional methods, exercise caution. Conduct small-scale tests before applying such methods to your entire garden. Be mindful of potential risks associated with unconventional supplements.

Conclusion:

Cultivating chili peppers at home is a delightful addition to your gardening pursuits. By following these guidelines, you can establish a thriving container garden and cautiously experiment with unconventional methods, like vitamin B complex supplementation, to enhance the vigor and yield of your chili pepper plants. Happy gardening and enjoy the flavorful harvest of chili peppers!

Apples, often celebrated as the epitome of health, hold a hidden potential beyond their nutritional benefits – the ability to give birth to new life in the form of saplings. Transforming discarded apple scraps into thriving apple saplings is a rewarding endeavor that requires minimal effort and zero cost. Let’s delve into the simple yet fulfilling process of nurturing apple saplings from seeds.

The Journey Begins: Extracting Seeds from Apples

The journey to nurturing your own apple tree commences with selecting a mature apple. Carefully extract the seeds from the core of the apple, ensuring they remain intact. This delicate process sets the stage for the germination of seeds and the birth of saplings.

Seed Germination: Awaiting Nature’s Miracle

Place the collected seeds inside a plastic or glass container lined with a damp white cloth napkin. Seal the container and allow the seeds to germinate in indirect sunlight for about 10 days. Vigilance is essential during this period to prevent mold formation and ensure successful germination.

Planting and Nurturing Your Sapling

After germination, delicately plant the germinated seeds in a pot filled with peat or high-quality, well-draining soil. Ensure the root faces downwards and the seed upwards, covering it with soil and misting with water. Position the pot in a well-lit area, avoiding direct sunlight exposure.

Witnessing Growth and Progress

As days pass, observe the sprout emerging from the soil, gradually growing taller with flourishing leaves. Within a month, the sapling will exhibit significant growth, indicating its readiness for further development. With proper care and nurturing, your apple sapling will thrive and mature into a magnificent tree, ready for grafting when it reaches optimal height and trunk diameter.

Embark on this journey of transformation, turning discarded apple scraps into flourishing saplings, and witness the wonders of nature unfold before your eyes. Happy gardening!