Author

Barbara L.

Browsing

Attention, gardening enthusiasts! Unlock the secret to growing strawberries that are not just big but also irresistibly sweet with the wonders of organic fertilization. Say hello to baskets full of plump, vibrant strawberries, each bursting with natural sweetness, right from your own garden.

Harnessing the Power of Organic Fertilizer

When it comes to fertilizing strawberries, the key lies in going organic. Organic fertilization not only benefits your health and the environment but also enriches your soil with nutrients that synthetic alternatives can’t match. And the best part? You can find the ingredients for this potent fertilizer right in your kitchen or garden compost pile.

The Ultimate Strawberry Fertilizer: Banana Peels and Eggshells

Believe it or not, the combination of banana peels and eggshells creates a powerhouse organic fertilizer that your strawberry plants will adore.

Why It Works:
  • Banana Peels: Packed with potassium, banana peels promote strong root development, flowering, and fruiting processes. They also enhance overall plant health and disease resistance.
  • Eggshells: Rich in calcium, eggshells prevent blossom end rot—a common issue in strawberries—while contributing to firm, delicious berries with strong cell walls.

How to Use This Fertilizer:

Preparation:
  • Cleanse: Rinse banana peels and eggshells to remove residue.
  • Crush: Thoroughly dry eggshells, then crush them into small pieces. Cut banana peels into small chunks.
Application:
  • Blend In: Mix crushed eggshells and banana peel pieces into the soil at the base of strawberry plants.
  • Extra Boost: For added potency, blend ingredients with water to create a nutrient-rich slurry and pour it onto the soil directly.
Timing:
  • Strategic Feedings: Apply this organic fertilizer at the beginning of the growing season and again during flowering to ensure strawberries receive essential nutrients when they need them most.

Embrace Organic Gardening Success

By adopting this simple yet powerful organic fertilization method, you’ll soon revel in a bounty of big, sweet strawberries that turn heads in your neighborhood. Not only will you be nourishing your plants, but you’ll also be enriching the soil and supporting the environment—all while relishing the fruits of your labor. Get ready to delight in the sweet success of organic gardening!

In every family, there’s a cherished recipe passed down through generations, infused with wisdom and a hint of old-world magic. Discover the secrets of Grandma’s Elixir of Vitality Seeds, a blend brimming with health benefits and natural wellness.

The Essence of the Elixir

At its core, this elixir is a blend of various seeds carefully chosen for their rich nutrient profiles and health-enhancing properties. Dive into the goodness of chia seeds, flaxseeds, pumpkin seeds, and sunflower seeds, each offering unique benefits for overall wellness.

Chia Seeds – The Energy Booster

Tiny yet mighty, chia seeds are packed with omega-3 fatty acids, fiber, and protein, providing sustained energy and supporting cardiovascular health.

Flaxseeds – The Heart’s Ally

High in alpha-linolenic acid, flaxseeds promote healthy cholesterol levels and contribute to overall heart health.

Pumpkin Seeds – The Immunity Warrior

Loaded with zinc and antioxidants, pumpkin seeds are immune-boosting powerhouses, aiding in overall wellness and vitality.

Sunflower Seeds – The Mood Lifter

Rich in vitamin E and tryptophan, sunflower seeds uplift mood and act as powerful antioxidants, promoting a calm and positive mindset.

Simple Yet Profound Preparation

Crafting Grandma’s Elixir of Vitality Seeds is wonderfully simple. Just measure equal parts of each seed, blend, and store in an airtight container. Sprinkle over oatmeal, blend into smoothies, or bake into bread for added crunch and nutrients.

Beyond Nutrition

This elixir isn’t just about physical nourishment; it’s a vessel of cherished memories and timeless wisdom. Each spoonful carries the legacy of past generations, bridging the gap between food and wellbeing.

Embrace Tradition, Celebrate Wellness

Grandma’s Elixir of Vitality Seeds is more than a blend of nutritious ingredients; it’s a daily ritual honoring simpler times and the abundance of nature. Cheers to good health and the sweet nourishment of tradition!

In the pursuit of radiant, even-toned skin, natural remedies often offer profound benefits, drawing from the wisdom of traditional beauty practices from around the world. Among these treasures is the Japanese rice mask, renowned for its skin-brightening properties and ability to impart a luminous, youthful glow. Let’s explore the secrets behind this magical mask and how you can create your own at home.

The Secret Behind the Mask: Rice, a staple in Japanese skincare, contains vitamins B and E, which aid in cell regeneration and slow down the aging process. These nutrients contribute to a more youthful and vibrant complexion by promoting skin renewal and reducing the appearance of dark spots. The rice mask is particularly effective in lightening the skin and providing an overall brightening effect.

Creating Your Own Japanese Rice Mask: Crafting this magical mask is a simple process that requires just a few ingredients, most of which are likely already in your kitchen. Follow these steps:

Soak two tablespoons of uncooked rice in water until it softens. Drain the rice, reserving the water, and grind the rice into a fine paste. Mix the rice paste with one tablespoon of honey and a small amount of milk until you achieve a smooth, spreadable consistency. Application for Radiant Results: Apply the mask evenly to your face and neck, allowing it to sit for 20 to 30 minutes to allow the nutrients to penetrate deeply into your skin. Afterward, rinse off the mask using the reserved rice water. This not only adds an extra boost of vitamins to your skincare routine but also acts as a natural toner, enhancing the skin-whitening effect of the mask.

Benefits Beyond Skin Deep: Regular use of the Japanese rice mask can lead to visible improvements in skin tone and texture. Its natural ingredients work synergistically to moisturize, exfoliate, and brighten the skin, resulting in a rejuvenated appearance. Additionally, the mask offers a gentle yet effective way to achieve a lighter complexion without the harsh chemicals found in commercial whitening products.

In conclusion, the Japanese rice mask is a testament to the power of natural ingredients in achieving beautiful, glowing skin. This easy-to-make, centuries-old beauty secret allows anyone to experience the luminous, even-toned complexion admired in Japanese beauty culture. Embrace the transformative power of rice on your skin and unveil a radiant, youthful glow with this magical mask.

Banana peels, often discarded as waste, can be repurposed into a potent natural fertilizer for your garden. Rich in essential nutrients like potassium, phosphorus, and calcium, these humble peels offer numerous benefits to your plants. In this article, we’ll explore a straightforward method for creating homemade banana peel fertilizer that will nourish your garden and promote healthy growth.

Materials Needed: Before you begin, gather the following materials:

Banana Peels: Collect several ripe banana peels. The quantity will depend on how much fertilizer you intend to make. Jar or Container: You’ll need a jar or container with a lid to hold the banana peels and water. Water: Water is essential for soaking the banana peels and initiating the fermentation process. Time and Patience: Making banana peel fertilizer requires patience as the peels need time to ferment and release nutrients.

Steps to Make Homemade Banana Peel Fertilizer:

Step 1: Collect Banana Peels Gather ripe banana peels over a few days until you have enough to make your fertilizer.

Step 2: Cut the Peels Cut the banana peels into smaller pieces. This will accelerate the decomposition process.

Step 3: Place in a Jar Place the cut banana peels into your jar or container, filling it about halfway.

Step 4: Add Water Pour water into the jar, ensuring that the banana peels are fully submerged. Seal the jar with the lid.

Step 5: Fermentation Allow the jar to sit in a cool, dark place for approximately a week. During this time, the banana peels will ferment, releasing valuable nutrients into the water.

Step 6: Strain the Liquid After a week, strain the liquid from the jar into another container. This liquid is your homemade banana peel fertilizer.

Step 7: Dilute and Use To use the banana peel fertilizer, dilute it with water. A common ratio is one part banana peel liquid to five parts water. Adjust the concentration based on your plants’ needs.

Step 8: Water Your Plants Apply the diluted banana peel fertilizer directly to the soil around the base of your plants. Avoid getting the fertilizer on the leaves to prevent staining.

Benefits of Banana Peel Fertilizer:

Rich in Nutrients: Banana peels provide essential nutrients like potassium, phosphorus, and calcium, promoting flower and fruit development, as well as root growth. Cost-Effective: Homemade banana peel fertilizer offers a budget-friendly alternative to store-bought fertilizers. Reduced Waste: Repurposing banana peels reduces kitchen waste and contributes to a more sustainable lifestyle. Environmentally Friendly: This natural fertilizer is free from harmful chemicals, making it safe for both your plants and the environment. By following these simple steps, you can transform discarded banana peels into a valuable resource for your garden. Homemade banana peel fertilizer is an eco-friendly, cost-effective solution that will help your plants thrive and flourish. Give it a try and witness the benefits of harnessing the power of nature in your garden.

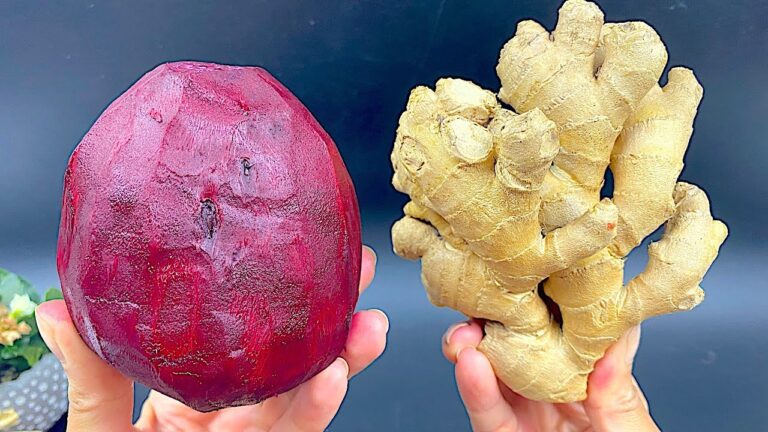
In the pursuit of radiant, youthful skin, nature often offers the most potent solutions. Among these, the combination of ginger and cornstarch stands out as a remarkable duo, providing a natural boost to your skincare routine. This blend, celebrated for its simplicity and effectiveness, promises to nurture your skin, leaving it glowing and smooth, without the worry of harsh chemicals.

Ginger: The Root of Radiance: Ginger is a true superhero in natural skincare, boasting high levels of antioxidants. These antioxidants combat free radicals, reducing inflammation and promoting even-toned, smooth skin. Additionally, ginger’s ability to enhance blood circulation contributes to its skin-rejuvenating properties, delivering essential nutrients to skin cells and imparting a vibrant, healthy glow.

Cornstarch: A Gentle Power: Despite its humble reputation, cornstarch is a gentle giant in the realm of natural beauty. Known for its soothing properties, cornstarch calms irritated skin while providing a silky-smooth texture. Its oil-absorbing qualities make it an excellent natural remedy for maintaining a matte, fresh appearance throughout the day.

A Winning Combination: When ginger and cornstarch are combined, they create a potent, natural alternative to commercial anti-aging products. This blend works to tighten and firm the skin, visibly reducing the appearance of fine lines and wrinkles. By stimulating collagen production, the foundation of youthful skin, this natural duo helps maintain elasticity and firmness, revealing a complexion that’s not only beautiful on the surface but also healthy and resilient from within.

How to Use This Magic Blend: Crafting a ginger-cornstarch mask is simple and cost-effective. Begin by grating fresh ginger and mixing it with cornstarch and a small amount of water to create a paste. Apply this mixture to your face, allowing it to dry gently as you relax. Rinse off with warm water to unveil soft, radiant skin.

In conclusion, the combination of ginger and cornstarch epitomizes the power of natural ingredients in achieving beautiful, youthful skin. This easy-to-make, affordable skincare solution offers a delightful way to pamper your skin, demonstrating that nature’s bounty is endlessly generous. Embrace the natural path to radiant, wrinkle-free skin today, and your complexion will thank you!

Are you tired of constantly buying expensive blueberries? Why not try your hand at growing your own? Not only will you save money, but you’ll also have the joy of picking and enjoying fresh fruit from your very own garden. Here are some helpful tips to get you started on your blueberry planting journey:

  1. Choose the Right Variety: Before you begin planting, research which blueberry variety thrives best in your specific climate. Some types prefer humid weather, while others can withstand freezing temperatures.
  2. Prepare the Soil: Blueberries thrive in acidic soil, with a pH ranging from 4 to 5. If your soil isn’t suitable for berry cultivation, consider planting them in pots filled with acidic soil.
  3. Provide Sunlight and Nutrient-Rich Soil: Blueberries need plenty of sunlight and nutrient-rich soil. Select a sunny spot for planting them in the ground, spacing the bushes about 5 feet apart. For pot planting, use an 18-inch pot filled with suitable soil. Water them regularly, about 1 to 2 inches per week.
  4. Protect Your Plants: Shield your blueberry plants from bugs, birds, and other critters by surrounding them with bamboo sticks and covering them with a food-grade net.
  5. Regular Pruning: Blueberry bushes can produce fruit for up to 20 years! To ensure their longevity, prune them regularly. Keep in mind that pruned bushes will not bear fruit in the year they are pruned, so consider having multiple bushes and alternate pruning schedules.
  6. Watch for Ripening: Pay attention to the buds in early spring. By July, the blueberries should be ripe and ready for picking. Wait for them to turn a rich blue hue before gently plucking them from the bush.

By following these tips, you can enjoy a never-ending supply of delicious blueberries right at your fingertips. Growing blueberries is a fun and rewarding project, especially if you have limited space. Share these insider tips with your friends on Facebook and start your own blueberry journey today!

Welcome to the world of homemade delights, where we’re bringing back the charm of making your own cheese with just two simple ingredients! There’s something truly special about creating from scratch what often gets tossed into our shopping carts without a second thought. And the cheese you see in the picture? It’s not just any cheese; it’s a creamy creation that’s been crafted at home, with love and a touch of culinary magic.

The Joy of Homemade Cheese

Homemade cheese has a unique character that no store-bought version can match. It’s about the freshness, the satisfaction of making it yourself, and the sheer pleasure of tasting something that came to life in your own kitchen. Plus, it’s easier than you might think!

Crafting Your Cheese Masterpiece

All you need is milk and an acid, like vinegar or lemon juice, and you’re ready to start. Here’s how you can make your own cheese, similar to the one in the image, right at home:

  1. Heat Your Milk: Begin by gently heating your milk in a large pot. You’ll want it warm, just before it reaches a boil.
  2. Add the Magic Ingredient: Once your milk is ready, stir in the acid. This could be a splash of vinegar or the juice of a lemon. Watch as the milk curdles, separating into curds and whey.
  3. Curds and Whey: Allow the mixture to cool slightly, then pour it through a cheesecloth-lined colander. The curds that stay behind will be the base of your cheese.
  4. Pressing Matters: Gather the corners of the cheesecloth and give it a gentle squeeze to remove excess liquid. For a firmer cheese, press it under a weight for a few hours.
  5. Season to Taste: Don’t forget to add your personal touch with a bit of salt or herbs before the final press. This is your cheese, after all!

The Final Touch

Once your cheese has reached the desired consistency, it’s ready to be savored. Spread it on a cracker, sprinkle it over a salad, or simply enjoy a slice – the possibilities are endless.

Homemade Cheese: A Tale of Simplicity

This homemade cheese journey is not just about the delicious end product. It’s a reminder of the simple pleasures that life offers. Making cheese at home is an act of slowing down, savoring the process, and celebrating the small accomplishments. Whether it becomes a regular activity or a once-in-a-while adventure, it’s about the joy found in creating something from its most basic elements.

Imagine stepping into a sun-drenched Italian kitchen, the soul of the household, where the timeless art of cheese-making is passed down through the generations. Today, we’re bringing that cherished tradition into your kitchen with a recipe that’s both simple and steeped in history. With just vinegar and milk, and a mere 10 minutes of your time, you can craft a homemade cheese that would make any Italian nonna proud.

The Easiest Cheese You’ll Ever Make

You might believe cheese-making to be a lengthy process requiring specialized cultures and a lot of patience. But this recipe dispels those notions. It’s as effortless as it is delicious – a testament to the magic of simplicity in cooking.

From Milk to Cheese in a Flash

Here’s what you’ll need to create this delightful homemade cheese:

  • Milk: Opt for fresh milk, straight from the dairy aisle of your favorite store or, if available, sourced directly from a local farm.
  • White Vinegar: This magical ingredient transforms milk into curds and whey, like a culinary alchemist.

Step-by-Step to Cheesy Bliss

  1. Warm the Milk: Pour your milk into a pot and gently warm it over medium heat until it’s steaming with tiny bubbles around the edges, just before it reaches a boil.
  2. Add the Vinegar: Stir in a few tablespoons of white vinegar once the milk is warm. Almost immediately, the milk will curdle, signaling the formation of cheese.
  3. Let it Sit: Remove the pot from the heat and allow it to sit for a couple of minutes. This allows the curds to gather and intensifies the flavor.
  4. Strain and Press: Line a colander with cheesecloth and pour the mixture through it to separate the curds from the whey. Gently press the curds to remove excess liquid.
  5. Flavor it Up: Add a pinch of salt, fresh herbs, or any other desired flavorings to customize your cheese.

Ready to Enjoy

In no time, you’ll have a batch of soft, fresh cheese ready to elevate your culinary creations. Spread it on crusty bread, sprinkle it over salads, or savor it straight from the spoon.

A Tradition Continued

Each time you make this cheese, you’re not just following a recipe – you’re upholding a piece of culinary heritage in your own kitchen. It’s a celebration of tradition, simplicity, and the extraordinary flavors that emerge from basic ingredients. So here’s to tradition, to simplicity, and to homemade cheese that’s ready in a flash – just like Nonna used to make!

Purslane (Portulaca oleracea) is often overlooked as a common weed, but it’s actually a nutritional powerhouse, packed with omega-3 fatty acids, vitamins (especially A and C), minerals, and antioxidants. Thriving in various climates and conditions, purslane is both versatile and resilient, making it a valuable addition to your diet. Here’s how to identify purslane and incorporate it into your meals with a simple, nutritious recipe.

Identifying Purslane

Characteristics:

  • Leaves: Small, oval-shaped, and fleshy, resembling a jade plant’s leaves.
  • Stems: Thick, reddish, and succulent.
  • Flowers: Tiny yellow flowers that only open on sunny mornings.
  • Growth Habit: Grows close to the ground and forms dense mats in gardens, fields, and cracks in sidewalks.

Foraging for Purslane

Purslane can be found in gardens, fields, and along roadsides. Choose plants in areas free from chemical pesticides and away from roads to avoid contamination. Harvest early in the morning when the leaves are most succulent.

Culinary Uses

Purslane can be eaten raw or cooked, offering a slightly lemony and salty flavor. It’s great in salads, sandwiches, and soups. Here’s a simple recipe to try:

Recipe: Purslane and Tomato Salad

Ingredients:

  • 2 cups fresh purslane, leaves and tender stems
  • 1 cup cherry tomatoes, halved
  • 1/4 cup red onion, thinly sliced
  • 2 tablespoons olive oil
  • 1 tablespoon apple cider vinegar
  • Salt and pepper to taste
  • Optional: Feta cheese or olives for garnish

Instructions:

  1. Prepare the Purslane: Rinse thoroughly under cold water and pat dry.
  2. Combine the Salad Ingredients: In a large bowl, mix purslane, cherry tomatoes, and red onion.
  3. Make the Vinaigrette: Whisk together olive oil, apple cider vinegar, salt, and pepper in a small bowl.
  4. Dress the Salad: Pour the vinaigrette over the salad and toss gently to coat.
  5. Serve: Garnish with feta cheese or olives if desired. Serve immediately.

Nutritional Benefits

Purslane is rich in omega-3 fatty acids, Vitamin A, Vitamin C, magnesium, and potassium, promoting heart health, brain function, and reducing inflammation.

Purslane is a versatile and nutritious addition to your diet, whether foraged in the wild or cultivated in your garden. Embrace this resilient plant and enjoy its flavor and health benefits in your culinary creations!

Aspirin, known scientifically as acetylsalicylic acid, has been found to offer remarkable benefits for vegetable plants beyond just keeping cut flowers fresh. Recent research conducted by the University of Rhode Island has highlighted its potential to enhance growth, strength, and resilience in vegetable crops. Here’s how you can utilize aspirin in your vegetable gardening practices:

Rooting Aid:

  • Soak vegetable cuttings in a solution of distilled water and dissolved aspirin for several hours before planting. This helps disinfect the cuttings and stimulates robust root development.

Growth Stimulant:

  • Dilute aspirin in water and spray the solution onto vegetable plants every few weeks. This promotes vigorous growth and strengthens plant immunity against diseases.

Seed Treatment:

  • Prior to sowing, soak vegetable seeds in a mixture of water and aspirin to improve germination rates and seedling vigor.

Soil Amendment:

  • Place aspirin tablets directly into the soil around vegetable plants, ensuring they receive regular watering to activate the aspirin’s beneficial properties.

Benefits:

  • Enhanced Growth: Aspirin-treated vegetables exhibit notable improvements in growth and strength.
  • Increased Resistance: Plants treated with aspirin show increased resistance to common pests and diseases, particularly solanaceous vegetables like tomatoes, peppers, and eggplants.
  • Cost-Effective: Aspirin treatment is a simple and cost-effective strategy for supporting healthier, more productive vegetable plants.

By incorporating aspirin treatment into your vegetable gardening routine, you can enjoy the transformative impact it has on the health and productivity of your plants. Give it a try and witness the benefits firsthand in your vegetable garden.