Author

Barbara L.

Browsing

Homemade banana vinegar is a unique and flavorful addition to your pantry, perfect for salad dressings, marinades, and even health tonics. Making vinegar from bananas not only utilizes overripe bananas that might otherwise be discarded but also produces a vinegar with a subtle, sweet undertone. Here’s a step-by-step guide to making banana vinegar at home, complete with creating your own “mother” of vinegar—the natural, jelly-like substance that helps ferment the liquid into vinegar.

Ingredients:

  • 6-8 ripe bananas
  • 4 cups water
  • 1 cup sugar (optional, to speed up fermentation)
  • 1 small piece of raw, unfiltered vinegar (contains the mother) or a vinegar mother from previous batches

Equipment:

  • Large glass jar
  • Cheesecloth or coffee filter
  • Rubber band or string
  • Strainer
  • Funnel
  • Bottles for storage

Instructions:

  1. Prepare the Banana Mixture:
    • Peel the bananas and mash them in a large bowl. You want to use very ripe or overripe bananas as they contain more natural sugars, which are essential for fermentation.
    • Transfer the mashed bananas to a large glass jar. Add water and sugar if using. The sugar isn’t mandatory but can help speed up the fermentation process by providing additional food for the bacteria.
  2. Add the Mother:
    • If using raw unfiltered vinegar, add it to the jar. This vinegar contains live acetic acid bacteria, which will start the fermentation process. If you have a vinegar mother from another batch, add it to the mixture.
  3. Cover and Store:
    • Cover the jar with a piece of cheesecloth or a coffee filter. Secure it with a rubber band or string. This allows air to flow into the jar to facilitate fermentation while keeping out insects and debris.
    • Store the jar in a warm, dark place for about 3 to 4 weeks. A pantry or a cabinet away from direct sunlight is ideal.
  4. Monitor the Fermentation:
    • Check the jar every few days. You should start to see bubbles forming within a week, indicating that fermentation is occurring.
    • After about 2 weeks, you might see a gelatinous layer forming on top of the liquid. This is the vinegar mother.
  5. Strain and Mature:
    • After 3 to 4 weeks, strain the mixture through a fine mesh strainer into a clean bowl to remove all solids.
    • Transfer the strained liquid back into the glass jar or into a clean bottle using a funnel.
    • Cover it again with the cheesecloth and secure it. Let it sit in the same warm, dark place for another 4 to 6 weeks. During this time, the vinegar will clarify and mature.
  6. Bottle Your Vinegar:
    • After the second fermentation period, taste your vinegar. If it has reached the desired acidity, it’s ready to be bottled.
    • Transfer the vinegar into bottles using a funnel and store it in a cool, dark place. The vinegar will keep indefinitely and may continue to mellow and improve with age.

Homemade banana vinegar is a delightful project that not only recycles leftover bananas but also provides you with a homemade product that’s both tasty and versatile. Use your banana vinegar in culinary recipes or as a health tonic, and enjoy the satisfaction of making something truly unique from scratch!

Crepes are a wonderfully versatile dish, perfect for breakfast, dessert, or a savory meal, depending on the fillings and toppings you choose. This quick and simple recipe will show you how to whip up the most delicious French pancakes in just 10 minutes, without the need for sugar.

Ingredients:

  • 1 cup all-purpose flour
  • 1 1/2 cups milk (or a dairy-free alternative)
  • 2 large eggs
  • 1 tablespoon olive oil or melted butter, plus extra for cooking
  • A pinch of salt
  • Optional: Vanilla extract or spices such as cinnamon for added flavor

Equipment:

  • Mixing bowl
  • Whisk
  • Non-stick skillet or crepe pan
  • Spatula

Instructions:

  1. Make the Batter:
    • In a large mixing bowl, combine the flour and salt.
    • In another bowl, beat the eggs and then add the milk and 1 tablespoon of olive oil or melted butter. If you like a hint of flavor, you can add a teaspoon of vanilla extract or a dash of cinnamon here.
    • Pour the liquid ingredients into the dry ingredients, whisking continuously to create a smooth, lump-free batter.
  2. Heat the Pan:
    • Heat a non-stick skillet or crepe pan over medium heat. Add a small amount of butter or oil to coat the surface.
  3. Cook the Crepes:
    • Pour a small amount of batter into the center of the hot pan. Immediately tilt and swirl the pan to spread the batter evenly across the surface.
    • Cook for about 1 to 2 minutes until the edges of the crepe begin to look dry and lift from the sides of the pan. Use a spatula to gently flip the crepe and cook for another minute on the other side until golden and slightly crisp.
  4. Serve:
    • Remove the crepe from the pan and place it on a plate. Continue with the remaining batter, adding butter or oil to the pan as needed between crepes.
    • Serve the crepes warm. For a savory version, fill them with ingredients like cheese, ham, and spinach. For a dessert, you can fill them with fresh fruit, a drizzle of honey, or a sprinkle of cinnamon.

Tips for Perfect Crepes:

  • Consistency: The batter should be quite thin, similar to heavy cream. If it’s too thick, add a bit more milk to achieve the desired consistency.
  • Resting the Batter: If you have time, let the batter rest for about 30 minutes at room temperature before cooking. This helps the flour absorb the liquid and can make the crepes more tender.
  • Cooking: Ensure the pan is not too hot as it can cause the crepes to cook too quickly and become difficult to flip.

Enjoy your delicious, homemade crepes! They are a fantastic and quick meal that can be customized to suit any taste, making them perfect for any occasion.

Picking the perfect watermelon can feel a bit like a gamble, but with a few tips, you can choose a sweet and juicy one almost every time! Here’s how to select the best watermelon at the store or farmers’ market:

1. Look for the Field Spot

  • Check for a creamy yellow spot, known as the field spot. This is where the watermelon rested on the ground and ripened under the sun. A white or absent field spot might indicate that it was picked too early.

2. Inspect the Weight

  • Pick up the watermelon; it should feel heavy for its size, which suggests it’s full of water and therefore juicier. Compare a few watermelons of similar size to see which feels heaviest.

3. Examine the Shape

  • Look for a watermelon that is uniform in shape. Oddly shaped watermelons may be an indication that it grew unevenly, possibly due to irregular watering.

4. Check the Surface

  • The skin should be dull and the rind hard. A shiny surface might indicate an underripe melon. Gently press on the rind; it should be firm and not give in to pressure.

5. Look for Sugar Spots and Webbing

  • Sugar spots, which look like brown, rough spots or blotches, are an indication of sweetness. Webbing, which appears as brown crisscross patterns, shows that bees touched the flower multiple times, generally a sign of a sweeter melon.

6. Tap the Watermelon

  • Give it a tap or knock. A ripe watermelon will have a deep, hollow sound. Underripe or overripe melons tend to have a duller thud.

7. Consider the Size

  • Not too big, not too small. Medium-sized watermelons are often the best in terms of texture and flavor balance.

8. Check for Uniform Color

  • The color should be consistent all around. Uneven coloring might suggest an uneven ripening process.

9. Avoid Imperfections

  • Steer clear of watermelons with cuts, dents, or soft spots. These could lead to premature spoiling or indicate that the melon was damaged while still growing.

By using these tips, you can more confidently select a watermelon that’s likely to be sweet and ready to enjoy. Remember, practice makes perfect, and the more you apply these tips, the better you’ll become at picking the perfect watermelon!

In our very own backyards, there exists a remarkable plant that possesses incredible medicinal properties. We often dismiss this plant without realizing that it has the potential to treat more than 10 diseases. This plant, scientifically known as Eleusine indica and commonly referred to as goose grass, is a hidden gem waiting to be discovered.

Discovering the Wonders of Goose Grass

Despite its unassuming appearance, goose grass is a treasure trove of medicinal benefits. It possesses anti-inflammatory, antioxidant, antidiabetic, antiallergic, and diuretic properties. Traditionally, it has been brewed into a tea that is used to treat various health issues.

A Multitude of Health Benefits

The versatility of goose grass in addressing a wide range of ailments is truly remarkable. Let’s take a closer look at some of its significant health benefits:

  • Cancer Prevention and Management: Goose grass is armed with antioxidants that fight against harmful free radicals, which can lead to the development of cancer cells. By regularly consuming goose grass tea, you can reduce the risk of cancer and prioritize your overall health.
  • Relief for Ovarian Cysts and Fibroids: The anti-inflammatory properties of goose grass make it an excellent natural remedy for reducing swelling and pain associated with ovarian cysts and fibroids. Incorporating goose grass tea into your daily routine can help alleviate symptoms and promote reproductive health.
  • Kidney Disease Support: Goose grass acts as a natural diuretic, increasing urine production and aiding in the removal of excess water and salt from the body. This is particularly beneficial for individuals suffering from kidney diseases, as it helps manage fluid balance and reduce swelling.
  • Diabetes Management: The antidiabetic properties of goose grass can significantly aid individuals with diabetes. By positively influencing blood sugar levels, goose grass tea can be a helpful addition to a diabetes management plan, improving overall glucose control.
  • Healing Bleeding and Wounds: Crushed goose grass can be made into a paste and applied directly to wounds to expedite the healing process and stop bleeding. Its natural properties help in clot formation and wound healing.
  • Combatting Parasites: Goose grass has natural laxative effects, making it beneficial in treating parasitic infections. By facilitating bowel movements, it helps expel parasites from the gastrointestinal tract, enhancing digestive health.
  • Pneumonia Recovery: Brew a tea from the roots of goose grass for a potent remedy against pneumonia. Regular consumption of this tea can significantly reduce pneumonia symptoms and accelerate recovery, often yielding results within a few days.
  • Managing High Blood Pressure: The calming effects of goose grass on the cardiovascular system can aid in managing high blood pressure. Incorporating goose grass tea into your routine may help maintain healthy blood pressure levels.
  • Fever Reduction: Goose grass can offer relief to those suffering from a fever. Drinking tea made from its cooked roots can help lower body temperature and alleviate fever symptoms.
  • Aiding Ligament Sprains: Goose grass can also be beneficial externally. For ligament sprains, applying a poultice made from crushed leaves can reduce swelling and pain, supporting the healing process.

Preparing and Using Goose Grass for Each Condition

The preparation of goose grass for medicinal use may vary slightly depending on the condition being treated:

  • For internal conditions such as diabetes, kidney disease, high blood pressure, and fever, brewing a tea from the leaves or roots is recommended. Boil a handful of goose grass in half a liter of water for 3 minutes, then consume one glass of the tea daily.
  • For external applications, such as wounds and sprains, create a paste by crushing fresh leaves. Apply this paste directly to the affected area for relief and healing.

Embracing the Healing Powers of Goose Grass

The extensive healing properties of goose grass highlight its potential as a powerful, natural remedy for a wide range of health issues. By understanding the specific preparations and applications for each condition, we can unlock the full potential of this common yet potent plant. Let’s integrate goose grass into our wellness routines for improved health and vitality.

Mimosa pudica, also known as the sensitive plant or touch-me-not, is a remarkable plant that goes beyond its intriguing ability to close its leaves when touched. Originating from Central and South America, this humble plant has been utilized in traditional medicine for centuries due to its impressive healing properties. While its interactive movement captures the attention of children and nature enthusiasts, the real magic lies in its wide range of health benefits. In this article, we will explore ten incredible health benefits of Mimosa pudica and provide practical ways to incorporate this plant into your wellness routine.

10 Health Benefits of Mimosa Pudica

1. Anti-inflammatory Properties: Mimosa pudica has powerful anti-inflammatory effects that can help reduce inflammation in the body. Whether applied topically to reduce swelling or taken internally, this plant can soothe conditions such as arthritis, muscle pain, and other inflammatory disorders.

2. Liver Health: Known for its hepatoprotective properties, Mimosa pudica protects and detoxifies the liver. It can be used to support liver function, cleanse the body of toxins, and promote overall liver health.

3. Digestive Aid: Mimosa pudica can assist with various digestive issues, including constipation and diarrhea. Its mild laxative properties regulate bowel movements, while its ability to reduce inflammation makes it effective for soothing the digestive tract.

4. Antimicrobial and Antiviral Effects: Studies have shown that Mimosa pudica possesses antimicrobial and antiviral properties, making it effective in fighting off infections. It can be used to treat minor wounds, prevent infections, and manage viral conditions.

5. Sedative and Relaxant: If you struggle with anxiety, insomnia, or stress, Mimosa pudica can be a natural solution. The plant has mild sedative effects that calm the nervous system, promoting better sleep and relaxation.

6. Oral Health: The antibacterial properties of Mimosa pudica make it an excellent natural remedy for oral health issues. It can be used as a gargle to reduce inflammation and infection in the mouth, throat, and gums.

7. Wound Healing: Mimosa pudica’s anti-inflammatory and antimicrobial properties make it effective for wound healing. When applied as a poultice, it can speed up the healing process of cuts, sores, and skin infections.

8. Menstrual Relief: Women suffering from menstrual cramps or premenstrual syndrome (PMS) may find relief in Mimosa pudica. The plant can help alleviate pain, reduce irritability, and regulate menstrual cycles.

9. Support for Hemorrhoids: Mimosa pudica’s soothing properties provide relief for hemorrhoids, reducing pain and inflammation when applied topically or taken internally.

10. Antioxidant Effects: Mimosa pudica is rich in antioxidants, which combat oxidative stress in the body. This not only supports overall health but also helps prevent chronic diseases linked to oxidative damage.

How to Use Mimosa Pudica: 5 Practical Applications

1. Herbal Tea: One of the simplest ways to use Mimosa pudica is to make an herbal tea.

How to Prepare: Boil one teaspoon of dried Mimosa pudica leaves in a cup of water for about 10 minutes. Strain and drink the tea once it cools down. This tea can help with digestive issues, anxiety, and insomnia.

2. Topical Poultice: For treating wounds, sores, or skin irritations, a Mimosa pudica poultice can be very effective.

How to Prepare: Crush fresh leaves and stems of the plant to form a paste. Apply the paste directly to the affected area and cover it with a clean cloth. Leave it on for a few hours before rinsing it off. Repeat as needed.

3. Gargle for Oral Health: To use Mimosa pudica for oral health, you can prepare a simple gargle.

How to Prepare: Boil a handful of leaves in water, let it cool, and then use the liquid as a mouthwash. This helps reduce inflammation and combat infections in the mouth and throat.

4. Bath Soak: For overall relaxation and skin health, you can add Mimosa pudica to your bath.

How to Prepare: Add a handful of dried leaves or a few drops of Mimosa pudica extract to warm bathwater. Soak in the bath for 20-30 minutes to benefit from its soothing and anti-inflammatory properties.

5. Capsules or Powders: Mimosa pudica is also available in capsule or powdered form for internal use.

How to Use: Follow the dosage instructions on the packaging, as concentrations can vary. This form is convenient for supporting digestive health, liver function, and reducing inflammation.

Disclaimer

While Mimosa pudica offers many health benefits, it is important to use it with caution. Pregnant or breastfeeding women should avoid this plant, and individuals with specific medical conditions should consult a healthcare provider before use. Excessive consumption can lead to adverse effects, so it is crucial to adhere to recommended dosages.

Mimosa pudica is more than just a plant with a touch-sensitive nature. It is a powerful natural remedy with a range of health benefits. From reducing inflammation to supporting liver health, this plant provides various uses that can enhance your wellness. By incorporating Mimosa pudica into your health regimen, whether through teas, poultices, or other methods, you can tap into its ancient healing properties. However, as with any medicinal plant, it is crucial to use Mimosa pudica responsibly and consult a healthcare professional when necessary.

Apple cider vinegar (ACV) and baking soda are two popular household items often touted for their health benefits. Together, they are sometimes recommended as a natural remedy for various ailments, from digestion issues to skin care. But what’s the truth about mixing these two? Is it healthy? Let’s delve into the details.

Understanding Apple Cider Vinegar and Baking Soda

Apple Cider Vinegar: ACV is made from fermented apple juice and is praised for its acetic acid content, which is believed to have several health benefits, including antimicrobial and antioxidant effects.

Baking Soda: Also known as sodium bicarbonate, baking soda is a base commonly used in baking and for neutralizing acids. It’s also used as a home remedy for acid reflux and as a mild disinfectant.

The Combination

When combined, apple cider vinegar and baking soda react chemically, neutralizing each other’s pH. This mixture results in a fizzing reaction, producing carbon dioxide. The theory behind consuming this mixture is that it can help balance the body’s pH, aid digestion, and detoxify the system.

Potential Benefits

  1. Digestive Aid: Some proponents believe that the combination can help balance stomach acid and alleviate symptoms like heartburn and indigestion.
  2. Detoxification: The mixture is sometimes used in detox regimens, with claims that it helps flush toxins from the body and improves liver function.
  3. pH Balance: It’s thought that this mixture can help maintain a healthy alkaline pH level, which some alternative health practitioners believe is important for fighting off diseases.

Health Considerations and Risks

While there are anecdotal reports of health benefits, scientific evidence supporting the health claims of drinking apple cider vinegar and baking soda together is limited. Moreover, there are several risks and considerations to keep in mind:

  • Tooth Enamel Erosion: Both ACV and baking soda are abrasive and acidic, which can damage tooth enamel if used frequently.
  • Gastrointestinal Issues: Consuming this mixture might lead to discomfort, including bloating and gas, due to the release of carbon dioxide.
  • Electrolyte Imbalance: Excessive consumption of baking soda can lead to electrolyte and acid/base imbalances, particularly in people with renal or cardiovascular diseases.

Recommendations

If you’re considering trying apple cider vinegar and baking soda for health reasons, it’s crucial to approach this remedy with caution:

  • Consult with a Healthcare Provider: Especially if you have underlying health conditions or take medications.
  • Moderation is Key: If you choose to try this remedy, use it sparingly and not as a daily supplement.
  • Watch for Adverse Reactions: Be aware of any negative symptoms like stomach pain, nausea, or dental sensitivity.

Conclusion

The combination of apple cider vinegar and baking soda might offer some health benefits, but these are not well-supported by scientific research. As with any home remedy, it’s important to use it wisely and consider professional medical advice, especially if you have health concerns or conditions. While natural remedies can complement a healthy lifestyle, they should not replace evidence-based medical treatments.

Did you know that the humble banana peel, often tossed away without a second thought, is a treasure trove of beauty secrets? For centuries, natural remedies have been passed down through generations, and banana peels play a starring role in one of the most remarkable: erasing wrinkles and rejuvenating skin. Let’s delve into this 100-year-old recipe and discover other top banana recipes for enhancing your beauty naturally.

The Miracle of Banana Peels

Erase Wrinkles with Banana Peel: Rich in antioxidants, vitamins, and minerals, banana peels can work wonders on your skin. The secret lies in their ability to moisturize and promote skin elasticity, reducing the appearance of wrinkles. Gently rubbing the inside of a banana peel on your face for a few minutes before rinsing off can reveal smoother, more radiant skin with regular use.

Top Banana Beauty Recipes

  1. Banana Peel & Oatmeal Scrub: Create a gentle exfoliating scrub by blending banana peels with oatmeal. This natural scrub helps remove dead skin cells, leaving your skin feeling refreshed and revitalized.
  2. Hydrating Banana Honey Mask: Mix a mashed ripe banana with a tablespoon of honey to form a powerful hydrating mask. This mixture is perfect for nourishing and soothing dry or tired skin, giving it a healthy, youthful glow.
  3. Banana Yogurt Soothing Mask: Blend banana with natural yogurt to soothe and calm sensitive skin. This mask is excellent for reducing irritation and redness, thanks to the natural probiotics in yogurt and the soothing effects of banana.
  4. Acne-Fighting Banana Peel Treatment: The anti-inflammatory and antibacterial properties of banana peels can help reduce acne. Apply the inside of a banana peel to the affected area and let it work its magic overnight to reduce swelling and redness.
  5. Natural Teeth Whitening with Banana Peel: The potassium in banana peels can help whiten teeth. Rub the inside of the peel on your teeth for a couple of minutes daily, and watch your smile brighten over time.

Embracing the simplicity and effectiveness of bananas in your beauty regimen is a delightful way to care for your skin naturally. These recipes not only make use of a common household fruit but also connect us to the wisdom of past generations, proving that sometimes, the best beauty secrets are the simplest ones.


The share button on FacebookThe button to share on Twitter Twitter, Pinterest, and the share button A button to share Pinemail The email-sharing tool ShareThis Share

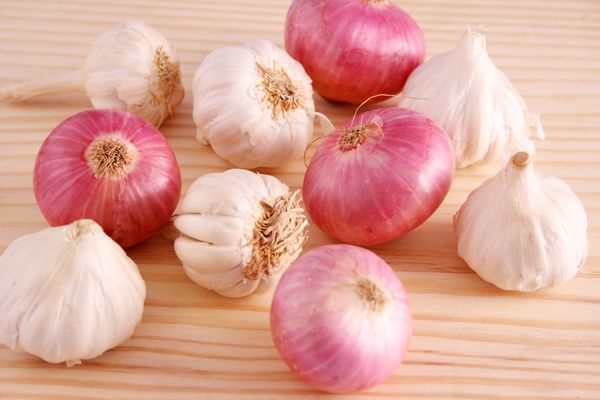
An Overview of Cloves and Their Benefits
The little spice with a strong taste, cloves, are wonderful for cooking and have many health advantages, especially as we become older. Even only two cloves a day may have a profound effect on your health. Let’s take a closer look at the many advantages that these modest spices provide.

Full with Nutrients
The vitamins, minerals, and fiber included in cloves make them a nutritious powerhouse that may do wonders for your health. Not only are they antioxidant-rich, dietary fiber-rich, and manganese-rich, but they also contain excellent quantities of vitamin K.

Advantages of Clove Use for Good Health

Immune System Boost: The strong antioxidant content of cloves aids in the fight against free radical damage and provides a boost to the immune system. When it comes to maintaining good health and warding against common diseases, this may be very helpful.
The eugenol in cloves helps alleviate gas and indigestion, so they’re good for your digestive system. It enhances digestive health and aids in food digestion by increasing enzyme synthesis.
The ancient usage of cloves as a treatment for dental disorders ensures that your teeth and gums remain healthy. Their ability to fight bacteria helps keep gums and teeth healthy and fresh-smelling.
Eugenol is also recognized for its ability to enhance liver function, which supports liver health. A healthy liver is essential for good health in general, and it aids in liver detoxification and optimization.
Cloves improve insulin production, which means they may regulate blood sugar levels, thus eating them regularly can assist with this.
Dietary Suggestions for Cloves
There are many easy and delicious ways to include cloves into your everyday routine:

Spice Up Your Tea: For a burst of flavor and some added health benefits, try infusing your tea with whole or ground cloves.
Meal Seasoning: Grind some cloves and add them to spice mixtures for stews, meats, or marinades.
As a home cure for a sore throat or to help with digestion, boil some cloves in water and drink the resulting concoction.
In conclusion, cloves are a healthy choice.
Numerous health advantages, including improved immune system function, liver function, and dental health, may be yours with only two cloves of garlic every day. Incorporating cloves into your diet is simple, and they provide a burst of flavor to a wide variety of foods. Making this simple adjustment will allow you to get the many health advantages of cloves and move closer to a healthier lifestyle. See the improvements to your health for yourself by giving it a try!

If you’re looking for a refreshing and tasty way to enjoy okra, a cold okra salad is an excellent choice. This dish is not only simple to prepare but also combines the unique texture and flavor of okra with vibrant, fresh ingredients. Here’s how to make a delicious cold okra salad that can serve as a perfect side dish or a light meal on its own.

Ingredients:

  • 1 pound fresh okra, ends trimmed
  • 1 pint cherry tomatoes, halved
  • 1 cucumber, peeled and diced
  • 1 small red onion, thinly sliced
  • 1/4 cup fresh parsley, chopped
  • 1/4 cup olive oil
  • 2 tablespoons red wine vinegar
  • 1 lemon, juiced
  • Salt and pepper, to taste
  • Optional: crumbled feta cheese or sliced olives for garnish

Instructions:

  1. Cook the Okra:
    • Bring a large pot of salted water to a boil.
    • Blanch the okra pods for about 2-3 minutes until they are bright green but still crisp.
    • Immediately transfer the okra to an ice water bath to stop the cooking process and preserve their color.
    • Once cooled, slice the okra into half-inch pieces.
  2. Prepare the Salad:
    • In a large mixing bowl, combine the sliced okra, halved cherry tomatoes, diced cucumber, and thinly sliced red onion.
    • Add the chopped parsley to the bowl.
  3. Make the Dressing:
    • In a small bowl, whisk together olive oil, red wine vinegar, and lemon juice.
    • Season with salt and pepper according to your taste preferences.
  4. Combine and Chill:
    • Pour the dressing over the salad ingredients and toss gently to coat everything evenly.
    • Cover and refrigerate the salad for at least one hour to allow the flavors to meld. This chilling time helps the okra absorb the dressing and spices.
  5. Serve:
    • Give the salad a good mix before serving to redistribute the dressing.
    • Garnish with crumbled feta cheese and sliced olives if desired for an extra burst of flavor.

Tips for the Best Cold Okra Salad:

  • Choose Fresh Okra: Look for bright green, firm pods that are not too large. Larger pods can be tough and fibrous.
  • Adjust the Ingredients: Feel free to add or subtract ingredients based on your preferences. Adding bell peppers or swapping the parsley for cilantro can bring a different flavor profile to the dish.
  • Acidity Adjustment: Adjust the amount of lemon juice or vinegar based on how tangy you like your salad. More lemon juice can add a refreshing zest to the dish.

This cold okra salad is not only simple to prepare but also offers a delightful mix of textures and flavors, making it a perfect addition to any meal, especially during warm weather. Enjoy your nutritious and delicious creation!

Growing okra can be incredibly rewarding, as this versatile and nutritious vegetable thrives in warm weather and can produce a bountiful harvest. There are several lesser-known techniques to accelerate okra growth and boost your yield. Here’s a guide to some of the fastest methods for growing okra that aren’t commonly discussed.

1. Choose the Right Variety

Selecting the right okra variety can significantly impact how quickly and successfully it grows. Varieties like ‘Clemson Spineless’ or ‘Emerald’ are known for their rapid growth and high yields. Research the varieties best suited for your climate and soil type.

2. Optimize Soil Conditions

Okra loves the heat and requires well-drained soil rich in organic matter to thrive. To speed up growth:

  • Enhance the soil with compost or aged manure before planting.
  • Maintain a pH between 6.0 and 6.8.
  • Use mulch to keep the soil warm and moist, which is crucial for okra.

3. Use Black Plastic Mulch

This method is seldom discussed but very effective. Covering your planting rows with black plastic mulch can accelerate soil warming and keep the roots cozy, which is essential for okra’s growth. This technique also helps retain soil moisture and suppress weeds.

4. Start Seeds Indoors

In cooler climates, start your okra seeds indoors about 4-6 weeks before the last frost date. Use biodegradable pots to avoid disturbing the roots when transplanting. Transplanting established seedlings can give you a head start on the growing season.

5. Soak Seeds Overnight

Okra seeds have a hard shell, so soaking them in water overnight before planting can soften the shell and speed up germination. This simple step can significantly reduce the time it takes for seedlings to emerge.

6. Consistent Watering

While okra is somewhat drought tolerant, consistent watering during the early stages of growth can speed up development. Water the plants deeply at least once a week, more frequently during extremely hot weather.

7. Optimal Plant Spacing

Plant okra seeds or seedlings about 12-18 inches apart in rows that are 3 feet apart. Proper spacing allows adequate air circulation and sunlight, which are essential for rapid growth and prevent diseases.

8. Regular Feeding

Feed your okra plants with a balanced fertilizer every 4-6 weeks to ensure they receive enough nutrients for fast growth. You can also use a nitrogen-rich fertilizer in the early stages to boost the growth of leaves and stems.

9. Prune Early

Though not often practiced, light pruning of the lower leaves when plants are young can encourage taller growth. Be careful not to over-prune, as this can stress the plants.

10. Harvest Regularly

Begin harvesting okra when the pods are about 2-3 inches long. Regular harvesting encourages the plants to produce more pods. If pods are left to mature on the plant, it can signal the plant to stop producing, slowing down overall yield.

By integrating these strategies, you can accelerate your okra growing process and enjoy a quicker harvest. While okra is generally easy to grow, these tips ensure you maximize productivity and enjoy fresh okra as soon as possible.