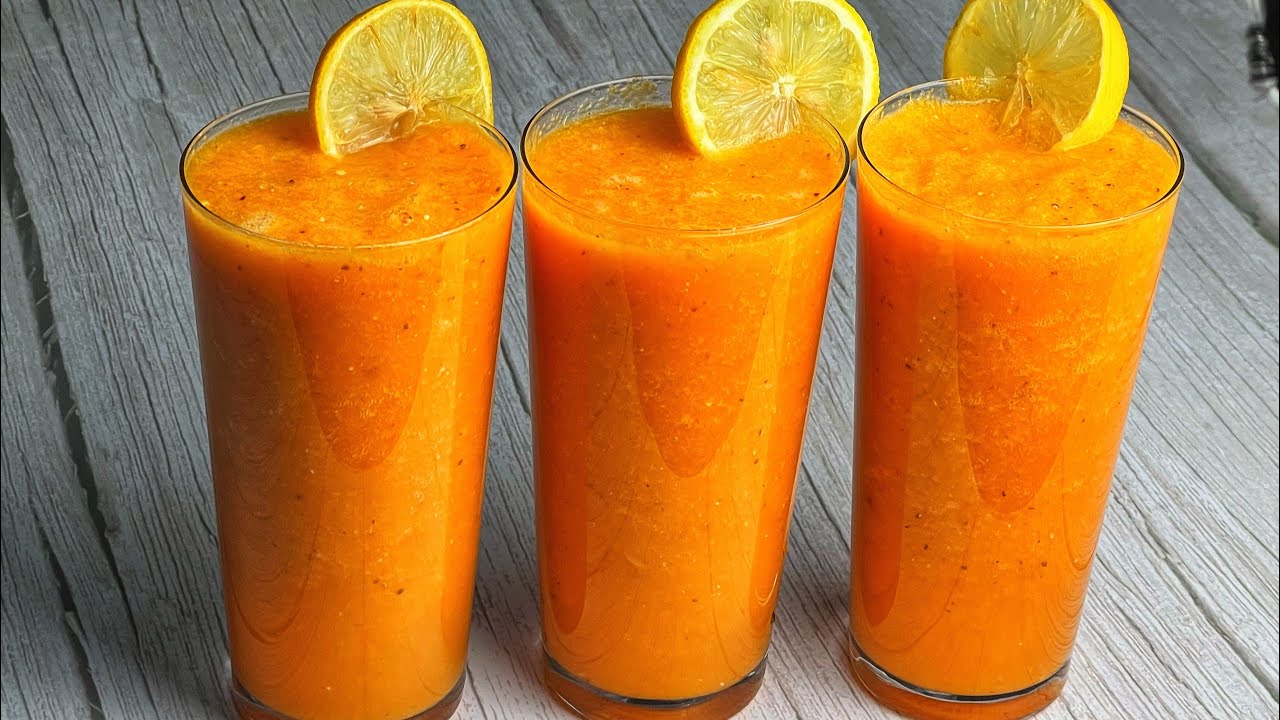
Author

Barbara L.

Browsing

Swelling in the legs and feet, also known as edema, can be uncomfortable and often signals underlying health issues. Fortunately, there are natural ways to manage this condition, and one powerful solution lies in a particular vitamin. Let’s explore how Vitamin B6 can help reduce swelling and improve your overall health.

Why Vitamin B6?

Vitamin B6, also known as pyridoxine, plays a crucial role in reducing water retention and improving circulation. It helps the body balance fluids and supports kidney function, making it a key nutrient in combating swelling in the legs and feet.

Benefits of Vitamin B6 for Swelling

  • Reduces Water Retention: Vitamin B6 helps regulate the balance of sodium and potassium in your body, which in turn reduces water retention and swelling.
  • Improves Circulation: Proper circulation is essential for reducing swelling, and Vitamin B6 supports healthy blood flow.
  • Supports Kidney Function: By promoting kidney health, Vitamin B6 helps your body efficiently remove excess fluids.

Sources of Vitamin B6

Incorporating Vitamin B6 into your diet is easy and delicious. Here are some foods rich in this essential vitamin:

  • Bananas: A convenient and tasty snack that provides a good amount of Vitamin B6.
  • Chicken and Turkey: Lean poultry is an excellent source of this vitamin.
  • Fish: Tuna, salmon, and other fish are rich in Vitamin B6.
  • Whole Grains: Brown rice, oatmeal, and whole wheat bread are all good choices.
  • Vegetables: Spinach, potatoes, and sweet potatoes contain significant amounts of Vitamin B6.
  • Nuts and Seeds: Sunflower seeds, sesame seeds, and walnuts are great for a quick Vitamin B6 boost.

Incorporating Vitamin B6 into Your Diet

  1. Balanced Meals
    • Ensure your meals include a variety of foods rich in Vitamin B6. For example, a grilled chicken salad with spinach, a side of sweet potato, and a handful of sunflower seeds makes a nutrient-packed meal.
  2. Healthy Snacks
    • Choose snacks like bananas, nuts, and whole grain crackers to keep your Vitamin B6 levels up throughout the day.
  3. Supplements
    • If you find it challenging to get enough Vitamin B6 from food alone, consider taking a supplement. Always consult with your healthcare provider before starting any new supplement regimen.

Additional Tips to Reduce Swelling

  • Stay Hydrated: Drink plenty of water to help your body flush out excess sodium and reduce swelling.
  • Elevate Your Legs: Elevating your legs above heart level can help reduce swelling by improving circulation.
  • Regular Exercise: Physical activity promotes good circulation and can help prevent fluid buildup in your legs and feet.

By ensuring you get enough Vitamin B6 through your diet, you can help reduce leg and foot swelling naturally. This essential vitamin not only aids in managing edema but also supports overall health. Incorporate these tips into your daily routine, and you might find relief from swelling and discomfort. Enjoy the benefits of a balanced diet rich in Vitamin B6, and take a step towards healthier, happier legs and feet!

Would you like to have a home that smells delightful, free of flies and mosquitoes, without spending a fortune? We have a simple and cost-effective trick that can transform your living space. With just a few natural ingredients, you can create a fresh and insect-free environment. Here’s how you can do it.

Natural Ingredients

The key to this trick lies in using natural ingredients that are both effective and inexpensive. You probably already have most of these items in your kitchen.

You will need:

  • Lemon
  • Cloves
  • Baking soda
  • Water

Steps to a Fresh and Insect-Free Home

  1. Lemon and Cloves for Insect Repellent:
    • Cut a Lemon in Half: Take a fresh lemon and cut it in half.
    • Insert Cloves: Stick several cloves into the flesh of each lemon half. Cloves have a strong scent that repels flies and mosquitoes.
    • Place the Lemon Halves: Put the clove-studded lemon halves in areas where flies and mosquitoes are common, such as near windows, doors, and in the kitchen. The combination of lemon and cloves creates a natural barrier that insects dislike.
  2. Baking Soda Air Freshener:
    • Prepare the Baking Soda: Take a small bowl and fill it with baking soda.
    • Add Essential Oil (Optional): For an extra pleasant aroma, you can add a few drops of your favorite essential oil to the baking soda. Lemon, lavender, or eucalyptus oils work particularly well.
    • Place the Bowl: Set the bowl in a central location in your home. The baking soda will absorb odors, while the essential oils (if used) will release a pleasant fragrance, keeping your house smelling fresh.
  3. Homemade Cleaning Spray:
    • Mix Ingredients: Combine equal parts of water and lemon juice in a spray bottle. You can also add a tablespoon of baking soda for extra cleaning power.
    • Clean Surfaces: Use this mixture to wipe down countertops, tables, and other surfaces. The lemon juice acts as a natural disinfectant and leaves behind a fresh scent, while the baking soda helps to remove stains and grime.

Benefits

  • Cost-Effective: These ingredients are inexpensive and easily available.
  • Natural and Safe: Unlike chemical sprays and cleaners, these natural ingredients are safe for your family and pets.
  • Effective: The combination of lemon, cloves, and baking soda not only freshens the air but also repels insects effectively.

By incorporating these simple tricks into your routine, you can enjoy a home that smells wonderful and is free from annoying flies and mosquitoes, all without spending much money. Give it a try and see the difference for yourself!

When it comes to fortifying your immune system and keeping viruses and bacteria at bay, few combinations are as effective as lemon and ginger. This simple yet powerful drink can help boost your immunity, keeping you healthy and energized. Here’s how to make this immune-boosting drink and why it works so well.

Why Lemon and Ginger?

Lemons are rich in vitamin C, a vital nutrient that helps strengthen the immune system, improve skin health, and enhance iron absorption. Ginger, on the other hand, is known for its anti-inflammatory and antioxidant properties. It helps reduce inflammation, fight off infections, and improve digestion. Together, these ingredients create a potent defense against illnesses.

Ingredients

  • 1 fresh lemon
  • 1-inch piece of fresh ginger root
  • 2 cups of water
  • 1 tablespoon of honey (optional)
  • A pinch of cayenne pepper (optional)

Instructions

  1. Prepare the Ingredients
    • Start by washing the lemon thoroughly. Cut it in half and squeeze the juice into a cup, removing any seeds.
    • Peel the ginger root and slice it into thin pieces.
  2. Boil the Water
    • Pour 2 cups of water into a small pot and add the ginger slices.
    • Bring the water to a boil, then reduce the heat and let it simmer for about 10 minutes. This allows the ginger to release its beneficial properties into the water.
  3. Combine Lemon and Ginger
    • After 10 minutes, remove the pot from the heat and strain the ginger-infused water into a cup.
    • Add the freshly squeezed lemon juice to the ginger water. Stir well to combine.
  4. Sweeten and Spice (Optional)
    • If you prefer a sweeter drink, add a tablespoon of honey. Honey not only adds sweetness but also has its own antibacterial properties.
    • For an extra kick, add a pinch of cayenne pepper. This spice can help clear sinuses and further boost your immune system.
  5. Enjoy Your Drink
    • Stir all the ingredients well and enjoy your warm, immune-boosting drink. For the best results, drink this mixture first thing in the morning.

Benefits of Lemon and Ginger Drink

  • Strengthens Immune System: Rich in vitamin C and antioxidants, this drink helps fortify your immune defenses.
  • Fights Inflammation: Ginger’s anti-inflammatory properties help reduce inflammation and pain.
  • Aids Digestion: Ginger helps improve digestion and relieve nausea, making this drink soothing for your stomach.
  • Detoxifies the Body: Lemon helps flush out toxins, promoting overall detoxification.
  • Hydrates and Energizes: This drink keeps you hydrated and provides a natural energy boost.

Additional Tips

  • Regular Consumption: For optimal immune support, drink this lemon and ginger mixture daily.
  • Fresh Ingredients: Always use fresh lemon juice and ginger to ensure you get the maximum health benefits.
  • Adjust to Taste: Feel free to adjust the amounts of lemon, ginger, honey, and cayenne pepper to suit your taste preferences.

Incorporating this lemon and ginger drink into your daily routine can significantly boost your immune system and help protect you against viruses and bacteria. It’s a simple, natural, and delicious way to stay healthy and energized. Give it a try, and feel the difference it makes!

Elevate your hydration game with this effortless and rejuvenating Blueberry Water recipe. By infusing water with the sweetness of blueberries, the zest of lemons, and the fragrant flair of fresh thyme, you create a beverage that’s not only a feast for the eyes but a boost for your health.

Why Choose Fruit-Infused Water?

Infusing water with fruits is a fantastic strategy to make drinking water more exciting, especially if you are between the ages of 45 to 65. It introduces a splash of flavor and a hint of elegance to your routine, transforming hydration into a joyous occasion.

Dive into the Delights of Blueberry

Center stage in this recipe is the beloved blueberry, known for its delightful flavor and numerous health perks. This blueberry water combines the fruit’s natural sweetness with the tangy essence of lemons and a whisper of thyme, crafting a beverage that’s refreshingly distinct and perfect for mature taste buds.

A Bounty of Benefits

This blueberry-infused water isn’t just a pleasure to sip on; it’s also brimming with antioxidants, which is essential for individuals above the age of 45. It’s an excellent alternative for anyone looking to increase their water intake or cut down on sugary drinks.

Ingredients for a Zesty Blueberry Lemon Thyme Water:

  • 1 cup of fresh or frozen blueberries
  • 2 lemons, sliced
  • A few sprigs of fresh thyme
  • 4 cups of water

Instructions:

  1. In a large pitcher, combine the blueberries, lemon slices, and fresh thyme.
  2. Add water to the pitcher and stir gently to mix the ingredients.
  3. Place the pitcher in the refrigerator and let it sit for at least 2 hours or overnight for maximum infusion.
  4. Serve the blueberry water over ice, garnished with extra blueberries, lemon slices, and thyme sprigs.

Enjoy the refreshing and revitalizing flavors of this Blueberry Water, and discover a new way to stay hydrated and healthy.

If you’re looking for a natural and effective way to boost your hair growth, look no further than your kitchen and garden. With just rosemary and olive oil, you can create a powerful hair treatment that can make your hair grow like crazy. Here’s how you can use these two ingredients to achieve healthier, longer hair.

Why Rosemary and Olive Oil?

Rosemary is renowned for its ability to stimulate hair growth due to its high antioxidant content and its ability to improve circulation to the scalp. Olive oil, on the other hand, is packed with vitamins and nutrients that nourish the hair, making it stronger and shinier. Combined, these ingredients can transform your hair care routine.

Ingredients

  • 1 cup of extra virgin olive oil
  • A handful of fresh rosemary leaves (or 2-3 tablespoons of dried rosemary)

Instructions

  1. Prepare the Infusion
    • Pour the olive oil into a small saucepan.
    • Add the rosemary leaves to the olive oil.
  2. Heat the Mixture
    • Place the saucepan on low heat and let the mixture warm up for about 5-10 minutes. Do not let it boil; just warm enough to infuse the rosemary into the oil.
    • Once it’s warmed, remove it from the heat and let it cool down completely.
  3. Strain the Oil
    • Once the oil has cooled, strain out the rosemary leaves using a fine mesh strainer or cheesecloth. Transfer the infused oil into a clean, airtight container.
  4. Apply to Your Hair
    • To use, take a small amount of the rosemary-infused olive oil and massage it into your scalp. Make sure to cover your entire scalp and work it through to the ends of your hair.
    • Leave the oil on your hair for at least 30 minutes. For best results, you can leave it on overnight by covering your hair with a shower cap.
  5. Rinse Thoroughly
    • Wash your hair with your regular shampoo and conditioner. You may need to shampoo twice to remove all the oil.

Benefits of Using Rosemary and Olive Oil

  • Stimulates Hair Growth: Rosemary improves circulation to the scalp, which stimulates hair follicles and promotes growth.
  • Nourishes and Conditions: Olive oil deeply nourishes the hair, making it soft, shiny, and strong.
  • Reduces Dandruff: The anti-inflammatory properties of rosemary can help reduce dandruff and soothe an itchy scalp.
  • Prevents Hair Loss: Regular use of this treatment can strengthen hair and prevent breakage and hair loss.

Additional Tips

  • Use Regularly: For best results, use this treatment 1-2 times per week.
  • Store Properly: Keep your rosemary-infused olive oil in a cool, dark place to maintain its potency.
  • Patch Test: If you have sensitive skin, do a patch test before applying the oil to your entire scalp to ensure you don’t have an adverse reaction.

By incorporating rosemary and olive oil into your hair care routine, you can naturally enhance hair growth and improve the overall health of your hair. This simple yet powerful treatment can help you achieve the long, luscious locks you’ve always dreamed of. Give it a try, and watch your hair grow like crazy!

Are you searching for a way to achieve perfect, youthful skin naturally? Look no further! A homemade facial toner combined with natural clove oil can work wonders for your complexion. These natural ingredients are easy to prepare and use, providing your skin with the nourishment it needs to look its best. Let’s explore how to make and use these fantastic skincare products.

Benefits of Clove Oil

Clove oil is renowned for its powerful antiseptic, antibacterial, and anti-inflammatory properties. It can help to:

  • Reduce Acne and Blemishes: Clove oil can kill acne-causing bacteria and reduce inflammation, making it an excellent remedy for clear skin.
  • Improve Skin Texture: Regular use of clove oil can help improve the texture of your skin, making it smoother and softer.
  • Combat Signs of Aging: Clove oil is rich in antioxidants that help fight free radicals, which can cause premature aging.

Homemade Facial Toner

A good facial toner helps to cleanse, refresh, and balance the skin. Here’s how to make a simple and effective toner at home:

Ingredients:

  • 1 cup of distilled water
  • 1 tablespoon of apple cider vinegar
  • 10 drops of clove oil

Steps:

  1. Mix the Ingredients: In a clean spray bottle or jar, combine the distilled water, apple cider vinegar, and clove oil. Shake well to mix thoroughly.
  2. Store Properly: Store the toner in a cool, dark place to maintain its effectiveness.

How to Use the Homemade Facial Toner

  1. Cleanse Your Face: Start with a clean face. Use your regular facial cleanser to remove any dirt and makeup.
  2. Apply the Toner: Using a cotton pad, apply the toner to your face and neck. Avoid the eye area.
  3. Let It Dry: Allow the toner to air dry on your skin. This will help tighten pores and prepare your skin for moisturizing.

Natural Clove Oil Treatment

After toning, using clove oil can provide additional benefits for your skin. Here’s how to incorporate clove oil into your routine:

Ingredients:

  • 2-3 drops of clove oil
  • 1 tablespoon of carrier oil (such as coconut oil or jojoba oil)

Steps:

  1. Dilute the Clove Oil: Mix 2-3 drops of clove oil with a tablespoon of your chosen carrier oil. This helps to reduce the potency of clove oil and prevent skin irritation.
  2. Apply to Your Skin: Gently massage the oil mixture into your skin, focusing on areas with blemishes or signs of aging. Use small, circular motions to promote blood circulation.
  3. Leave It On: Allow the oil to absorb into your skin. You can leave it on overnight for maximum benefits or rinse off after 20-30 minutes if preferred.

Additional Tips

  • Patch Test: Always perform a patch test before using new products on your skin to ensure you don’t have an allergic reaction.
  • Consistency is Key: For the best results, incorporate these treatments into your daily skincare routine.
  • Stay Hydrated: Drinking plenty of water and maintaining a healthy diet can also contribute to youthful, glowing skin.

By using this homemade facial toner and natural clove oil, you can achieve perfect, youthful skin. Give these remedies a try and enjoy the benefits of healthy, radiant skin!

Looking for a simple and effective cleaning hack? Just dip half a lemon in baking soda and get ready to be amazed! This natural combination is perfect for tackling a variety of household cleaning tasks. Let’s explore how this easy trick can leave your home sparkling clean.

Why Lemon and Baking Soda?

Lemon and baking soda are a powerful duo when it comes to cleaning. Lemon is rich in citric acid, which acts as a natural disinfectant and deodorizer. Baking soda, on the other hand, is a gentle abrasive that helps scrub away grime and stains. Together, they create a potent cleaning solution that’s both effective and eco-friendly.

How to Use Lemon and Baking Soda for Cleaning

Materials:

  • 1 large lemon
  • 1 tablespoon of baking soda

Steps:

  1. Prepare the Lemon:
    • Cut the lemon in half. You’ll only need one half for this trick, so you can save the other half for later use.
  2. Dip in Baking Soda:
    • Pour a tablespoon of baking soda onto a small plate.
    • Dip the cut side of the lemon into the baking soda, coating it generously.
  3. Scrub and Clean:
    • Use the lemon half to scrub surfaces that need cleaning. This works particularly well on kitchen countertops, sinks, stovetops, and bathroom fixtures.
    • The combination of lemon juice and baking soda will fizz slightly, helping to lift dirt and stains.
  4. Rinse and Wipe:
    • After scrubbing, rinse the area with water and wipe clean with a damp cloth. You’ll be left with a fresh, clean surface and a pleasant lemony scent.

Benefits of Using Lemon and Baking Soda

  • Natural and Safe:
    • Unlike chemical cleaners, this natural solution is safe to use around children and pets.
  • Effective Cleaning:
    • The citric acid in lemon helps to break down grease and grime, while the baking soda provides gentle scrubbing action.
  • Pleasant Aroma:
    • Lemons leave a fresh, citrusy scent that makes your home smell clean and inviting.
  • Eco-Friendly:
    • Using natural ingredients reduces your reliance on harsh chemicals, making this method better for the environment.

Additional Tips

  • Microwave Cleaner:
    • Place a lemon half in a bowl of water and microwave for a few minutes. The steam will loosen grime, making it easy to wipe clean.
  • Garbage Disposal Freshener:
    • Drop lemon peels coated in baking soda into your garbage disposal and run it with cold water to eliminate odors.
  • Stain Remover:
    • For stubborn stains on cutting boards or countertops, let the lemon and baking soda mixture sit for a few minutes before scrubbing.

By using this simple trick, you can easily tackle tough cleaning jobs around the house. Give it a try and be surprised by how effective this natural cleaning method can be!

Maintaining the health of your kidneys, liver, and lungs is essential for overall well-being. These organs play crucial roles in detoxifying the body, filtering out toxins, and supporting respiratory health. A powerful, natural way to support these vital organs is by incorporating a delicious drink made from ginger, celery, carrot, and lime into your daily routine. This combination helps cleanse your body and boost your immune system. Here’s how to prepare this health-boosting drink and why it works.

Ingredients

  • 1-inch piece of fresh ginger
  • 2 stalks of celery
  • 3 large carrots
  • 1 lime
  • 1 cup of water (optional, for blending)

Instructions

  1. Prepare the Ingredients
    • Start by washing the ginger, celery, and carrots thoroughly to remove any dirt and pesticides.
    • Peel the ginger and carrots. Cut the ginger, celery, and carrots into smaller pieces for easier blending or juicing.
  2. Juice or Blend
    • Juicer Method: If you have a juicer, simply feed the ginger, celery, and carrots through the juicer. Collect the juice in a container.
    • Blender Method: If you’re using a blender, add the ginger, celery, and carrots to the blender. Add 1 cup of water to help blend the ingredients smoothly. Blend until you achieve a smooth consistency, then strain the mixture through a fine mesh sieve or cheesecloth to remove the pulp.
  3. Add Lime
    • Squeeze the juice of one lime into the prepared juice. Stir well to combine. Lime adds a refreshing citrus flavor and provides additional vitamin C, which boosts the immune system.
  4. Serve and Enjoy
    • Pour the juice into a glass and enjoy it fresh. For best results, drink this mixture on an empty stomach in the morning to maximize its detoxifying benefits.

Benefits of Ginger, Celery, Carrot, and Lime

  • Kidney Health: Celery acts as a natural diuretic, helping to flush out toxins and waste from the kidneys. Ginger helps reduce inflammation and improves kidney function.
  • Liver Detox: Carrots are rich in beta-carotene and antioxidants that support liver health and detoxification. Ginger also aids in liver cleansing and protects against liver diseases.
  • Lung Support: Lime is high in vitamin C, which supports lung health and helps fight respiratory infections. Ginger’s anti-inflammatory properties help clear the respiratory tract and reduce symptoms of respiratory issues.
  • Immune Boosting: The combination of these ingredients is rich in vitamins, minerals, and antioxidants, which help strengthen the immune system and protect the body from infections.

Additional Tips

  • Stay Hydrated: Drink plenty of water throughout the day to support the detoxifying effects of this juice.
  • Healthy Diet: Complement this drink with a balanced diet rich in fruits, vegetables, and whole grains to enhance overall health.
  • Regular Exercise: Incorporate regular physical activity to promote circulation and overall organ function.

By regularly consuming this ginger, celery, carrot, and lime drink, you can support the health of your kidneys, liver, and lungs while boosting your immune system. This natural, refreshing beverage is an easy and delicious way to help your body detoxify and stay healthy. Give it a try, and feel the difference it makes in your well-being!

Kickstart your day with a delicious and nutritious early morning smoothie that’s perfect for fueling your body and keeping you energized. This smoothie recipe combines the goodness of bananas, sesame seeds, protein oats, Greek yogurt, Herbalife protein powder, and soya nature milk. It’s easy to make and packed with essential nutrients to keep you going strong all morning. Let’s dive into the recipe and its wonderful benefits.

Ingredients

  • 1 banana
  • 1 tablespoon sesame seeds
  • 1/4 cup protein oats
  • 1/2 cup Greek yogurt
  • 1 scoop Herbalife protein powder
  • 1 cup soya nature milk

Benefits of the Ingredients

1. Banana: Bananas are rich in potassium and provide a natural source of energy. They also add a creamy texture and natural sweetness to the smoothie.

2. Sesame Seeds: Sesame seeds are packed with essential nutrients like calcium, magnesium, and healthy fats. They help support bone health and add a subtle nutty flavor.

3. Protein Oats: Oats are a great source of dietary fiber and protein. They help keep you full longer and provide a steady release of energy.

4. Greek Yogurt: Greek yogurt is rich in protein and probiotics, which aid in digestion and boost your immune system. It also gives the smoothie a thick and creamy consistency.

5. Herbalife Protein Powder: Adding protein powder increases the protein content, making this smoothie a great option for a post-workout snack or a meal replacement.

6. Soya Nature Milk: Soya milk is a fantastic dairy-free option that is high in protein and calcium. It helps create a smooth and velvety texture for the smoothie.

How to Make the Early Morning Smoothie

Step-by-Step Instructions:

  1. Prepare the Ingredients: Peel the banana and break it into chunks. Measure out the sesame seeds, protein oats, Greek yogurt, Herbalife protein powder, and soya nature milk.
  2. Blend: Place all the ingredients into a blender. Start with the banana, sesame seeds, protein oats, Greek yogurt, and protein powder. Pour the soya nature milk over the top.
  3. Blend Until Smooth: Blend the ingredients on high until the mixture is smooth and creamy. If the smoothie is too thick, you can add a bit more soya milk to reach your desired consistency.
  4. Serve: Pour the smoothie into a glass and enjoy immediately. For an extra touch, you can garnish with a sprinkle of sesame seeds or a slice of banana.

Tips for Best Results

  • Use Frozen Banana: For a colder, thicker smoothie, use a frozen banana. This adds a nice chill without needing to add ice, which can dilute the flavor.
  • Adjust Sweetness: If you prefer a sweeter smoothie, you can add a teaspoon of honey or a few dates.
  • Blend Well: Make sure to blend the smoothie until it’s completely smooth to avoid any gritty texture from the oats and seeds.

Conclusion

This early morning smoothie is not only delicious but also packed with nutrients to kickstart your day. The combination of banana, sesame seeds, protein oats, Greek yogurt, Herbalife protein powder, and soya nature milk provides a balanced mix of carbohydrates, protein, and healthy fats. It’s a perfect way to fuel your morning, whether you’re heading to the gym, going to work, or just starting your day at home. Try this smoothie recipe and enjoy a tasty, nutritious boost every morning!

Eggshells are incredibly versatile and can be used in clever ways that you may not have thought of. Here are 15 genius ways to use eggshells that will make you reconsider tossing them in the trash:

Garden Fertilizer

Crush eggshells and sprinkle them around the base of your plants. They provide essential calcium for plant growth.

Pest Control

Use crushed eggshells to deter pests like slugs, snails, and even cats. Create a barrier by scattering the shells around your garden that these pests won’t cross.

Compost Enhancer

Add eggshells to your compost pile. As they break down, they help balance the pH of the compost and enrich it with valuable nutrients.

Seed Starters

Use eggshells as small pots for starting seeds. They are biodegradable and can be planted directly into the soil with the seedlings, giving them an extra boost of calcium.

Household Cleaner

Crushed eggshells mixed with a little soapy water make for a gentle abrasive cleaner. Use them to scrub pots, pans, and surfaces without worrying about scratching.

Face Mask

Turn eggshells into a fine powder, mix them with egg whites, and create a natural exfoliating face mask. Apply the mixture to your face, let it dry, and rinse off for smoother skin.

Laundry Whitener

Place crushed eggshells in a small mesh bag and add them to your laundry. The shells help remove stains and keep whites bright.

Natural Drain Cleaner

Make a mixture of warm water, dish soap, and ground eggshells to clean your pipes. They act as a scrub and prevent clogs.

Calcium Supplement for Pets

Sprinkle a small amount of crushed eggshells over your pet’s food as a calcium supplement. It’s a great addition to their diet.

Coffee Grounds Enhancer

Add crushed eggshells to your coffee grounds before brewing. The shells reduce the acidity of the coffee, resulting in a smoother taste.

Craft Projects

Get creative and use eggshells in various craft projects. Paint them, use them in mosaics, or as unique decorations for Easter eggs.

Calcium Supplement for Humans

Sterilize and grind eggshells into a fine powder to use as a natural calcium supplement. Add the powder to smoothies, baked goods, or sprinkle it over food.

Soil Amendment for Tomatoes

Help your tomato plants by adding crushed eggshells to the planting hole or around the base. This helps prevent blossom end rot.

Bird Feed

Sterilize and crush eggshells, then mix them with birdseed. The calcium boost will benefit birds, especially when it comes to their own eggshells.

Household Deodorizer

Place dried eggshells in a bowl or container and put it in your refrigerator or cupboard. They naturally absorb odors, keeping your kitchen fresh.

Conclusion

Eggshells have far more uses than you may have realized. Whether it’s gardening, pest control, beauty treatments, or craft projects, they offer a multitude of benefits. So next time you crack an egg, think twice before throwing away the shell – it might come in handy!