Author

Barbara L.

Browsing

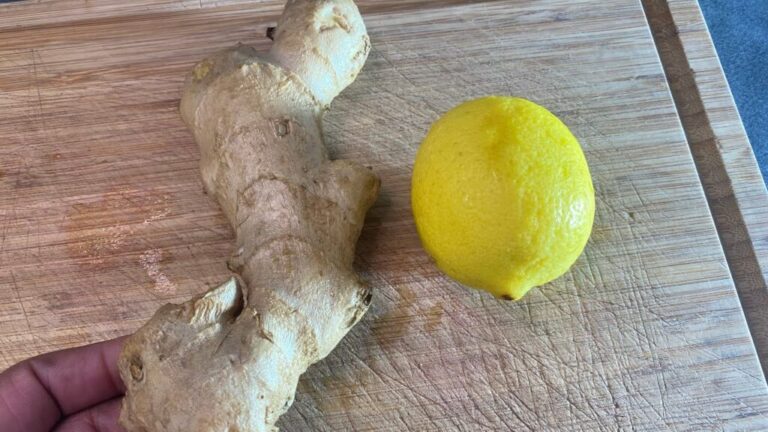
As the temperature rises, there’s nothing quite like a refreshing drink to cool down and revitalize your senses. One of the best summer refreshments is Ginger Lemon Juice, often referred to as Ginger Lemonade. This zesty beverage is not only delicious but also packs a punch of health benefits, making it a perfect choice for staying hydrated during the hot months. Here’s how you can whip up this simple yet invigorating drink right at home.

Health Benefits of Ginger Lemon Juice

Boosts Digestion: Ginger is renowned for its ability to aid digestion. It helps calm an upset stomach and promotes the flow of bile, which helps you digest fats.

Enhances Immune System: Lemon is high in vitamin C, a natural antioxidant that improves the immune system and has antibacterial and antiviral properties.

Hydration: Staying well-hydrated is crucial, especially during summer. Adding fresh lemon and ginger to your water can make it more appealing, helping you to drink more throughout the day.

Ingredients

  • 1 cup of freshly squeezed lemon juice (about 4-6 lemons)
  • 2 tablespoons of freshly grated ginger root
  • 4 cups of cold water
  • Honey or agave syrup, to taste
  • Ice cubes
  • Lemon slices and mint leaves for garnish

Instructions

  1. Prepare the Ingredients: Start by juicing the lemons until you have one cup of juice. Grate the fresh ginger — you’ll want about two tablespoons.
  2. Infuse the Ginger: In a small saucepan, combine the grated ginger with 1 cup of water. Bring to a boil, then simmer for about 5 minutes to let the ginger infuse the water. This creates a strong ginger concentrate.
  3. Strain: After simmering, strain the ginger water through a fine mesh sieve into a large pitcher. This will remove the ginger solids and leave you with a clear, flavorful liquid.
  4. Mix the Lemonade: To the ginger-infused water, add the lemon juice, the remaining 3 cups of cold water, and sweetener to taste. Stir well until all the ingredients are fully combined.
  5. Chill and Serve: Add plenty of ice to the pitcher and stir. Slice a few more lemons for garnish and add them to the pitcher along with some fresh mint leaves.
  6. Enjoy: Serve the ginger lemon juice in glasses over more ice, garnished with a slice of lemon and a sprig of mint.

This Ginger Lemon Juice is not only a fantastic way to stay cool and refreshed but also a delightful way to boost your health. Whether you’re enjoying a quiet afternoon at home or entertaining guests, this drink is sure to be a hit. Enjoy your summer days with this tasty, healthful beverage!

Have you ever considered the incredible potential of orange peels? These often overlooked scraps can actually be used in a variety of practical ways. Instead of throwing them away, why not repurpose them to create natural fragrances, oils, degreasers, and cleaning agents? By simply placing orange peels in a bottle of water, you can unlock a multitude of possibilities while also saving money.

Discover the Benefits of Using Orange Peels for Homemade Cleaners

If you want to reduce household waste and avoid harsh chemicals, repurposing orange peels for homemade cleaners is a fantastic option. Not only is it environmentally friendly, but it’s also budget-friendly. Here are some benefits of utilizing this natural alternative:

  • Safe for most surfaces
  • Free from toxins and chemicals
  • Cost-effective
  • Helps reduce food waste
  • Provides long-lasting effectiveness

Make Your Own All-Purpose Cleaner in a Few Simple Steps

Creating your own all-purpose cleaner from orange peels is easy and requires minimal ingredients. The result is a versatile cleaner that lasts for months. Follow these simple steps:

  1. Save the peels: Collect orange peels in a container and store them in the refrigerator. Approximately 4-6 medium-sized oranges should be enough.
  2. Wash and disinfect: Clean the peels with water and salt to eliminate germs, pesticide residues, and parasites. Cut the peels into strips and place them in the container until it’s halfway full.
  3. Add baking soda and water: Include a teaspoon of baking soda and water in the container, leaving room for fermentation.
  4. Infuse the solution: Let the orange peels steep for at least a week to enhance the cleaning solution’s fragrance. Remember to open the container daily to release gases.
  5. Filter and utilize: After a week, filter the liquid into a spray bottle or container. This citrus detergent, enriched with citric acid and sodium bicarbonate, can be used to clean various surfaces, from dishes to floors.

By embracing this simple DIY method, you not only minimize waste but also contribute to a healthier, eco-conscious lifestyle. It’s a win-win situation for your wallet and the environment! So, next time you enjoy a juicy orange, don’t forget about the incredible potential that its peels have to offer.

When coughs, laryngitis, or bronchitis take hold, finding relief becomes a top priority. One of the oldest and most natural remedies for these respiratory ailments is marshmallow root tea. This herbal solution has been used for centuries to soothe irritation in the throat and lungs, reduce coughing, and expel mucus. Here’s a closer look at how marshmallow root tea can help alleviate these symptoms and how you can prepare it at home.

The Healing Power of Marshmallow Root

Marshmallow Root: This plant is not related to the sugary confection that shares its name but has been a staple in herbal medicine due to its mucilage content. Mucilage is a gelatinous substance that coats and soothes mucus membranes in the respiratory system, helping to reduce irritation and promote healing.

Benefits of Marshmallow Root Tea

  • Soothes the Throat: The mucilage in marshmallow root forms a protective layer around the throat, easing soreness and irritation caused by coughing.
  • Reduces Cough: By soothing the throat, marshmallow root helps to reduce the cough reflex and promote more comfortable breathing.
  • Clears Mucus: It helps in thinning and loosening mucus, which makes it easier to expel and clears the lungs.

Ingredients Needed

  • 1-2 tablespoons of dried marshmallow root
  • 1 cup of boiling water
  • Honey or lemon (optional, for flavor)

How to Prepare Marshmallow Root Tea

  1. Steep the Root:
    • Place the dried marshmallow root in a cup or a tea infuser.
    • Pour boiling water over the marshmallow root.
    • Cover and let it steep for about 10-15 minutes. The longer it steeps, the more mucilaginous the tea will be.
  2. Strain and Serve:
    • Remove the marshmallow root and strain the tea into another cup to ensure it is clear of any plant particles.
    • Add honey or a squeeze of lemon to enhance the flavor if desired.
  3. Enjoy:
    • Drink the tea warm. For best results, consume two to three cups a day when experiencing symptoms.

Why You’ll Love This Tea

Marshmallow root tea not only provides effective relief from respiratory discomfort but also offers a natural, gentle alternative to over-the-counter medications. The process of making and sipping the tea can be very comforting, especially when you’re feeling under the weather.

Conclusion

If you’re struggling with a persistent cough, laryngitis, or bronchitis, give marshmallow root tea a try. It’s a time-tested natural remedy that offers soothing relief and helps clear your lungs, making your days and nights more comfortable. Enjoy the healing benefits of this herbal tea and breathe easier this season!

Crafting tomato preserves doesn’t have to be complicated. With just a few ingredients and a little patience, you can enjoy the taste of fresh tomatoes all year round. No more relying on store-bought alternatives or making trips to the supermarket!

Tomato preserves are incredibly versatile and can be used in a variety of dishes. Whether you want to enhance your favorite spaghetti sauce or add flavor to other culinary creations, tomato preserves are a game-changer. They bring homemade goodness to your meals, even when fresh tomatoes are out of season.

The Perfect Time and Method

While summer is the best time to preserve tomatoes, there’s a method that extends their shelf life up to two years. All you need are some ripe tomatoes, ideally from your own garden, and plenty of basil.

The key to delicious tomato preserves lies in the ripeness and variety of tomatoes you use. To ensure you’re choosing the right ones, consult your local greengrocer. It’s also a good idea to prepare the sauce a couple of days after purchasing the tomatoes, as this can enhance the final product.

One simple way to determine whether tomatoes are ripe is by checking if the stem easily detaches from the fruit. And remember, when you open a jar of tomato sauce, it should taste, look, and smell the same as when you first made it. Any changes in flavor, color, or aroma indicate spoilage, and the sauce should be discarded.

Foolproof Recipe for Tomato Preserves

Proper sterilization of jars is crucial for successful preservation. Follow this easy recipe using around 7 kg of tomatoes, which will yield approximately 3 2L jars:

Ingredients:

  • 7 kg of ripe tomatoes
  • Basil, to taste
  • Boiling water for sterilizing jars

Preparation time: 15 minutes

Cooking time: 30 minutes

Shelf life: 2 years

Preparation:

  1. Slice and blend the tomatoes into a puree, then transfer the puree to a saucepan and bring it to a boil.
  2. Skim off any foam that forms on the surface while it’s boiling. Continue boiling for a couple more minutes before turning off the heat.
  3. Pierce the tomatoes with a fork and place them in sterilized glass jars. Fill the jars with the tomato puree.
  4. To seal the jars, immerse them in boiling water in a pan to create a vacuum. Store the sealed jars in a cool, dry place.

Ensuring a tight seal and vacuum is essential for extending the shelf life of your tomato preserves. With this foolproof method, you’ll always have homemade preservatives at your fingertips, ready to elevate any dish, from a quick spaghetti to flavorful seasonings! Enjoy the delicious taste of summer all year round.

Seeking a brighter, more radiant smile? There’s a simple kitchen staple that might just be the secret you’re looking for: turmeric. Known for its deep golden color and health benefits, turmeric is not just for cooking—it can also be a natural solution for enhancing dental health, including tartar removal and teeth whitening.

Why Turmeric?

Turmeric has been used in traditional medicine for centuries, largely due to its anti-inflammatory and antimicrobial properties. These characteristics make it an excellent choice for oral health, as it can help fight bacteria, reduce inflammation, and even gently remove surface stains on teeth.

Ingredients for a Turmeric Teeth Whitener

  • Turmeric powder: 1 teaspoon
  • Coconut oil: 1 tablespoon
  • Baking soda: 1 teaspoon

How to Make Your Turmeric Teeth Whitener

Step-by-Step Guide
  1. Mix the Ingredients: In a small bowl, combine the turmeric powder, coconut oil, and baking soda. Mix them together until you achieve a paste-like consistency. The coconut oil has antibacterial properties and can help reduce plaque, while baking soda gently polishes away surface stains.
  2. Apply the Mixture: Use a new, soft toothbrush to apply the mixture to your teeth. Alternatively, you can use your fingertip or a small, soft cloth if you prefer not to use a brush.
  3. Brush Gently: Gently brush your teeth with the mixture for about 2 minutes. Be sure to cover all areas, including the back of your teeth and along the gum line.
  4. Wait a Little: Let the mixture sit on your teeth for an additional 2-3 minutes to allow the turmeric to work its magic.
  5. Rinse Thoroughly: Rinse your mouth well with water until all the mixture is washed away. You might need to rinse several times to remove all the yellow residue.
  6. Daily Brushing: You can use this turmeric paste several times a week in place of your regular toothpaste.

Final Thoughts

This turmeric-based teeth whitening remedy is a natural and cost-effective way to help brighten your smile and reduce dental tartar. It’s a simple addition to your oral hygiene routine that could lead to noticeable benefits. As with any home remedy, results can vary, and it’s always a good idea to consult with your dentist, especially if you have concerns about your dental health or the use of natural ingredients like turmeric. Enjoy your journey to a brighter smile with the surprising power of turmeric!

In our quest for better health and well-being, we often forget that nature has provided us with powerful remedies throughout history. One such traditional treatment is the infusion of lemon peels in olive oil, also known as “oleolith.” This ancient recipe has stood the test of time because of its amazing rejuvenating properties and the overall sense of well-being it brings. In this article, we will explore the benefits of oil infused with lemon peel and provide you with an easy step-by-step guide to making this incredible elixir.

The Advantages of Oil Infused with Lemon Peel

Lemon peels are packed with minerals and chemicals that offer numerous health benefits. When soaked in olive oil, these active compounds are released, creating a unique oleolith with a multitude of advantages. Here are some of the benefits of using oil infused with lemon peel:

  1. Boosts Energy: Lemon peel oleolith is well-known for its ability to invigorate and restore vitality. The vitamins and minerals in lemon peels strengthen the immune system and combat fatigue.
  2. Improves Mood: The fresh and citrusy aroma of lemon peels in oil has a positive effect on mood. The scent of lemon promotes tranquility and helps reduce feelings of stress and anxiety.
  3. Antioxidant Powerhouse: Lemon peels contain high levels of antioxidants, protecting the body against the harmful effects of free radicals. These antioxidants support cellular health and reduce the risk of chronic illnesses.
  4. Enhances Skincare: Infused oil with lemon peel can improve the quality of your skincare routine. It helps to improve skin appearance, reduce blemishes, and promote a radiant complexion.

How to Infuse Oil with Lemon Peel: A Step-by-Step Guide

Creating oil infused with lemon peel is a simple process that can be done at home. Follow these steps to make your own:

Step 1: Collect the Ingredients
Gather one hundred grams of lemon peels and one hundred milliliters of the highest quality olive oil. It’s recommended to use organic lemons to minimize pesticide residue.

Step 2: Wash and Dry the Lemon Peels
Thoroughly wash the lemons and use a grater to extract the peels. Be careful not to scrape too deeply, as the white pith can add a bitter taste.

Step 3: Store the Lemon Peels in a Glass Jar
Choose a dry, clean glass jar with a tight seal. Fill the jar with the grated lemon peels, ensuring it’s completely full.

Step 4: Pour Olive Oil over the Lemon Peels
Cover the lemon peels with olive oil, making sure they are fully submerged and no air bubbles remain.

Step 5: Allow Infusion
Seal the jar tightly and store it in a cool, dark place for at least two weeks. During this time, the beneficial components of the lemon peels will be absorbed by the oil.

Step 6: Filter the Oil
After two weeks, separate the infused oil from the lemon peels by filtering it through a sieve or coffee filter. Transfer the infused oil to a clean, dry container for long-term storage.

Ways to Use Oil Infused with Lemon Peel

Once you’ve created your lemon peel oleolith, explore its various uses, including:

  • Body Massage: Massage a small amount of oil into your skin in a circular motion for a renewing and revitalizing sensation.
  • Aromatherapy: Add a few drops of infused oil to an aroma diffuser or vaporizer to fill your surroundings with the invigorating citrus scent.
  • Skincare: After cleansing your face, apply a small amount of oil (avoiding the eye area) and gently massage it in to moisturize and improve skin appearance.
  • Bath Ritual: Enhance your bathing experience by adding a few drops of the infused oil to your bathwater. The citrus scent will help relax your body, relieve tension, and promote overall well-being.

Before applying the oil to a larger area of your skin, perform a sensitivity test on a small patch of skin. Discontinue use and consult a medical professional if you experience any allergic reactions or irritation.

It’s always important to consult with a qualified medical professional before trying any home remedies. While infused oil with lemon peel is generally safe, personalized advice based on your health and circumstances is essential.

In summary, oil infused with lemon peel is a timeless remedy that offers energy and overall well-being benefits. It’s easy to make at home and can improve your mood, energy levels, and skincare routine. Remember to seek professional advice before starting any new therapy. Feel free to share this information with your friends and spread the word about the power of infused oil from lemon peels!

Garlic, a staple of European cuisine, is more than just a flavorful ingredient. Despite its strong scent, garlic offers a wide range of health benefits that you shouldn’t overlook. In fact, incorporating garlic into your daily routine can lead to some surprising advantages. Here, we reveal nine secret uses for garlic that you might not have known before.

1. Enhance Your Sleep Quality with Garlic

Did you know that placing a clove of garlic under your pillow can help improve your sleep? Garlic contains sulfur compounds that not only give it its distinct aroma but also have a calming effect on the body. For a natural sleep aid, try this recipe: heat 200 cc of milk, chop up a clove of garlic, and add a tablespoon of honey. After letting it cool, drink it about an hour before bedtime. You’ll be amazed at the positive impact it can have on your sleep quality.

2. Combat Colds Naturally

For centuries, garlic has been used as a natural antibiotic and a remedy for colds. Simply boil some water, add a chopped clove of garlic, and drink the mixture with a little sugar every day for a week when you have a cold. You’ll be harnessing the power of garlic to help fight off those pesky cold symptoms.

3. Tap Into the Aphrodisiac Powers of Garlic

Contrary to popular belief, garlic has potent aphrodisiac properties that can enhance your romantic encounters. To experience the best results, consider using garlic extracts in your culinary creations. Let the magic of garlic spice up your love life!

4. Say Goodbye to Acne

Thanks to its antibiotic and antibacterial properties, garlic can also be used as a natural treatment for acne. Before bed, apply a clove of garlic to any problem areas on your skin. The powerful properties of garlic will work their magic overnight, helping to reduce inflammation and improve the appearance of your skin.

5. Harness the Power of Garlic as a Natural Antiseptic

Got a minor injury that needs cleaning? Garlic can help! By using a peeled garlic clove, you can naturally clean and promote healing of small wounds. However, remember that it’s still important to seek medical attention for more serious injuries.

6. Combat Hair Loss with Garlic

If you’re experiencing hair loss, garlic might just be the natural solution you’ve been looking for. Garlic’s allicin has anti-hair loss properties that can help strengthen your hair follicles. You can either apply garlic slices directly to your hair or create a mixture of crushed garlic and olive oil for a revitalizing hair treatment.

7. Easy Splinter Removal

Having trouble getting rid of a splinter? Try using garlic! Place a small clove of garlic on the splinter and cover it with a bandage overnight. The antibacterial properties of garlic will help soften the skin and make splinter removal a breeze.

8. Keep Mosquitoes at Bay

Say goodbye to pesky mosquito bites by using garlic as a natural repellent. Create a spray by combining petroleum jelly, beeswax, and essential oil of garlic. Alternatively, you can also sprinkle cloves in areas prone to mosquito activity. Not only will you keep insects away, but you’ll also enjoy the added benefit of a pleasant aroma.

9. Enhance the Flavor of Your Favorite Dishes

And of course, let’s not forget about the original reason why garlic is so beloved in the culinary world. Adding garlic to your dishes not only improves the taste, but it also brings a wealth of health benefits to the table. From boosting your immune system to reducing inflammation, garlic is truly a superfood that should have a permanent place in your kitchen.

In conclusion, garlic is more than just a pungent ingredient. It’s a powerhouse of natural remedies that can improve your sleep, combat colds, boost your love life, and much more. So next time you’re cooking, don’t hesitate to include a little garlic – the benefits are too good to pass up!

As we age, taking care of our health becomes more important than ever. And one simple way to prioritize our well-being is by exploring the world of plants with medicinal properties. Today, we want to introduce you to one such plant that deserves a spot in our gardens – purslane.

Unveiling the Healing Secrets of Purslane

Often mistaken for a common weed, purslane is an unassuming plant with incredible therapeutic properties that have been recognized for centuries. It has a wide range of health benefits, from strengthening our immune system to improving sleep quality. Let’s dive deeper into what this hidden gem has to offer.

A Nutritional Powerhouse for Healthy Aging

What makes purslane so highly regarded is its impressive nutritional profile. Its vibrant green leaves are bursting with essential vitamins including A, C, E, and B-complex. But that’s not all – purslane is also a rich source of Omega 3 fatty acids, which are crucial for maintaining a healthy immune system and reducing the risk of heart diseases.

The Healing Touch of Purslane

Purslane is not only packed with nutrients; it also possesses remarkable therapeutic goodness. With its anti-inflammatory, cooling, diuretic, and antioxidant properties, purslane becomes a valuable aid in promoting our overall well-being. The presence of mucilage in purslane also makes it an excellent natural remedy for sensitive or dry skin. In fact, for centuries, it has been used to enhance kidney function, as well as a mouthwash for oral ulcers and gingivitis.

From Garden to Plate: The Culinary Delights of Purslane

What sets purslane apart is its versatility in the kitchen. Its fresh leaves can be enjoyed raw in salads, imparting a delightful crunch and adding a burst of flavor to your summer meals. Cooked purslane is perfect for hearty winter soups or sautéed with a drizzle of oil and a squeeze of lemon. The texture of its leaves also makes them great for holding sauces, enhancing the deliciousness of your dishes.

Embrace the Power of Purslane, but Balance is Key

While purslane offers incredible health benefits, it is important to consume it in moderation and alternate with other vegetables. By embracing purslane’s power and incorporating it into our lives, we can reap the full benefits it has to offer. So let’s explore the wonders of this fantastic plant and make it a part of our journey towards a healthier lifestyle.

Introduction:

Are you looking for a natural way to support your weight loss goals? Turmeric water might just be the beverage you need to add to your daily routine. With just two ingredients—water and turmeric—this simple drink packs a powerful punch, aiding in weight management and offering a host of other health benefits.

If you’re looking for a natural remedy to tackle a variety of common ailments, look no further than mint. This fragrant herb, commonly used to flavor foods and beverages, also offers a host of health benefits. Drinking mint tea can help alleviate digestive issues, freshen your breath, and even boost your mood. Here’s how to make this simple remedy and why it works so well.

Ingredients:

  • A handful of fresh mint leaves (or 1 tablespoon of dried mint)
  • 2 cups of water
  • Honey (optional, for taste)
  • Lemon (optional, for added flavor)

Step-by-Step Recipe:

1. Prepare the Mint

Start by washing a handful of fresh mint leaves thoroughly. If you’re using dried mint, measure out about 1 tablespoon.

2. Boil the Water

In a medium-sized pot, bring 2 cups of water to a boil.

3. Add the Mint

Once the water is boiling, add the fresh or dried mint to the pot. Reduce the heat and let the mint simmer for about 5-10 minutes. This allows the essential oils and beneficial compounds to infuse into the water.

4. Strain the Liquid

After simmering, remove the pot from the heat and let it cool slightly. Strain the liquid into a cup, discarding the mint leaves.

5. Add Honey and Lemon (Optional)

If desired, add a teaspoon of honey to sweeten the tea and a squeeze of lemon juice for extra flavor and vitamin C. Stir well.

6. Drink and Enjoy

Sip the warm mint tea slowly. For best results, drink this tea once or twice a day.

Why This Remedy Works

**1. Mint: Mint is known for its soothing and cooling properties. It contains menthol, which helps relax the muscles of the digestive tract and alleviate symptoms like indigestion, bloating, and gas. Mint also has antibacterial properties that can freshen your breath and combat oral bacteria. Additionally, the aroma of mint has been shown to reduce stress and improve mood.

Benefits of Mint Tea

  • Alleviates Digestive Issues: Mint tea can help soothe an upset stomach, relieve indigestion, and reduce bloating and gas.
  • Freshens Breath: The antibacterial properties of mint help to kill bacteria in the mouth that cause bad breath.
  • Reduces Stress and Anxiety: The calming effect of mint can help reduce stress and improve mood, making it a great drink to unwind with.
  • Boosts Immune System: Mint is rich in vitamins and antioxidants that help strengthen the immune system and protect against common illnesses.
  • Relieves Headaches: The menthol in mint can help alleviate tension headaches and migraines.

Additional Tips

  • Use Fresh Mint: For the best flavor and maximum health benefits, use fresh mint leaves whenever possible.
  • Stay Hydrated: Drink plenty of water throughout the day to keep your body hydrated and support overall health.
  • Enjoy Hot or Cold: Mint tea can be enjoyed hot or cold. To make iced mint tea, simply let the tea cool and serve it over ice.

Final Thoughts

Mint tea is a simple, natural remedy that can help alleviate a variety of common health issues. From soothing digestive problems to freshening breath and reducing stress, this versatile drink is a great addition to your daily routine. Give this easy recipe a try and enjoy the refreshing and healing benefits of mint tea. Here’s to better health and well-being!