Author

Barbara L.

Browsing

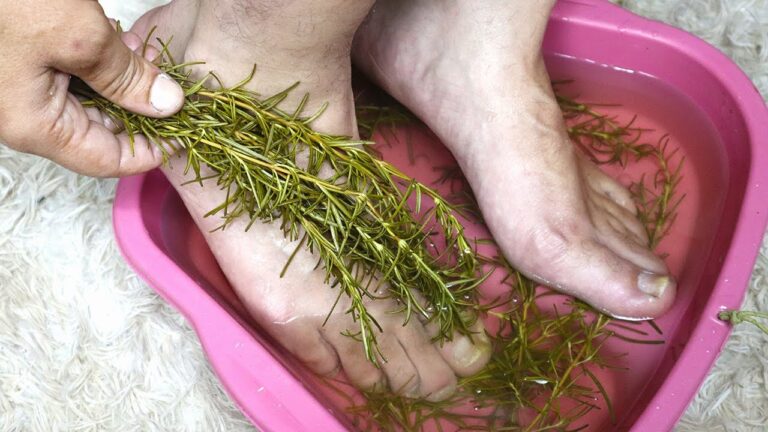
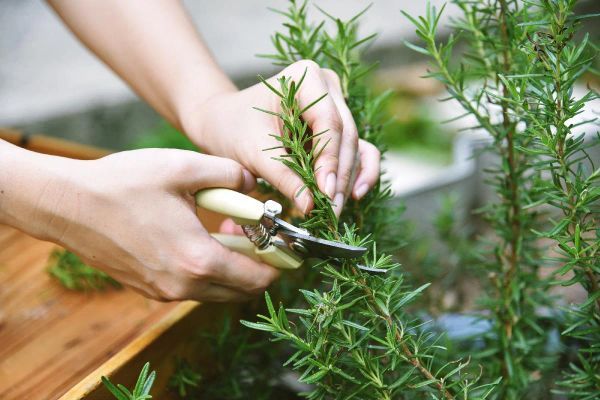
Varicose veins can be a painful and unsightly issue, but nature often offers effective remedies. Among these, rosemary is an herb with remarkable therapeutic properties that can help manage and reduce the symptoms of varicose veins. This easily accessible herb is not only aromatic and flavorful in culinary uses but also packed with health benefits that you must know about.

Why Rosemary Works

Rosemary is rich in antioxidant and anti-inflammatory compounds, which are key to its effectiveness against varicose veins. The herb contains rosmarinic acid and other essential oils that are known to improve circulation and reduce inflammation. This can help alleviate the pain, swelling, and appearance of varicose veins.

How to Use Rosemary for Varicose Veins

Rosemary Oil Massage:

Creating a rosemary oil infusion for topical application is one of the best ways to utilize rosemary for varicose veins.

Ingredients:

  • Fresh rosemary or dried rosemary leaves
  • Carrier oil (such as olive oil or coconut oil)

Instructions:

  1. Prepare the Rosemary: If using fresh rosemary, rinse and dry the sprigs thoroughly. For dried rosemary, ensure it is free from moisture.
  2. Infuse the Oil: Combine the rosemary with your choice of carrier oil in a jar. If you want to speed up the infusion process, gently heat the oil with rosemary over low heat for 2 hours. Do not boil.
  3. Strain and Store: Allow the oil to cool, then strain out the rosemary. Store the infused oil in a dark glass bottle to keep it fresh.
  4. Application: Massage the rosemary oil gently onto the affected areas. Use circular motions to enhance circulation. Perform this massage daily, ideally in the evening, to allow the oil to work overnight.

Rosemary Tea Bath:

Alternatively, a rosemary tea bath can provide therapeutic benefits for the whole body, particularly for varicose veins.

Ingredients:

  • A handful of dried rosemary leaves
  • Hot water

Instructions:

  1. Make Rosemary Tea: Steep the dried rosemary leaves in hot water for about 15 minutes.
  2. Prepare the Bath: Strain the tea and add it to a bath of warm water.
  3. Relax and Soak: Soak in the rosemary-infused bath for 20-30 minutes. The warm water helps in dilating blood vessels and improves circulation, while rosemary’s properties work on reducing inflammation and pain.

Precautions:

While rosemary is generally safe for topical use and baths, it’s important to do a patch test first to check for any allergic reactions. Additionally, consult with a healthcare provider if you have severe varicose veins or if symptoms persist.

Rosemary’s ability to ease the symptoms of varicose veins is an excellent example of how traditional remedies can complement modern health practices. Incorporating rosemary into your routine as a natural treatment option can lead to significant improvements in comfort and appearance related to varicose veins.

Keeping your bones and joints healthy is crucial for maintaining mobility and quality of life, especially as you age. This simple, natural remedy combines seeds and prunes with honey, each component packed with nutrients essential for bone health and cartilage restoration. Here’s a detailed guide on how to make and use this potent mixture.

Benefits of Ingredients:

  • Sesame Seeds: High in calcium and zinc, sesame seeds are excellent for bone density and overall bone health.
  • Flaxseed: Contains Omega-3 fatty acids that help reduce inflammation in the joints and promote stronger bones.
  • Pumpkin Seeds: Rich in magnesium, which is crucial for bone integrity and strength.
  • Sunflower Seeds: Provide a good source of vitamin E, which protects bones and joints from oxidative damage.
  • Dried Prunes: Known for their high content of vitamin K, which helps maintain bone mineral density and reduces bone turnover.
  • Honey: Acts as a natural binder and sweetener, but also brings anti-inflammatory benefits to support joint health.

Instructions for Making the Remedy:

  1. Ingredients Preparation:
    • 3 tablespoons sesame seeds
    • 3 tablespoons flaxseed
    • 3 tablespoons pumpkin seeds
    • 3 tablespoons sunflower seeds
    • 5 dried prunes
    • 200 grams of honey
  2. Grind the Seeds and Prunes:
    • Using a food processor or a coffee grinder, finely grind the sesame seeds, flaxseed, pumpkin seeds, and sunflower seeds. Ensure the mixture is evenly ground.
    • Chop the dried prunes into small pieces or blend them into the seed mixture until everything is finely mixed.
  3. Mix with Honey:
    • In a bowl, combine the ground seeds and prunes with honey. Stir until all the ingredients are well incorporated and form a homogenous mixture.
  4. Storage:
    • Transfer the mixture into an airtight glass jar and store it in a cool, dry place or refrigerate to prolong its shelf life.
  5. Daily Use:
    • Take one teaspoon of the mixture every day. It can be consumed directly or mixed into a warm beverage, yogurt, or spread on toast as part of your breakfast.

Tips for Consumption:

  • Consistency is Key: For best results, incorporate this natural remedy into your daily routine and consume it regularly.
  • Morning Routine: Taking this mixture in the morning can help your body absorb all the nutrients effectively throughout the day.

Precautions:

  • While this remedy is natural, it’s important to consider any allergies or sensitivities to the ingredients listed. Always perform a patch test or start with a smaller dose to see how your body reacts.
  • If you are taking other medications or have underlying health conditions, particularly related to the thyroid or hormone-sensitive conditions (due to flaxseed’s phytoestrogen content), consult with a healthcare professional before starting any new dietary supplement.

This natural remedy is a simple, cost-effective way to support your bone and joint health with everyday ingredients. Enjoy the benefits of these natural components and help maintain your mobility and comfort as part of a healthy lifestyle.

Boiling walnuts is a lesser-known technique that can transform the taste and texture of these nuts, making them unique in flavor and easier to digest. This method, passed down from generations like a cherished secret from your grandmother, not only softens the walnuts but can also reduce their bitterness. Here’s how to boil walnuts and why this old trick is still worth using today.

Benefits of Boiling Walnuts:

  • Reduces Bitterness: The tannins, which cause the bitter taste in raw walnuts, are leached out in the boiling process.
  • Softens Texture: Boiling makes walnuts softer, which is ideal for recipes requiring softer nuts or for those who find raw walnuts too hard.
  • Improves Digestibility: Boiling can help break down some of the compounds in walnuts that are difficult for some people to digest.

Instructions for Boiling Walnuts:

Ingredients:

  • Fresh walnuts, in shell or shelled

Equipment:

  • Large pot
  • Water
  • Colander
  • Towel (optional, for drying)

Steps:

  1. Prepare the Walnuts:
    • If using walnuts in the shell, you might want to crack them slightly before boiling to ensure the heat penetrates the nut.
    • If using shelled walnuts, ensure they are clean and free from debris.
  2. Boil the Water:
    • Fill a large pot with enough water to cover the walnuts completely.
    • Bring the water to a rolling boil.
  3. Boil the Walnuts:
    • Add the walnuts to the boiling water.
    • Let them boil for about 10-15 minutes. The length of boiling time can vary depending on whether the walnuts are shelled or unshelled and your desired softness.
  4. Cool and Drain:
    • After boiling, drain the walnuts using a colander.
    • Allow them to cool. If you plan to use or eat them immediately, you can spread them on a towel to dry or just let them air-dry.

Tips for Using Boiled Walnuts:

  • Cooking and Baking: Boiled walnuts can be chopped and added to baked goods, like cakes or bread, where a softer texture is desired.
  • Salads and Dishes: They can also be used in salads or other dishes where a less bitter, softer nut might be preferable.
  • Snacking: Enjoy them as a snack, perhaps with a touch of salt or mixed with other spices and seasonings.

Boiling walnuts might seem like an unconventional approach, but it’s a simple, effective technique to enhance their culinary use. This method can open up new ways to enjoy walnuts in your cooking and snacking habits, just as your grandmother might have intended. Give it a try and see how this timeless kitchen secret can improve your recipes and snacking experience!

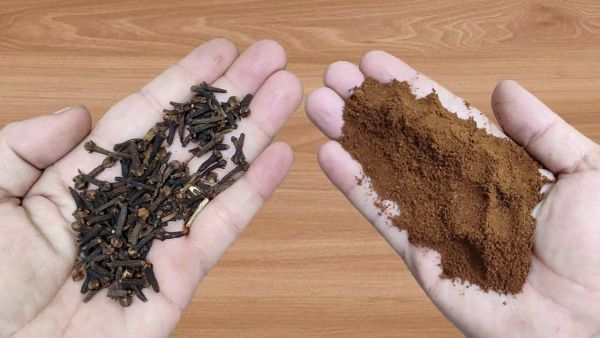
Varicose veins can be a painful and unsightly condition, but natural remedies often offer effective relief without the need for invasive treatments. Cloves, a common spice in the kitchen, have remarkable properties that can help manage and possibly reduce the appearance of varicose veins. Here’s how cloves can be used to combat this condition and why they might just be the remedy you need to say goodbye to varicose veins forever.

Why Cloves Work

Cloves contain eugenol, a powerful anti-inflammatory and antithrombotic compound that can help improve blood circulation and reduce swelling. This makes them particularly useful for treating varicose veins, as they can help reduce the pain and visibility of swollen veins. Cloves also have natural pain-relieving properties, providing comfort from the discomfort associated with varicose veins.

How to Use Cloves for Varicose Veins

Cloves Massage Oil:

Ingredients:

  • 15-20 whole cloves
  • ½ cup of carrier oil (such as olive oil or coconut oil)

Instructions:

  1. Infuse the Oil:
    • Crush the cloves slightly to release their oil.
    • Combine the crushed cloves with the carrier oil in a small saucepan.
    • Gently heat the mixture on low for about 10 minutes, being careful not to burn the oil.
    • Remove from heat and let it cool.
  2. Strain and Store:
    • Strain the oil through a fine mesh sieve or cheesecloth to remove the clove pieces.
    • Transfer the clove-infused oil into a clean bottle or jar and seal it tightly.
  3. Apply:
    • Gently massage the clove oil onto the affected areas using circular motions.
    • Perform the massage in the evening, allowing the oil to work overnight.

Cloves Tea Soak:

Alternatively, you can make a cloves soak to relieve symptoms.

Ingredients:

  • 1 tablespoon of ground cloves
  • 1 liter of boiling water

Instructions:

  1. Prepare the Tea:
    • Steep the ground cloves in boiling water for about 15 minutes.
  2. Cool and Use:
    • Let the tea cool to a comfortable temperature.
    • Soak a clean cloth in the tea and apply it as a compress to the affected areas.
    • You can also use the tea as a foot soak if the varicose veins are on your legs.

Additional Tips and Considerations:

  • Consistency is Key: For best results, use the clove treatment regularly. Improvement might take several weeks to become noticeable.
  • Skin Sensitivity Test: Before applying clove oil or tea to larger areas of skin, do a patch test to ensure you do not have an allergic reaction.
  • Consult a Healthcare Provider: While cloves can provide relief, they are not a cure for underlying vascular problems. Consult a healthcare provider for a comprehensive treatment plan if your condition is severe.

Using cloves as part of your approach to dealing with varicose veins can provide natural, effective relief and improve the quality of life. This simple remedy might be just what you need to manage this condition effectively at home.

Weeding can be a frustrating task, especially as we get older. Keeping our outdoor spaces clean and tidy without using harmful chemicals can feel like a never-ending battle. But don’t worry, we have a simple solution that has been passed down by seasoned gardeners. With just three basic ingredients – vinegar, coarse salt, and dishwashing liquid – you can easily tackle those pesky weeds.

The combination of white vinegar, salt, and dishwashing liquid creates a powerful natural solution that effectively eliminates weeds while minimizing harm to the environment. Let’s break down the role of each ingredient:

White Vinegar: The acidic properties of vinegar are what make it so effective. When sprayed on weeds, it dries out the plant tissues, causing them to wither and die. Vinegar works even better when applied in direct sunlight, speeding up the drying process.

Coarse Salt: Salt has been used for centuries as a natural desiccant. When applied to the soil, it prevents moisture from being absorbed by the plants, effectively killing the weeds at their roots. Salt also has long-lasting effects, discouraging new weeds from sprouting in treated areas.

Dishwashing Liquid: The dish soap acts as a surfactant, helping the vinegar and salt mixture stick to the weed’s leaves. This increases the potency of the solution by ensuring that the active ingredients remain on the plant and penetrate its surface.

Homemade Weed Killer Recipe

To make the most effective homemade weed killer, it’s important to follow the right proportions. Here’s what you’ll need:

  • 1 liter of white vinegar
  • A handful of coarse salt
  • 1 teaspoon of dishwashing liquid

This recipe will give you approximately five liters of weed killer, enough to cover a significant area of your garden or driveway.

Steps for Preparation:

  1. In a clean container, pour the liter of white vinegar.
  2. Gradually add the handful of coarse salt, stirring gently until it fully dissolves.
  3. Once the salt has dissolved, add the teaspoon of dishwashing liquid and continue stirring until the mixture is well-blended.
  4. Transfer the solution into a spray bottle for easy application.

Application Tips

Now that you have your weed-killing solution ready, it’s time to put it to work. Here’s how to apply it for maximum efficiency:

Pick the Right Time: It’s best to apply this solution during dry weather. Rain can wash away the weed killer before it has a chance to work, so choose a sunny day when no rain is expected for the next 24 hours.

Spray Directly on Weeds: Focus on spraying the solution directly onto the weeds, making sure to cover their leaves and stems completely. Be careful when applying near desirable plants, as the solution can damage or kill them too.

Avoid Overuse: While this solution is effective, using too much of it, especially the salt component, can harm the long-term health of the soil. Limit its use to paved areas, driveways, or spaces where you don’t plan to grow plants.

Advantages of Homemade Weed Killer

Using a homemade weed killer has several advantages:

Environmentally Friendly: Traditional chemical weed killers contain harmful ingredients that can contaminate soil, water, and harm beneficial insects like bees. This natural solution avoids these issues, making it safer for the environment.

Cost-Effective: The ingredients – vinegar, salt, and dish soap – are inexpensive and commonly found in most households. By using this recipe, you can save money compared to buying commercial herbicides.

Simple and Quick: Making this solution requires no special equipment, and it’s easy to apply. In just a few minutes, you can have a powerful weed killer ready to use.

Zero-Waste Option: Making your own solution helps reduce plastic waste from commercial products. You can reuse containers and avoid unnecessary packaging.

Safety Precautions

While this method is natural, it’s still important to be cautious:

Avoid Overuse in Soil: Using too much salt can change the chemical composition of the soil, making it difficult for any plants to grow in treated areas. It’s best to reserve this method for paved surfaces or areas where you don’t plan to plant anything.

Keep Away from Desired Plants: This solution doesn’t discriminate between weeds and other plants, so be careful where you spray it. If it gets on your flowers, shrubs, or garden plants, it could cause significant damage.

Child and Pet Safety: Be mindful if children or pets play in areas where you’ve applied the solution. While it’s natural, vinegar and salt can still cause irritation if ingested or touched.

Additional Weed Control Options

If you’re looking for other ways to control weeds in your garden, here are a few additional options to consider:

  • Mulching: Covering the ground with organic materials like wood chips, straw, or leaves can prevent weeds from getting the sunlight they need to grow.
  • Manual Weeding: Although it takes time and effort, pulling weeds by hand ensures they’re removed from the root, reducing the chances of them growing back.
  • Ground Cover Plants: Planting low-growing, dense ground cover plants can naturally suppress the growth of weeds by taking up the space and nutrients they would otherwise use.

By using this simple, natural, and economical solution to combat weeds, you contribute to a more sustainable gardening practice, avoiding the harmful chemicals found in commercial herbicides. Not only will you protect your garden’s ecosystem, but you’ll also save money and reduce waste. So grab your spray bottle and say goodbye to those unwanted weeds – naturally!

Remember, whether you’re a novice or an experienced gardener, this simple tip is a must-have for managing invasive weeds in an eco-friendly way. Happy gardening!

Have you ever spotted goose grass in your garden and dismissed it as a pesky weed? Well, it’s time to think again! Goose grass, also known as cleavers or bedstraw, is a resilient plant that offers a whole lot more than meets the eye. From detoxification to skincare, this plant has numerous benefits that you shouldn’t overlook. Let’s take a closer look!

1. Detoxification Dynamo

Goose grass is a natural detoxifier. Its diuretic properties help flush toxins from your body, support kidney function, and enhance overall detoxification processes. You can even find it in herbal teas and detox drinks for its cleansing effects.

2. Lymphatic Support

Boost your immune system and overall health with goose grass. This incredible plant acts as a lymphatic tonic, improving waste removal and enhancing lymph circulation. It’s like giving your immune defenses a well-deserved boost!

3. Soothe Your Skin

If you suffer from skin ailments like eczema or psoriasis, goose grass might be able to help. Its anti-inflammatory properties can soothe irritation and provide relief. Simply apply it topically in the form of salves or poultices.

4. Aid Digestion

For centuries, goose grass has been used to aid digestion. It has gentle laxative properties that can relieve constipation and promote a healthy digestive tract. Plus, its mild diuretic abilities reduce bloating and water retention.

5. Nutrient-Rich

Don’t let its unassuming appearance fool you, goose grass is packed with nutrients! It’s rich in vitamins C and A, as well as iron. Adding this plant to your salads or juices can significantly enhance your dietary intake of essential nutrients.

Goose Grass in Your Garden

1. Natural Mulch and Compost Material

Instead of considering goose grass a nuisance, why not use it to your advantage? It’s a fantastic addition to compost because of its rapid growth and green nature, which enriches the compost with nitrogen. It also acts as a natural mulch, suppressing weeds and retaining soil moisture.

2. Indicator of Soil Health

The presence of goose grass in your garden can actually speak volumes about your soil health, especially its nitrogen levels. If goose grass is thriving, it suggests favorable soil conditions. On the other hand, its absence could indicate nitrogen deficiencies.

3. Control Erosion

Are you dealing with erosion on slopes or other areas of your garden? Goose grass is the answer! Its sticky and interlocking nature makes it excellent for controlling erosion. It stabilizes the ground quickly, preventing soil loss.

4. Create Wildlife Habitat

Embrace the biodiversity in your garden with goose grass. The dense growth of this plant provides shelter for small insects and other wildlife. Additionally, its seeds are a food source for birds, contributing to the ecological balance within your garden.

Frequently Asked Questions

Can I Consume Goose Grass Raw?

Yes, goose grass is edible and has been used in salads and teas. Just make sure to harvest it from areas free of pesticides and other contaminants.

Is Goose Grass Safe For Pets?

Generally, goose grass is safe for pets. However, if your pet experiences any adverse reactions, it’s best to monitor them closely and consult a veterinarian.

Can I Use Goose Grass If I’m Pregnant?

Pregnant individuals should exercise caution when using herbal remedies, including goose grass. It’s always recommended to consult with a healthcare provider before use.

Please note that the information provided here is for general informational purposes only and should not replace professional advice. Always consult with healthcare professionals or qualified gardeners before using goose grass for medicinal or gardening purposes, especially if you have specific health conditions or unique garden needs. Proper plant identification is crucial before consumption or use.

Goose grass is much more than just a weed. It’s a versatile plant that offers multiple health and gardening benefits. The next time you come across goose grass in your garden, take a moment to consider its potential before deciding to remove it. You might just find that it can be a valuable ally for your health and garden!

Potatoes are a beloved and versatile food enjoyed by people all over the world. They not only taste delicious but are also packed with essential nutrients like B-group vitamins, potassium, phosphorus, and magnesium, making them a healthy choice. In this article, we will show you how to grow potatoes in a pot, making it easy and accessible for anyone, especially those between the ages of 45 and 65.

Prepare the Potatoes

To get started, you’ll need a large pot, some soil, and a bag of potatoes. Place the potatoes in a container with the “eye” facing upward. Store them in a cool place and patiently wait for the sprouts to emerge. This step will require a little bit of patience, but trust me, it’s worth it.

Cut the Potatoes

Once the sprouts appear, it’s time to cut the potatoes into pieces. Meanwhile, fill the pot with soil. Bury the potato pieces in the soil, making sure to leave a portion protruding from the surface. This will give your potatoes room to grow and thrive.

Water Regularly

Watering your potatoes regularly is crucial to their growth. However, be mindful not to overwater, as it can lead to fungal growth. Aim to keep the soil consistently moist, but not waterlogged. By doing this, you’ll provide the perfect environment for your potatoes to flourish.

Harvest Time

The best part of growing your own potatoes is the harvest. You’ll know it’s time to harvest when the plant foliage turns yellow. Gently dig into the soil, and there you have it – your very own homegrown potatoes, fresh and ready to be enjoyed.

Growing potatoes in a pot is a simple and rewarding process. Not only will you have a fresh and readily available supply of this versatile vegetable, but you’ll also experience the satisfaction of cultivating it yourself. So why not give it a try and enjoy the taste of your own homegrown potatoes? It’s a great way to connect with nature and savor the goodness of freshly grown produce.

The Spider Plant (Chlorophytum comosum) is not just a decorative piece for your home. Originating from the tropical forests of South Africa, this popular ornamental plant has made its way to homes all around the world, including Italy. And here’s the exciting part – according to a NASA study, the Spider Plant is one of the best plants for purifying indoor air!

Our homes may be filled with toxic substances that we may not even be aware of. Everyday items like paints, glues, and cleaning products release harmful compounds such as benzene, xylene, formaldehyde, and carbon monoxide. These substances can have a detrimental effect on our health, contributing to respiratory problems and even cancer. But fear not, because the Spider Plant is here to help!

This beautiful plant has a remarkable ability to absorb and block these harmful substances, effectively cleaning the air in our homes. With its long green leaves and distinctive white stripe, the Spider Plant not only adds a touch of beauty to any space but also acts as a natural air purifier. It thrives best in well-lit and humid environments, making it a perfect choice for bathrooms or near windows – just be sure to avoid direct sunlight.

One of the best things about the Spider Plant is its adaptability and ease of care. Even if you don’t consider yourself a green thumb, you can still enjoy the benefits of this air-purifying plant. It requires minimal attention and can withstand a variety of conditions, ultimately making it a wonderful addition to your home.

If you’re looking to improve the air quality in your living space, consider adding a Spider Plant. It’s a simple yet effective way to create a healthier environment. Let this incredible plant do its magic and enjoy the fresh, clean air it provides. Your lungs will thank you!

Did you know that fig trees have much more to offer than just their delicious fruit? They also produce a versatile sap that can be used for various purposes. In this guide, we’ll explore how to safely collect and use fig sap, enhancing your sustainable living practices.

What You Should Know Before Collecting Fig Sap

Before you embark on collecting fig sap, it’s essential to keep a few important things in mind:

Safety First: Fig sap contains latex, which can irritate the skin and eyes. To protect yourself, always wear gloves and protective eyewear when handling the sap.

Seasonal Collection: The best time to collect fig sap is during late spring through early autumn when the tree is actively growing, and the sap flow is more abundant.

Tree Health: Only collect sap from healthy, mature trees. This ensures that you avoid stressing young or weakened specimens.

Tools and Materials You Will Need

To collect fig sap, gather the following tools and materials:

  • Gardening gloves
  • Protective eyewear
  • Sharp knife or a small, clean cutting tool
  • Collection container (such as a glass jar or plastic bowl)

A Step-by-Step Guide to Collecting Fig Sap

Follow these steps to safely collect fig sap from a fig tree:

1. Prepare Your Tools: Ensure that all your tools are clean and sharp. A clean cut is less harmful to the tree.

2. Select the Right Spot: Choose a spot on a branch or the trunk where you can easily make a small incision. Avoid areas that appear diseased or damaged.

3. Make a Small Incision: Carefully cut into the bark of the fig tree. The incision should be shallow and no more than a few inches long to minimize damage.

4. Gather the Sap: Position your collection container under the incision to catch the dripping sap. Depending on the flow, you may need to leave it for a few hours.

5. Seal the Cut: Once you have collected enough sap, seal the cut with a natural tree sealant or smooth mud over it to protect the tree from infections.

Utilizing and Maximizing the Benefits of Fig Sap

Fig sap has been utilized for various purposes in different cultures:

1. Natural Remedy: Diluted fig sap has been used as a natural remedy to soothe skin irritations and treat warts.

2. Culinary Enhancements: With the right processing, fig sap can serve as a coagulant in making dairy-free cheese.

3. Gardening Aid: Applying fig sap to other plants can act as a natural deterrent for pests.

Collecting and using fig sap is not only a rewarding endeavor that allows you to connect with nature but also provides a range of benefits. By following these steps, you can ensure a safe and effective collection process, contributing to your eco-friendly, sustainable lifestyle.

Safety Note: Before using fig sap, always perform a patch test with diluted sap to check for allergic reactions. If you’re unsure about proper handling and usage, consult with a professional.

Guavas are not only delicious but also a nutritional powerhouse, providing a wide range of health benefits that many may not be aware of. From boosting the immune system to aiding in weight loss, guavas are an excellent addition to your daily diet. Let’s explore the multiple benefits of guavas in more detail.

Boost Your Immune System with Vitamin C

Guavas are incredibly rich in vitamin C, containing up to four times the amount found in oranges. This essential nutrient is crucial for strengthening the immune system and helping it fight off infections more effectively. It also plays a key role in protecting the body against chronic diseases like cancer and heart disease by fighting free radicals.

Maintain Digestive Health with High Dietary Fiber

One significant benefit of guavas is their high dietary fiber content. Just one guava can provide about 16% of the recommended daily intake of fiber. Fiber is essential for maintaining digestive health as it regulates bowel movements, prevents constipation, and may even reduce the risk of colon cancer. Additionally, fiber promotes a feeling of fullness, making it beneficial for weight management.

Protect Cells with Antioxidant Properties

Guavas are packed with antioxidants like lycopene, beta-carotene, and vitamin A. These compounds are crucial for protecting cells from damage caused by free radicals. By consuming antioxidant-rich foods like guavas, you can help reduce the risks of chronic conditions such as cancer and heart disease, promoting overall health.

Promote Heart Health and Regulate Blood Pressure

Guavas are an excellent source of potassium, which plays a critical role in regulating blood pressure. Adequate potassium intake is associated with lower blood pressure levels, reducing the risk of stroke and heart attacks. By balancing out the negative effects of salt in the body, potassium helps maintain a healthy heart and circulatory system.

A Low-Calorie Snack for Weight Management

For those watching their weight, guavas are an ideal choice. They are low in calories yet high in fiber, making them a satisfying snack without excessive calories. With only about 60 calories per guava, they can help stave off hunger and support weight loss efforts.

Culinary Versatility for Delicious and Healthy Meals

Guavas are incredibly versatile in the kitchen. You can enjoy them raw to savor their natural sweetness and crisp texture. Alternatively, guavas can be sliced into salads, blended into smoothies, or used as a tangy addition to baked goods. The culinary flexibility of guavas makes it easy to incorporate them into your diet in various delicious ways.

Economical and Accessible

Guavas are not only good for your health but also budget-friendly. They are widely available in many parts of the world, particularly in tropical regions, and are generally inexpensive. This accessibility makes guavas an excellent option for individuals and families looking to enhance their diet without breaking the bank.

Embrace Guavas for a Balanced and Nutritious Diet

In conclusion, guavas offer a robust profile of health benefits that make them a valuable addition to any diet. Rich in vital nutrients like vitamin C, dietary fiber, potassium, and antioxidants, guavas support numerous aspects of health, from immune function and digestive health to protecting against chronic diseases and aiding in weight management. Moreover, their culinary flexibility and economic accessibility make guavas an appealing choice for a wide range of people. Embrace the delightful benefits of guavas and consider incorporating them into your daily dietary routine to take full advantage of all that this wonderful fruit has to offer.