In the quiet corners of rural China, where longevity and vibrant health are celebrated as everyday miracles, one 95-year-old doctor continues to live proof of nature’s healing power. Despite his age, he remains energetic, clear-minded, and active—and he attributes much of his vitality to one simple, powerful drink that he consumes daily. This traditional beverage, rooted in Chinese medicine, is made from just three ingredients: tomato, carrot, and lemon.
More than just a refreshing drink, it serves as a potent natural remedy to detoxify the liver, improve digestion, and enhance overall vitality. Whether you’re in your 30s or well into your senior years, this nutrient-packed drink can help support your body’s detox pathways and keep your digestive system working like clockwork.
Why the Liver and Gut Need Extra Support as We Age
As the body ages, the liver and intestines can become less efficient at processing toxins, absorbing nutrients, and maintaining balance. Slower digestion, decreased enzyme production, and accumulated waste can all take a toll on your energy levels, immune strength, and even the clarity of your skin.
Modern lifestyles, often filled with processed foods, stress, and environmental toxins, only add to the burden. That’s why daily support with the right nutrients can make a world of difference—not just in how you feel, but in how well your body continues to perform its most essential functions.
The Trio of Health: Tomato, Carrot, and Lemon
Each ingredient in this drink is carefully chosen for its specific health-enhancing properties. Combined, they create a detoxifying elixir that works gently yet effectively to nourish your organs and restore balance from the inside out.
1. Tomato: The Liver’s Antioxidant Ally
Tomatoes are loaded with lycopene, a powerful antioxidant known for its protective effects on the liver. Lycopene helps shield liver cells from damage caused by oxidative stress, a major contributor to liver dysfunction and inflammation.
Tomatoes also offer vitamins A and C, potassium, and fiber—all of which support healthy blood flow, toxin elimination, and tissue repair. When consumed regularly, tomatoes help cleanse the liver, improve bile production, and reduce the risk of fatty liver disease. It’s no wonder this juicy fruit is a staple in many liver-supporting diets.

2. Carrot: A Gut-Friendly Source of Beta-Carotene
Carrots bring vibrant color to the drink and play an equally vibrant role in your gut health. Rich in beta-carotene, which the body converts into vitamin A, carrots nourish the mucosal lining of the digestive tract, aiding in smoother digestion and healthier bowel movements.
Vitamin A also plays a key role in supporting the immune cells that reside in the gut. Carrots offer natural fiber to promote regularity and help feed the good bacteria in your intestines. If you’ve been dealing with bloating, constipation, or digestive sluggishness, carrots can help get things moving in the right direction.
3. Lemon: Nature’s Detoxifier and Immunity Booster
The juice of a lemon adds a refreshing tang to this drink while delivering a burst of vitamin C, one of the most effective antioxidants for fighting inflammation and supporting the immune system. Lemon juice is known for its alkalizing effects on the body and its ability to stimulate the liver’s detoxifying enzymes.
It also helps dissolve mucus in the digestive tract and enhances bile production, allowing your body to process fats and eliminate toxins more efficiently. Starting your day with lemon-infused drinks is a common ritual in many detox programs, and this recipe makes it easy to include lemon in a delicious way.

How This Detox Drink Supports Your Health
This humble blend of three ingredients offers a cascade of benefits that reach far beyond your digestive tract. It’s a holistic tonic for full-body wellness.
Supports Liver Detoxification
The liver is the body’s primary detox organ. It filters out harmful substances, including environmental pollutants, alcohol, and food additives. When overloaded, the liver becomes sluggish and toxins begin to accumulate. This drink helps cleanse the liver gently, allowing it to operate more efficiently and reducing the overall toxic load on your body.
Promotes Digestive Regularity
With its combination of natural fiber, digestive enzymes, and gut-soothing nutrients, this drink helps relieve constipation, bloating, and irregular bowel movements. It creates a healthier environment in the intestines and helps eliminate waste more effectively.
Boosts Immune Function
Thanks to its high content of vitamin C and antioxidants, the drink strengthens your immune system by neutralizing free radicals and supporting white blood cell function. A stronger immune system means fewer infections, quicker recovery times, and a healthier response to everyday stressors.
Reduces Inflammation
Chronic inflammation is at the root of many degenerative diseases, including liver dysfunction and gastrointestinal disorders. The anti-inflammatory compounds in tomatoes and carrots work together to calm internal inflammation, support tissue healing, and reduce your risk of long-term disease.
Improves Skin Clarity and Radiance
The liver and gut are directly linked to your skin’s appearance. When they function efficiently, your skin benefits from a clearer, more radiant glow. By aiding in toxin elimination, this drink can help reduce breakouts, dullness, and puffiness—leaving you looking as refreshed as you feel.
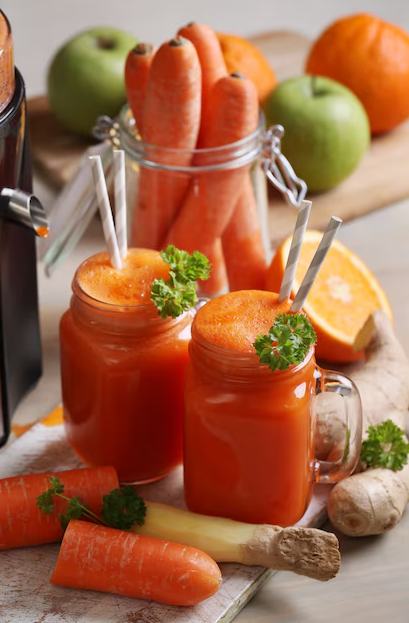
How to Make the Tomato-Carrot-Lemon Detox Drink
This liver and gut detox drink is easy to prepare and takes just a few minutes from start to finish. Use fresh, high-quality produce for the best results.
Ingredients:
-
1 medium ripe tomato
-
1 large carrot, peeled
-
Juice of half a lemon
-
1 cup of warm water
Instructions:
-
Wash and chop the tomato and carrot into small chunks for easier blending.
-
Place the tomato, carrot, and warm water into a blender and blend until smooth.
-
If you prefer a smoother consistency, strain the mixture using a fine mesh sieve or cheesecloth.
-
Squeeze the juice of half a lemon into the blend and stir well.
-
Pour into a glass and drink immediately while fresh.
Best Time to Drink It
For maximum benefits, drink this tonic first thing in the morning on an empty stomach. This helps your body absorb the nutrients more efficiently and sets a positive tone for your digestive system for the rest of the day. You can also drink it between meals as a natural energy booster and digestive aid.
Make It a Daily Ritual for Lifelong Benefits
Consistency is key when it comes to natural health practices. Drinking this liver and gut detox blend daily can lead to noticeable improvements in your energy levels, digestion, and skin. It’s a simple but powerful habit that can transform how you feel over time.
Other Tips for Supporting Your Liver and Gut
While this drink is a fantastic addition to your wellness routine, combining it with healthy lifestyle habits will yield even better results.
Focus on a whole-food diet rich in fiber, greens, and fermented foods. Stay well-hydrated throughout the day. Avoid excessive alcohol and minimize processed foods. Engage in daily movement or light exercise to stimulate circulation and digestion. These habits work hand-in-hand with your detox drink to enhance liver and gut function naturally.
Experience the Wisdom of Generations
This tomato, carrot, and lemon detox drink is more than just a health trend—it’s a time-tested remedy passed down through generations of Chinese medicine practitioners. It represents a philosophy of health that values prevention, balance, and simplicity. When a 95-year-old doctor relies on it to stay vibrant and active, it’s worth giving it a place in your own wellness journey.
Start your mornings with this nourishing blend and feel the difference in your body, mind, and skin. Sometimes, the simplest remedies have the most profound impact.