Author

Barbara L.

Browsing

In the world of natural remedies, turmeric and honey stand out as a powerhouse combination, often referred to as “Golden Honey.” This blend harnesses the anti-inflammatory and antioxidant properties of turmeric alongside the antibacterial and soothing benefits of honey. Together, they offer a simple yet effective way to support overall health and wellness naturally.

The Benefits of Turmeric and Honey

Turmeric: This vibrant yellow spice contains curcumin, a compound with powerful anti-inflammatory and antioxidant properties. Curcumin has been shown to help reduce inflammation, combat pain, and support joint health. It also plays a role in enhancing immunity and has been studied for its effects on various aspects of health from digestive to cognitive.

Honey: Known for its natural antibacterial qualities, honey soothes and heals. It’s often used to treat sore throats, boost immunity, and even aid in wound healing due to its enzymatic production of hydrogen peroxide. Honey also acts as a natural preservative and enhances the taste of turmeric, making the mixture more enjoyable to consume.

How to Make Golden Honey

Ingredients:

  • 1 part turmeric powder
  • 1 part raw honey

Instructions:

  1. Mix Ingredients: Combine turmeric powder and raw honey in a clean jar. Stir until you get a smooth, well-integrated paste.
  2. Storage: Seal the jar tightly and store it in a cool, dry place. You can keep it at room temperature for easy use.

Ways to Use Golden Honey

  • Daily Health Supplement: Take a teaspoon of Golden Honey by itself or dissolve it in a glass of warm water each morning to promote general wellness.
  • As a Cold Remedy: At the first sign of a cold, you can take half a teaspoon of Golden Honey every few hours to harness its antibacterial and anti-inflammatory properties.
  • In Cooking: Use Golden Honey as a glaze for roasted vegetables or meats to add a healthy and flavorful twist to your meals.
  • For Skin Care: Apply a small amount of Golden Honey as a face mask to exploit its anti-inflammatory and antibacterial benefits, which can help combat acne and brighten the skin.

Precautions and Considerations

  • Allergies and Interactions: As with any remedy, check for allergies before using turmeric and honey, especially if you have allergies to bees or pollen. Turmeric can also interact with certain medications, including blood thinners and diabetes drugs.
  • Quality of Ingredients: Use high-quality, organic turmeric and raw honey to maximize the health benefits and minimize exposure to unwanted chemicals or additives.
  • Use in Moderation: While turmeric and honey are generally safe for most people, it’s important to use them in moderation. Excessive consumption of turmeric can cause digestive upset in some individuals.

Conclusion

Turmeric and honey, when combined, create a powerful supplement that supports health and wellness in multiple ways. From improving immune function to providing anti-inflammatory benefits, this golden combination is an easy and natural way to support your body and mind. Whether used as a daily supplement, a culinary ingredient, or even in skincare, Golden Honey is a testament to the powerful synergy of natural ingredients.

Boost Your Energy Naturally: Discover the Powerful Benefits of Garlic, Lime, Lemon, and Ginger Elixir

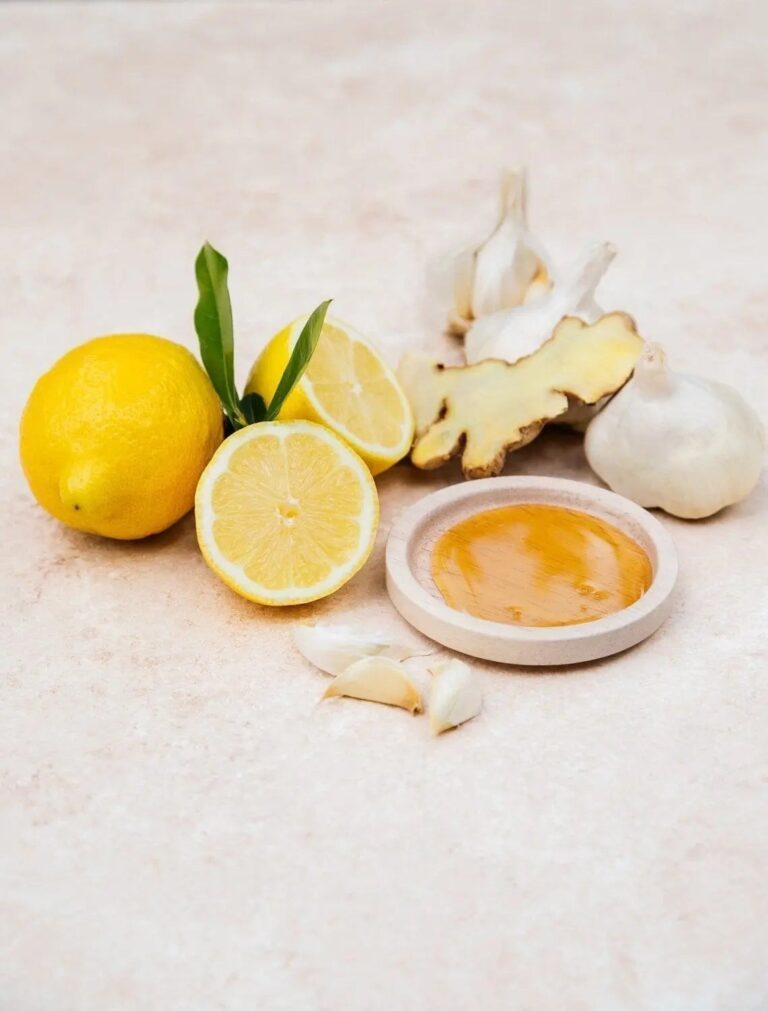
In today’s fast-paced world, maintaining energy levels naturally can feel challenging. This simple recipe combines garlic, lime, lemon, and ginger into a refreshing elixir that supports your overall wellness. Each ingredient is packed with nutrients and creates a perfect blend to help you feel revitalized and balanced.

Ingredients You’ll Need:
2 cloves of fresh garlic
1-inch piece of fresh ginger root
1 lemon
1 lime
2 cups of water
1 tablespoon of honey (optional)
Step-by-Step Preparation:
1. Gather and Prep Ingredients

Peel and finely chop the garlic cloves.
Peel and grate the ginger root.
Squeeze the juice from the lemon and lime, removing any seeds.
2. Simmer the Elixir

In a saucepan, bring the water to a boil.
Add the garlic and ginger to the boiling water. Reduce the heat and simmer for 10 minutes.
3. Combine and Serve

Remove the mixture from heat and let it cool slightly.
Strain the liquid into a cup to remove any solids.
Stir in the lemon and lime juice.
Add honey for a touch of sweetness, if desired, and enjoy warm.
Health Benefits of This Elixir
Garlic: Known for its natural properties, garlic is a valuable addition to this drink, supporting overall wellness.

Ginger: A versatile root that aids digestion and promotes circulation, helping you feel energized.

Lemon and Lime: Citrus fruits high in vitamin C, they help support your immune system and add a refreshing flavor to the drink.

When and How to Use
Enjoy this elixir first thing in the morning to start your day or as an afternoon pick-me-up when you need an energy boost. Regular use as part of a healthy lifestyle can support your overall well-being.

Disclaimer: This recipe is intended to complement a healthy lifestyle. It is not intended to diagnose, treat, cure, or prevent any medical condition. Always consult with a healthcare professional before making significant changes to your diet.

In the pursuit of a healthier lifestyle, detoxification can play a vital role. It helps your body rid itself of unwanted toxins and can contribute to overall well-being. Utilizing natural remedies like aloe vera and rosemary can be an effective and gentle way to support your body’s natural detox processes. Here’s how these two powerful plants can help cleanse your body and boost your health.

Introduction to Aloe Vera and Rosemary

Aloe vera and rosemary are two plants known for their health benefits and therapeutic properties. Aloe vera is widely recognized for its anti-inflammatory and laxative properties, making it great for digestion and internal cleansing. Rosemary, on the other hand, is celebrated for its antioxidant properties and ability to support liver health and enhance mental clarity.

How Aloe Vera and Rosemary Detox the Body

  1. Aloe Vera for Internal Cleansing:
    • Digestive Health: Aloe vera gel contains enzymes that help break down sugars and fats, keeping your digestion running smoothly.
    • Natural Detoxifier: The gel’s laxative properties aid in cleansing by promoting regular bowel movements, helping to flush toxins from the digestive tract.
  2. Rosemary for Enhanced Liver Function:
    • Liver Support: Rosemary is rich in antioxidants, which help protect the liver and enhance its detoxification capabilities.
    • Mental Clarity: Its anti-inflammatory effects can also improve circulation to the brain, boosting cognitive function.

Preparing Aloe Vera and Rosemary Detox Drink

Creating a detox drink using aloe vera and rosemary is simple:

  • Ingredients:
    • 1 tablespoon of fresh aloe vera gel (scooped from the leaf)
    • 1 teaspoon of dried rosemary or a fresh sprig
    • 1 cup of boiling water
    • Honey or lemon (optional, for taste)
  • Method:
    • Add the dried rosemary or fresh sprig to boiling water and steep for about 5 minutes.
    • Strain the rosemary leaves and mix in the fresh aloe vera gel until well dissolved.
    • Add honey or lemon to enhance the flavor if desired.
    • Drink this once daily, preferably in the morning on an empty stomach.

Additional Tips for Effective Detoxification

To maximize the benefits of your detox efforts:

  • Stay Hydrated: Drink plenty of water throughout the day to help flush out toxins.
  • Eat a Balanced Diet: Focus on foods rich in antioxidants and fiber, such as fruits, vegetables, and whole grains.
  • Exercise Regularly: Physical activity increases circulation and sweat, aiding in the elimination of toxins.
  • Get Adequate Rest: Sleep is crucial for your body’s recovery and renewal processes.

Conclusion: Natural Solutions for a Healthy Body

Using aloe vera and rosemary as part of your daily routine can significantly contribute to your body’s natural detoxification process. These natural remedies not only help eliminate toxins but also provide additional health benefits that can enhance your overall well-being. Give this powerful combination a try and experience a natural boost in your body’s cleansing efforts!

Lemongrass tea, with its delightful citrus flavor and aroma, is more than just a pleasant beverage to start your day. This herbal tea, made from the stalks of the lemongrass plant, offers a variety of health benefits that can positively impact your well-being when consumed regularly. Here’s what happens to your body when you drink a glass of lemongrass tea each morning.

1. Digestive Health Improvement

  • Lemongrass possesses antifungal and antibacterial properties, which can help maintain a healthy digestive system. It is often used to relieve bloating, constipation, and indigestion due to its ability to promote proper digestion.

2. Anxiety and Stress Reduction

  • The calming effect of lemongrass tea is well-noted. Its mild sedative properties can help reduce anxiety and promote relaxation, making it a great way to start a busy day.

3. Detoxification

  • Lemongrass tea is a natural diuretic, which means it helps flush out toxins from the body by increasing the frequency and quantity of urination. This process helps cleanse the liver, kidneys, bladder, and pancreas.

4. Immune System Boost

  • High in antioxidants, lemongrass tea helps fight against free radicals, which are responsible for disease and aging. Regular consumption can strengthen your immune system, making it easier for your body to ward off diseases.

5. Blood Pressure and Heart Health

  • Lemongrass is known for its ability to improve blood circulation and lower blood pressure by relaxing the muscles around the blood vessels. Better circulation contributes to reduced chances of arteriosclerosis and prevents various cardiac disorders.

6. Pain Relief

  • Due to its anti-inflammatory properties, drinking lemongrass tea can help reduce pain associated with headaches, joint pains, and even menstrual cramps.

7. Skin Health

  • With its purifying functions and ability to help improve blood circulation, lemongrass tea can lead to clearer and healthier skin. It can also help treat acne and fungal infections when applied topically.

How to Make Lemongrass Tea

Ingredients:

  • 2-3 stalks of fresh lemongrass (or 1 tablespoon of dried lemongrass)
  • 4 cups of water
  • Honey or lemon (optional, for taste)

Instructions:

  1. Prepare the Lemongrass: If using fresh lemongrass, peel off the outer layers and chop the stalks into 2-inch lengths. Bruise the stalks (crush them slightly) to release the flavor.
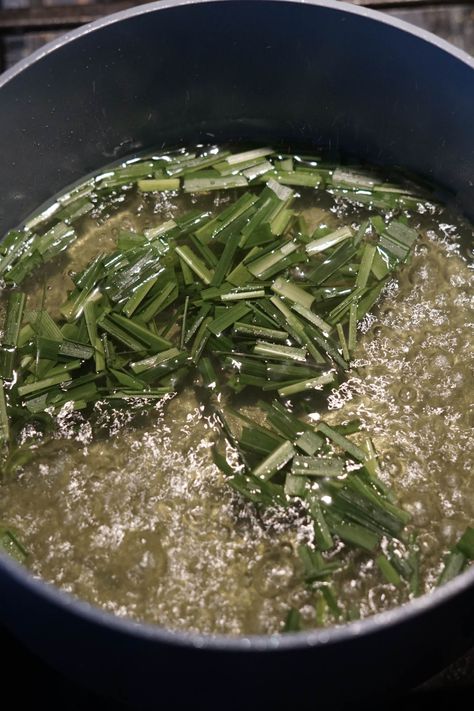
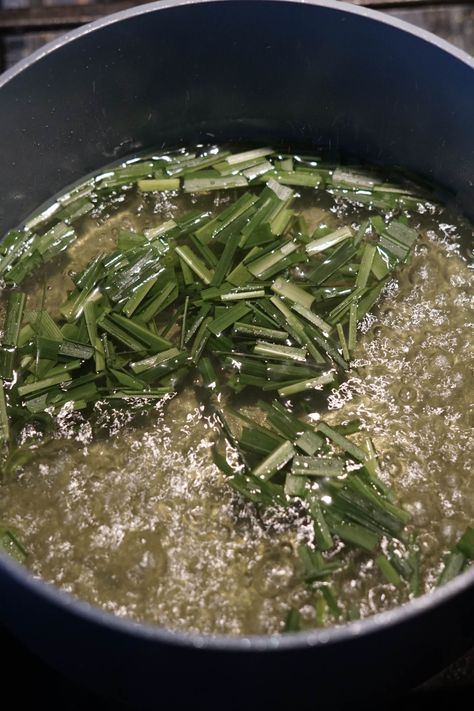
  2. Boil: Add the chopped lemongrass to boiling water and let it simmer for about 10 minutes.
  3. Steep: Remove from heat and let the tea steep for another 5 minutes. For a stronger infusion, you can steep it longer.
  4. Strain and Serve: Strain the tea into a cup. Add honey or lemon if desired for flavor enhancement.
  5. Enjoy: Drink it warm in the morning to maximize its therapeutic benefits.

Conclusion

Starting your day with a cup of lemongrass tea can significantly boost your health in numerous ways. From aiding digestion to enhancing your immune system, the benefits of this tea are both refreshing and health-promoting. As with any herbal remedy, if you have allergies or are on medication, it’s advisable to consult with a healthcare provider before starting regular consumption.

Cooking broccoli with leeks is not only a delicious combination but also a highly nutritious one. Leeks add a mild, onion-like flavor that complements the earthy taste of broccoli perfectly, making this dish a favorite for many. Here’s a simple yet flavorful recipe to prepare broccoli with leeks that you might find yourself cooking up to three times a week!

Why Broccoli and Leeks?

  • Broccoli is a powerhouse of nutrients, including vitamin C, vitamin K, iron, and fiber. It’s known for its health benefits, such as improving immune health and aiding digestion.
  • Leeks, part of the onion family, offer a more delicate and sweeter flavor than onions. They are rich in flavonoids, particularly one called kaempferol, which is thought to have a protective effect against heart disease.

Ingredients:

  • 1 large head of broccoli, cut into florets
  • 2 medium leeks, cleaned and thinly sliced
  • 2 tablespoons olive oil
  • 2 cloves garlic, minced
  • Salt and pepper to taste
  • Optional: Lemon zest or juice, Parmesan cheese, or crushed red pepper flakes for added flavor

Instructions:

  1. Prepare the Vegetables:
    • Begin by cutting the broccoli into bite-sized florets.
    • Trim the leeks, removing the root and the dark green part. Slice the white and light green parts thinly. Make sure to rinse them well to remove any dirt trapped between the layers.
  2. Sauté the Leeks:
    • In a large skillet, heat the olive oil over medium heat.
    • Add the sliced leeks and garlic to the skillet. Sauté for about 5-7 minutes or until the leeks are tender and aromatic. Be careful not to burn the garlic.
  3. Cook the Broccoli:
    • Add the broccoli florets to the skillet with the leeks. Stir to combine.
    • Season with salt and pepper. Cover and let cook for about 5-8 minutes, stirring occasionally. If you prefer your broccoli to be more tender, you can add a few tablespoons of water to the pan before covering to steam it lightly.
  4. Finish and Serve:
    • Once the broccoli is cooked to your liking, remove from heat. If desired, add a sprinkle of lemon zest or a squeeze of lemon juice to brighten the flavors.
    • Serve warm. If you like, top with grated Parmesan cheese or a pinch of crushed red pepper flakes for a bit of heat.

Serving Suggestions:

This dish makes a fantastic side for meats like chicken or fish, or it can be enjoyed as a standalone vegetarian meal. It’s versatile enough to be paired with grains such as quinoa or farro for a more filling meal.

Conclusion:

Cooking broccoli with leeks is a healthy, tasty, and simple way to enjoy these vegetables. This dish not only packs a nutritional punch but also adds variety to your weekly meals, making vegetables the star of your dining table. Give it a try, and you might just find yourself making it three times a week like many others have!

Generating electricity with a potato is a classic science experiment that demonstrates the basics of electrochemical cells. While it’s not the most practical or efficient method for daily use, it’s a fascinating way to understand how certain natural materials can generate electricity. Here’s a step-by-step guide on how you can use potatoes to charge your phone, a fun experiment that also serves as an educational demonstration.

Understanding the Science

Potatoes contain phosphoric acid, which makes them a good candidate for a simple battery. By inserting electrodes made from two different metals into a potato, an electrochemical reaction occurs, producing a small amount of electricity. This is similar to the basic principle behind commercial batteries.

Materials Needed

  • 2 to 3 large potatoes
  • Copper coins or strips of copper
  • Zinc nails or galvanized nails (zinc-coated)
  • Alligator clip wires
  • A low-power device to charge (like an LED or a calculator for demonstration; charging a phone requires many potatoes connected in series and parallel)

Instructions

  1. Prepare the Potatoes:
    • Wash the potatoes to remove any dirt, as you will be inserting electrodes into them.
  2. Insert the Electrodes:
    • Push a copper coin or strip and a zinc nail into each potato, making sure they do not touch each other. The copper serves as the positive electrode, and the zinc acts as the negative electrode.
  3. Connect the Electrodes:
    • Use alligator clips to connect the zinc nail in one potato to the copper coin in another potato. This starts to build a series circuit, increasing the voltage.
    • Continue connecting potatoes in series to increase the total voltage. To charge a small device like an LED, you will typically need a series of potatoes.
  4. Connect to Your Device:
    • Once you have your series circuit, you can connect the free copper electrode (from the first potato) and the free zinc electrode (from the last potato) to a device.
    • Note: To generate enough power to charge something like a phone, you would need hundreds of potato batteries connected in series and parallel, which is not practical but is an interesting experiment!
  5. Monitor the Output:
    • Use a multimeter to measure the voltage and current produced by your potato battery setup to ensure it matches the requirements of the device you intend to power.

Considerations and Limitations

  • Power Output: A single potato battery can generate about 0.5 to 0.8 volts. Many such cells are needed to reach a higher voltage and sufficient current.
  • Efficiency and Practicality: While this method is an excellent educational tool, it is not efficient for actual daily use due to the low power output and the impracticality of setting up numerous cells.
  • Safety: The voltage generated is generally safe, but it’s important to handle all electrical connections with care.

Conclusion

Using potatoes to generate electricity is more about learning and experimenting with the principles of chemistry and electricity than about practical application. It highlights how natural materials can interact with common metals to produce electricity, providing a great teaching tool for basic electrical concepts. Whether you’re a teacher, student, or hobbyist, this experiment is a creative way to explore the science of batteries.

Did you know that combining cloves and white vinegar creates a natural remedy or solution that can work wonders around your home and for your well-being? This simple recipe has many practical uses, making it a must-try. Here’s why this combination is so incredible and how to use it!


Why Combine Cloves and White Vinegar?

  1. Cloves: Packed with antimicrobial, antifungal, and aromatic properties, cloves are a natural powerhouse. They’re known for their ability to fight bacteria, freshen the air, and even repel insects.
  2. White Vinegar: A cleaning staple, vinegar is antibacterial, a natural disinfectant, and an effective deodorizer.

When combined, the two create a versatile mixture that’s both natural and highly effective.


How to Prepare Clove-Infused White Vinegar

Ingredients:

  • 1 cup white vinegar
  • 10–15 whole cloves
  • A clean jar with a lid

Instructions:

  1. Combine Ingredients: Place the cloves into the clean jar and pour the white vinegar over them.
  2. Infuse: Seal the jar tightly and let the mixture sit for 7–10 days at room temperature. Shake the jar gently every few days to enhance the infusion.
  3. Strain: After 10 days, strain out the cloves and transfer the infused vinegar to a spray bottle or container.

Uses for Clove-Infused White Vinegar

  1. Natural Cleaner:
    • Use it as a surface cleaner to disinfect countertops, sinks, and tiles. Its antimicrobial properties make it effective and safe for your home.
  2. Insect Repellent:
    • Spray it around doors, windows, or areas where pests like ants or mosquitoes enter. Cloves naturally repel insects.
  3. Deodorizer:
    • Use it to remove odors in the kitchen or bathroom. The clove scent leaves a fresh, clean aroma.
  4. Laundry Freshener:
    • Add a small amount to your laundry rinse cycle to eliminate odors and leave clothes smelling fresh.
  5. Personal Care (Optional):
    • Dilute the mixture with water and use it as a foot soak to refresh tired feet and fight bacteria.

Why You’ll Love It

This simple mixture is eco-friendly, cost-effective, and versatile. It eliminates the need for harsh chemicals while delivering amazing results. Whether you’re cleaning, freshening, or repelling insects, clove-infused vinegar is a fantastic addition to your natural home solutions.

Give it a try—you’ll be amazed at the difference! ✨

This no-bake, no-gelatin dessert with milk and fresh fruit is as delicious as it is beautiful! It’s creamy, naturally sweetened with fruits, and perfect for a healthy indulgence. Here’s how to recreate this stunning and easy dessert:


Ingredients:

  • 2 cups milk (your choice: cow’s milk, almond milk, or coconut milk for added flavor)
  • 2 tablespoons cornstarch (for thickening)
  • 1 tablespoon honey or maple syrup (optional, for a hint of sweetness)
  • A mix of fresh fruits, sliced (e.g., oranges, kiwi, berries, or mango)

Instructions:

  1. Prepare the Milk Mixture:
    • In a saucepan, mix the milk and cornstarch thoroughly until smooth.
    • Heat the mixture over medium heat, stirring constantly, until it thickens to a pudding-like consistency. Add honey or maple syrup if desired for extra sweetness.
  2. Arrange the Fruits:
    • In a rectangular or square mold (or even individual cups), layer your sliced fruits beautifully. Make sure they’re evenly distributed for a colorful look.
  3. Pour the Milk Mixture:
    • Carefully pour the warm milk mixture over the fruits, ensuring the liquid fills all the gaps and covers the fruit completely.
  4. Chill and Set:
    • Place the mold in the refrigerator and let it chill for at least 1–2 hours, or until fully set.
  5. Serve:
    • Once set, gently remove the dessert from the mold and slice it into portions. Enjoy this creamy, fruity delight!

Why You’ll Love It:

  • No Sugar Needed: The natural sweetness of the fruits makes this dessert light and guilt-free.
  • Quick and Easy: Just 5 minutes of preparation and no baking required!
  • Healthy and Wholesome: Packed with calcium from milk and vitamins from fresh fruits.

Give this simple, refreshing dessert a try—it’s perfect for any occasion and a hit with kids and adults alike!

Bedbugs can quickly turn your home into a battleground, making it uncomfortable and distressing. These persistent pests are notoriously difficult to get rid of, but there is a surprising solution that you may have right in your cupboards and garden: lavender. Not only is lavender a natural remedy, but it is also easy to use. Let’s explore how you can harness the power of lavender to tackle bedbugs once and for all.

Image

The Secret Weapon in Your Cupboards: Lavender Essential Oil

Lavender essential oil is more than just a pleasant fragrance for your home; it is a natural enemy of bedbugs. Its antiparasitic properties make it a potent tool for repelling and eliminating these unwelcome invaders. If you are fortunate enough to grow lavender in your garden, you have a powerful weapon at your disposal. Simply scatter a few branches in the corners of your rooms to deter bedbugs with their strong and pleasant aroma. For those who are sensitive to essential oils, using lavender branches is a gentle yet effective alternative.

How to Use Lavender Essential Oil Against Bedbugs

Creating a lavender spray to target bedbugs is incredibly simple. Here’s how you can do it:

  1. Take a clean spray bottle.
  2. Add 15 drops of lavender essential oil.
  3. Pour in 50 ml of water.
  4. Shake the bottle well to mix the solution.
  5. Spray the mixture generously on areas where bedbugs are present, such as mattresses, bed frames, and corners of the room.

For an even stronger remedy, consider blending lavender oil with other essential oils like peppermint or tea tree oil to create a powerful anti-bedbug solution.

Garden Allies in the Fight Against Bedbugs

Lavender isn’t the only natural remedy hiding in your garden. Several other plants offer bedbug-repelling properties, providing a comprehensive approach to pest control.

  • Thyme: Known for its strong scent, thyme disrupts bedbugs’ ability to locate their hiding spots.
  • Peppermint: Its refreshing aroma doubles as a natural deterrent for bedbugs.
  • Lemongrass: This plant emits a citrusy scent that bedbugs find intolerable.
  • Tansy: Often overlooked, tansy is a traditional remedy for repelling various pests, including bedbugs.
  • Natural Predators: Encouraging beneficial insects that prey on bedbugs can provide long-term control in outdoor areas.

Why Lavender and its Allies Work So Well

The secret lies in the natural compounds found in these plants, particularly in their oils and aromas. These compounds disrupt bedbugs’ ability to thrive and reproduce, effectively making your home an uninhabitable environment for them.

A Natural, Fragrant Solution

With lavender essential oil and garden remedies like thyme and peppermint, you can take a safe, natural approach to eliminating bedbugs. Say goodbye to harsh chemicals and embrace these eco-friendly solutions that not only rid your home of pests but also leave it smelling fresh and inviting.

Take back control of your space and enjoy a bedbug-free home with these simple, natural remedies. With a little help from your cupboard and garden, peace of mind is just a few sprays away!

This powerful tea combines three natural ingredients—rosemary, ginger, and garlic—to create a nutrient-packed drink with incredible health benefits. It boosts immunity, improves digestion, supports heart health, and reduces inflammation. Here’s how you can prepare this super health drink.


Ingredients

  • 1-2 sprigs of fresh rosemary (or 1 teaspoon dried rosemary)
  • 1-inch piece of fresh ginger, sliced or grated
  • 2 cloves of garlic, crushed
  • 2-3 cups of water
  • 1 teaspoon honey or lemon juice (optional, for taste)

Instructions

  1. Prepare the Ingredients
    • Rinse the rosemary sprigs thoroughly.
    • Slice or grate the ginger for maximum flavor extraction.
    • Crush the garlic cloves lightly to release their beneficial compounds.
  2. Boil the Water
    • In a pot, bring the water to a gentle boil.
  3. Add the Ingredients
    • Add the rosemary, ginger, and crushed garlic to the boiling water.
    • Reduce the heat and let it simmer for 5-10 minutes.
  4. Strain and Serve
    • Remove the pot from heat and strain the tea into a cup.
    • Add honey or lemon juice if desired for additional flavor.
  5. Enjoy Warm
    • Sip slowly and enjoy this health-boosting drink while it’s warm.

Health Benefits of Rosemary, Ginger, and Garlic Tea

  1. Boosts Immunity:
    • Garlic and ginger are known for their antibacterial and antiviral properties, helping to ward off colds and infections.
  2. Reduces Inflammation:
    • Ginger and rosemary have powerful anti-inflammatory compounds that can alleviate joint pain and muscle soreness.
  3. Supports Digestion:
    • Ginger aids in digestion by relieving bloating and nausea, while rosemary improves gut health.
  4. Promotes Heart Health:
    • Garlic helps lower blood pressure and cholesterol, while rosemary and ginger improve circulation and reduce the risk of heart disease.
  5. Improves Mental Clarity:
    • Rosemary is known for enhancing memory and focus, making this tea a brain-boosting beverage.
  6. Detoxifies the Body:
    • The antioxidants in these ingredients help flush out toxins and support liver health.

Tips for Best Results

  • Drink this tea once daily, preferably in the morning, to maximize its health benefits.
  • Use fresh ingredients whenever possible for the best flavor and potency.
  • Avoid boiling garlic for too long to preserve its beneficial compounds.

Conclusion

This rosemary, ginger, and garlic tea is not only easy to make but also a natural powerhouse for your health. Incorporate it into your routine to enjoy its wide range of benefits, from boosting immunity to improving heart health. ☕