Author

Barbara L.

Browsing

If you’re looking to elevate your coffee experience, adding cloves might be the twist you never knew you needed. This simple addition not only enhances the flavor profile of your morning brew but also brings several health benefits that can save you from needing to buy various supplements at the market. Discover how mixing cloves with coffee can transform your daily routine into a rich and healthful ritual.

Why Add Cloves to Coffee?

Cloves are a powerful spice known for their medicinal properties and robust flavor. When added to coffee, cloves can:

  • Enhance Flavor: Cloves add a warm, spicy kick that complements the boldness of coffee.
  • Boost Health Benefits: Cloves are rich in antioxidants and have antibacterial, antiviral, and anti-inflammatory properties. They can aid in digestion, boost the immune system, and help manage pain and sickness.

How to Prepare Clove-Infused Coffee

Ingredients:

  • Freshly ground coffee beans
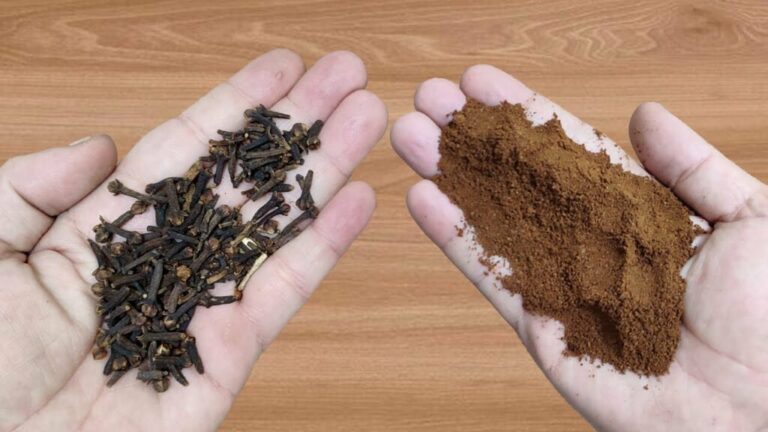
  • Ground cloves (start with a small pinch per cup to adjust to taste)
  • Water

Instructions:

  1. Mix Your Coffee: Prepare your coffee as usual, whether you use a drip coffee maker, a French press, or any other method. Add a pinch of ground cloves directly to the coffee grounds before brewing. This way, the cloves infuse as the coffee brews, seamlessly integrating their flavor and health benefits.
  2. Brew as Normal: Proceed with your standard brewing method. The heat from the brewing process will extract the flavors and oils from the cloves, blending them with the coffee.
  3. Adjust to Taste: If the flavor is too mild, increase the amount of cloves slightly next time. If it’s too strong, reduce the quantity.

Benefits of Clove Coffee

  • Antioxidant Boost: Both coffee and cloves are high in antioxidants, providing a double dose that can help protect your cells from damage by free radicals.
  • Digestive Aid: Cloves can help ease digestion, making this an ideal drink after meals.
  • Mood Enhancer: The stimulating effects of caffeine combined with the therapeutic aroma of cloves can help improve your morning mood and mental clarity.

Serving Suggestions:

  • With a Twist: Add a cinnamon stick or a dash of nutmeg for an even more aromatic experience.
  • Sweeten It Up: If you like your coffee sweet, consider adding honey or a splash of natural vanilla extract, which can complement the spice of the cloves beautifully.

Conclusion:

Mixing cloves with your coffee is a simple yet effective way to enhance both the flavor and nutritional value of your daily brew. This spice not only adds a delightful zest to your morning but also brings with it health benefits that could reduce your need to buy certain health products. So next time you brew a pot of coffee, reach for the cloves and transform your cup into something extraordinary.

Aronia berries, also known as chokeberries, are small, dark fruits that have been gaining attention for their incredible health benefits. Native to North America, these berries have been used for centuries in traditional medicine, and modern science is beginning to confirm what ancient healers knew: Aronia is a true superberry. Here’s a look at the remarkable healing properties of Aronia and why you might want to include it in your diet.

Rich in Antioxidants

Aronia berries are packed with antioxidants, particularly anthocyanins, which give the berries their deep purple color. These powerful compounds help neutralize free radicals in the body, protecting cells from oxidative stress and reducing the risk of chronic diseases such as cancer, heart disease, and diabetes.

Boosts Immune Function

The high vitamin C content in Aronia berries plays a crucial role in supporting the immune system. Regular consumption of Aronia can help your body fight off infections, reducing the frequency and severity of colds and other illnesses.

Supports Heart Health

Aronia berries are known to improve cardiovascular health. They help reduce inflammation, lower blood pressure, and improve cholesterol levels. The polyphenols in Aronia can prevent the oxidation of LDL cholesterol, which is a major factor in the development of atherosclerosis, a condition that can lead to heart attacks and strokes.

Regulates Blood Sugar Levels

Studies have shown that Aronia berries can help regulate blood sugar levels, making them beneficial for people with diabetes or those at risk of developing the condition. The berries improve insulin sensitivity and may help in preventing blood sugar spikes after meals.

Promotes Digestive Health

The dietary fiber found in Aronia berries is beneficial for digestive health. Fiber helps promote regular bowel movements, prevents constipation, and supports a healthy gut microbiome. A healthy digestive system is crucial for overall health and well-being.

Anti-Inflammatory Properties

Chronic inflammation is at the root of many diseases, including arthritis, heart disease, and cancer. The anti-inflammatory compounds in Aronia berries help reduce inflammation in the body, potentially lowering the risk of developing these chronic conditions.

Detoxification

Aronia berries support the liver in its detoxification processes. They help the liver eliminate toxins from the body more effectively, which is crucial for maintaining overall health and preventing diseases related to toxin buildup.

Improves Vision

The high levels of carotenoids, including lutein and zeaxanthin, found in Aronia berries contribute to eye health. These compounds protect the eyes from damage caused by UV light and oxidative stress, potentially reducing the risk of age-related macular degeneration and other eye disorders.

How to Incorporate Aronia into Your Diet

  • Juice: Aronia juice is a popular way to consume the berries. It’s tart and refreshing, making it a great addition to smoothies or as a standalone drink.
  • Dried Berries: Dried Aronia berries can be added to cereals, salads, or baked goods, providing a healthy boost to your meals.
  • Supplements: Aronia supplements are available for those who prefer an easy, concentrated dose of the berry’s benefits.
  • Tea: Aronia berry tea is another delicious way to enjoy the healing properties of this superberry.

Conclusion

Aronia berries are among the most potent superfoods available, offering a wide range of healing properties that can benefit your health in numerous ways. From boosting your immune system to protecting your heart and supporting digestion, incorporating Aronia into your diet could be a simple and effective way to enhance your overall well-being. Give these powerful berries a try and experience their remarkable benefits for yourself.

It’s easy to disregard bananas once they’ve turned dark and soft, but before you think of throwing away those overripe bananas, consider the unique benefits they offer. Overripe bananas, characterized by their darkened peels and mushy texture, are not only edible but can be incredibly useful and nutritious. Here’s why the riper they are, the more valuable they become.

Enhanced Sweetness and Texture

As bananas ripen, their starches break down into sugars, naturally sweetening the fruit. This makes overripe bananas perfect for cooking and baking, as their enhanced sweetness and soft texture can add flavor and moisture to various dishes without the need for additional sugar.

Ideal for Baking

Overripe bananas are a baker’s secret weapon. Their soft, mushy texture makes them easy to mash and mix into batter, providing natural sweetness and moisture to cakes, muffins, and breads. Banana bread, in particular, is a classic recipe that benefits from the deep, rich flavor of overripe bananas.

Health Benefits

  • Higher Antioxidant Levels: Overripe bananas have higher antioxidant levels than their firmer, yellower counterparts. These antioxidants help combat free radicals, which can cause damage to cells.
  • Easier Digestion: The softer the banana, the easier it is to digest. As the fruit ripens, the fiber breaks down, which is helpful for those with sensitive stomachs.
  • Increased Tryptophan: Overripe bananas contain more tryptophan compared to fresher bananas. Tryptophan is an amino acid that the body converts into serotonin, which can improve mood and support sleep.

Other Creative Uses

  • Smoothies: Overripe bananas blend seamlessly into smoothies, adding natural sweetness and a creamy texture without the need for ice cream or sweeteners.
  • Face Masks: The natural moisturizing effect of overripe bananas makes them great for homemade face masks. Combined with ingredients like honey and yogurt, they can hydrate and nourish the skin.
  • Plant Fertilizer: The peels of overripe bananas are rich in potassium and other minerals that can nourish garden plants. Burying banana peels in the soil can help boost plant health.

Storing Overripe Bananas

If you’re not ready to use your overripe bananas right away, peel them and store them in a plastic bag in the freezer. This preserves their nutritional value and makes them easy to toss into smoothies or thaw for baking at a later time.

Conclusion

So, the next time you see a banana turning brown and soft, think twice before discarding it. Overripe bananas are not only edible but are packed with potential. From enhancing your baking projects to boosting your health with antioxidants, these fruits prove that sometimes, the best things come in slightly bruised packages.

Watermelon is a refreshing treat, especially during the warm months, but choosing the right one can sometimes feel like a gamble. To help you select a sweet watermelon easily, here are effective tips that will let you know at a glance whether you’re picking a winner.

1. Check the Field Spot

The field spot is the area where the watermelon rested on the ground. When you’re picking a watermelon, look for one with a creamy yellow or even slightly orange field spot. A white or green field spot, on the other hand, usually indicates that the watermelon isn’t fully ripe.

2. Give It a Thump

Thumping is one of the most popular methods to test for a good watermelon. A ripe watermelon will have a deep, hollow sound when you tap it. Unripe or overripe melons will sound dull. Practice will help you distinguish these sounds more clearly over time.

3. Check for Uniformity

Look at the shape of the watermelon. It should be uniform without major flat sides. Irregularities in shape can indicate uneven ripening or that the melon grew with insufficient water or nutrients.

4. Look at the Tail

The tail of the watermelon can indicate its ripeness. A dried tail suggests that the watermelon is ripe, while a green tail might mean it was picked too soon and may not be as sweet.

5. Assess the Weight

Pick up the watermelon and gauge how heavy it feels for its size. A ripe watermelon will feel heavier than it looks since it’s full of water. If it feels light for its size, it might be dry on the inside and less juicy.

6. Inspect the Skin

A shiny appearance can indicate an underripe watermelon. Look for a duller, matte skin, which often signifies ripeness. Additionally, a smooth rind free of dents and bruises is ideal, as these can affect the taste and freshness.

7. Check the Color

A ripe watermelon will typically have a dark green color without too many white stripes or spots. Bright green suggests that the melon might not yet be ripe.

Conclusion

By using these tips, you can pick a sweet watermelon more reliably and enjoy this delicious fruit at its best. Remember, each watermelon can vary, so combining these tips will give you the best chance of choosing a deliciously ripe melon.

Banana peels are often overlooked as just trash, but they hold a plethora of uses that can benefit your garden, your skin, and even your home. After discovering these innovative applications, you might find yourself saving every peel. Here’s why you’ll never look at banana peels the same way again.

1. Fertilizer for Your Garden Banana peels are rich in potassium, phosphorus, and calcium, essential nutrients that can promote healthy plant growth. You can chop up the peels and bury them directly in the soil around your plants. As they decompose, they release these vital nutrients, enriching the soil and supporting the health of your garden plants.

2. Natural Pest Repellent Banana peels can also help protect your plants from pests. Aphids, a common garden pest, are repelled by the compounds found in banana peels. Simply place pieces of the peel around the base of your susceptible plants, or bury them just under the soil surface to keep aphids at bay without using harmful chemicals.

3. Shoe Polish The inside of a banana peel can be used as a natural shoe polish. Simply rub the inside of the peel against your leather shoes, then buff with a soft cloth. The natural oils in the peel moisturize the leather and make your shoes look shiny and new.

4. Skin Care Banana peels have properties that can soothe and heal skin. Rubbing the inside of a banana peel on your face can help reduce inflammation, soothe irritation, and diminish acne. The peels can also be used to treat warts; placing a small piece of banana peel on a wart and securing it with a bandage overnight can help diminish its appearance.

5. Silver Polish The potassium in banana peels is great for cleaning and polishing silverware. Blend banana peels with water to make a paste, then use a soft cloth to apply the paste to your tarnished silver. After polishing, rinse the silver and dry it to see it shine like new.

6. Meat Tenderizer Adding a banana peel to a roasting pan can help keep meats moist during cooking. The peel prevents the meat from drying out and adds a slight sweetness that enhances flavor.

7. Bruise Treatment Banana peels can potentially speed up the healing of bruises due to their esterified fatty acids. Placing a banana peel on a bruise and securing it with a bandage for a few hours can help reduce the appearance of the bruise.

Conclusion Banana peels are more than just waste; they are a versatile resource that offers natural solutions for your garden, home, and beauty needs. By finding new uses for banana peels, not only are you reducing waste, but you are also tapping into a free and natural resource that offers numerous benefits. So the next time you enjoy a banana, think twice before you throw that peel away.

Cooking eggs might seem simple, but achieving that perfectly cooked consistency can often be elusive. One common mistake people make is starting with cold water. This method can lead to unevenly cooked, hard-to-peel eggs. Instead, let’s explore the “hot start” method, which is lauded by chefs for producing consistently excellent eggs.

The Hot Start Method Explained

Starting eggs in hot water, or the “hot start” method, involves placing eggs directly into boiling or near-boiling water. This technique offers several advantages over the traditional cold start method, where eggs are placed in cold water that is then brought to a boil.

Benefits of the Hot Start Method

  1. Easier Peeling: When eggs are placed directly into hot water, it helps the whites firm up faster, separating from the membrane that lines the shell. This makes the peeling process much smoother, especially with fresh eggs that typically are more difficult to peel.
  2. More Controlled Cooking: The hot start method allows for more precise control over the cooking time. Since the water is already hot, the time it takes for it to come back to a boil is reduced, and the cooking process starts immediately.
  3. Reduced Cracking: Adding eggs to cold water and then heating it up can cause the eggs to crack due to rapid temperature changes. Starting with hot water minimizes this risk as the temperature shift for the eggs is more gradual after the initial shock.

Steps to Perfectly Cooked Eggs with the Hot Start Method

  1. Boil Water: Bring a pot of water to a boil. The water level should be enough to cover the eggs by at least an inch.
  2. Prepare Eggs: Take the eggs out of the fridge just before cooking to avoid extreme temperature differences. Lower the eggs gently into the boiling water using a spoon or ladle to prevent cracking.
  3. Set Timer:
    • For soft-boiled eggs, cook for about 6-7 minutes.
    • For firmer yet creamy yolks (medium-boiled), cook for about 8-9 minutes.
    • For fully firm yolks (hard-boiled), cook for about 11-12 minutes.
  4. Ice Bath: Once the eggs are done, transfer them immediately to an ice bath or run under cold water for at least a minute. This stops the cooking process and makes peeling easier.
  5. Peel and Enjoy: Tap the eggs gently to crack the shell, then start peeling. The shell should come off easily and cleanly.

Conclusion

If you’ve been starting your eggs in cold water, switching to the hot start method might change your cooking routine for the better. This method not only simplifies the peeling process but also improves the overall texture and appearance of your cooked eggs. Give it a try next time, and enjoy the simplicity and perfection of well-cooked eggs every time.

If you’re grappling with issues like poor blood circulation or hair loss, incorporating Ginkgo biloba into your daily regimen might just be the solution you need. This ancient plant, revered for centuries in traditional medicine, offers a myriad of health benefits, particularly in enhancing circulation and promoting hair health. Let’s delve into how Ginkgo biloba can turn the tide on these common concerns.

Why Ginkgo Biloba?

Ginkgo biloba is one of the oldest living tree species and its leaves are used to make extracts that are beneficial for health. Here are the primary ways it can benefit those suffering from poor circulation and hair loss:

  1. Improves Blood Circulation:
    • Ginkgo biloba is renowned for its ability to improve blood flow to various parts of the body, including the extremities. By increasing blood circulation, it helps deliver more oxygen and nutrients to the organs and tissues, aiding in overall health and vitality.
  2. Supports Hair Growth:
    • The enhanced circulation provided by Ginkgo biloba can also have direct benefits for hair growth. Improved blood flow to the scalp ensures that hair follicles receive the nutrients they need to maintain health and promote hair growth, thereby reducing hair fall and potentially reversing the effects of hair thinning.
  3. Antioxidant Properties:
    • Ginkgo’s high antioxidant content helps protect the hair follicles from damage by free radicals. This is crucial in preventing premature hair aging and fallout.
  4. Reduces Inflammation:
    • Chronic inflammation can lead to numerous health issues, including poor circulation and hair loss. Ginkgo biloba’s anti-inflammatory effects can help mitigate these conditions and promote healthier body systems.

How to Use Ginkgo Biloba

  • Supplements: Ginkgo biloba is widely available in capsule, tablet, or liquid extract form. Taking a supplement as directed by a healthcare provider can help improve circulation and hair health.
  • Tea: Ginkgo biloba leaves can be used to brew tea. This can be a soothing way to enjoy the benefits, though it might be less potent than extracts.
  • Topical Solutions: Some hair care products contain Ginkgo biloba extract. Applying these directly to the scalp may help improve hair root health directly.

Precautions

  • Consult a Healthcare Provider: Before starting any new supplement regimen, especially Ginkgo biloba, it’s important to consult with a healthcare provider, particularly if you are on medication like blood thinners, as Ginkgo can interact with medications.
  • Allergies: Be aware of potential allergies and start with smaller doses to test the body’s reaction.

Conclusion

Ginkgo biloba is more than just a supplement; it’s a potent plant that can significantly improve your quality of life. Whether you’re looking to enhance your circulation, boost your hair health, or both, Ginkgo biloba offers a natural and effective solution. Embrace this ancient remedy and watch as poor circulation and hair loss become problems of the past.

Banana peels are often tossed without a second thought, destined for the trash or compost bin. However, these humble scraps have surprising uses that can benefit your garden, beauty routine, and even your diet.

1. Fertilize Your Plants Banana peels are a treasure trove of nutrients, including potassium, phosphorus, and calcium, which are essential for plant growth. You can chop them up and bury them in the soil around your plants to give them a natural nutrient boost. Alternatively, soak the peels in water for a few days and use the water as a nourishing liquid fertilizer.

2. Polish and Protect The inside of a banana peel can be used to polish and shine leather shoes and bags. Simply rub the inner white side of the peel on the surface of the leather, then buff it with a soft cloth. The natural oils in the peel moisturize the leather, keeping it looking new.

3. Natural Pest Repellant Banana peels can help keep aphids away from your garden. Place the peels just under the soil surface near affected plants. The pests dislike the peels and will tend to stay away.

4. Soothe Skin Irritations Banana peels can be used to soothe irritated skin. The peel contains esterified fatty acids which have been isolated and incorporated into various lotions. For a home remedy, rubbing a banana peel on a mosquito bite or on areas affected by poison ivy can help reduce itching and inflammation.

5. Improve Your Diet While not common in Western cuisine, banana peels are edible and packed with fiber and vitamins. You can cook them in various ways to make them palatable. For instance, try blending banana peel into your smoothies, or baking them into banana bread for added nutrients and fiber.

6. Teeth Whitening For a natural teeth whitening solution, gently rub the inside of a banana peel on your teeth for about two minutes every day. The manganese, magnesium, and potassium in the peel can help remove some stains from the enamel.

7. Remove Splinters The enzymes in a banana peel can help to dislodge splinters. Tape a piece of the peel over the splinter with the inner side touching the skin. Leave it on for 30 minutes before removing the splinter.

Conclusion Next time you enjoy a banana, hold onto the peel. With its various uses from garden care to skin treatments, banana peels are too valuable to throw away. Experiment with these tips, and you may find banana peels becoming a staple in your home for more than just their delicious fruit.

Apple compote is a wonderful way to preserve the natural sweetness and delightful texture of apples for months. By omitting sugar, you not only retain the genuine flavor of the apples but also make a healthier choice. Here’s how you can prepare this simple, sugar-free treat:

Ingredients:

  • Fresh apples (any variety that cooks well, such as Granny Smith or Fuji)
  • Water
  • Optional: Cinnamon, nutmeg, or vanilla extract for extra flavor

Instructions:

  1. Prepare Your Apples:
    • Start by washing the apples thoroughly.
    • Peel the apples if you prefer a smoother compote, or leave the skins on for added fiber.
    • Core and slice the apples into even pieces. This ensures they cook evenly.
  2. Cook the Apples:
    • Place the apple slices in a large pot.
    • Add just enough water to cover the bottom of the pot (about half an inch). This prevents the apples from sticking and helps them cook down without needing added sugar.
    • If you like, add a cinnamon stick, a sprinkle of nutmeg, or a few drops of vanilla extract. These natural flavors complement the apples beautifully without overpowering their natural sweetness.
  3. Simmer Gently:
    • Bring the water to a gentle simmer and cover the pot.
    • Let the apples cook for about 20-30 minutes, or until they are tender and have formed a thick, saucy consistency. Stir occasionally to ensure they don’t stick to the pot.
  4. Cool and Store:
    • Once the apples are cooked to your liking, remove them from heat.
    • If you used a cinnamon stick, remove it before storing.
    • Allow the compote to cool completely before transferring it to airtight containers.
  5. Preserve:
    • You can store your apple compote in the refrigerator for up to two weeks.
    • For longer storage, spoon the compote into freezer-safe bags or containers and freeze. Properly stored, the compote can last several months in the freezer.

Serving Suggestions: Enjoy your apple compote as a topping for oatmeal, yogurt, or pancakes. It also works wonderfully as a mix-in for baked goods or simply as a healthy dessert on its own.

Ingredients:

  • 4 large carrots, washed and peeled
  • 2 large apples, washed and cored
  • Fresh ginger (about a 1-inch piece), peeled (optional for added zing)
  • Fresh lemon juice (from 1/2 a lemon) to enhance flavor and preserve color

Equipment:

  • Juicer or blender
  • Fine mesh strainer (if using a blender)
  • Large bowl or pitcher

Instructions:

  1. Prepare the Ingredients:
    • If you’re using a juicer, simply cut the apples and carrots into pieces small enough to fit through the feed chute.
    • If you’re using a blender, chop the apples and carrots into small chunks to make blending easier.
  2. Extract the Juice:
    • For Juicer Users: Feed the carrots, apples, and ginger (if using) into the juicer. Alternate between the carrots and apples to maximize the amount of juice extracted.
    • For Blender Users: Add the chopped carrots, apples, and ginger to the blender along with 1/2 cup of water to help the blending process. Blend until smooth.
  3. Strain the Mixture:
    • If you used a blender, pour the mixture through a fine mesh strainer into a large bowl or pitcher. Use the back of a spoon to press down and extract as much juice as possible.
  4. Add Lemon Juice:
    • Stir in the fresh lemon juice. This not only adds a refreshing tang but also helps keep the juice vibrant and prevents oxidation.
  5. Serve or Store:
    • Serve the juice immediately over ice for the freshest taste.
    • If storing, pour the juice into an airtight container and refrigerate. Consume within 24 hours for best quality.

Health Benefits:

  • Apples are a great source of soluble fiber and vitamin C.
  • Carrots provide beta-carotene, fiber, vitamin K1, potassium, and antioxidants.
  • Ginger adds anti-inflammatory properties and can aid digestion.
  • Lemon not only enhances the flavor but also boosts the vitamin C content further, promoting immune health.

Enjoy your fresh and vibrant apple and carrot juice as a wonderful start to your day or as a refreshing afternoon pick-me-up!