Author

Barbara L.

Browsing

Burdock root, esteemed for its nutritional richness and medicinal properties, is gaining recognition for its positive impact on various bodily systems. Here’s an overview of its benefits, usage, potential side effects, and fun facts:

About Burdock Root: Originating from Europe and Asia, burdock root belongs to the Arctium genus of the Asteraceae family and is now cultivated globally. Its crisp texture and sweet yet slightly spicy taste make it a notable addition to the culinary world.

Key Benefits of Burdock Root:

  1. Hair Health: Promotes hair growth and combats hair loss.
  2. Blood Purification: Cleanses the blood of toxins and harmful microbes.
  3. Skin Benefits: Reduces inflammation and addresses skin conditions like acne and eczema.
  4. Cancer Prevention: Shows potential in inhibiting certain cancer types, particularly liver and pancreatic cancers.
  5. Organ Health & Immunity: Shields liver cells, benefits those with liver injuries, and boosts immunity.
  6. Women’s Health: Addresses menstrual irregularities and hormone imbalances.
  7. Kidney Health: Supports kidney function by aiding urine production and toxin removal.
  8. Digestive Health: Acts as a prebiotic, promoting beneficial gut bacteria growth and enhancing digestion.

Fun Facts:

  • Dandelion Connection: Dandelion, related to burdock, offers supplementary health benefits.
  • Unpeeled Intake: Consuming unpeeled burdock root maximizes antioxidant intake.
  • Related to Chicory: Burdock is related to chicory, a component in various teas. Exercise caution with chicory if prone to dehydration.

Potential Side Effects:

  • Allergies: Those allergic to Asteraceae family plants may react to burdock.
  • Pediatric Concerns: Limited data suggests caution when giving burdock to children.
  • Pregnancy Risks: May stimulate uterine contractions, posing risks during pregnancy.
  • Dehydration Issues: Being a diuretic, burdock root can worsen dehydration.

In Conclusion: While burdock root offers numerous health benefits, it’s crucial to be aware of potential risks and consult with a healthcare professional before extensive incorporation into one’s diet. With proper knowledge and caution, burdock root can be a valuable addition to a holistic approach to health and wellness.

Growing cucumbers in soil bags with minimal care is indeed a creative and efficient method for cultivating this popular vegetable. Here’s a summary of the process and its benefits:

Materials and Tools:

  • Soil bags
  • Plastic bottles
  • Cucumber seedlings
  • Kitchen waste (compostable)
  • Vitamin B1 pills
  • Dishwashing foam
  • Wood grid (for support)
  • Scissors
  • Cup

Method:

  1. Prepare Soil Bags: Fill soil bags with potting mix, ensuring they are tightly closed at the bottom.
  2. Insert Plastic Bottles: Cut plastic bottles to create funnel shapes and place them in each soil bag for water reservoirs and fertilizer.
  3. Position the Bottles: Secure the bottles in the soil bags with twine or zip ties, leaving the necks exposed.
  4. Create Planting Holes: Cut holes in the bags to plant cucumber seedlings around the plastic bottles.
  5. Plant Cucumber Seedlings: Plant cucumber seedlings in the prepared holes, ensuring they are well-anchored.
  6. Provide Adequate Drainage: Make drainage holes at the bottom of each soil bag to prevent waterlogging.
  7. Support System: Install a wood grid behind the bags to support the growing cucumber vines.
  8. Regular Maintenance: Water the plants regularly, provide sunlight, and add kitchen waste and vitamin B1 after two months.
  9. Dishwashing Foam: Occasionally apply a mixture of dishwashing foam and water to deter pests.
  10. Harvest Cucumbers: Harvest ripe cucumbers regularly to encourage continuous production.

Benefits:

    • Low Maintenance: Suitable for busy individuals due to minimal care requirements.
    • Space-Efficient: Optimizes garden space by using soil bags placed in rows.
    • Recycling: Utilizes recycled plastic bottles for water reservoirs and fertilizer.
    • Continuous Harvest: Provides a steady supply of cucumbers throughout the growing season.

Conclusion: Growing cucumbers in soil bags with minimal maintenance is a resourceful gardening technique that can yield impressive results. By following the outlined steps and incorporating recycled materials like plastic bottles and kitchen waste, you can enjoy a bountiful cucumber harvest with little effort. Give this method a try and experience the convenience and productivity it offers in home gardening.

Coffee grounds and vinegar may seem like an unusual combination, but they offer surprising benefits for skincare. Let’s delve into the advantages and how to harness them in a DIY beauty routine:

Coffee Grounds: The Skincare Treasure

  • Coffee grounds are not just waste; they are rich in skincare benefits.
  • They are known for their exfoliating properties, helping to remove dead skin cells and reveal a smoother complexion.
  • The caffeine in coffee grounds can stimulate blood flow and reduce inflammation, making them effective for reducing puffiness and dark circles under the eyes.

Apple Cider Vinegar: A Natural Tonic

  • Apple cider vinegar is a popular natural remedy known for its antibacterial and antifungal properties.
  • It can help balance the skin’s pH levels, making it an excellent toner for acne-prone or oily skin.
  • Its gentle exfoliating properties can help improve skin texture and tone over time.

The Coffee-Vinegar Fusion: A Skincare Marvel

  • When combined, coffee grounds and apple cider vinegar create a potent skincare solution that addresses multiple concerns.
  • This DIY blend is cost-effective, natural, and avoids the harsh chemicals often found in commercial skincare products.
  • The combination can help rejuvenate the skin, reduce inflammation, and improve overall skin health.

DIY Age-Defying Face Mask Recipe: Ingredients:

  • 1 tablespoon of coffee grounds
  • 1/2 tablespoon of apple cider vinegar
  • 1/2 teaspoon of nutritional yeast flakes
  • Optional: honey for added moisture

Instructions:

  1. In a bowl, mix together the coffee grounds, apple cider vinegar, and nutritional yeast flakes.
  2. Add honey if desired for additional hydration.
  3. Apply the mixture to your face or body, avoiding the eye area.
  4. Leave the mask on for about 10 minutes.
  5. Rinse off with water, pat dry, and follow up with a moisturizer.

Benefits of the Coffee-Vinegar Skincare Approach:

  • Provides a natural alternative to commercial skincare products.
  • Helps improve skin texture, tone, and overall appearance.
  • Can address various skincare concerns, including acne, inflammation, and signs of aging.
  • Promotes eco-consciousness by repurposing kitchen ingredients for skincare.

Embracing Natural Skincare:

  • Incorporating DIY skincare recipes like the coffee-vinegar face mask into your routine can lead to healthier, more radiant skin.
  • Experimenting with natural ingredients allows you to customize your skincare regimen to suit your unique needs.
  • By embracing natural skincare approaches, you not only support your skin’s health but also contribute to a more sustainable beauty industry.

In conclusion, the coffee-vinegar skincare fusion offers a simple yet effective way to enhance your beauty routine using natural ingredients. Give it a try and experience the transformative benefits for yourself!

Growing mushrooms at home using recycled 5L plastic bottles is a rewarding and eco-friendly endeavor that allows you to enjoy fresh mushrooms at a fraction of the cost. Let’s summarize the key steps involved in this innovative cultivation method:

Materials and Equipment Needed:

  • Recycled 5L plastic bottles
  • Straw
  • Mushroom embryo (spores or mycelium)
  • Plastic wrap
  • High-pressure watering can
  • Soil and substrate

Step-by-Step Guide:

  1. Preparing the Bottles:
    • Clean and sanitize the plastic bottles.
    • Cut off the top section of each bottle, leaving the bottom part intact to serve as the container for mushrooms.
  2. Preparing the Straw:
    • Boil the straw to kill contaminants and soften it.
    • Allow the straw to cool and drain excess water.
  3. Creating Air Holes:
    • Use a drill or heated metal rod to create small holes all over the plastic bottles for air exchange.
  4. Layering the Bottles:
    • Layer the bottom of the bottles with boiled straw.
    • Introduce mushroom embryo (spores or mycelium) onto the straw bed.
    • Layer more straw on top, creating a mix of straw and mushroom embryo within each bottle.
  5. Covering with Plastic Wrap:
    • Place plastic wrap over the top of each bottle to maintain humidity levels and promote mycelium growth.
  6. Initial Watering:
    • Use a high-pressure watering can to moisten the straw and mushroom embryo.
  7. Observing Growth:
    • Monitor the bottles over the next 12 days for signs of mycelium growth.
    • Remove plastic wrap carefully once growth is observed.
  8. Second Round of Watering:
    • Water the bottles regularly through the top opening to keep the growing medium moist.
  9. Adding Soil and Substrate:
    • Introduce a layer of soil and substrate to the top of each bottle around 12-15 days after removing the plastic wrap.
  10. Continued Watering and Growth:
  • Water the bottles as mushrooms grow, maintaining consistent humidity and moisture levels.
  • Within 45 days, fully grown mushrooms should be ready for harvest.

Conclusion: Growing mushrooms at home in recycled plastic bottles is an efficient and sustainable method that yields fresh and flavorful mushrooms. By following these simple steps, you can embark on a journey of homegrown culinary delight while minimizing waste and environmental impact. Enjoy the fruits of your labor as you harvest your own delicious mushrooms right from your kitchen!

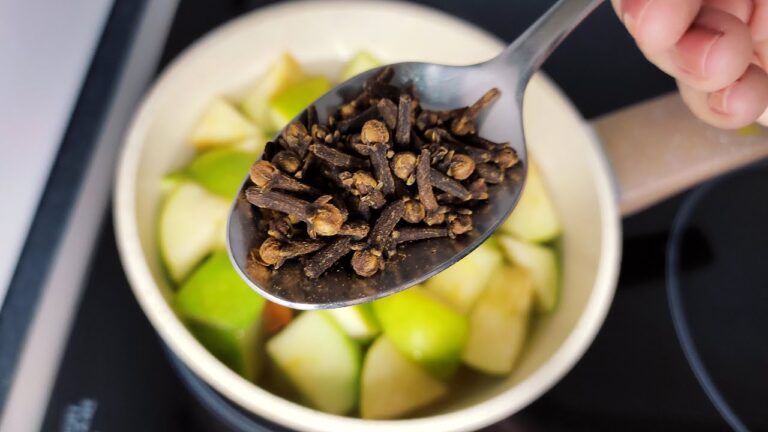
Repurposing apple peels into homemade apple cider vinegar is not only a brilliant way to minimize food waste but also a rewarding endeavor that yields a delicious and nutritious product. Let’s summarize the process and benefits:

Unlocking the Potential of Apple Peels

1. Nutrient-Rich Apple Peels:

  • Apple peels contain a plethora of nutrients and beneficial compounds, making them a valuable addition to your diet.
  • They are packed with fiber, antioxidants, vitamins, and minerals, offering various health benefits.

2. Repurposing Apple Peels into Apple Cider Vinegar:

  • Instead of discarding apple peels, transform them into homemade apple cider vinegar.
  • Follow these simple steps:
    • Gather apple peels or any other apple leftovers.
    • Sterilize a glass jar and fill it halfway with the peels.
    • Prepare a mixture of lukewarm water and honey, adding a tablespoon of honey for each liter of water.
    • Pour the water and honey mixture over the peels, ensuring they are fully submerged.
    • Cover the jar with a cloth and secure it with a rubber band.
    • Store the jar in a warm place, ideally around 20 degrees Celsius, for approximately 4 weeks.
    • Check the jar weekly and remove any white patina that forms on the surface.
    • After 4 weeks, strain the liquid and transfer the homemade apple cider vinegar to glass bottles for storage in the refrigerator.

3. Benefits of Homemade Apple Cider Vinegar:

  • Homemade apple cider vinegar retains the natural goodness and flavor of the apples, offering a superior taste compared to store-bought versions.
  • It contains beneficial enzymes and probiotics that support digestion and gut health.
  • Apple cider vinegar is versatile and can be used for various culinary purposes, including salad dressings, marinades, and sauces.
  • Incorporating homemade apple cider vinegar into your diet may promote overall health and well-being.

Conclusion:

  • Don’t underestimate the value of apple peels; repurpose them into homemade apple cider vinegar to minimize food waste and reap the benefits of this nutritious elixir. Enjoy the delightful flavors and health-enhancing properties of homemade apple cider vinegar in your culinary creations.

These are excellent natural methods for cleaning and shining tiles, passed down from generations and proven effective. Here’s a refined version of your guide:

Revive Your Tiles with Grandma’s Natural Cleaning Secrets

If your tiles have lost their luster and shine, fret not! With these simple yet effective methods using natural ingredients, you can bring them back to life without breaking a sweat or the bank.

1. Linseed Oil for Luxurious Shine

Terracotta, cement, and ceramic tiles can regain their lost shine with the help of humble linseed oil. Here’s how:

  • Application: Apply a few drops of linseed oil on a clean cloth.
  • Gentle Rubbing: Gently rub the oil onto the tiles, ensuring not to use excessive amounts to avoid slippery floors.
  • Absorption: Let the oil soak into the tiles and dry naturally. Repeat if necessary for an impeccable shine.

2. Potato Cooking Water for Grease-Busting Power

Harness the power of potato cooking water to banish grease and dirt from your tiles:

  • Reuse: Instead of discarding potato cooking water, save it for your cleaning endeavors.
  • Starch Action: The natural starch in potato water absorbs grease, leaving tiles spotless and shiny.
  • Regular Use: Employ this method monthly to maintain the pristine appearance of your tiles.

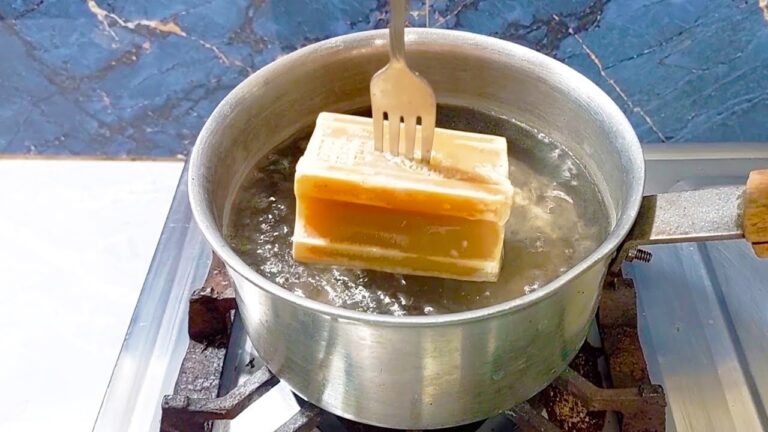
3. Black Soap for a Natural Deep Clean

Black soap, a versatile and potent cleaning agent, is your ally in achieving immaculate tiles:

  • Preparation: Mix black soap with water in a bucket, ensuring proper dilution.
  • Mopping Mastery: Gently mop the floors with the black soap solution, allowing its degreasing and disinfectant properties to work their magic.
  • Admire the Shine: Revel in the newfound cleanliness and shine bestowed upon your floors.

4. White Vinegar for Stubborn Stain Removal

Conquer stubborn stains on your tiles with the power of white vinegar:

  • Solution Preparation: Mix equal parts of white vinegar and water in a spray bottle.
  • Application: Spray the solution onto the stained areas and let it sit for a few minutes.
  • Scrub and Rinse: Use a brush or sponge to scrub the stains, then rinse with water for gleaming, stain-free tiles.

Bid farewell to expensive chemical cleaners and embrace these natural, time-tested solutions for pristine and radiant tiles. Your floors will thank you with their renewed brilliance and vitality!

Cardamom, often hailed as the “Queen of Spices,” is a prized aromatic spice cherished in culinary delights and traditional remedies across the globe. Originating from the Indian subcontinent, this tropical gem captivates with its rich fragrance and versatile flavor profile. If you’re eager to nurture your own cardamom plant from seed and ensure its flourishing growth, this guide is tailor-made for you.

1. Embarking on Your Cardamom Journey:

  • Select Fresh Seeds: Begin your journey with fresh, viable seeds. Opt for plump seeds devoid of any signs of mold or damage.
  • Seed Soaking Ritual: Prior to planting, immerse the cardamom seeds in water for approximately 12 hours. This gentle soak softens the seed coat, facilitating the germination process.

2. Planting the Seeds of Promise:

  • Soil Preparation: Craft an optimal environment for your cardamom seeds by blending rich, loamy soil with excellent drainage. A concoction of compost, sandy soil, and a touch of perlite or vermiculite sets the stage for success.
  • Planting Depth: Nestle the seeds approximately 1 inch deep into the soil, ensuring ample contact for germination.
  • Mindful Spacing: Allow generous spacing of at least 2 feet between seeds or seedlings, as cardamom plants possess a penchant for grandeur.
  • Nourishing Waters: Following planting, administer a gentle yet thorough watering session to kickstart the growth journey.

3. Nurturing the Green Elegance:

  • Sunlight Serenade: Shower your cardamom plants with indirect sunlight or partial shade, mimicking their natural habitat beneath the verdant canopies of towering trees.
  • Thermal Comfort: Maintain a cozy temperature range of 22°C to 32°C, ensuring optimal growth conditions.
  • Hydration Harmony: Embrace the plant’s affinity for humidity by keeping the soil consistently moist, steering clear of waterlogged conditions to avert root rot.
  • Feeding Ritual: Fuel the growth spurt with a balanced liquid fertilizer administered every three weeks during the growing season.

4. Tender Loving Care for Green Cardamom:

  • Pruning Poetry: As your plant flourishes, embark on a pruning journey to trim away weak or unhealthy shoots, nurturing robust growth.
  • Pest Patrol: Stay vigilant against pesky invaders like aphids and spider mites. Employ the gentle efficacy of neem oil as a natural remedy to combat these unwelcome guests.
  • Harvesting Symphony: Tune into the plant’s cues, harvesting cardamom pods when they adopt a pale green or yellowish-green hue, ensuring a bountiful yield before they split open.

5. Parting Wisdom and Final Flourishes:

  • Repotting Rendezvous: Should you opt for container cultivation, consider repotting as your plant outgrows its current abode.
  • Mulching Melody: Serenade your cardamom plant with a protective layer of organic mulch, fostering moisture retention and thwarting weed encroachment.
  • Embrace Patience: Remember, cardamom is a slow-blooming beauty, necessitating patience for the fruition of flowering and subsequent pod production.

In essence, while nurturing cardamom from seed may demand a sprinkle of patience, the rewards are a savory symphony for the senses. With diligent care and conducive conditions, relish the pleasure of harvesting your own luscious cardamom pods, infusing your culinary endeavors with the vibrant essence and unparalleled aroma that only homegrown cardamom can provide!

In the heart of your kitchen lies a delightful secret, where simple ingredients transform into something extraordinary. Picture this: a bowl of yogurt metamorphosing into rich, creamy butter with just a touch of culinary magic! Yes, it’s true—no more last-minute dashes to the store for butter; all you need is yogurt. Let’s embark on this culinary adventure, adding a personal touch to your meals and a sense of satisfaction to your cooking repertoire.

The Journey of Transformation

The path from yogurt to butter may seem like a feat of kitchen wizardry, but it’s rooted in a beautifully simple process. This method not only yields a delectable end product but also grants the joy of crafting butter with your own hands, using just one humble ingredient. Let’s unravel the magic.

Ingredients You’ll Need

  • Yogurt: The shining star of our culinary alchemy. Opt for full-fat, plain yogurt for optimal results. For an extra touch of adventure, consider starting with homemade yogurt.

The Transformation Process

  1. Strain to Obtain Greek Yogurt: Kick off by straining your plain yogurt to eliminate excess whey. This can be achieved using a cheesecloth or a fine mesh strainer. Allow the yogurt to strain overnight in the refrigerator. The outcome? A luxuriously thick Greek yogurt, laying the groundwork for our butter.
  2. Churn the Yogurt: Transfer the strained Greek yogurt into a spacious bowl. Now, let’s get churning. You can employ a hand mixer, a food processor, or even a trusty stand mixer for this task. Begin whipping the yogurt on a medium to high setting. As you whip away, watch as the yogurt gradually separates into butter and buttermilk.
  3. Separate the Butter: Once the separation becomes apparent, cease churning. You’ll observe tiny clumps of butter forming amidst the buttermilk. Use a spatula to gather these buttery clumps and transfer them onto a clean cheesecloth or a fine mesh strainer to drain off the remaining buttermilk.
  4. Rinse and Shape: Rinse the butter under cold water to eliminate any residual buttermilk, ensuring an extended shelf life. Then, mold the butter to your liking. Some prefer rolling it into parchment paper-wrapped logs, while others opt for shaping it into blocks.

Voilà! Homemade Butter

Behold—a velvety, homemade butter born from a humble bowl of yogurt. This butter isn’t just a testament to your culinary prowess but also a healthier alternative, devoid of the preservatives commonly found in store-bought varieties.

Embracing the Art of Homemade Goodness

Crafting your own butter pays homage to the era of self-sufficiency, bringing a slice of culinary heritage into your contemporary kitchen. It’s about pausing to relish the process of creating something from scratch. Spread it atop your morning toast, drizzle it over a medley of steamed vegetables, or incorporate it into your favorite recipes. Each indulgence promises not only a creamy, luscious flavor but also the gratification of having crafted it yourself.

So, the next time you reach for that tub of yogurt, envision the boundless potential it holds. With a dash of effort, you can metamorphose it into butter, elevating your meals to new heights. Enjoy the journey of creation and savor the delectable rewards that ensue.

Throughout history, humanity has turned to nature for sustenance and healing, finding solace in the Earth’s bountiful offerings. Among these gifts lies Broadleaf Plantain, scientifically known as Plantago major. This resilient medicinal herb, abundant in various regions, holds ancient roots in traditional medicine, firmly establishing itself as a cornerstone of natural remedies.

Distinguishing Features

Broadleaf Plantain, while similar to Ribwort Plantain (Plantago lanceolata), stands out with its distinct broad leaves. This versatile herb serves as the foundation for beneficial infusions, tinctures, and syrups, boasting a myriad of therapeutic attributes waiting to be explored.

Ancient Wisdom, Modern Application

Ancient civilizations revered Plantain as a primary natural remedy, giving rise to the adage, “the path to Plantain is swifter than the journey to the doctor.” While Plantain should not replace expert medical advice, its undeniable therapeutic potential continues to garner attention. Let’s delve into its diverse benefits:

Nature’s Pharmacy

Broadleaf Plantain is a treasure trove of health benefits, containing flavonoids, iridoids, mucilage, tannins, and essential minerals that synergistically enhance its healing properties.

  • Respiratory Support: Calms respiratory issues, aids in mucus removal, and promotes easier breathing.
  • Mucous Membrane Fortification: Tonic properties strengthen mucous membranes, crucial for respiratory and gastrointestinal health.
  • Muscle Relief: Alleviates spasms, cramps, and congestion.
  • Topical Healing: Accelerates wound healing and aids in stopping bleeding.
  • Digestive Aid: Eases symptoms of digestive disorders and reduces gut inflammation.
  • Skin Care: Effective against various skin conditions and aids in skin tightening.
  • Antimicrobial Properties: Fights infections and promotes oral health.
  • Pain Management: Acts as a natural analgesic for various ailments.
  • Eye Health: Soothes eye infections and irritation.
  • Heart Health: Supports cholesterol management and cardiovascular well-being.
  • Immune Boost: Strengthens the body’s defenses against illness.
  • Antioxidant Support: Combats oxidative stress and reduces chronic disease risk.
  • Blood Sugar Regulation: Beneficial for managing diabetes.

Harnessing Plantain’s Healing Potential

  • Tincture: Consume 3-5 ml of Plantain tincture thrice daily for ailments like catarrh or digestive disturbances.
  • Juice: Drink therapeutic juice made from dehydrated Plantain leaves to treat conditions like cystitis, diarrhea, and respiratory infections.
  • Infusion: Gargle Plantain leaf infusion for relief from excessive mucus or a sore throat.
  • Syrup: Prepare a soothing syrup from Plantain infusion to ease throat inflammation and cough.
  • Poultices: Apply mashed fresh Plantain leaves as poultices for wounds or insect bites.

Armed with this knowledge, when encountering Broadleaf Plantain in the wild, appreciate its potency. Nature offers Broadleaf Plantain as a steadfast ally in our journey towards holistic well-being.

Milk has long been praised for its nutrient-rich composition, yet recent discourse has sparked questions about its place in our diets. Let’s sift through the facts and myths to determine whether milk is a worthy addition to your table.

Nutrient Powerhouse

Milk boasts a treasure trove of essential nutrients, including calcium, vitamin D, phosphorus, potassium, and high-quality proteins. These nutrients are crucial for bone strength, muscle maintenance, and overall health, making milk a convenient source of multiple vitamins and minerals.

Lactose Intolerance: A Digestive Dilemma

For some, lactose intolerance poses a challenge. Difficulty digesting lactose, the sugar in milk, can lead to discomfort and bloating. Lactose-free options or plant-based alternatives offer relief for those with sensitive stomachs.

Navigating Fat Content

The fat content in milk has sparked debate, particularly regarding saturated fats and their impact on heart health. Opting for skimmed or low-fat milk can provide the benefits of milk without excessive fat intake, catering to various health needs and dietary preferences.

Beyond Calcium

While milk is celebrated for its calcium content, it’s not the sole source. Leafy greens, almonds, and fortified foods offer alternative avenues to meet your calcium needs. Diversifying calcium sources ensures comprehensive bone health support.

Personal Preference Prevails

Ultimately, whether milk is beneficial or detrimental hinges on individual health, dietary requirements, and preferences. For those who tolerate milk well and enjoy its taste, it can be a valuable addition to a balanced diet. However, if milk doesn’t agree with you, numerous alternatives and nutrient sources are available. Listening to your body and seeking guidance from a healthcare professional can help you make informed choices for optimal nutrition.