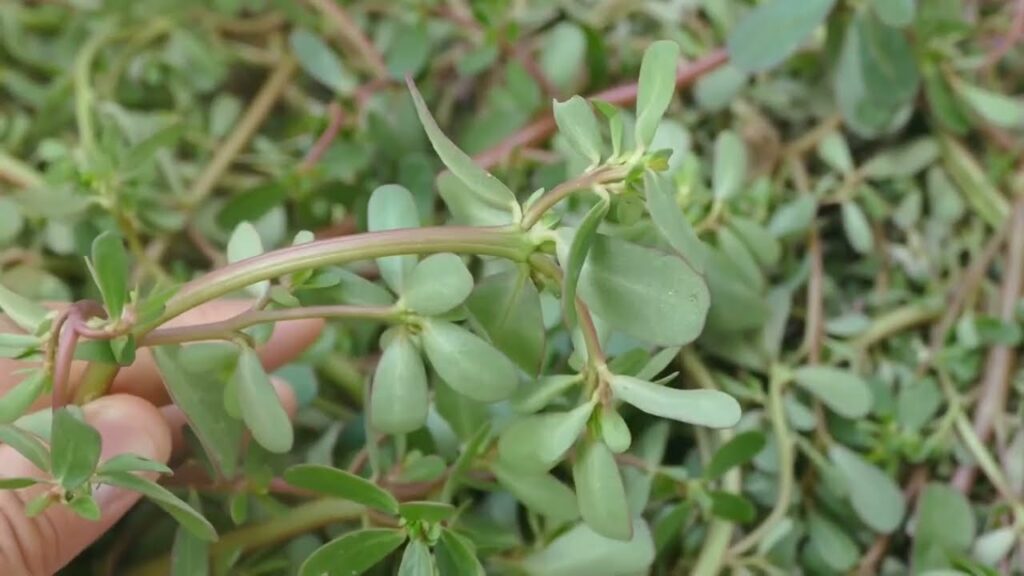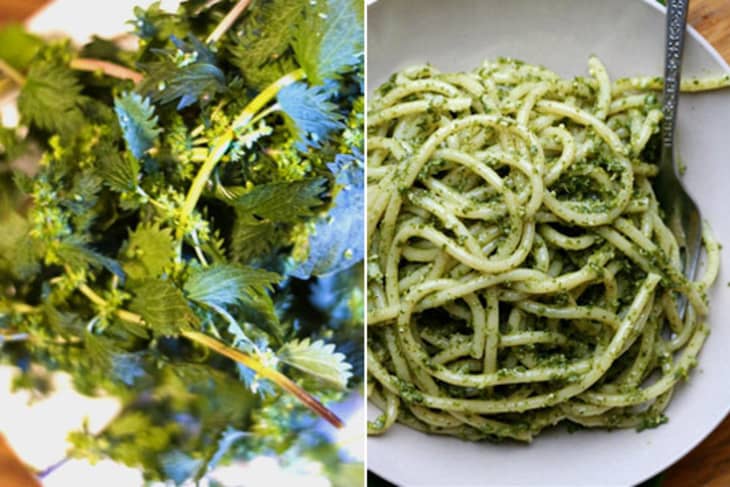
Exploring international cuisine can be a delightful journey, especially when it introduces you to new ways to use familiar ingredients. Nettles, often overlooked, are a staple in various cultures for their health benefits and versatility in cooking. Inspired by neighbors from Turkey, I’ve learned a delicious and nutritious way to prepare nettles that might just change the way you think about this humble green.
The Benefits of Nettles:
Nettles are more than just a common weed; they are rich in vitamins A, C, and K, as well as iron, potassium, manganese, and calcium. These nutrients make nettles excellent for supporting bone health and boosting the immune system. They also have anti-inflammatory properties, making them a great addition to a healthy diet.
Turkish-Style Nettles Recipe:
Cooking nettles Turkish-style involves transforming them into a vibrant, tasty dish that pairs beautifully with a variety of meals. Here’s how to make it:
- Ingredients:
- 500g fresh nettle leaves
- 2 tablespoons olive oil
- 1 onion, finely chopped
- 2 cloves garlic, minced
- 1/2 cup rice, washed and drained
- 1 teaspoon paprika
- 1 teaspoon dried mint
- Salt and pepper to taste
- 2 cups vegetable broth or water
- Lemon slices for serving
- Preparation Steps:
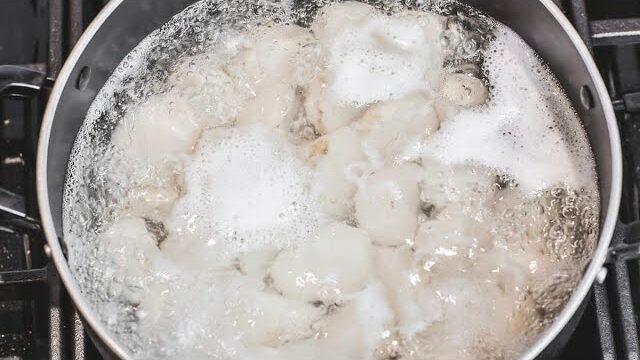
- Prepare the Nettles: Wearing gloves, rinse the nettle leaves thoroughly and blanch them in boiling water for 2 minutes to remove the sting. Drain and chop roughly.
- Cook the Base: Heat the olive oil in a pan over medium heat. Add the chopped onion and garlic, sautéing until they are translucent.
- Add the Nettles and Rice: To the pan, add the chopped nettles, rice, paprika, dried mint, salt, and pepper. Stir well to combine all the ingredients.
- Simmer: Pour in the vegetable broth or water. Bring the mixture to a boil, then reduce the heat and cover. Let it simmer for about 20 minutes, or until the rice is tender and most of the liquid has been absorbed.
- Serve: Check the seasoning and adjust if necessary. Serve hot, accompanied by fresh lemon slices to enhance the flavors.
Tips for Enjoyment:
- Complement the Dish: This dish can be enjoyed as a side with grilled meats or as a hearty vegetarian main course.
- Health Benefits: Regularly including nettles in your diet can contribute to improved overall health due to their high nutrient content.
- Cultural Appreciation: Cooking and sharing this dish can be a wonderful way to appreciate and discuss Turkish culinary traditions.
Embracing the culinary traditions of Turkey with nettles not only broadens your cooking repertoire but also adds a nutritious and delicious component to your meals. Give this recipe a try and enjoy the wholesome and hearty flavors it brings to your table!