Author

Barbara L.

Browsing

When life gives you oranges, don’t just enjoy the fruit—save the peels too! Orange peels are packed with flavor and nutrients, and turning them into a delightful sugar-free jam is a creative and delicious way to reduce food waste. Here’s how you can transform those vibrant peels into a scrumptious, sugar-free treat that will liven up your meals and snacks.

Benefits of Orange Peel

Orange peels are not only fragrant and flavorful but also boast several health benefits. They are rich in fiber, vitamins, and antioxidants, which can aid digestion and support overall health. By incorporating orange peel jam into your diet, you’re not just enhancing flavors but also consuming nutrients that support your wellbeing.

Ingredients Needed

  • Peels from 4 large oranges
  • 1 cup of water
  • 1/2 cup of a sugar substitute (like erythritol, stevia, or monk fruit sweetener)
  • Juice of 1 lemon
  • Optional: Spices such as cinnamon or ginger for extra flavor

Step-by-Step Guide to Making Sugar-Free Orange Peel Jam

  1. Prepare the Orange Peels: Wash the oranges thoroughly. Peel them and try to remove as much of the white pith as possible, as it can be bitter. Slice the peels into thin strips or small pieces, depending on your texture preference.
  2. Blanch the Peels: To remove any remaining bitterness and soften the peels, blanch them in boiling water for about 10 minutes. Drain and rinse under cold water.
  3. Cook the Peels: In a saucepan, combine the blanched peels, water, sugar substitute, and lemon juice. Bring the mixture to a boil, then reduce the heat and let it simmer. Stir occasionally to prevent sticking and ensure even cooking. If you like, add a pinch of cinnamon or ginger for an aromatic twist.
  4. Simmer Until Thickened: Continue to simmer the mixture until it thickens and the peels become translucent. This process might take about 25-30 minutes. As the water evaporates, the natural pectin in the orange peels will help the jam set.
  5. Cool and Store: Once the jam reaches a thick consistency, remove it from the heat and let it cool. Transfer the jam to a clean jar and refrigerate. The jam will continue to thicken as it cools.

Serving Suggestions

This versatile orange peel jam can be used in various ways. Spread it on toast, swirl it into yogurt, or use it as a topping for oatmeal. It also pairs beautifully with cheese and crackers for a gourmet snack.

Conclusion

Making your own sugar-free orange peel jam is an enjoyable and rewarding process that not only saves your orange peels from the trash but also gives you a uniquely tasty condiment. It’s a fabulous way to add zest and sweetness to your diet without the added sugar, making it a healthy choice for everyone, especially those monitoring their sugar intake. Try this simple recipe and discover the delicious potential of orange peels!


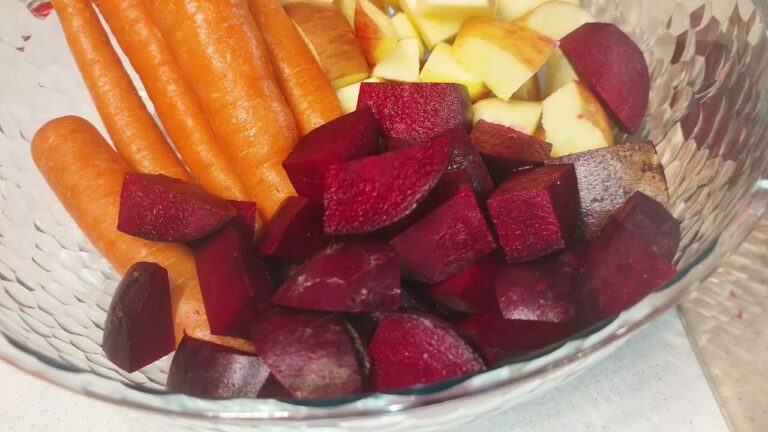
Are you looking for a delightful new way to enjoy carrots? Why not try making your own carrot milk at home? This easy, three-ingredient recipe transforms simple carrots into a creamy, nutritious drink that’s perfect for any time of day. Not only is it delicious, but making your own carrot milk means you know exactly what’s going into your beverage—no additives or preservatives, just pure goodness.

Ingredients

  • 2 large carrots
  • 4 cups of milk (choose your favorite, whether dairy or a plant-based alternative like almond or oat milk)
  • 1 tablespoon of honey or another sweetener of your choice (optional)

Instructions

  1. Prepare the Carrots: Start by thoroughly washing the carrots. Peel them to remove any dirt or pesticides, and then chop them into small pieces. This will help them cook faster and infuse more flavor into the milk.
  2. Cook the Carrots: In a medium saucepan, bring the milk to a gentle boil. Add the chopped carrots to the boiling milk. Reduce the heat to a simmer and let the carrots cook until they are tender, about 10-15 minutes. The milk will take on a slight orange hue, and the carrots will soften significantly.
  3. Sweeten the Mixture: While your carrots and milk are simmering, add a tablespoon of honey or your chosen sweetener. This step is optional and can be adjusted according to your taste preferences. Some might prefer the mild, natural sweetness from the carrots alone.
  4. Blend and Strain: Allow the mixture to cool slightly before transferring it to a blender. Blend the mixture until it’s completely smooth. Then, strain it through a fine mesh sieve or cheesecloth to ensure the liquid is smooth and creamy.
  5. Serve or Store: You can enjoy the carrot milk warm, or let it chill in the refrigerator to serve cold. It makes for a refreshing drink on its own or can be used as a base in smoothies or other recipes.

Health Benefits

Carrot milk is not only tasty but also packed with nutrients. Carrots are a great source of beta-carotene, which is converted into vitamin A in the body. This vitamin is crucial for good vision, skin health, and immune function. Combined with the protein and calcium from milk, this drink is both nourishing and satisfying.

Conclusion

Homemade carrot milk is a simple and delightful treat that’s easy to make and full of health benefits. With just three ingredients, you can create a delicious drink that offers a unique twist on traditional milk. Whether you enjoy it by itself, over cereal, or as a base for smoothies, carrot milk is a versatile addition to your dietary repertoire. Give this recipe a try and discover the wonderful flavor of carrots in a whole new way!


When it comes to finding age-old remedies and recipes, sometimes the answers lie in our own kitchen. Surprisingly, some of the simplest ingredients can hold the key to unlocking hidden benefits. One such combination that has been passed down through generations involves just two common ingredients: rice and yeast. Prepare to be amazed by the magical powers these two ingredients possess!

The Power of Rice and Yeast

Rice and yeast are staples in various cuisines around the world. However, their uses extend far beyond the culinary realm. When these two ingredients come together, they create a powerful mixture that offers a multitude of health benefits and practical uses.

Benefits and Uses

Fermented Rice Water for Hair Care

If you want to nourish your hair and promote growth, rice and yeast are your secret weapons. By fermenting rice water with the addition of yeast, you can give your hair follicles the boost they need. This magical mixture is known to strengthen and add silky smoothness to your hair. The fermentation process enriches the water with extra vitamins and minerals, ensuring your hair stays vibrant and healthy.

Natural Skin Care

Who needs expensive beauty products when you have rice and yeast? Applying a mixture of these two ingredients to your skin can work wonders. The yeast provides a generous dose of antioxidants and B-vitamins, helping to reduce signs of aging and improve your skin tone. Treat yourself to a rejuvenating facial mask made from this magical mixture, and watch your skin come alive with a youthful glow.

Digestive Health

Good digestion is crucial for overall wellness, and rice and yeast are here to help. The probiotic properties of yeast contribute to maintaining a healthy gut, while rice provides essential nutrients and energy without weighing you down. By incorporating small amounts of edible yeast into your cooked rice, you can support your digestive system and enjoy a probiotic boost.

How to Prepare and Use

For Hair Care

  1. Soak rice in water for about 30 minutes, then strain and keep the water.
  2. Add a small amount of yeast to the rice water and let it ferment overnight.
  3. After your regular shampoo routine, use this fermented rice water as a final rinse.

For Skin Care

  1. Mix ground rice with a little yeast and water to form a paste.
  2. Apply the paste to your face as a mask.
  3. Leave it on for 10-15 minutes, then rinse off with warm water.

For Digestive Health

Incorporate small amounts of edible yeast into your cooked rice and consume it directly. This simple addition will give your digestive system a probiotic boost.

Conclusion

While the combination of rice and yeast may seem humble, its benefits are anything but ordinary. These natural ingredients, often recommended by wise grandmothers, have stood the test of time for a reason. By integrating this traditional wisdom into your routine, you can enjoy the wonderful health and beauty benefits that rice and yeast have to offer. Give it a try and experience the magic for yourself!

Introduction

When it comes to natural health remedies, the combination of cloves and lemon stands out for its potential benefits, especially in the realm of weight management. Both ingredients are celebrated not only for their distinctive flavors but also for their health-promoting properties. This article delves into how integrating cloves and lemon into your daily routine can help support a healthy lifestyle.

The Health Benefits of Cloves

Cloves are a treasure trove of antioxidants, which play a critical role in protecting our cells from damage by free radicals. These tiny spices are also packed with fiber, vitamins, and minerals that aid in promoting digestive health and boosting metabolism. The active compound in cloves, eugenol, has been studied for its anti-inflammatory and pain-relieving properties, making it a beneficial addition to any diet.

Adding cloves to your diet can be as simple as incorporating them into your meals. They can be ground and added to spice mixes, teas, or even baked goods, providing a warm, distinctive flavor and a host of health benefits.

Lemon’s Role in Weight Management

Lemon is another fantastic ally in the journey towards a healthier weight. Its high vitamin C content and antioxidants are essential for health and vitality. Lemon’s natural acidity helps improve digestion and can kickstart your metabolism in the morning. Additionally, the zest and juice of a lemon add refreshing flavor without extra calories, making it a great addition to drinks and dishes.

One of the simplest ways to incorporate lemon into your diet is by starting your day with a glass of warm lemon water. This not only hydrates but also helps cleanse the digestive system, preparing it for the day ahead.

Combining Cloves and Lemon

Combining cloves and lemon not only enhances their flavors but also boosts their health benefits. A warm beverage made from steeping ground cloves and a slice of lemon in hot water can be a soothing and healthful drink. This concoction can aid digestion, reduce inflammation, and even help in managing weight by improving metabolic processes.

Conclusion

While cloves and lemon are excellent for supporting weight management, it’s important to include them as part of a balanced diet accompanied by regular physical activity. These natural ingredients offer a range of health benefits that go beyond weight loss, from improving digestive health to boosting immunity. By making these small additions to your daily routine, you can enjoy the flavors and reap the health benefits they bring.

Introduction

Keeping your home clean and fresh doesn’t always require harsh chemicals or expensive products. Sometimes, simple household items can do wonders. One surprising yet effective cleaning combination is aspirin and hot water. This article explores how you can use these two common items to achieve a sparkling clean toilet and other areas of your home.

The Magic of Aspirin

Aspirin, typically known for its pain-relieving properties, also has excellent cleaning capabilities due to its mild acidity. The active ingredient, acetylsalicylic acid, can help break down stubborn stains and buildup. It’s particularly effective in tackling hard water stains and mineral deposits that can accumulate in toilets and sinks over time.

Using aspirin for cleaning is straightforward and environmentally friendly. It involves minimal scrubbing, making it an appealing option for keeping your bathroom clean.

How to Use Aspirin and Hot Water for Cleaning

To harness the cleaning power of aspirin, you will need a few uncoated aspirin tablets and hot water. Here’s a simple method to clean your toilet:

  1. Dissolve the Aspirin: Start by dissolving about 4-5 aspirin tablets in a small bowl of hot water. Make sure the water is hot to ensure the tablets dissolve completely.
  2. Apply to the Toilet: Pour the dissolved aspirin solution into the toilet bowl. Make sure to distribute it evenly around the bowl, especially targeting any noticeable stains or rings.
  3. Let It Sit: Allow the solution to sit for 30 minutes to an hour. This waiting period gives the aspirin ample time to break down the stains.
  4. Scrub and Flush: After the soaking time, use a toilet brush to scrub the bowl thoroughly. The stains should come off easily with minimal effort. Finally, flush the toilet to rinse away the residue.

Other Uses of Aspirin in Cleaning

Aside from toilets, aspirin can be used to clean other areas of your home. It’s effective in removing soap scum from tiles and glass shower doors. You can also use it to clean vases and teacups stained by hard water and tea.

Conclusion

Aspirin and hot water offer a safe, effective, and eco-friendly way to keep your home clean, especially for those looking for gentle and straightforward cleaning solutions. By incorporating these simple items into your cleaning routine, you can maintain a fresh and inviting home without the need for harsh chemicals. Give it a try and enjoy the sparkling results!

Imagine a drink so powerful in its nutritional prowess that it’s credited with supporting the vitality and health of a 107-year-old. This isn’t just any beverage; it’s a blend of nature’s finest—spinach, apple, tomato, lemon, and ginger, all mixed with 300ml of water. Each sip is packed with antioxidants, vitamins, and minerals. Let’s explore how to make this anti-aging elixir and understand why it’s considered a fountain of youth.

The Powerhouse Ingredients

  • Spinach: Loaded with iron, folate, and vitamins A and C, spinach is a cornerstone for maintaining strong, healthy cells.
  • Apple: High in fiber and vitamin C, apples are great for the digestive system and for maintaining heart health.
  • Tomato: Rich in lycopene, tomatoes are excellent for skin health and cardiovascular support.
  • Lemon: This citrus fruit not only enhances flavor but also boosts immunity and detoxifies the body thanks to its vitamin C content.
  • Ginger: Known for its anti-inflammatory properties, ginger can soothe the digestive system and bolster immune defenses.

How to Prepare the Anti-Aging Drink

Ingredients:

  • A handful of fresh spinach
  • 1 medium apple, cored and sliced
  • 1 ripe tomato, quartered
  • Juice of 1 lemon
  • 1 inch of ginger root, peeled
  • 300ml of filtered water

Instructions:

  1. Prepare Your Ingredients: Wash the spinach, apple, and tomato thoroughly. Peel the ginger root and slice it finely to maximize its flavor and health benefits.
  2. Blend Together: In a blender, combine the spinach, apple, tomato, and ginger. Add the lemon juice and 300ml of water. Blend until smooth. If you prefer a thinner consistency, you can add more water.
  3. Strain (Optional): For a smoother drink, strain the mixture using a fine mesh sieve or cheesecloth to remove pulp and excess fibers.
  4. Serve Fresh: Enjoy this drink preferably in the morning to kickstart your day with a burst of energy and nutrients.

The Benefits of Daily Consumption

The combination of these ingredients provides a synergistic effect that promotes overall health and well-being:

  • Skin Health: The vitamins and antioxidants in this drink help combat the signs of aging by nourishing the skin from within.
  • Digestive Health: Fiber from apples and the soothing properties of ginger make this drink a great choice for digestive wellness.
  • Immune Support: With the abundance of vitamin C and other antioxidants, this beverage can help strengthen the immune system.

Final Thoughts

This anti-aging elixir is more than just a drink; it’s a lifestyle choice embraced by someone who has lived beyond a century. Incorporating this drink into your daily routine could not only enhance your day-to-day health but also inspire a holistic approach to aging. Here’s to many more years of vitality and wellness!

Discover the incredible potency of a natural concoction that’s making waves for its health benefits. This duo of ginger and aloe vera isn’t just your ordinary health booster; it’s a formidable force in the natural health community, known for being 150 times stronger than the classic combo of garlic and lemon in battling bacteria. Let’s dive into how you can make this “Natural Bomb” and why it’s revered as a bacteria destroyer.

The Potent Ingredients

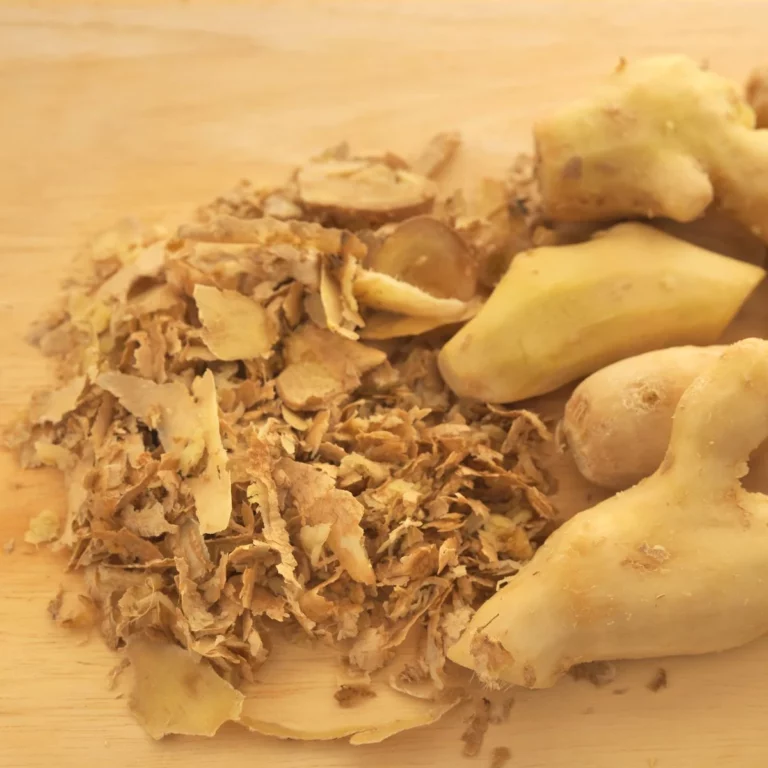
  • Ginger: This root is celebrated for its anti-inflammatory, antioxidant, and antimicrobial properties. Ginger has been used for centuries to combat a variety of ailments, from colds to nausea.
  • Aloe Vera: Beyond its topical application for burns and skin ailments, aloe vera is also consumed for its health benefits, which include digestive support, immune enhancement, and antibacterial capabilities.

How to Prepare the Ginger and Aloe Vera Tonic

Ingredients:

  • 1 large ginger root
  • 2 tablespoons of fresh aloe vera gel
  • 1 cup of water or coconut water (for added electrolytes)
  • Optional: Honey or lemon for taste

Instructions:

  1. Prepare the Ingredients: Peel the ginger root and chop it into small pieces. Extract the gel from an aloe vera leaf, ensuring you’re using the clear inner gel and not the outer green part, which can be laxative.
  2. Blend the Ingredients: In a blender, combine the chopped ginger, aloe vera gel, and water or coconut water. Blend until smooth.
  3. Strain and Serve: Use a fine mesh strainer or cheesecloth to strain the mixture, extracting as much liquid as possible. If desired, enhance the flavor with a spoonful of honey or a squeeze of lemon.
  4. Consumption Tips: Drink a small glass of this tonic in the morning on an empty stomach for maximum benefits. It’s potent, so starting with a small dose to assess tolerance is advisable.

The Benefits of the Ginger-Aloe Tonic

  • Antibacterial Strength: Both ginger and aloe vera have strong antibacterial properties that help in fighting off infections and bolstering the immune system.
  • Digestive Health: This tonic can aid in soothing the digestive tract, reducing inflammation, and promoting healthy digestion.
  • Skin and Overall Health: Aloe vera is hydrating and rich in antioxidants, which are beneficial for skin health, while ginger’s anti-inflammatory properties can help with various systemic inflammatory conditions.

Why It’s Considered a Natural Bomb

The combination of ginger and aloe vera creates a synergy that enhances their individual antibacterial and health-promoting properties. This makes the tonic a powerful tool against bacteria and a booster for overall health, earning it the nickname of a “Natural Bomb.”

Conclusion

Integrating this ginger and aloe vera tonic into your daily routine could provide a significant boost to your immune system, help maintain your digestive health, and contribute to your overall well-being. Nature’s pharmacy offers us powerful remedies, and this dynamic duo stands out as a particularly strong candidate in the natural health arsenal.

At 90 years old, grandma doesn’t just carry a wealth of wisdom; she also boasts a skincare secret that has kept her looking decades younger. The magic lies in her simple, yet powerful, homemade facial mask made from two everyday ingredients: onion and tomato. This potent combination is known for its skin-tightening and rejuvenating properties. Let’s uncover how to create this age-defying remedy.

The Power of Onion and Tomato

  • Onion: Rich in vitamins A, C, and E, onions are excellent for skin health. They possess qualities that help reduce inflammation, fight off acne, and promote collagen production, which is essential for skin elasticity and firmness.
  • Tomato: Tomatoes are packed with lycopene, a powerful antioxidant that protects the skin from environmental damage while also offering a natural firming effect. The high content of vitamin C in tomatoes helps in brightening the skin and fading blemishes.

Preparing Grandma’s Onion and Tomato Face Mask

Ingredients:

  • 1 small onion
  • 1 ripe tomato
  • Optional: A teaspoon of honey or aloe vera gel for extra soothing properties

Instructions:

  1. Extract the Juices:
    • Peel the onion and blend it into a smooth puree.
    • Cut the tomato and blend it separately until smooth.
    • Using a fine mesh strainer or cheesecloth, squeeze out the juice from both the onion and tomato purees.
  2. Mix the Ingredients:
    • Combine equal parts of onion juice and tomato juice. If your skin is sensitive, you can dilute the mixture with a little water.
    • For additional skin-soothing effects, add honey or aloe vera gel to the mix.
  3. Apply the Mask:
    • Wash your face thoroughly with a gentle cleanser and pat dry.
    • Using a cotton ball, apply the mixture to your face, avoiding the eye area.
    • Leave the mask on for about 15-20 minutes, or until it starts to dry.
  4. Rinse Off:
    • Wash off the mask with lukewarm water and pat your face dry with a soft towel.
    • Follow up with a moisturizer to hydrate your skin.

Benefits of Regular Use

With regular application, perhaps two to three times a week, you may begin to see noticeable improvements in your skin’s firmness and texture. The antioxidants will work to rejuvenate your skin from within, potentially reducing signs of aging and giving you a radiant, youthful complexion.

Why Grandma Swears By It

This onion and tomato face mask is more than a beauty routine; it’s a testament to using natural, accessible ingredients to maintain youthful skin. Grandma’s method harnesses the power of nature to nourish and revitalize the skin without the need for expensive cosmetic products or procedures.

Conclusion

Embracing natural remedies like grandma’s onion and tomato mask can be a delightful, effective way to care for your skin. This simple concoction could be your ticket to tighter, brighter skin, proving that sometimes, the best skincare secrets are already in our kitchens!

  1. Boosts Immune System: Garlic is rich in compounds like allicin, which have been shown to enhance the disease-fighting response of white blood cells when they encounter viruses, such as the common cold or the flu.
  2. Reduces Blood Pressure: Studies have found that garlic supplements can have a significant impact on reducing blood pressure in people with hypertension.
  3. Lowers Cholesterol: Garlic supplementation can help lower total and LDL cholesterol levels, particularly in those who have high cholesterol.
  4. Natural Antibiotic: The allicin in garlic exhibits antibacterial and antifungal properties, making it a natural remedy to fight infections.
  5. Improves Heart Health: Garlic consumption is linked to health benefits such as reducing atherosclerosis (hardening of the arteries), lowering triglyceride levels, and relaxing blood vessels.
  6. Enhances Physical Performance: Garlic was traditionally used in ancient cultures to reduce fatigue and enhance the labor capacity of workers; modern studies suggest it can also improve exercise performance.
  7. Detoxifies Heavy Metals: At high doses, the sulfur compounds in garlic have been shown to protect against organ damage from heavy metal toxicity.
  8. Improves Bone Health: Garlic may help decrease bone loss by increasing estrogen levels in females, making it a good addition to the diet for osteoporosis prevention.
  9. Antioxidant Properties: Garlic contains antioxidants that protect against cell damage and aging. It may reduce the risk of Alzheimer’s disease and dementia.
  10. Supports Digestive Health: Garlic helps combat sickness, including the common cold, and supports the health of the digestive tract.

How to Enjoy Garlic Worldwide

Garlic’s versatility is celebrated across various cuisines globally. Here’s how some cultures incorporate garlic into their cooking:

  • Italy: In Italy, garlic is used in just about everything from pasta to roasted meats and stews. It’s an essential ingredient in aglio e olio spaghetti, which is one of the simplest and most loved pasta dishes.
  • China: Known for its robust flavors, Chinese cuisine uses garlic in stir-fries, marinades, and sauces, such as the famous Szechuan sauce.
  • Egypt: Garlic is used to make a popular condiment called Toum, a garlic paste that accompanies kebabs or shawarma.
  • Mexico: Garlic is a key ingredient in many Mexican dishes, including salsas, soups, and as a seasoning for meats.
  • India: In Indian cooking, garlic is used in curries, dals, and is often paired with onion, ginger, and spices to create a flavor base.

Garlic in Your Diet

To maximize the health benefits of garlic, it’s best to consume it raw or slightly cooked. Adding chopped or crushed fresh garlic to dishes just before serving can preserve the most health benefits.

Conclusion

Garlic isn’t just for adding depth to dishes; it’s a powerhouse of nutrients and health benefits that can play a significant role in maintaining and improving overall health. Whether used in simple home cooking or gourmet dishes, garlic’s benefits make it a global superfood worth incorporating into your diet.

Here’s a delightful way to save on pharmacy bills and boost your health naturally: bay leaves and salt! This simple duo can work wonders, and it’s incredibly easy to incorporate into your daily routine.

Bay Leaves: Nature’s Little Secret

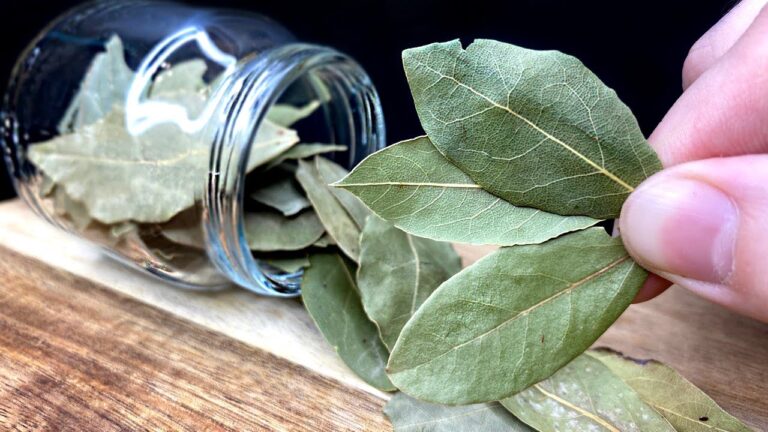
Bay leaves are not just for adding flavor to your stews and soups; they are packed with vitamins and minerals. They’re known for their powerful antioxidants, which can help reduce inflammation and promote overall wellness. Whether you’re dealing with a pesky cold or just looking to enhance your health, a bay leaf can be your go-to remedy.

Salt: More Than Just a Flavor Enhancer

While we all know salt for its role in cooking, it also has therapeutic properties when used correctly. A pinch of salt can help balance electrolytes in your body and even soothe sore throats when used as a gargle.

How to Use Bay Leaves and Salt for Health

  1. Bay Leaf Tea: Simply boil a few bay leaves in water, add a pinch of salt, and let it steep. This tea can be a calming, therapeutic drink that aids digestion and can help you feel more relaxed.
  2. Salt Water Gargle: Dissolve a teaspoon of salt in warm water and use it as a gargle to relieve sore throats and improve oral health.
  3. Aromatherapy: Burn a bay leaf in your room. The released compounds can reduce stress and even help you achieve better sleep.

Benefits of This Simple Combination

  • Natural Detox: Bay leaves stimulate urination, which helps flush out toxins from the body.
  • Pain Relief: The anti-inflammatory properties can help reduce pain from arthritis or other chronic conditions.
  • Improved Digestive Health: Bay leaves are excellent for settling upset stomachs and improving digestion.

Easy to Incorporate

You don’t need to make big changes to benefit from these ingredients. Just adding them to your daily routine or your meals can make a significant difference in your well-being.

In Conclusion

Turning to natural remedies like bay leaves and salt can be a gentle yet effective way to manage minor health issues. It’s a testament to the power of nature’s own medicine cabinet. Before making any major changes to your health regimen, it’s always a good idea to consult with a healthcare provider, especially to ensure these remedies fit seamlessly into your health plan. So, why not give this simple combination a try and potentially reduce those trips to the pharmacy?