Category

Uncategorized

Category

Have you seen any lines on your nails recently? Although usually not a cause for concern, these marks can sometimes indicate hidden health problems or lack of nutrients. Here is more information about what creates lines on nails and when it might be a good idea to see a doctor.

1. Getting Older

As you age, it is common for vertical lines on your nails to become more noticeable. These lines usually go from the base to the end of the nail and are usually not a problem.

2. Lack of necessary nutrients.

Not having enough of some nutrients can also cause changes in nail health, like the development of vertical lines on the nails. Essential nutrients for keeping nails healthy are:

Protein: Nails are mostly composed of a protein named keratin. Not having enough protein can make it hard for your body to create strong and healthy nails.

Vitamin B12:

Not having enough B12 can make your nails change color and texture.

Low levels of iron can cause vertical lines on nails and sometimes nails that look like spoons.

Dehydration is when your body loses too much water.

Not drinking enough water can impact your whole body, including your nails. If you don’t drink enough water, your nails can become weak and have lines on them. It’s important to drink enough water to keep your nails and skin healthy.

Injury to a fingernail.

Injuries like crushing or constantly picking at your nails can create lines on them. These injuries can harm the skin under the nail and affect how the nail grows.

5. Skin Conditions

Some skin problems, like psoriasis or eczema, can lead to changes in the nails, like ridges, especially around the cuticles or the skin near the nail.

6. Heart and blood vessel illnesses.

Bad circulation can reduce the amount of blood reaching your nails, which can impact how they grow and look. Health issues like peripheral arterial disease or other heart problems can show symptoms in the nails.

Final thoughts

Lines going up and down on your nails are typically a harmless indication of getting older. If you see any other changes in your nails, such as color differences, thickness variations, or if there are other symptoms along with the ridges, it’s a good idea to see a doctor. Eating well, drinking enough water, and being careful not to hurt your nails can keep them healthy and looking good. Keep in mind that your nails can show how healthy you are, so it’s important to take care of them.

In our quest for health and well-being, sometimes the most effective remedies are found not in the pharmacy aisle but within our own homes, waiting quietly in our cabinets. Today, we spotlight a household staple typically reserved for freshening breath, now hailed as a hero in the fight against nail fungus: mouthwash. This easy-to-follow recipe offers a beacon of hope for those seeking a safe and effective solution to a stubborn problem.

Unlocking the Power of Mouthwash

Mouthwash is renowned for its antiseptic properties, designed to kill bacteria and germs in the mouth. However, these same properties make it an excellent candidate for tackling the fungi responsible for nail infections. The active ingredients in many mouthwashes, such as eucalyptol, menthol, and thymol, possess antifungal and antibacterial capabilities, making this not just a breath freshener but a formidable foe against nail fungus.

A Simple Yet Effective Recipe

Embarking on this treatment journey requires nothing more than a bottle of your regular, over-the-counter mouthwash. Here’s how to harness its power:

  1. Choose Your Mouthwash: Opt for a brand with antiseptic properties, ideally one that’s alcohol-based, as alcohol is a potent antifungal agent.
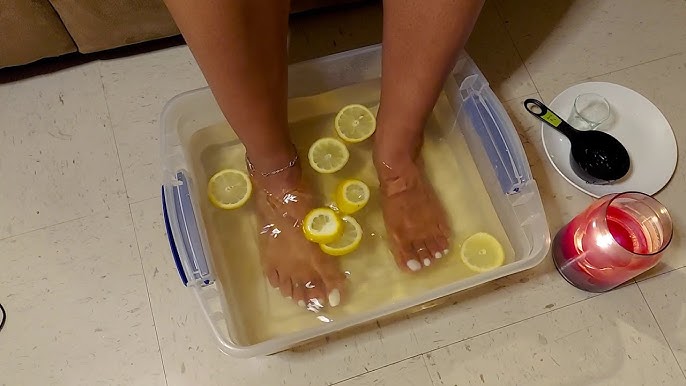
  2. Preparation: Fill a basin or a bowl large enough to comfortably soak your feet or hands with equal parts mouthwash and warm water. If the affected area is small, you can use a smaller container.
  3. The Soaking Process: Submerge the affected nails in the mixture for about 30 minutes. This allows the antifungal agents to penetrate the nail and combat the fungus.
  4. Repeat and Persist: For best results, this soaking should be done daily until signs of improvement are visible. Consistency is key to ensuring the fungus is thoroughly eradicated.

Why This Works

The rationale behind using mouthwash for nail fungus lies in its ingredients, which are designed to penetrate hard surfaces (like teeth) and kill bacteria and fungi. By applying these properties to nail care, mouthwash can offer a surprising yet effective remedy for those battling nail fungus.

A Word of Caution

While mouthwash is a safe alternative for most, it’s always prudent to consult with a healthcare provider before starting any new treatment, especially if you have sensitive skin or a severe fungal infection.

Embracing Alternative Solutions

This mouthwash remedy is more than just a treatment; it’s a testament to the power of thinking outside the box and utilizing everyday items in new and beneficial ways. In the fight against nail fungus, sometimes the solution is as close as your bathroom cabinet. So, before you despair over stubborn nail fungus, remember this simple, yet powerful, mouthwash recipe. It might just be the remedy you’ve been searching for.


Nettles, often overlooked as just another pesky weed, are actually a nutritional powerhouse with numerous health benefits, particularly for maintaining healthy blood sugar levels. This humble green plant, commonly found in many backyards, is not only rich in nutrients but also has properties that can help manage blood sugar effectively. Here’s why nettles deserve a spot in your wellness routine and how to safely incorporate them into your diet.

The Health Benefits of Nettles

Nettles are incredibly nutrient-dense, containing a wealth of vitamins (A, C, K, and several B vitamins) and minerals (iron, magnesium, phosphorus, potassium, and calcium). More than just vitamins and minerals, nettles have been used in herbal medicine for centuries to treat various ailments, including those related to blood sugar control.

One of the remarkable properties of nettles is their ability to naturally support blood sugar management. Research suggests that nettles can help improve insulin sensitivity and reduce blood glucose levels, making them an excellent addition to a diet focused on managing blood sugar.

How to Use Nettles

1. Nettle Tea: One of the simplest ways to enjoy the benefits of nettles is by drinking nettle tea. You can make this by steeping dried or fresh nettle leaves in boiling water. This herbal tea is not only soothing but can be a great addition to your daily routine.

2. Cooking with Nettles: Young nettle leaves are excellent in soups, stews, and smoothies. When cooked, nettles lose their sting and can be a delicious substitute for spinach.

3. Nettle Supplements: For those who prefer a more convenient form, nettle supplements are available in capsules or as extracts.

Preparing Nettles Safely

When handling fresh nettles, it’s important to wear gloves to avoid their sting. Boiling or sautéing nettles will remove their stinging properties, making them safe to eat.

Conclusion

Nettles might not be the first thing that comes to mind when you think about managing blood sugar, but they are a natural, effective way to support your health. Whether you choose to brew a comforting tea or stir them into a hearty soup, nettles offer a range of benefits that extend far beyond their reputation as just a weed. So next time you spot these greens, consider the potential they hold for enhancing your well-being!

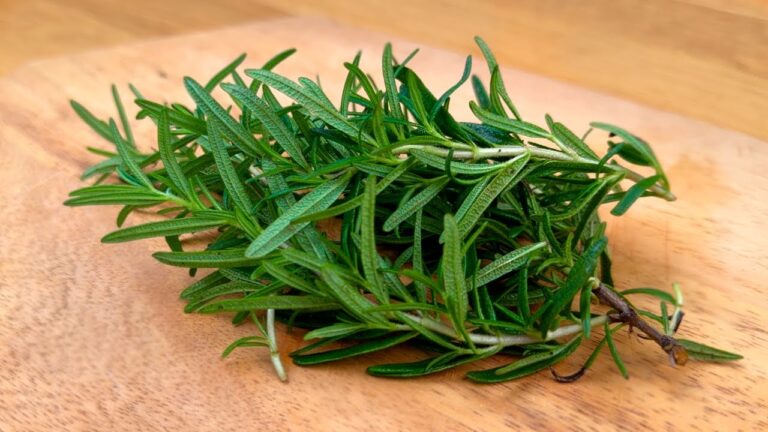
If you’re a fan of unique flavors and affordability, then a rosemary-infused drink might just be your perfect match. Rosemary, the aromatic and flavor-enhancing herb, is not limited to cooking alone. It can also transform a simple drink into something extraordinary without breaking the bank.

Why Choose Rosemary?

Rosemary is a versatile herb that complements both sweet and savory flavors, making it an excellent addition to drinks. Not only is it abundant and easy to grow, but it’s also packed with antioxidants that can support your overall health.

Ingredients for a Rosemary-Infused Drink

Creating a rosemary-infused beverage is simple and requires just a few ingredients:

  • Fresh rosemary sprigs
  • Your choice of base (such as lemonade, sparkling water, or apple cider)
  • Optional sweeteners like honey
  • Optional: lemon, lime, or orange slices for added zest

Steps to Prepare Your Rosemary Drink

  1. Prepare the Rosemary: Rinse a few sprigs of fresh rosemary under cold water and pat them dry. Lightly bruise the leaves to release the essential oils, which will intensify the flavor in your drink.
  2. Infuse the Base: In a pitcher, combine your chosen drink base with the rosemary sprigs. If you prefer a sweetened beverage, add your desired amount of sweetener to blend the flavors well.
  3. Let It Sit: Allow the mixture to infuse for at least an hour in the refrigerator. The longer it sits, the more pronounced the rosemary flavor will be.
  4. Serve: Remove the rosemary sprigs and pour the infused beverage into glasses. For an extra refreshing twist, add fresh slices of citrus like lemon, lime, or orange.

Tips for the Best Rosemary Beverage

  • Experiment with Bases: Rosemary pairs well with a variety of bases. For a refreshing non-alcoholic option, try sparkling water with a squeeze of lemon. If you have a sweet tooth, opt for apple cider or homemade lemonade.
  • Enhance with Fruit: Adding fresh fruit not only improves the presentation but also complements the flavor of rosemary, making your drink even more delightful.
  • Adjust Sweetness: Everyone has different preferences when it comes to sweetness. Start with a smaller amount of sweetener and adjust to your taste.

In Conclusion

A rosemary-infused beverage is an excellent choice for anyone seeking a delicious and cost-effective drink. With its rich flavor and health benefits, rosemary can elevate a simple drink into a delightful treat that’s both refreshing and aromatic. Whether you’re hosting a gathering or simply enjoying a quiet afternoon, give this rosemary drink a try and savor the rich flavors that rosemary has to offer!

Garlic has been cherished for centuries, not just for its distinctive flavor, but also for its remarkable health benefits. Eating raw garlic daily might seem a bit unconventional, but the positive effects on your body are truly impressive. Let’s dive into what happens when you incorporate raw garlic into your daily routine.

Boosts Your Immune System

One of the most significant benefits of eating raw garlic is its ability to enhance your immune system. Garlic is rich in compounds like allicin, which have potent antibacterial, antiviral, and antifungal properties. These compounds help your body fend off common illnesses like colds and flu, keeping you healthier year-round.

Reduces Inflammation

Garlic is a powerful anti-inflammatory agent. Regular consumption can help reduce inflammation in your body, which is beneficial for managing conditions like arthritis. The antioxidants in garlic, including selenium and vitamin C, also help combat free radicals, further reducing inflammation.

Improves Heart Health

Eating raw garlic daily can do wonders for your heart. Garlic has been shown to lower blood pressure, reduce cholesterol levels, and improve overall heart health. The allicin in garlic helps relax blood vessels and prevent blood clots, promoting better blood flow and reducing the risk of cardiovascular diseases.

Enhances Digestive Health

Garlic can improve your digestive system’s efficiency. It stimulates the production of digestive juices and promotes healthy gut flora. This can lead to better digestion, reduced bloating, and relief from various digestive disorders.

Supports Detoxification

Garlic is a natural detoxifier. It helps your body eliminate toxins and heavy metals, such as lead, from your system. The sulfur compounds in garlic enhance the liver’s detoxification process, ensuring your body stays clean and healthy.

Aids in Weight Management

Garlic can also aid in weight management. It boosts metabolism, helping you burn calories more efficiently. Additionally, garlic acts as a natural appetite suppressant, helping you feel fuller longer and reducing the urge to snack between meals.

Promotes Skin Health

Raw garlic has benefits for your skin as well. Its antibacterial and antioxidant properties help fight off acne-causing bacteria and reduce skin inflammation. Regular consumption can lead to clearer, healthier skin.

How to Incorporate Raw Garlic into Your Diet

Incorporating raw garlic into your diet is simple. Here are a few tips:

  1. Start Small: Begin with a small amount to let your body adjust. One clove a day is a good starting point.
  2. Chop and Rest: Chop or crush the garlic and let it sit for a few minutes before eating. This activates the beneficial compounds.
  3. Mix with Food: Add raw garlic to salads, dressings, or mix it into dips like hummus. This can help mellow the strong flavor.
  4. Morning Boost: For a powerful health boost, consume raw garlic on an empty stomach in the morning.

Conclusion

Eating raw garlic every day can lead to numerous health benefits, from boosting your immune system and improving heart health to enhancing digestion and promoting skin health. While the taste might take some getting used to, the positive effects on your body make it well worth the effort. Give raw garlic a try and enjoy the remarkable benefits it brings to your overall well-being. Here’s to a healthier, happier you!

Are you dreaming of a dazzling smile that lights up the room? Imagine waking up each morning to teeth that sparkle like pearls and radiate confidence. Well, your dream can now become a reality in just one minute!

Picture this: after just 60 seconds, your teeth transform from dull yellow to a luminous pearl white, gleaming with a newfound brilliance. Yes, you heard it right! Thanks to an innovative solution, achieving a radiant smile has never been easier.

Say goodbye to stubborn tartar that dulls your teeth and makes you self-conscious. With this remarkable product, tartar buildup becomes a thing of the past, effortlessly removed to reveal the natural beauty of your teeth. No more worrying about unsightly stains or discoloration tarnishing your smile. Instead, embrace the confidence that comes with a set of teeth that shines bright like a diamond.

But wait, there’s more! Not only does this magical solution banish tartar, but it also works wonders on eggshell-thin enamel. Over time, our enamel can wear down, leaving our teeth vulnerable to damage and decay. However, with this revolutionary product, eggshell-thin enamel becomes a thing of the past. Your teeth will be stronger, healthier, and more resilient than ever before.

The best part? This transformation takes just one minute of your time. That’s right – in the time it takes to brew a cup of coffee or scroll through your social media feed, you can unveil a smile that’s worthy of a Hollywood red carpet.

So, what are you waiting for? Say hello to a brighter, more confident you with teeth that shine like never before. Whether you’re meeting friends for coffee, attending a family gathering, or simply smiling at yourself in the mirror, let your pearly whites steal the show.

Don’t let age dull your sparkle – reclaim your radiant smile today! With this simple yet powerful solution, you can turn back the clock and unlock the secret to timeless confidence. Say goodbye to yellow, hello to pearl white, and let your smile light up the world. It’s time to shine!

Are you tired of spending money on expensive household cleaning products? Look no further than your kitchen! You can easily create a natural and cost-effective cleaner using orange peels. Not only will this save you money, but it is also environmentally friendly.

The Wonders of Orange Peels

Oranges are not only delicious, but their peels have many practical uses as well. Did you know that orange peels contain citric acid, making them perfect for cleaning? Plus, they are loaded with vitamin C, antioxidants, and minerals like magnesium and potassium, offering numerous health benefits.

The Simple Steps to a Powerful Cleaner

Creating your own natural cleaner with orange peels is a breeze. Just follow these simple steps:

1. Peeling the Orange

Start by efficiently peeling the orange to get long strips of peel. Cut off the ends of the orange, loosen the peel with a spoon, and make a vertical cut to remove it in one piece.

2. Preparing the Peels

Once you have the peels, give them a thorough wash with water and a pinch of salt. This will remove any pesticide residues or parasites, ensuring that your homemade cleaner is safe to use.

3. Creating the Cleaning Solution

Place the cleaned orange peels into a clean plastic bottle, filling it halfway. Then, add a teaspoon of baking soda to the bottle. Finally, fill the bottle with water, leaving some space at the top for fermentation.

4. Fermentation Process

Let the mixture sit in a dry place out of direct sunlight for about three days. Remember to open the cap daily to release any built-up gas.

An Effective and Affordable Solution

Once the fermentation process is complete, your homemade cleaner is ready to use. The combination of citric acid from the orange peels and baking soda creates a powerful cleaning solution that is great for washing dishes and cleaning kitchen surfaces.

Not only is this natural cleaner just as effective as commercial cleaners, but it’s also much more affordable. By using orange peels that would otherwise be thrown away, you’re not only saving money but also reducing waste.

So, the next time you indulge in a juicy orange, don’t forget to save the peels. With this simple homemade cleaner, you can keep your home sparkling clean while saving money and helping the environment at the same time.

Garlic has been used for centuries as a natural remedy for various health issues. Its potent anti-inflammatory and antioxidant properties make it an excellent ally in managing leg pain, rheumatism, varicose veins, arthritis, headaches, and joint pain. Here’s how garlic can help with these common ailments.

Leg Pain

Leg pain can be caused by muscle fatigue, poor circulation, or inflammation. Garlic can help improve blood circulation, reducing pain and discomfort. Simply incorporate more garlic into your diet by adding it to your meals or taking garlic supplements. A warm garlic oil massage can also provide relief. To make garlic oil, crush a few garlic cloves and mix with warm olive oil. Apply this mixture to the affected area and massage gently.

Rheumatism

Rheumatism involves chronic pain and inflammation in the muscles and joints. Garlic’s anti-inflammatory properties can help alleviate these symptoms. Consuming raw garlic cloves or garlic supplements regularly can reduce inflammation and pain. Additionally, a garlic-infused oil massage can provide soothing relief to sore muscles and joints.

Varicose Veins

Varicose veins are swollen, twisted veins that can cause discomfort. Garlic helps improve blood flow and reduce inflammation, making it beneficial for managing varicose veins. You can make a simple garlic remedy by mixing minced garlic with a little olive oil and lemon juice. Apply this mixture to the affected veins and massage gently. Regular consumption of garlic can also help strengthen veins and improve circulation.

Arthritis

Arthritis causes pain and stiffness in the joints. Garlic can reduce inflammation and pain associated with arthritis. Adding garlic to your diet or taking garlic supplements can be beneficial. You can also prepare a garlic compress by mashing a few garlic cloves and mixing them with warm olive oil. Apply this compress to the affected joints to help reduce pain and swelling.

Headaches

Garlic can help alleviate headaches due to its anti-inflammatory properties. Consuming garlic regularly can reduce the frequency and intensity of headaches. For quick relief, you can crush a garlic clove and inhale its aroma. Alternatively, mix crushed garlic with a little olive oil and massage it onto your temples and forehead.

Joint Pain

Joint pain can be effectively managed with garlic. Its anti-inflammatory properties help reduce swelling and pain. Incorporate garlic into your meals or take garlic supplements to experience its benefits. A garlic-infused oil massage can also provide relief. To prepare, crush a few garlic cloves and mix with warm olive oil. Apply this mixture to the affected joints and massage gently.

In Conclusion

Garlic is a powerful natural remedy that can help manage various aches and pains, including leg pain, rheumatism, varicose veins, arthritis, headaches, and joint pain. By incorporating garlic into your daily routine, you can take advantage of its numerous health benefits and enjoy a more comfortable, pain-free life. Always consult with a healthcare professional before starting any new treatment, especially if you have existing health conditions.

Crafting your own insect repellent spray offers a natural and gentle solution to ward off unwanted pests such as fleas, ants, and cockroaches. Follow these simple steps to create and utilize this homemade remedy:

Ingredients:

  • 1 cup of liquid detergent (any dishwashing liquid)
  • 2 cups of alcohol or apple cider vinegar
  • 2 tablespoons of cloves
  • 1/4 cup of water

Instructions:

  1. Prepare Clove Infusion: Boil 1/4 cup of water in a saucepan. Add 2 tablespoons of cloves to the boiling water and let them simmer for 10 minutes.
  2. Prepare Detergent and Alcohol (or Vinegar) Mixture: While the clove infusion is simmering, mix 1 cup of liquid detergent with 2 cups of alcohol or apple cider vinegar in a separate container.
  3. Combine Ingredients: After 10 minutes, remove the clove infusion from heat and allow it to cool. Once cooled, combine the clove infusion with the detergent and alcohol (or vinegar) mixture. Gently mix to avoid excessive foaming.
  4. Transfer to Spray Bottle: Pour the resulting solution into a spray bottle equipped with a diffuser nozzle.

How to Use:

  • Apply Liberally: Spray the homemade repellent in areas frequented by insects, focusing on entry points where pests may enter your home.
  • Maintain Cleanliness: Keep surfaces clean to remove food residues that attract insects and to eliminate insect eggs and larvae.

By following these steps, you can effectively repel insects from your home using a natural and eco-friendly solution.